Table of Contents
Advertisement
Advertisement
Table of Contents

Related Manuals for Zanussi ZDT200


Summary of Contents for Zanussi ZDT200
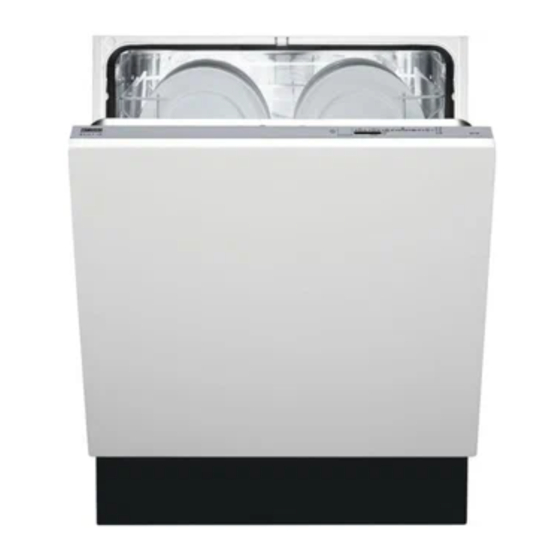
- Page 1 156997470en.qxp 12/27/2006 4:35 PM Page 1 User manual Dishwasher ZDT 200...
-
Page 2: Table Of Contents
156997470en.qxp 12/27/2006 4:35 PM Page 2 Content Safety information - - - - - - - - - - - - - - - - - - -3 Control panel and functions - - - - - - - - - - - -4 Audible signals - - - - - - - - - - - - - - - - - - - - -6 Programme table - - - - - - - - - - - - - - - - - - -7 Before the first use - - - - - - - - - - - - - - - - - -8... -
Page 3: Safety Information
156997470en.qxp 12/27/2006 4:35 PM Page 3 Safety information In the interest of your safety and to ensure the correct use, before installing and first using the appliance, read this user manual carefully, including its hints and warnings. To avoid unnecessary mistakes and accidents, it is important to ensure that all people using the appliance are thoroughly familiar with its operation and safety features. -
Page 4: Control Panel And Functions
156997470en.qxp 12/27/2006 4:35 PM Page 4 Never use the dishwasher if the electrical All sides of the dishwasher must never be ● ● supply cable and water hoses are damaged; drilled to prevent damage to hydraulic and or if the control panel, work top or plinth area electric components. - Page 5 156997470en.qxp 12/27/2006 4:35 PM Page 5 This option allows the start of the programme to be delayed by 3 hours. Delay start button Once the washing programme has been set, press the delay start button. The corresponding indicator light illuminates. The countdown of the delay start begins automatically.
-
Page 6: Audible Signals
156997470en.qxp 12/27/2006 4:35 PM Page 6 Audible signals Audible signals have been introduced to help Factory setting: audible signals activated. indicate which operations the dishwasher is performing. - end of the washing programme, - malfunction of the appliance. Deactivation/activation of the audible signals 1. -
Page 7: Programme Table
156997470en.qxp 12/27/2006 4:35 PM Page 7 Programme table Cycle description Programme Prewash 70° INTENSIVE Normal soil. Main wash Crockery, cutlery, pots and pans 2 intermediate rinses Final rinse Prewash 65° NORMAL Normal soil Main wash Crockery and cutlery 2 intermediate rinses Final rinse Light soil Main wash... -
Page 8: Before The First Use
156997470en.qxp 12/27/2006 4:35 PM Page 8 Before the first use When using separate special IMPORTANT! (dishwasher) salt, rinse aid and If the drying results are not satisfactory we detergent: recommend that you: 1. Fill up the rinse aid dispenser with rinse aid. - set the water softener 2. - Page 9 156997470en.qxp 12/27/2006 4:35 PM Page 9 Water hardness Number of flashes of the Adjustment of the water “end of programme” light hardness setting in Clarke in °TH in mmol/l manually electronically 64 - 88 91 - 125 9,0 - 12,5 level 10 53 - 63 76 - 90...
- Page 10 156997470en.qxp 12/27/2006 4:35 PM Page 10 Setting the water softener electronically (see table) The water softener is factory set at position 5. 1. The dishwasher must be switched off. 4. To change the level, press the Switch on the dishwasher by pressing the On-Off Programme/Cancel button.
-
Page 11: Filling With Dishwasher Salt
156997470en.qxp 12/27/2006 4:35 PM Page 11 Filling with dishwasher salt CAUTION! Use only special salt suitable for dishwashers Unscrew the cap. Only before filling with Using the funnel salt for the first time, provided, pour in the fill the salt container salt until the container is with water filled with salt. -
Page 12: Filling With Rinse Aid
156997470en.qxp 12/27/2006 4:35 PM Page 12 Filling with rinse aid Open the lid. Fill up with rinse aid. Clean up any rinse aid The maximum level for which overflows. Close filling is indicated by the lid and press until it locks. -
Page 13: Loading Cutlery And Dishes
156997470en.qxp 12/27/2006 4:35 PM Page 13 Loading cutlery and dishes The following items are not suitable for use When loading the dishwasher, make sure ● ● in the dishwasher: that you: - Remove all left over food and debris. - Cutlery with wooden, horn, china or mother-of-pearl handles - Soften remnants of burnt food in pans - Plastic items that are not heat resistant... -
Page 14: Adjusting The Height Of The Upper Basket
156997470en.qxp 12/27/2006 4:35 PM Page 14 The two rows of prongs Load upper basket. For taller items, the cup on the lower basket can Light items (plastic racks can be folded be easily lowered to bowls etc.) must be upwards. allow you to load pots, loaded in the upper pans and bowls. -
Page 15: Filling With Detergent
156997470en.qxp 12/27/2006 4:35 PM Page 15 Filling with detergent IMPORTANT! Only use detergents suitable for dishwashers. Observe the manufacturer’s dosing and storage recommendations. Open the lid. Observe the dosing Fill in the detergent in levels. compartment A. For programmes with When using detergent Close the lid. -
Page 16: Cleaning And Care
156997470en.qxp 12/27/2006 4:35 PM Page 16 Cleaning and Care Cleaning the filters IMPORTANT! NEVER use the dishwasher without filters. Incorrect repositioning and fitting of the filters will produce poor washing results. Remove filter A from the The dishwasher must Clean filters A, B and C Turn the handle about base of the washing be switched off... -
Page 17: Environmental Concerns
156997470en.qxp 12/27/2006 4:35 PM Page 17 External cleaning Frost precautions Clean the external surfaces of the machine and Avoid placing the machine in a location where control panel with a damp soft cloth. If the temperature is below 0°C. If this is necessary use only neutral detergents. -
Page 18: Something Not Working
156997470en.qxp 12/27/2006 4:35 PM Page 18 Something not working IMPORTANT! The dishwasher will not start or stops during operation. Certain problems are due to the lack of simple maintenance or oversights, which can be solved with the help of the indications described in the chart, without calling out an engineer. Open the door and see which fault code is active. - Page 19 156997470en.qxp 12/27/2006 4:35 PM Page 19 The wash results are not satisfactory The wrong washing programme has been selected. ● The dishes are not clean The dishes were arranged in such a way as to stop water reaching all parts ●...
-
Page 20: Technical Data
156997470en.qxp 12/27/2006 4:35 PM Page 20 Technical data Dimensions Width 59.6 cm Height 81.8 - 87.8 cm Depth. 55.5 cm Electrical connection Information on the electrical connection is given on the rating plate on Voltage - Overall power - Fuse the inner edge of the dishwasher’s door. -
Page 21: Hints For Test Institutes
156997470en.qxp 12/27/2006 4:35 PM Page 21 Hints for test institutes Testing in accordance with EN 60704 must be Test in accordance with EN 50242 must be carried out with appliance fully loaded and carried out when the salt container and rinse using the test programme (see "Consumption aid dispenser have been filled with salt and values"). -
Page 22: Installation
156997470en.qxp 12/27/2006 4:35 PM Page 22 Installation WARNING! Any electrical and/or plumbing work required to install this appliance should be carried out by a qualified electrician and/or plumber or competent person. Water connection WARNING! WARNING! The dishwasher must not be connected to Only use, for connection to the water mains, open water appliances or instantaneous water new hose-set;... -
Page 23: Drain Hose
156997470en.qxp 12/27/2006 4:35 PM Page 23 Ensure that the hoses Drain hose are not kinked, crushed or entangled. - Connect drain hose to the sink. Secure it with the supplied hose clamp. - Required height: 30 to 100 cm above bottom of CAUTION! the dishwasher. -
Page 24: Fitting Under A Counter
156997470en.qxp 12/27/2006 4:35 PM Page 24 Fitting under a counter IMPORTANT! Carefully follow the instructions on the enclosed template for building in the dishwasher and fitting the furniture panel. WARNING! The dishwasher must be secured against tilting. Therefore make sure that the counter it is fixed under, is suitably secured to a fixed structure (adjacent kitchen units cabinets, wall). -
Page 25: European Guarantee
156997470en.qxp 12/27/2006 4:35 PM Page 25 European guarantee This appliance is guaranteed by Electrolux, in each of the countries listed in the following page, for the period specified in the appliance guarantee or otherwise by law. If you move from one of these countries to another of these countries the appliance guarantee will move with you subject to the following qualifications: The appliance guarantee starts from the date... - Page 26 Ireland +353 1 40 90 753 Long Mile Road Dublin 12 Italia +39 (0) 434 558500 C.so Lino Zanussi, 26 - 33080 Porcia (PN) Latvija +37 17 84 59 34 Kr. Barona iela 130/2, LV-1012, Riga Lietuva +370 5 27 80 609...
- Page 27 156997470en.qxp 12/27/2006 4:35 PM Page 27 Notes ................
- Page 28 156997470en.qxp 12/27/2006 4:35 PM Page 28 www.electrolux.com 156997470 27122006 Subject to change without notice...
Need help?
Do you have a question about the ZDT200 and is the answer not in the manual?
Questions and answers