Table of Contents
Advertisement
Quick Links
Advertisement
Table of Contents

Related Manuals for Yashica APW-10


Summary of Contents for Yashica APW-10
-
Page 1: User Manual
DV CAMERA APW-10 USER MANUAL... -
Page 2: Table Of Contents
Table of Contents About this manual.............v Copyright................v Precautions ..............vi Before You Start ...............ix Introducing the video camera ....1 System requirements..........1 Features..............1 Unpacking the video camera........2 About the video camera..........3 1.4.1 Front view...........3 1.4.2 Top view .............3 1.4.3 Bottom view ..........3 1.4.4 Right and Left views .........4 1.4.5... - Page 3 2.7.1 Setting the date and time ......14 2.7.2 Setting the language ........15 2.7.3 Setting the beep........15 Using the Video Camera ......16 Recording Videos..........16 Video Menu ............18 3.2.1 Resolution ..........19 3.2.2 White Balance...........19 3.2.3 Quality............20 3.2.4 EV ..............20 3.2.5 Capture Mode ..........21 Playing Videos ............22 Video Playback Menu...........24 3.4.1...
- Page 4 3.7.5 Effect............36 3.7.6 Night Mode ..........37 3.7.7 Burst Mode ..........37 3.7.8 Face Detect..........38 3.7.9 Date Stamp ..........38 Viewing Photos .............39 Photo Playback Menu ..........41 3.9.1 Delete............42 3.9.2 Protect ............43 3.9.3 Autoplay ...........44 3.9.4 Copy to Card ..........44 3.9.5 DPOF ............45 3.10 System Menu ............46 3.10.1 Format ............47...
- Page 5 feature ..............51 3.13 Diving mode............52 Installing software and drivers ....53 Drivers ..............53 4.1.1 Mass Storage..........53 4.1.2 PC Camera..........54 Presto! Video Works ..........55 Presto! Mr. Photo ..........56 Specification..............57 Troubleshooting ..............60...
-
Page 6: About This Manual
Preface Congratulations on your purchase of this advanced video camera. Ensure that you read this manual carefully and keep it in a safe place for future reference. About this manual Every effort has been made to ensure that the contents of this manual are correct and up to date. -
Page 7: Precautions
Precautions General precautions Do not use or store the product in dusty, dirty, or sandy areas, as its components may be damaged. Do not store the product in a hot environment. High temperatures can shorten the life of electronic devices, damage batteries and warp or melt certain plastics. -
Page 8: Notes On The Lcd Screen
Notes on the LCD Screen Be very careful to ensure the fluid contained in the LCD screen does not escape if the screen becomes cracked or damaged. If this occurs, follow these steps: If the fluids make contact with skin, wipe it with a clean cloth then rinse with a large amount of water. - Page 9 Do not open or close the battery/card compartment cover with wet hands. Do not open the battery/card compartment cover next to water or a pool. The camera is not dust-proof. Do not bump or knock the camera underwater, otherwise the battery/card compartment cover may open.
-
Page 10: Before You Start
Power supply Use only the type of battery that came with your camera. Using any other type of battery may damage the equipment and invalidate the warranty. Ensure the battery is inserted correctly. Inserting the battery incorrectly can cause damage to the product and possibly start a fire. -
Page 12: Introducing The Video Camera
1 Introducing the video camera Read this section to learn about the features and functions of the video camera. This chapter also covers system requirements, package contents, and descriptions of the hardware components. 1.1 System requirements The video camera requires a PC with the following specifications: Windows®... -
Page 13: Unpacking The Video Camera
1.3 Unpacking the video camera The following items should be present in the package. If any item is missing or appears damaged, contact your dealer immediately. Video camera Pouch USB/AV cable CD ROM User’s Manual... -
Page 14: About The Video Camera
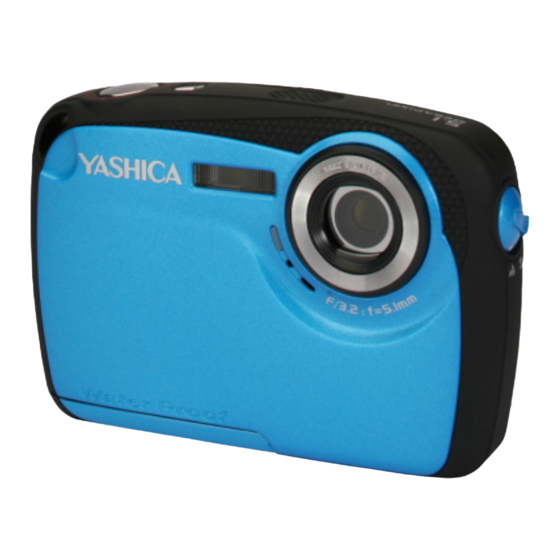
1.4 About the video camera Refer to the following illustrations to familiarize yourself with the buttons and controls of this video camera. 1.4.1 Front view LED light Lens Microphone 1.4.2 Top view Power button Record button Speaker 1.4.3 Bottom view SD card slot Battery compartment Tripod socket... -
Page 15: Right And Left Views
1.4.4 Right and Left views Strap hole Macro button 1.4.5 Back view Power LED Zoom button Mode button LCD screen 4-way Navigation Playback button button Menu button... - Page 16 See the table below for a description of each button’s function. Name Button Function Power Press and hold to turn the Button power on or off. In Video mode: x Press to start recording a Record video. Press again to stop. Button In Photo mode: x Press to take a picture.
- Page 17 Name Button Function Press to switch to different modes: Video, Video (in Mode Diving), Photo, or Photo (in Button Diving). In OSD menus: x Use the 4-way Navigation Button to select items in the menu and press the middle button to confirm. In Video and Photo modes: x Press the Down Navigation Button to toggle the display...
-
Page 18: About The Leds
Name Button Function Press to switch to Playback Playback mode. Button Press to display the menu for Menu the current mode. Button 1.4.6 About the LED The following table describes the camera LED: Color Definition Green Power-on Green Blinking Low battery Power Protect/Unlock All Red Blinking... -
Page 19: Getting Started
2 Getting started Read this section to learn how to start using the video camera. This section covers basic functions such as switching on, inserting the batteries and memory card, and configuring preliminary settings. See later chapters for advanced functions. 2.1 Inserting an SD card An SD card can be installed in the video camera to provide additional storage space for still images, video clips, or other files. -
Page 20: Inserting The Batteries
Close the bottom cover. Push the tab downwards to secure the bottom cover lock. 2.2 Inserting the batteries This video camera is designed to use two AAA alkaline batteries. 1RWH 7KH EDWWHULHV DUH QRW VXSSOLHG z Note: Install the batteries exactly as described here. Installing the batteries incorrectly could cause damage to the video camera and possibly start a fire. - Page 21 Push the tab upwards to open the bottom cover lock then push right to open the bottom cover. Push left to open the battery cover. Insert the batteries. Ensure that the + and – symbols on the batteries line up with the + and – symbols on your video camera.
- Page 22 Close and push right to secure the battery cover. Close the bottom cover. Push the tab downwards to secure the bottom cover lock.
-
Page 23: Turning On/Off The Video Camera
2.3 Turning on/off the video camera Press and hold the Power Button to turn the video camera on/off. 2.4 Connecting to TV with a USB/AV Cable To view pictures or videos on a TV, connect the video camera to a TV using the supplied USB/AV cable as shown. -
Page 24: Connecting To Pc With A Usb/Av Cable
2.5 Connecting to PC with a USB/AV Cable To manage your pictures or videos on a PC, connect the video camera to a computer with the supplied USB/AV cable as shown. -
Page 25: Changing Modes
2.6 Changing modes The video camera can operate in four modes: , Video (in Video Diving), Photo, and Photo (in Diving). Press the Mode Button to toggle different modes. 2.7 Before you start Before you start using the video camera, some basic settings such as the Date/Time, Language, and Beep functions need to be configured. -
Page 26: Setting The Language
2.7.2 Setting the language To select the language, please do the following: Press the Menu Button to display the OSD menu. Use the Left/Right Navigation Button to select the Setting tab. Use the Up/Down Navigation Button to select Language. Press the Middle Navigation Button to confirm. -
Page 27: Using The Video Camera
3 Using the Video Camera 3.1 Recording Videos To record a movie, please do the following: Press the Power Button to turn on the video camera. Press the Mode Button to switch to Video mode. Press the Record Button to start recording the video. To adjust the video, you may: x Use the Zoom Button to zoom in and out. - Page 28 Icon Description Indicates the number of saved files. Memory status indicator : indicates that an SD card is used. : indicates that no SD card is inserted and the internal memory is used. Indicates the current resolution. Indicates the current Quality setting. Indicates the current date and time.
-
Page 29: Video Menu
3.2 Video Menu To access the Video menu, please do the following: Make sure you are in the Video mode. Press the Mode Button to switch to the Video mode if not. Press the Menu Button to open the Video menu. Use the Up/Down Navigation Button to scroll through the selections until the desired one is highlighted. -
Page 30: Resolution
3.2.1 Resolution The Resolution selection allows you to set the resolution before you record a video. The higher the resolution, the more memory space is required. To select the resolution, please do the following: Use the Left/Right Navigation Button to select the desired option: x QVGA: Select this option for 320 x 240 resolution. -
Page 31: Quality
x Tungsten: Select this option for normal indoor lighting conditions. x Fluorescent: Select this option for fluorescent lighting. Press the Middle Navigation Button to confirm. 3.2.3 Quality The Quality selection allows you to set the quality before you record a video. The higher the quality, the more memory space is required. -
Page 32: Capture Mode
3.2.5 Capture Mode The Capture Mode selection allows you to select the capture mode for recording movie or recording voice. To select the capture mode, please do the following: Use the Left/Right Navigation Button to select Video Mode or Voice Mode. Press the Middle Navigation Button to confirm. -
Page 33: Playing Videos
3.3 Playing Videos To play videos, please do the following: Make sure you are in the Video mode. Press the Mode Button to switch to the Video mode if not. Press the Playback Button to enter the Video Playback mode. Press the Left/Right Navigation Button to browse the videos. - Page 34 Icon Description Indicates the number of the current video and the total number of videos. Indicates the elapsed time and total clip length. Indicates the current battery status. Indicates that the file is protected. Indicates that the video camera is in Playback mode.
-
Page 35: Video Playback Menu
3.4 Video Playback Menu To access the Video Playback menu, please do the following: Make sure you are in the Video Playback mode. When in Video mode, press the Playback Button to switch to the Video Playback mode. Press the Menu Button to open the Video Playback menu. Use the Up/Down Navigation Button to scroll through the selections until the desired one is highlighted. -
Page 36: Delete
3.4.1 Delete The Delete selection allows you to delete files. To delete files, please do the following: Use the Left/Right Navigation Button to select Cancel, Delete One, or Delete All. Press the Middle Navigation Button to confirm. x Delete One: Use the Left/Right Navigation Button to select the desired file. -
Page 37: Protect
3.4.2 Protect The Protect selection allows you to protect files from being deleted. To protect files, please do the following: Use the Left/Right Navigation Button to select Cancel, Protect One, or Protect All. Press the Middle Navigation Button to confirm. x Protect One: Use the Left/Right Navigation Button to select the desired file. -
Page 38: Copy To Card
3.4.3 Copy to Card The Copy to Card selection allows you to copy all saved files in the internal memory to the inserted memory card. To copy all files to the memory card, please do the following: Use the Left/Right Navigation Button to select Press the Middle Navigation Button to confirm. -
Page 39: Voice Mode
3.5 Voice Mode 3.5.1 Recording voice files To record a voice file, please do the following: Make sure you are in the Video mode. Press the Mode Button to switch to the Video mode if not. Press the Menu Button to open the Video menu. Use the Up/Down Navigation Button to select Capture Mode. -
Page 40: Playing Voice Files
Icon Description Indicates the number of saved files. Memory status indicator : indicates that an SD card is used. : indicates that no SD card is inserted and the internal memory is used. Indicates the current date and time. Indicates the remaining recording time. Indicates the current battery status. -
Page 41: Shooting Photos
3.6 Shooting Photos To shoot a photo, please do the following: Press the Power Button to turn on the video camera. Press the Mode Button to switch to Photo mode. Press the Record Button to capture a photo. To adjust the camera, you may: x Use the Zoom Button to zoom in and out. - Page 42 Icon Description Indicates the number of the saved pictures and the remaining number of pictures. Memory status indicator : indicates that an SD card is used. : indicates that no SD card is inserted and internal memory is used. Indicates the current file size. Indicates the current Quality setting.
- Page 43 Indicates that Night Mode is set to On. Indicates the current White Balance setting. Indicates the current Flash mode. Indicates that the video camera is in Photo mode. Indicates the current EV compensation value. Indicates the current Zoom status.
-
Page 44: Photo Menu
3.7 Photo Menu To access the Photo menu, please do the following: Make sure you are in the Photo mode. Press the Mode Button to switch to the Photo mode if not. Press the Menu Button to open the Photo menu. Use the Up/Down Navigation Button to scroll through the selections until the desired one is highlighted. -
Page 45: Size
3.7.1 Size The Size selection allows you to set the resolution before you capture an image. The higher the resolution, the more memory space is required. To select the resolution, please do the following: Use the Left/Right Navigation Button to select the desired option: x 1M: Select this option for 1280 x 960 resolution. -
Page 46: White Balance
Press the Middle Navigation Button to confirm. 3.7.3 White Balance The White Balance selection allows you to adjust the white balance when capturing images under specific lighting conditions. To set the white balance, please do the following: Use the Left/Right Navigation Button to select the desired option: x Auto: Select this option to let the video camera set the... -
Page 47: Effect
3.7.4 The EV selection allows you to adjust the exposure compensation of the picture. To set the exposure compensation, please do the following: Use the Left/Right Navigation Button to select the desired value. Press the Middle Navigation Button to confirm. 3.7.5 Effect The Effect selection allows you to change the camera effect. -
Page 48: Night Mode
3.7.6 Night Mode The Night Mode helps you to get better results while shooting at night. To set the night mode, please do the following: Use the Left/Right Navigation button to select Auto or Night Mode. Press the Middle Navigation button to confirm. -
Page 49: Face Detect
3.7.8 Face Detect The Face Detect selection allows you to detect and track faces automatically. To set the face detection, please do the following: Use the Left/Right Navigation Button to select disable or enable the face detection. Press the Middle Navigation Button to confirm. -
Page 50: Viewing Photos
3.8 Viewing Photos To view photos, please do the following: Make sure you are in the Photo mode. Press the Mode Button to switch to the Photo mode if not. Press the Playback Button to enter the Photo Playback mode. Press the Left/Right Navigation Button to browse the recorded photos. - Page 51 Icon Description Indicates the number of current image and total number of saved images. Indicates the current battery status. Indicates that the file is protected. Indicates that the video camera is in Playback mode.
-
Page 52: Photo Playback Menu
3.9 Photo Playback Menu To access the Photo Playback menu, please do the following: Make sure you are in the Photo Playback mode. When in Photo mode, press the Playback Button to switch to the Photo Playback mode. Press the Menu Button to open the Photo Playback menu. Use the Up/Down Navigation Button to scroll through the selections until the desired one is highlighted. -
Page 53: Delete
3.9.1 Delete The Delete selection allows you to delete files. To delete files, please do the following: Use the Left/Right Navigation Button to select Cancel, Delete One, or Delete All. Press the Middle Navigation Button to confirm. x Delete One: Use the Left/Right Navigation Button to select the desired file. -
Page 54: Protect
3.9.2 Protect The Protect selection allows you to protect files from being deleted. To protect files, please do the following: Use the Left/Right Navigation Button to select Cancel, Protect One, or Protect All. Press the Middle Navigation Button to confirm. x Protect One: Use the Left/Right Navigation Button to select the desired file. -
Page 55: Autoplay
3.9.3 Autoplay The Autoplay selection allows you to enable a slide show function, which displays each image in turn at a regular interval. To start the auto play, please do the following: Use the Left/Right Navigation Button to select Press the Middle Navigation Button to confirm. -
Page 56: Dpof
3.9.5 DPOF The DPOF selection allows you to use the DPOF (Digital Print Order Format) function to tag pictures stored in the memory card with print information. You can tag all or individual pictures. To set the DPOF, please do the following: Use the Left/Right Navigation Button to select Single Print or Print All. -
Page 57: System Menu
3.10 System Menu To access the System menu, please do the following: Press the Menu Button to open the OSD menu. Use the Left/Right Navigation Button to select the Setting tab. Use the Up/Down Navigation Button to scroll through the selections until the desired one is highlighted. -
Page 58: Format
3.10.1 Format The Format selection allows you to format your memory card or the internal memory when no memory card is inserted. To format your memory card or internal memory, please do the following: Use the Left/Right Navigation Button to select Press the Middle Navigation Button to confirm. -
Page 59: Language
3.10.3 Language See section 2.7.2 “Setting the language”. 3.10.4 Auto Power Off The Auto Power Off selection allows you to set an idle time after which the video camera automatically sets to sleep mode to save power. To set the auto power off, please do the following: Use the Left/Right Navigation Button to select: x Off: Disable the Auto Power Off function. -
Page 60: Tv Standard
Press the Middle Navigation Button to confirm. 3.10.7 TV Standard The TV Standard selection allows you to select the TV standard of the recorded videos. To adjust the TV standard, please do the following: Use the Left/Right Navigation Button to select NTSC or PAL. Press the Middle Navigation Button to confirm. -
Page 61: Thumbnail Mode
3.11 Thumbnail mode In Playback mode, you can view images, video clips, and audio clips in thumbnails. Turn on the video camera and ensure it is in Playback mode. The most recent image/video clip/audio clip is displayed on the screen. Press the T Button to enter the Thumbnail mode. -
Page 62: Usb Mode
3.12 USB mode You can use the USB mode to connect to a printer or a host PC. Before connecting to a printer or PC, refer to “Installing software and drivers” in chapter 4. When the video camera is connected to a computer or printer using the USB cable and the video camera is turned on, the menu to the right is displayed. -
Page 63: Diving Mode
3.13 Diving mode The Diving mode allows you to shoot videos or capture images in underwater conditions. In Diving mode, the video camera will automatically adjust the White Balance setting. z Note: Except for the White Balance setting, you can adjust all the other video/image settings just like in the Video/Photo mode. -
Page 64: Installing Software And Drivers
4 Installing software and drivers Read this section to learn how to install drivers and software for the video camera. 4.1 Drivers You can use the “Mass Storage” function of the camera on the PC. 4.1.1 Mass Storage The digital video camera offers Mass Storage function via the built-in card reader. -
Page 65: Pc Camera
4.1.2 PC Camera You need to install a driver for the video camera to use as a PC or web cam in all Windows operating systems: Windows 2000/ XP SP2/Vista/Windows 7 (All 32-bit only). z Note: Driver installation is required for all operating systems. The video camera can be used as a PC camera or a web cam. -
Page 66: Presto! Video Works
4.2 Presto! Video Works Presto! Video Works is an advanced software application for editing video. To install Presto! Video Works: Insert the supplied CD-ROM in the CD-ROM drive. If the CD-ROM does not automatically boot, use Windows Explorer to execute the InstallMgr.exe file in the root directory. -
Page 67: Presto! Mr. Photo
4.3 Presto! Mr. Photo Presto! Mr. Photo is an advanced photo editing software application. To install Presto! Mr. Photo: Insert the supplied CD-ROM in the CD-ROM drive. If the CD-ROM does not automatically boot, use Windows Explorer to execute the InstallMgr.exe file in the root directory. -
Page 68: Specification
Appendix Specification General Imaging 1/3.2” CMOS 5.0 Megapixel Sensor sensor 5.0 Megapixel Active pixels Storage media Internal: Built-in 16MB Flash Memory SD Card, SDHC Compatible (Up to SDHC 16GB Class6) Color effects Color/B&W/Sepia F3.2, f=5.1mm Lens Fixed lens Focus range Normal: 1.5m~infinity Macro: 20~21 cm Still image... - Page 69 General Zoom Movie: Digital Zoom 4X, Advance Zoom 2X Camera: Digital Zoom 4X, Advance Zoom 2X Still Image Playback: Digital Zoom 16X (max.) TFT Monitor 2.5” TFT (480 x 234 pixels) LED Flash Effective range: 1.2 ~1.8 m Mode: Auto/Off/Forced White balance Auto/Sunny/Cloudy/Tungsten/ Fluorescent -2.0 EV~+2.0 EV...
- Page 70 General Auto power Off, 1 min., 5 min. Power supply 2 x AAA (Alkaline/Ni-cd/Ni-MH) Dimension 98 (W) x 63 (H) x 31 (D) mm Weight Approx. 106r5g (without batteries)
-
Page 71: Troubleshooting
Troubleshooting Problem Possible Solution Cause Cannot turn on The batteries are Insert the batteries the video not inserted correctly. camera. correctly. The batteries have Replace the batteries. no power. The video The auto power off Turn the power on camera function is again. - Page 72 Problem Possible Solution Cause Memory card The memory Unlock the cannot be card is protected. memory card. used. The memory Format the card contains memory card. non-DCF images Before formatting taken by other the card, ensure video cameras. you back up the files.
Need help?
Do you have a question about the APW-10 and is the answer not in the manual?
Questions and answers