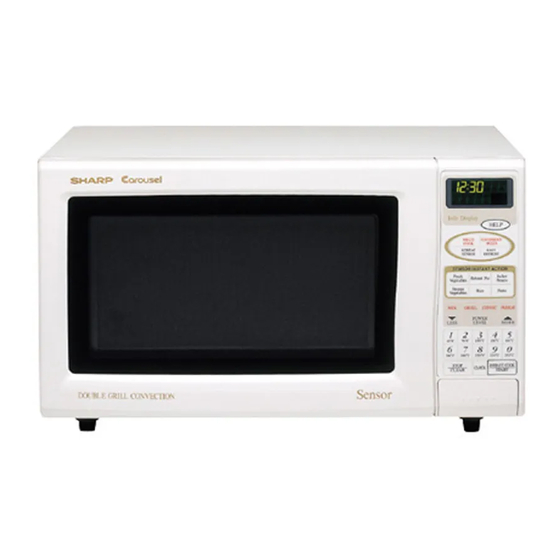
Sharp Carousel R-880B Operation Manual
Double grill convection microwave oven
Hide thumbs
Also See for Carousel R-880B:
- Service manual (48 pages) ,
- Operation manual and cookbook (70 pages)

Related Manuals for Sharp Carousel R-880B


Summary of Contents for Sharp Carousel R-880B
- Page 1 ® DOUBLE GRILL CONVECTION MICROWAVE OVEN MODEL R-880B OPERATION MANUAL Info Display...
-
Page 2: Table Of Contents
Operation of Touch Control Panel Control Panel Display INFO DISPLAY COOKING SYSTEM Touch Control Panel Layout Thank you for buying a Sharp Microwave Oven. Before Operating Your new oven has an "Information Display System" Getting Started which offers you step-by-step instructions to easily guide Clock Setting you through each feature. -
Page 3: Important Safety Instructions
16. Do not use the microwave oven to fry with oil or heat by a SERVICE CENTRE APPROVED BY oil for deep frying. The temperature can not be SHARP. And it must be replaced by a qualified controlled and the oil may catch fire. service technician trained by SHARP. - Page 4 4. Children should be taught all important safety To avoid the possibility of explosion instructions : use of potholders, careful removal and sudden boiling of food coverings; pay special attention to pack- aging (e.g. self-heating materials) designed to 1. Never use sealed containers. Remove seals and make food crisp because they may be extra hot.
-
Page 5: Installation Instructions
If there is any damage, please do not operate the oven until it has been checked by a SERVICE CENTRE APPROVED BY SHARP and repaired, if necessary. -
Page 6: Connecting Plug
If you have any doubts about your electrical supply ask a qualified electrician. If you do not make the proper electrical connections you might damage your microwave oven or injure yourself. Neither SHARP nor the supplier will be liable if this happens. -
Page 7: Operation Of Touch Control Panel
OPERATION OF TOUCH CONTROL PANEL The operation of the oven is controlled by pressing the appropriate pads arranged on the surface of the control panel. An entry signal tone should be heard each time you press the control panel to make a correct entry. In addition the oven will beep for approximately 2 seconds at the end of the cooking cycle, or 4 times when a cooking procedure is required. -
Page 8: Before Operating
Getting Started Step Procedure Pad Order Display Plug the oven into a power point and switch SHARP, MICRO-WAVE, on the power. OVEN will be displayed re- Ensure the oven door is closed. peatedly. Press the STOP/CLEAR pad so that the STOP oven beeps. -
Page 9: Microwave Cooking
MICROWAVE COOKING Microwave Time Cooking This is a manual cooking feature, first enter the cooking time then the power level. You can programme up to 99 minutes, 99 seconds. There are five different power levels. – – – – – – –... -
Page 10: Sequence Cooking
Instant Cook™ For your convenience Sharp’s Instant Cook allows you to easily cook for one minute on HIGH power. Step Procedure Pad Order Display Press the INSTANT COOK/START pad. -
Page 11: Heating Without Food
HEATING WITHOUT FOOD Before the first use and after cleaning the top and bottom heaters must be conditioned. The procedure involves heating the heaters for a period of 20 minutes. You may notice some smoke and odour during this process, the oven is not out of order. -
Page 12: To Preheat And Cook By Convection
To Preheat and Cook by Convection * Suppose you want to preheat the oven to 200°C then cook for 20 minutes at 200°C. Step Procedure Pad Order Display Press the PREHEAT pad. PREHEAT (Operation guide off : Press desired preheat temperature pad. -
Page 13: Convection And Microwave Cooking
Convection and Microwave Cooking Your oven can be programmed to combine convection and microwave cooking operations. * Suppose you want to roast chicken pieces for 15 minutes at 180°C and then cook at 8 minutes on MEDIUM. Step Procedure Pad Order Display Press the CONVEC pad. -
Page 14: Preheating
PREHEATING For best results, preheat to the required temperature with the turntable in the oven. Add food after preheating. * To preheat the oven to 200°C Step Pad Order Procedure Display Press the PREHEAT pad. PREHEAT (Operation guide off: Select preheating temperature. 200°C Press the INSTANT COOK/ INSTANT COOK... -
Page 15: Grill Cooking
GRILL COOKING Your oven has three grill cooking modes. Select the desired grill mode by pressing the GRILL pad. For the top heater mode, press the GRILL pad once. For the bottom heater mode, press the GRILL pad twice. For the top and bottom heaters mode, press the GRILL pad three times. It is not necessary to preheat for grill cooking. -
Page 16: Mix Cooking
MIX COOKING Your oven has four preprogrammed settings that make it easy to cook with both grill heaters and microwave. Select the desired mix setting by pressing the MIX pad. It is not necessary to preheat for the mix cooking. Preset programme The times pressing... -
Page 17: Automatic Operations
AUTOMATIC OPERATIONS Notes for Automatic Operations 1. Wipe off any moisture from the outside of cooking containers and the interior of the oven with a dry cloth or paper towel prior to cooking on SENSOR INSTANT ACTION or REHEAT SENSOR. 2. -
Page 18: Reheat Sensor
Reheat Sensor Press to select 3 popular reheat menus. 1.Dinner Plate REHEAT Follow the details provided in REHEAT 2.Reheat Pizza SENSOR SENSOR MENU GUIDE on page 6 in the 3.Casseroles/Canned Food cooking guides. * Suppose you want to reheat 1 serve of Dinner plate. Step Procedure Pad Order... -
Page 19: Convenience/Pizza
Convenience / Pizza Press to select 6 popular menus. 1.Frozen Pizza 4.Frozen Pasta Follow the details provided in CONVENIENCE 2.Fresh Pizza 5.Crumbed Fish CONVENIENCE / PIZZA MENU GUIDE on page 7 in the /PIZZA 3.Fries 6.Finger Food cooking guides. * Suppose you want to cook 0.5 kg Frozen Pizza. Step Procedure Pad Order... -
Page 20: Multi Cook
Multi Cook Press to select 6 popular Grill and Mix cooking 1.Roast Beef 4.Roast Pork menus. 2.Roast Lamb 5.Grilled Steak/Chops MULTI Follow the details provided in MULTI COOK COOK 3.Roast Chicken 6.Grilled Chicken Pieces MENU GUIDE on page 8 - 9 in the cooking guides. -
Page 21: Easy Defrost
Easy Defrost The Easy Defrost feature allows you to defrost meats by entering weight. EASY Follow the details provided in EASY DEFROST MENU GUIDE on page 0 in the cooking DEFROST guides. * Suppose you want to defrost 2.0 kg of Poultry. Step Procedure Pad Order... -
Page 22: Other Convenient Features
OTHER CONVENIENT FEATURES Help Feature HELP The HELP feature has 6 different programs. Auto Start The Auto Start feature allows you to set your oven to start automatically. * Suppose you want to start cooking a casserole for 20 minutes on MEDIUM at 4:30 in the afternoon. (Check that the correct time of day is displayed.) Step Procedure... -
Page 23: Child Lock
Information Guide On/Off This oven is preset with the Information Guide On. As you get more familiar with your oven, the Information Guide can be turned off. * To turn off the Information Guide. After step 1 for Auto Start. Step Procedure Pad Order... -
Page 24: Demonstration Mode
Press the number 4 pad. Press the INSTANT COOK/START INSTANT COOK pad. START Then DEMO,SHARP, MICROWAVE, OVEN will appear repeatedly. Cooking operations can now be demonstrated with no power in the oven. * Suppose you demonstrate Instant Cook. Step Procedure... -
Page 25: Less/More Setting
Info on Pads Each pad carries useful guide. * To get the guide for MULTI COOK pad. After step 1 for Auto Start. Step Procedure Pad Order Display Press the MULTI COOK pad. MULTI COOK The guide message will be repeated twice, and then the display will show the time of day. If you want to cancel the guide, press the STOP/CLEAR pad. -
Page 26: Increasing/Decreasing Time
Increasing or Decreasing Time During A Cooking Programme Microwave, Convection, Grilling or Mix time can be added or decreased during a cooking programme using the “MORE” or “LESS” pads. * Suppose you want to increase cooking time by 2 minutes during 5 minutes on MEDIUM cooking. Step Procedure Pad Order... -
Page 27: Care And Cleaning
CARE AND CLEANING IMPORTANT: Do not touch the cavity around the oven lamp after cooking. This part will become hot when the oven lamp is on. Use thick cloth for cleaning the oven to avoid burns. Before cleaning ensure oven cavity is cool. Exterior: The outside may be cleaned with mild soap and warm water, wipe clean with a damp cloth. -
Page 28: Service Call Check
If both the wall socket and the fuse are functioning properly, CONTACT YOUR NEAREST SERVICE CENTRE APPROVED BY SHARP. NOTE: 1. If time in the display is counting down very rapidly, check Demonstration Mode. (Please see page 23 for detail.) 2. -
Page 29: Guarantee
GUARANTEE SHARP ELECTRONICS DIVISION OF SEARTEC GROUP TRADING (PTY) LTD (“the Company”) guarantees to the original purchaser that the product sold with this certificate is free of defects in material or workmanship under normal use and service for a period of 2 (two) years from the date of purchase thereof, subject to the following conditions: 1. -
Page 70: Quick Reference Guide
Grill Cooking INSTANT COOK GRILL START eg. 15 minutes eg. TOP heater Mix Setting Cooking Time Mix Cooking INSTANT COOK START eg. 15 minutes eg. High mix top grill TINSEA779 WRR0 - M32 PRINTED IN THAILAND ® SHARP CORPORATION OSAKA, JAPAN...
Need help?
Do you have a question about the Carousel R-880B and is the answer not in the manual?
Questions and answers