Table of Contents
Advertisement
Advertisement
Table of Contents

Related Manuals for Tricity Bendix SE500/1


Summary of Contents for Tricity Bendix SE500/1
-
Page 2: Table Of Contents
The following symbols are used in this user manual: Important information concerning your personal safety and information on how to avoid damaging the appliance. General information and tips Environmental information Contents Important safety instructions Oven cooking chart Product description Roasting chart Controls and their functions Defrost Before first use... -
Page 3: Important Safety Instructions
Important safety instructions These warnings are provided in the interests of from using the appliance safely without your safety. Ensure that you understand them supervision or instruction by a responsible all before installing or using the appliance. person to ensure that they can use the Your safety is of paramount importance. -
Page 4: Cleaning And Maintenance
• Do not use the appliance if the ceramic glass • Do not leave the cookware containing is damaged. If a fault or crack becomes foodstuff, e.g. fat or oil in the appliance in visible, disconnect the appliance immediately case it is inadvertently switched on. •... -
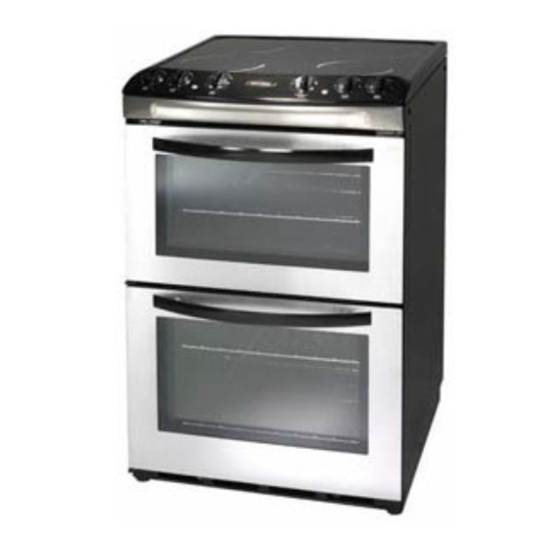
Page 5: Product Description
Product description Control panel Top oven / Grill Main oven Controls and their functions Top oven / Grill Hob controls Main oven Hob controls control temperature control Main oven indicator neon Top oven / Grill indicator neon... -
Page 6: Before First Use
Before using the appliance Rating plate • This is situated on the lower front frame of the Always allow the cooling fan to cool the appliance and can be seen upon opening the appliance down before switching off at the wall prior to carrying out any cleaning or maintenance door. -
Page 7: Grill And Oven Furniture
Grill and oven furniture • The following items of grill and oven furniture 1 straight shelf (For grilling and top oven cooking) have been supplied with the appliance. If you require replacements of any of the items listed below please contact your local service force centre. -
Page 8: The Hob
The hob Do not use the appliance if the ceramic glass is damaged. If a fault or crack becomes visible, disconnect the appliance immediately from the electricity supply and contact your local service force centre. Using the hob Turn the hob control The highest number represents the hottest knob to the required setting and the lowest number represents the... -
Page 9: The Grill
• Never leave the hotplates on when not covered with a saucepan. Do not allow hot pans or baking trays to • touch the controls as dammage may occur. Ensure that the hob and saucepans are clean and dry before the start of cooking. •... -
Page 10: The Grill Pan And Handle
The grill pan and handle The grill pan has a removable handle. Attach and remove as described below To attach. Press the Slide the handle To Remove. Press Release the button. button on the handle towards the left and the button on the with the thumb and release the button. -
Page 11: Hints And Tips
Hints and tips • Most foods should be placed on the grid in the • When toasting bread use the shelf in position 3 grill pan to allow maximum circulation of air to with the grid in the high position. •... -
Page 12: The Top Oven
The top oven The top oven is the smaller of the two ovens. It The top oven is also ideal for use as warming is designed for cooking smaller quantities of compartment to warm dishes and keep food hot. food. It gives especially good results if used to Use the top oven when you want to warm cook fruitcakes, sweets and savoury flans or plates. - Page 13 • Hints and tips The material and finish of the baking tray and dishes used affect base browning. • Arrange the shelves in the required Enamelware, dark, heavy or non-stick positions before switching the oven on. utensils increase base browning. Shiny Shelf positions are counted from the aluminium or polished steel trays reflect the bottom upwards.
-
Page 14: The Main Oven
The main oven The fan oven is particularly suitable for cooking Batch baking larger quantities of food. The advantages of fan The fan oven cooks evenly on both shelf levels, oven cooking are: especially useful when batch baking. Preheating To fit the main oven shelves The fan oven quickly reaches its temperature, The shelf should be fitted with the straight rods so it is not usually necessary to preheat the... -
Page 15: Things To Note
• It is recommended that when baking larger Things to note quantities the shelf positions should be • The oven light will illuminate. evenly spaced to suit the load being cooked. • The indicator neon will glow. It may turn on A slight increase in cooking time may be and off during use to show that the setting is necessary. -
Page 16: Oven Cooking Chart
Oven cooking chart T h e t e m p e r a t u r e a n d b a k i n g t i m e s a r e f o r g u i d a n c e o n l y , a s t h e s e w i l l d e p e n d o n t h e c o n s i s t e n c y o f t h e v a r i o u s i n g r e d i e n t s a n d t h e n u m b e r , t y p e a n d s i z e o f b a k i n g t r a y o r t i n s u s e d . - Page 17 Oven cooking chart continued FAN OVEN TOP OVEN APPROX FOOD COOKING COOKING COOK TIME (h) TEMP °C TEMP °C Choux Pastry 190 - 200 180 - 190 0:30 – 0:40 Éclairs / Profiteroles 170 - 180 170 - 180 0:20 – 0:35 Flaky Pastry 210 - 220 210 - 220...
-
Page 18: Roasting Chart
Roasting chart Meat Temperature Cooking time 20-35 minutes per ½kg (1lb) 160 – 180 °C Beef/ Beef boned and 20-35 minutes over 25-35 minutes per ½kg (1lb) 160 – 180 °C Mutton/Lamb and 25-35 minutes over 30-40 minutes per ½kg (1lb) 160 –... -
Page 19: Defrost
Defrost This main oven function defrosts most foods faster than more conventional methods. It is particularly suitable for delicate frozen foods which are to be served cold e.g. cream filled gateaux, cakes covered with icings or frostings, cheesecakes, biscuits, scones, etc. Using defrost Turn the main oven temperature control to... -
Page 20: Main Oven Light
Main oven light It is possible to turn the light on in your main oven. Using main oven light Turn the main oven temperature control to the required setting. Slow cook The slow cook setting gives a very low heat in Some foods such as pastry and biscuits are not the oven. -
Page 21: General Points
Food preparation – slow cooking Joints of meat and poultry Milk puddings • Do not cook meat joints over 2.7kg (6lb). • Cover the cereal with boiling water and leave • Do not cook poultry over 2 kg (4lb 8oz). it to stand for 30 minutes. -
Page 22: Care And Cleaning
Care and cleaning Cleaning the ceramic hob • Make sure the ceramic glass is cool before Before cleaning always allow the appliance cleaning. It is important to clean the ceramic to cool down before switching off at the hob daily to prevent foodstuff being burnt on. electricity supply. - Page 23 • Avoid using a dishcloth or sponge to clean To remove burnt on foodstuff the hob. These may leave a layer of soiled • We strongly recommend the use of a detergent on the hob surface, which will burn Ceramic Hob Scraper (incorporating a single and discolour the next time the hob is used.
- Page 24 Cleaning inside the grill and • Covering joints during cooking will also prevent splashing onto the interior surfaces. oven compartments (SE500/1) Removing the covering for the last 20-30 • The sides and back of the main oven minutes will allow extra browning if required.
- Page 25 Cleaning between the outer and inner door glass The inner door glass is removable for cleaning. Please note that the door glass on your product may differ in type and shape from that shown in the diagrams. To remove the glass Open the oven door to gain access to the top of the oven door.
-
Page 26: Replacing An Oven Light Bulb
To clean the glass door panels Clean the inner glass door panels using hot soapy water, hob cleaner may also be used. Do not use hob cleaner on the stainless steel or painted surfaces. Ensure that all parts are well rinsed and thoroughly dried before attempting to replace the glass. -
Page 27: Troubleshooting
Troubleshooting Please carry out the following checks on your In-guarantee customers should make sure appliance before calling a Service Engineer. It that the checks have been made as the may be that the problem is a simple one which engineer will make a charge if the fault is not you can solve yourself without the expense of a a mechanical or electrical breakdown. -
Page 28: Installation Instructions
Installation instructions • Overhanging surfaces or a cooker hood should be a minimum of 685mm above the This appliance must be earthed hob. • If your appliance has been damaged in transit, contact your supplier immediately. Do not attempt to install it. •... - Page 29 • We recommend you use a new length of • When refitting the mains terminal cover, twin core earthed cable to ensure your ensure that the lower tabs are located inside safety. the bottom edge of the aperture, before • Make connection by proceeding as follows: - fixing the two screws into the top edge of the mains terminal cover.
-
Page 30: Technical Data
Technical data Voltage: 230-240 Volts AC 50Hz Wattage: 9.5 - 10.3 kW Height: 900mm Width: 600mm Depth: (excluding handles and knobs) 600mm Weight 61.0kg This appliance complies with: European Council Directive 73/23/EEC, EMC Directive 89/336/EEC, CE Marking Directive 93/68/EEC, Energy Label Directive 2002/40/EC Environment At the end of the appliances After installation please dispose of the... -
Page 31: Guarantee / Custormer Care
Guarantee / Customer care Standard guarantee conditions Service and Spare Parts In the event of your appliance requiring service, or if We, Electrolux, undertake that if within 12 months of you wish to purchase spare parts, please contact the date of the purchase this Electrolux appliance or your local Service Force Centre by telephoning any part thereof is proved to be defective by reason only of faulty workmanship or materials, we will, at... - Page 32 www.electrolux.com www.tricity-bendix.co.uk 349152501 - 04/2007...
Need help?
Do you have a question about the SE500/1 and is the answer not in the manual?
Questions and answers