Aiwa XR-EM50 Operating Instructions Manual
Cd stereo system
Hide thumbs
Also See for XR-EM50:
- Operating instructions manual (20 pages) ,
- Service manual (45 pages) ,
- Service manual (73 pages)
Table of Contents
Advertisement
Available languages
Available languages
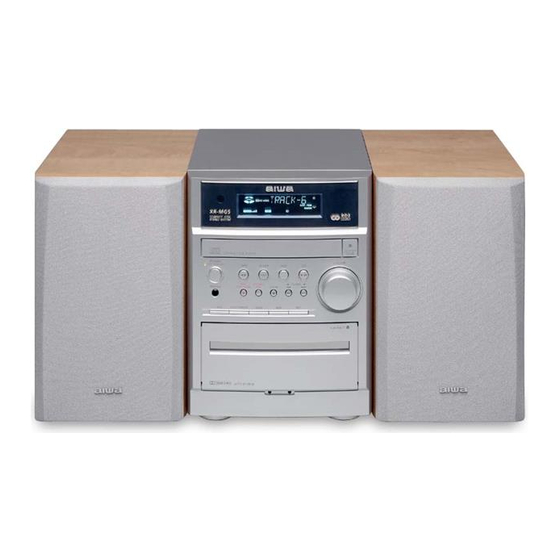
CD Stereo System
XR-EM50
U
C
Owner's record
For your convenience, record the model number and serial
number (you will find them on the rear of your set) in the space
provided below. Please refer to them when you contact your
Aiwa dealer in case of difficulty.
Model No.
Serial No. (Lot No.)
For assistance and information
(United States and Puerto Rico)
8C-CL5-903-01
011220ASW-H-BF
OPERATING INSTRUCTIONS
MANUAL DE INSTRUCCIONES
MODE D'EMPLOI
En
(English)
E
(Español)
F
(Français)
Advertisement
Chapters
Table of Contents

Related Manuals for Aiwa XR-EM50


Summary of Contents for Aiwa XR-EM50
- Page 1 OPERATING INSTRUCTIONS (English) CD Stereo System MANUAL DE INSTRUCCIONES (Español) XR-EM50 MODE D'EMPLOI (Français) Owner’s record For your convenience, record the model number and serial number (you will find them on the rear of your set) in the space provided below. Please refer to them when you contact your Aiwa dealer in case of difficulty.
-
Page 2: Important Safety Instructions
IMPORTANT SAFETY INSTRUCTIONS WARNING To reduce the risk of fire or electric shock, do not expose this appliance to rain or moisture. Read the Operating Instructions carefully and completely before Ventilation - The unit should be situated with adequate space operating the unit. -
Page 3: Table Of Contents
TABLE OF CONTENTS IMPORTANT SAFETY INSTRUCTIONS ..2 Outdoor Antenna Lightning PREPARATIONS ........4 Power lines - An outside antenna system should not be located For added protection for this unit receiver during a lightning storm, PARTS AND CONTROLS ......5 in the vicinity of overhead power lines or other electric light or power or when it is left unattended and unused for long periods of time, ADJUSTMENTS BEFORE OPERATION .. -
Page 4: Preparations
PREPARATIONS 3 Connect the AC power cord to an AC outlet. Connection Remote control The clock will flash on the display. Plug in the AC power cord to the AC outlet after all other Detach the battery compartment lid at the rear of the remote For setting the clock, see page 7. -
Page 5: Parts And Controls
PARTS AND CONTROLS 3 wREC/REC PAUSE Main unit: front Main unit: rear Starts and pauses recording. SYNCHRO REC Starts recording and CD play simultaneously. sCLEAR CD and Tape: stops playback. Radio: clears a preset station. f/r, t/g (TUNING -, +) CD: skips to a previous or a succeeding track when pressed, searches a track in fast forward or reverse playback when held down. - Page 6 7 FUNCTION Remote control DISPLAY Switches the active function among TAPE, TUNER, AUX PROGRAM and CD. Selects programmed CD playback mode. 8 PRESET +,- TIMER Tunes in a preset station. Selects timer mode. 9 f/r, t/g SLEEP 0 VOLUME +,- Selects sleep-timer mode.
-
Page 7: Adjustments Before Operation
ADJUSTMENTS BEFORE OPERATION Setting the clock TAPE, 1 Hold down SHIFT and press CLOCK on the remote TUNER/BAND, control. AUX, CD CLOCK DISPLAY When the unit is turned off, you can also press SET. POWER 2 Within 6 seconds, press f or g to set the 6STANDBY/ON time. -
Page 8: Cd Operations
CD OPERATIONS Random/Repeat play 0–10, +10 In random play mode the unit plays all the tracks in random order. In repeat play mode it plays repeatedly all the tracks or PROGRAM the track being played. You can select random and repeat all DISPLAY play at the same time. -
Page 9: Programmed Play
To check the program Programmed play Notes on CDs Press f or g repeatedly in stop mode. The track •Do not place more than one disc. Plays back up to 30 selected tracks in programmed order. number and program number are displayed in succession. •Do not tilt the unit with a disc loaded. -
Page 10: Radio Operations
RADIO OPERATIONS Tuning in preset stations TUNER MODE 1 Select the band. 2 Press PRESET + ,- on the remote control repeatedly. 0–10, +10 TUNER/BAND With each press, the station with the succeeding or POWER preceding preset number is tuned in. PRESET +,- You can tune in the desired preset station directly by pressing the numbered buttons on the remote control. -
Page 11: Sound Adjustments
SOUND ADJUSTMENTS Adjustments To switch to monaural FM reception Hold down SHIFT and press TUNER MODE on the remote control so that "MONO" is displayed. To cancel, repeat the above so that "STEREO" is displayed. VOLUME Tip: When FM stereo reception is poor, switching to monaural TONE reduces noise. -
Page 12: Tape Playback
TAPE PLAYBACK Notes on cassettes TUNER MODE •Use of 120-minute or longer tapes is not recommended since they are extremely thin and easily deformed or FUNCTION damaged. •Wind up any slack in the tape with a pencil or similar tool REV MODE before use. -
Page 13: Tape Recording
TAPE RECORDING To start CD recording more easily To record a 4-second blank space (only for TUNER Basic recording Insert the tape to be recorded, load the disc, and press or AUX source) Use only type I (normal) tapes. Inserting 4-second blank spaces may help you locate the SYNCHRO REC. - Page 14 Programmed Edit Recording As you program the CD tracks to record, Programmed Edit FUNCTION Recording displays the remaining recording time for each side of the tape, so you can easily select a set of desired tracks CD EDIT/ 0–10, +10 within the length of your tape.
- Page 15 6 Repeat step 5 to select the rest of the tracks for To stop recording To prevent accidental erasure side A. Press s. Recording and CD playback stop simultaneously. Break off the plastic tab of the cassette tape with a screwdriver The remaining recording time of side A is displayed.
-
Page 16: Timer Operations
TIMER OPERATIONS 5 Press f or g to set the timer-activated duration, then press SET. With each press, the timer-activated duration changes in POWER 5-minute steps between 5 to 240 minutes. SLEEP TIMER 6 Press f or g to adjust the volume for timer POWER playback, and press SET. -
Page 17: Timer Recording
8 Insert the recording tape and then turn the unit To check the timer setting Timer recording off. Hold down SHIFT and press TIMER on the remote control Timer recording is available only for TUNER and AUX (with an "5 REC" remains on the display to indicate the timer repeatedly so that "5 PLAY"... -
Page 18: Reference
REFERENCE Condensation Care and maintenance Troubleshooting Moisture may form on the CD pickup lens when: Occasional care and maintenance of the unit and the software If your unit fails to perform properly, check the following guide •The unit is moved from a cold spot to a warm spot are needed to optimize the performance of your unit. -
Page 19: Specifications
GENERAL COPYRIGHT Specifications Check copyright laws relevant to recordings from discs, radio Power requirements 120 V AC, 60 Hz MAIN UNIT CX-LEM50 Power consumption 40 W or tape for the country where the unit is to be used. TUNER Power consumption in standby mode FM tuning range 87.5 MHz to 108 MHz With ECO mode on: 0.7 W... -
Page 20: Instrucciones Importantes De Seguridad
INSTRUCCIONES IMPORTANTES DE SEGURIDAD ADVERTENCIA Para reducir el riesgo de incendios o de descargas eléctricas, no exponga esta unidad a la lluvia ni a la Lea cuidadosa y completamente el manual de instrucciones antes Ventilación - La unidad deberá colocarse solamente donde tenga humedad. - Page 21 ÍNDICE INSTRUCCIONES IMPORTANTES Tormentas eléctricas Sobrecarga - No sobrecargue los tomacorrientes ni los cables de DE SEGURIDAD ......... 20 prolongación, ya que esto podría resultar en descargas eléctricas o Para proteger bien esta unidad contra tormentas eléctricas, o cuando PREPARACIONES ....... 22 incendios.
-
Page 22: Preparaciones
PREPARACIONES 3 Conecte el cable de alimentación de CA a una Conexión Mando a distancia toma de CA. Conecte el cable de alimentación de CA a la toma de CA una Suelte la tapa del compartimento de las pilas en la parte El reloj parpadeará... -
Page 23: Partes Y Controles
PARTES Y CONTROLES 3 wREC/REC PAUSE Unidad principal: parte delantera Unidad principal: parte posterior Inicia y hace pausas en la grabación. SYNCHRO REC Inicia simultáneamente la grabación y la reproducción de un disco compacto. sCLEAR Disco compacto y cinta: detiene la reproducción. Radio: borra una emisora presintonizada. - Page 24 6 SHIFT Mando a distancia DISPLAY Manténgalo pulsado cuando pulse un botón numerado PROGRAM para cambiar su función a la impresa sobre el número. Selecciona el modo de reproducción programada de 7 FUNCTION discos compactos. Cambia la función activa entre TAPE, TUNER, AUX y CD. TIMER 8 PRESET +,- Selecciona el modo del temporizador.
-
Page 25: Ajustes Antes Del Funcionamiento
AJUSTES ANTES DEL FUNCIONAMIENTO Ajuste del reloj TAPE, 1 Mantenga SHIFT pulsado y pulse CLOCK en el TUNER/BAND, mando a distancia. AUX, CD CLOCK DISPLAY Cuando la unidad está apagada también puede pulsar SET. POWER 2 Antes de que pasen 6 segundos, pulse f o 6STANDBY/ON g para configurar la hora. -
Page 26: Funcionamiento Del Reproductor De Discos Compactos
FUNCIONAMIENTO DEL REPRODUCTOR DE DISCOS COMPACTOS Reproducción aleatoria/repetida 0–10, +10 En modo de reproducción aleatoria la unidad reproduce todas las pistas en orden aleatorio. En modo de reproducción repetida PROGRAM reproduce repetidamente todas las pistas o la pista que se está DISPLAY reproduciendo. - Page 27 Para comprobar el programa Reproducción programada Notas sobre discos compactos Pulse f o g repetidamente en modo de parada. El •No introduzca más de un disco. Reproduce hasta 30 pistas seleccionadas en el orden número de pista y el número de programa aparecerán en •No incline la unidad con un disco dentro.
-
Page 28: Funcionamiento Del Sintonizador
FUNCIONAMIENTO DEL SINTONIZADOR Sintonización de emisoras presintonizadas TUNER MODE 1 Seleccione la banda. 2 Pulse PRESET +,- en el mando a distancia repetidamente. 0–10, +10 TUNER/BAND Con cada pulsación, se sintonizará la emisora con el POWER número de presintonización siguiente o anterior. PRESET +,- Puede sintonizar la presintonía deseada directamente TUNER/BAND... -
Page 29: Ajustes De Sonido
AJUSTES DE SONIDO Ajustes Para cambiar a recepción FM monoaural Mantenga pulsado SHIFT y pulse TUNER MODE en el mando a distancia de modo que aparezca "MONO" en pantalla. Para cancelar, repita el paso anterior de modo que VOLUME "STEREO" aparezca en pantalla. Consejo: TONE Cuando la recepción FM estéreo sea de mala calidad, el... -
Page 30: Reproducción De La Cinta
REPRODUCCIÓN DE LA CINTA Para expulsar la cinta Pulse z PUSH EJECT una vez se haya detenido la platina TUNER MODE completamente. FUNCTION Notas sobre casetes •Las cintas de 120 minutos o más no se recomiendan porque REV MODE REC/ son muy finas y se deforman o dañan fácilmente. -
Page 31: Grabación De Una Cinta
GRABACIÓN DE UNA CINTA Para comenzar la grabación de un disco compacto Para grabar un espacio en blanco de 4 segundos Grabación básica más fácilmente (sólo para TUNER o fuente AUX) Use sólo cintas del tipo I (normales). Insertar espacios en blanco de 4 segundos puede ayudarle a Introduzca la cinta a grabar, cargue el disco y pulse SYNCHRO localizar el principio de la pista en otro equipo con la ayuda de REC. - Page 32 En el mando a distancia, mantenga pulsado SHIFT y pulse REC/REC PAUSE para iniciar la grabación. FUNCTION Grabación con edición programada Cuando programe las pistas del disco compacto a grabar, la CD EDIT/ 0–10, +10 CHECK Grabación con edición programada mostrará el tiempo de REC/ grabación restante para cada cara de la cinta, para que así...
- Page 33 6 Repita el paso 5 para seleccionar el resto de las Para detener la grabación Para evitar el borrado accidental pistas para la cara A. Pulse s. La grabación y la reproducción del disco compacto Rompa la lengüeta de plástico de la cinta con un destornillador El tiempo de grabación restante en la cara A aparecerá...
-
Page 34: Funcionamiento Del Temporizador
FUNCIONAMIENTO DEL TEMPORIZADOR •Para reproducción temporizada de una transmisión radiofónica, seleccione "TUNER". La banda la seleccionará más adelante en el paso 7. POWER •Para reproducción temporizada del equipo conectado a SLEEP las tomas AUX IN, seleccione "AUX (VIDEO o TV)". TIMER 5 Pulse f o g para ajustar la duración del POWER... - Page 35 8 Introduzca la cinta a grabar y luego apague la Para comprobar el ajuste del temporizador Grabación temporizada unidad. Mantenga pulsado SHIFT y pulse TIMER repetidamente en el La grabación temporizada sólo está disponible para fuentes "5 REC" permanecerá en pantalla para indicar el modo mando a distancia de forma que "5 PLAY"...
-
Page 36: Referencia
REFERENCIA Condensación Cuidados y mantenimiento Guía para la solución de problemas Puede formarse condensación en la lente del fonocaptor del Es necesario un cuidado y mantenimiento ocasionales de la Si su unidad no funciona correctamente, compruebe la siguiente reproductor de discos compactos cuando: unidad y del software para un óptimo funcionamiento de su guía y las secciones relevantes del Manual de Instrucciones. - Page 37 REPRODUCTOR DE DISCOS COMPACTOS DERECHOS DE AUTOR Especificaciones Compruebe la legislación sobre derechos de autor relevante Láser Láser semiconductor ( = 780 nm) UNIDAD PRINCIPAL CX-LEM50 Convertidor D/A 1 bit doble a grabaciones de discos, radio o cintas para el país en que Relación de señal a ruido 80 dB (1 kHz, 0 dB) vaya a utilizarse la unidad.
-
Page 38: Instructions Importantes Concernant La Securite
INSTRUCTIONS IMPORTANTES CONCERNANT LA SECURITE ATTENTION Pour réduire les risques d’incendie ou de décharge électrique, ne pas exposer cet appareil à la pluie ou à Lisez attentivement et entièrement le Mode d’emploi avant de faire Ventilation - Ménagez un espace suffisant autour de l’appareil l’humidité. - Page 39 TABLE DES MATIÈRES INSTRUCTIONS IMPORTANTES Antenne extérieure Foudre CONCERNANT LA SECURITE ....38 Pour renforcer la protection de l’appareil par temps d’orage Lignes d’alimentation - Un système d’antenne extérieure doit PRÉPARATIFS ........40 s’accompagnant de foudre ou s’il est laissé sans surveillance et être localisé...
-
Page 40: Préparatifs
PRÉPARATIFS 3 Raccordez le cordon d'alimentation secteur à la Raccordement Télécommande prise de courant secteur. Branchez le cordon d'alimentation secteur à la prise Détachez le couvercle du compartiment à piles qui se trouve L'horloge clignotera sur l'affichage. d'alimentation secteur après avoir fait tous les autres à... -
Page 41: Parties Et Contrôles
PARTIES ET CONTRÔLES 3 wREC/REC PAUSE Unité principale: avant Unité principale: arrière Démarre et met en pause l'enregistrement. SYNCHRO REC Démarre l'enregistrement et la lecture d'un CD simultanément. sCLEAR CD et cassette: arrête la lecture. Radio: supprime une station préréglée. f/r, t/g (TUNING -,+) CD: saute à... - Page 42 6 SHIFT Télécommande DISPLAY Maintenez-la enfoncée tout en appuyant sur une touche PROGRAM numérotée pour changer sa fonction à celle inscrite au- Sélectionne le mode lecture programmée d'un CD. dessus du numéro. TIMER 7 FUNCTION Sélectionne le mode de temporisé. Commute la fonction active parmi TAPE, TUNER, AUX et SLEEP Sélectionne le mode de minuterie de sommeil.
-
Page 43: Réglage Avant La Mise En Marche
RÉGLAGES AVANT LA MISE EN MARCHE Pour régler l'horloge TAPE, 1 Maintenez enfoncée SHIFT et appuyez sur CLOCK TUNER/BAND, sur la télécommande. AUX, CD CLOCK DISPLAY Lorsque l'unité est éteinte, vous pouvez également appuyer sur SET. POWER 6STANDBY/ON 2 Dans les 6 secondes, appuyez sur f ou g TUNER/BAND, pour régler l'heure. -
Page 44: Pour Opérer Le Cd
POUR OPÉRER LE CD Lecture aléatoire/lecture répétée 0–10, +10 En mode de lecture aléatoire l'unité lit toutes les pistes dans un ordre aléatoire. En mode de lecture répétée elle lit plusieurs PROGRAM fois toutes les pistes ou la piste en cours de lecture. Vous pouvez DISPLAY sélectionner la lecture aléatoire et la lecture répétée de toutes RANDOM/... - Page 45 Pour vérifier le programme Lecture programmée Remarques sur les CD Appuyez plusieurs fois sur f ou g en mode arrêt. Le •N'introduisez pas plus d'un disque. Lit jusqu'à 30 pistes sélectionnées dans un ordre programmé. numéro de la piste et le numéro du programme s'affichent •Ne soulevez pas l'unité...
-
Page 46: Pour Opérer La Radio
POUR OPÉRER LA RADIO Réception des stations préréglées TUNER MODE 1 Sélectionnez la bande. 2 Appuyez plusieurs fois sur PRESET +,- sur la télécommande. 0–10, +10 TUNER/BAND Avec chaque pression, la station au numéro de préréglage POWER suivant ou précédent est réglée. PRESET +,- Vous pouvez directement mettre en réception la station TUNER/BAND... -
Page 47: Réglages Du Son
RÉGLAGES DU SON Réglages Pour passer à la réception FM monophonique Maintenez enfoncée SHIFT et appuyez sur TUNER MODE sur la télécommande afin que " MONO " s'affiche. Pour annuler, répétez l'opération ci-dessus afin que VOLUME " STEREO " s'affiche. Conseil: TONE Lorsque la réception FM stéréo est faible, le passage à... -
Page 48: Lecture Des Cassettes
LECTURE DES CASSETTES Remarques sur les cassettes TUNER MODE •Il est déconseillé d'utiliser des cassettes de 120 minutes ou plus car elles sont si fines qu'elles peuvent facilement se FUNCTION déformer ou s'endommager. •Tendez la bande à l'aide d'un crayon ou autre instrument REV MODE similaire avant de l'utiliser. -
Page 49: Enregistrement Sur Cassette
ENREGISTREMENT SUR CASSETTE •Le(s) réglage(s) de volume et de tonalité sont sans effets Pour enregistrer un espace vierge de 4 secondes Enregistrement de base sur l'enregistrement. (uniquement pour la source TUNER ou AUX) Utilisez uniquement des cassettes du type I (normal). L'insertion d'un espace vierge de 4 secondes peut vous aider à... - Page 50 Montage d'un enregistrement programmé En programmant les pistes d'un CD à enregistrer, le montage FUNCTION d'un enregistrement programmé affiche le temps restant d'enregistrement pour chaque face de la cassette, afin que CD EDIT/ 0–10, +10 vous puissiez sélectionner facilement un programme de pistes CHECK souhaitées en respectant la longueur de votre cassette.
- Page 51 6 Répétez l'étape 5 pour sélectionner le reste des Pour arrêter l'enregistrement Pour éviter des effacements accidentels pistes pour la face A. Appuyez sur s. L'enregistrement et la lecture du CD s'arrêtent Brisez la languette de la cassette avec un tournevis ou autre Le temps restant d'enregistrement de la face A s'affiche.
-
Page 52: Pour Opérer La Minuterie
POUR OPÉRER LA MINUTERIE •Pour la lecture temporisée d'une émission de radio, sélectionnez " TUNER ". Vous sélectionnerez la bande plus tard dans l'étape 7. POWER •Pour la lecture temporisée de l'équipement raccordé aux SLEEP prises AUX IN, sélectionnez " AUX ( VIDEO ou TV )". TIMER POWER 5 Appuyez sur f ou g pour régler la durée... -
Page 53: Enregistrement Temporis
7 Préparez la source. Pour vérifier le réglage de la minuterie Enregistrement temporisé Pour enregistrer la radio, sélectionnez la bande et réglez Maintenez enfoncée SHIFT et appuyez plusieurs fois sur L'enregistrement temporisé est également disponible pour les la station souhaitée. TIMER sur la télécommande afin que "5 PLAY "... -
Page 54: Référence
RÉFÉRENCE Condensation Entretien et maintenance Guide de dépannage De l’humidité peut se former sur la lentille de lecture du CD L'entretien et la maintenance occasionnels de l'unité et du Si votre appareil cesse de fonctionner correctement, suivez le quand: logiciel sont nécessaires pour optimiser le rendement de votre guide suivant et les sections appropriées de ce mode d'emploi. - Page 55 GÉNÉRALITÉS DROITS D'AUTEUR Spécifications Veuillez vérifier les lois concernant les droits d'auteur des Alimentation 120 V secteur, 60 Hz UNITÉ PRINCIPALE CX-LEM50 Consommation 40 W enregistrements des disques, de la radio ou de cassettes Consommation en mode d'attente extérieures du pays dans lequel cet appareil est utilisé. TUNER avec le mode ECO activé: 0,7 W Plage d'accord FM...
- Page 56 NOTE REMARQUE CAUTION TO PREVENT ELECTRIC SHOCK DO NOT USE THIS This equipment has been tested and found to comply with the Cet appareil a été testé et jugé conforme aux limites des (POLARIZED) PLUG WITH AN EXTENSION CORD, limits for a Class B digital device, pursuant to Part 15 of the appareils numériques de Classe B, conformément à...
Need help?
Do you have a question about the XR-EM50 and is the answer not in the manual?
Questions and answers