Table of Contents
Advertisement
MIG WELDER 131
MIG WELDER 131
MIG WELDER 131
MIG WELDER 131
MIG WELDER 131
Assembly AND OPERATING INSTRUCTIONS
3491 Mission Oaks Blvd., Camarillo, CA 93011
Visit our Web site at http://www.harborfreight.com
Copyright © 2003 by Harbor Freight Tools
this manual or any artwork contained herein may be reproduced in any shape
or form without the express written consent of Harbor Freight Tools.
For technical questions and replacement parts, please call 1-800-444-3353
06098
®
. All rights reserved. No portion of
Advertisement
Table of Contents

Related Manuals for Chicago Electric 6098


Summary of Contents for Chicago Electric 6098
- Page 1 Copyright © 2003 by Harbor Freight Tools this manual or any artwork contained herein may be reproduced in any shape or form without the express written consent of Harbor Freight Tools. For technical questions and replacement parts, please call 1-800-444-3353 06098 ®...
-
Page 2: Specifications
ITEM Welding Current Duty Cycle Power Consumption Open Circuit Voltage Heat Control Ground Cable Torch Power Cable Power Cord Thermal Overload Protection with Light Wire Size Welding Material Size Wire Spool Size Weight Accessories You will need the manual for the safety warnings and precautions, assembly instructions, operating and maintenance procedures, parts list and diagram. - Page 3 Use of any other parts will void the warranty. Only use accessories intended for use with this tool. Approved accessories are available from Harbor Freight Tools. Do not operate tool if under the influence of alcohol or drugs. Read warning labels on prescriptions to determine if your judgment or reflexes are impaired while taking drugs.
- Page 4 Protective clothing should be free of holes, dry, and ANSI approved. This unit draws enough current to cause serious injury or death. Before turning the welder on, check the electrode holder to be sure that there are no protruding screw heads, and that all insulation is secure.
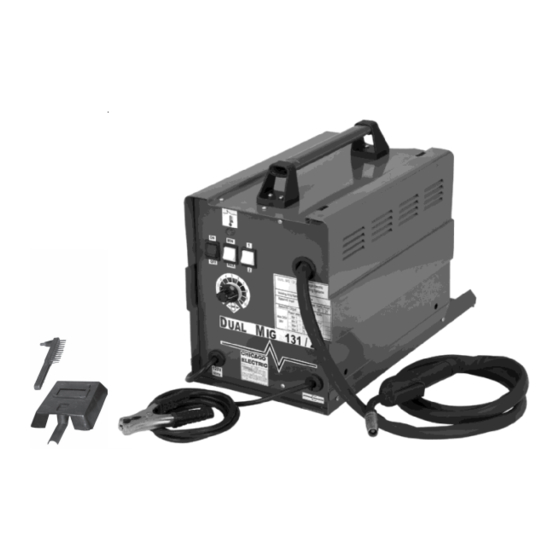
- Page 5 Line Cord (13) Brush Hammer Handheld Shaded Face Shield If any parts are missing or broken, please call Harbor Freight Tools at the number on the cover of this manual as soon as possible. SKU 06098 Unpacking Ground Cable with Clamp...
- Page 6 MIG Welder Unit Insert the Handle (4) into the Handle Sockets (3) and mount the Handle Sockets to the Side Panel B (1) top using supplied hardware. Lift Side Panel B (1) all the way to expose the wire spool and Wire Feed Mechanism (10).
-
Page 7: Welding Operation
Refer to the power setting table on the next page. Thinner metals use lower current. Heavier metals use higher current. Verify that the On/Off Switch is in the OFF position, then plug the MIG Welder Line Cord into a dedicated, 120 VAC, 20 amp line with delayed action type circuit breaker or fuses. - Page 8 Overload protector will activate, the red Overload indicator will light, and the Arc Welder will turn off until it cools down. If this happens, turn the On/Off Switch to the OFF position and wait about 3 ~ 5 minutes.
-
Page 9: Troubleshooting
Overload controller defective. Caution: Before performing any maintenance on the MIG Welder, unplug the power Line Cord from the electrical outlet. Periodically using compressed air, open the top and side panels and blow out all dust from the interior. - Page 10 Store the unit in a clean and dry location. Periodically clean out the Torch Head. Replacing the Wire Reel When the wire on the Feed Reel is used up, you will need to replace it as described on page 6, step 5 through step 9. NOTE: Some parts are listed and shown for illustration purposes only and are not available individually as replacement parts.
- Page 11 Wire Feed Mechanism Assembly Drawing SKU 06098 Page 11...
- Page 12 MIG Welder 131 Schematic Diagram MIG Welder 131 Assembly Drawing SKU 06098 Page 12...
- Page 13 Hand Held Shield Assembly Drawing SKU 06098 Page 13...