Table of Contents
Advertisement
Owner's Manual & Safety Instructions
Save This Manual
operating, inspection, maintenance and cleaning procedures. Write the product's serial number in the
back of the manual near the assembly diagram (or month and year of purchase if product has no number).
Keep this manual and the receipt in a safe and dry place for future reference.
When unpacking, make sure that the product is intact
and undamaged. If any parts are missing or broken,
please call 1-888-866-5797 as soon as possible.
©
Copyright
2015 by Harbor Freight Tools
No portion of this manual or any artwork contained herein may be reproduced in
any shape or form without the express written consent of Harbor Freight Tools.
Diagrams within this manual may not be drawn proportionally. Due to continuing
improvements, actual product may differ slightly from the product described herein.
Tools required for assembly and service may not be included.
Keep this manual for the safety warnings and precautions, assembly,
Visit our website at: http://www.harborfreight.com
Visit our website at: http://www.harborfreight.com
Email our technical support at: productsupport@harborfreight.com
®
. All rights reserved.
Read this material before using this product.
Failure to do so can result in serious injury.
SAVE THIS MANUAL.
REV 15d
Advertisement
Table of Contents

Subscribe to Our Youtube Channel
Related Manuals for Chicago Electric 62719


Summary of Contents for Chicago Electric 62719
- Page 1 Owner’s Manual & Safety Instructions Save This Manual Keep this manual for the safety warnings and precautions, assembly, operating, inspection, maintenance and cleaning procedures. Write the product’s serial number in the back of the manual near the assembly diagram (or month and year of purchase if product has no number). Keep this manual and the receipt in a safe and dry place for future reference.
-
Page 2: Table Of Contents
A moment of inattention while operating welders may result in serious personal injury. Page 2 For technical questions, please call 1-888-866-5797. Item 62719... -
Page 3: Safety
3. Keep clothing free of grease, oil, solvents, or any flammable substances. Wear dry, insulating gloves and protective clothing. Item 62719 For technical questions, please call 1-888-866-5797. Page 3... - Page 4 Clean and purge containers before applying heat. Vent closed containers, including castings, before preheating, welding, or cutting. Page 4 For technical questions, please call 1-888-866-5797. Item 62719...
-
Page 5: Maintenance
2. Have your Welder serviced by a qualified maintenance, or cleaning procedures. repair person using only identical replacement parts. This will ensure that the safety of the Welder is maintained. SAVE THESE INSTRUCTIONS. Item 62719 For technical questions, please call 1-888-866-5797. Page 5... -
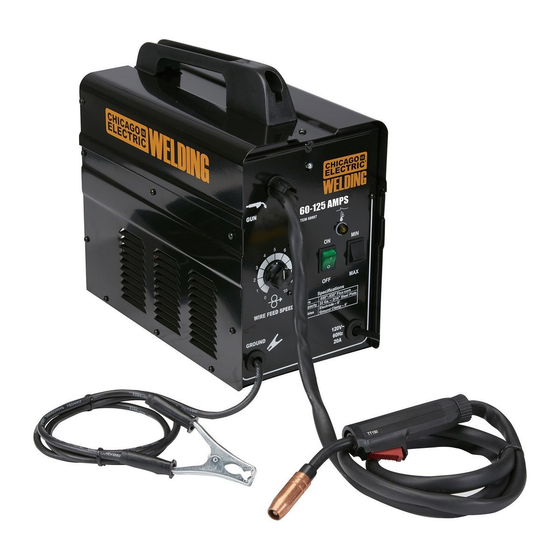
Page 6: Specifications
(See explanation on page 14) Open Circuit Voltage 2.38 Welder Tips / Wire Size Installed tip will accept 0.030" Flux-Core wire Wire Spool Capacity 4" diameter / 2 lb. spool Page 6 For technical questions, please call 1-888-866-5797. Item 62719... -
Page 7: Setup
2. The notch on the front of the Handle should drop into the slot in the Cover. Both ends of the Handle should lay flush against the top of the Cover. Cover 3. Secure with Screw at front of unit. Item 62719 For technical questions, please call 1-888-866-5797. Page 7... -
Page 8: Wire Spool Installation
Wire Spool so that it will unwind counterclockwise . Spindle 5. Replace the Top Plate (turned as shown in illustration), the Spring and the Knob. wire must unwind in this direction Page 8 For technical questions, please call 1-888-866-5797. Item 62719... - Page 9 13. Lay the Gun Cable out in a straight line so that the wire moves through it easily. Leave the cover open, so that the feed mechanism can be observed. Contact Item 62719 For technical questions, please call 1-888-866-5797. Page 9...
- Page 10 Gun. Wire If the wire does not feed properly and the Spool is stationary, turn the Welder to OFF, unplug it, and slightly tighten the Feed Tensioner clockwise before retrying. Page 10 For technical questions, please call 1-888-866-5797. Item 62719...
- Page 11 Gun. 19. Replace the Nozzle and cut the wire off at " from tip ( " stickout). Contact 20. Swing the Cover closed until the Cover Latch locks in place. Item 62719 For technical questions, please call 1-888-866-5797. Page 11...
-
Page 12: Basic Welding
Make practice welds on pieces of scrap to practice technique before welding anything of value. Page 12 For technical questions, please call 1-888-866-5797. Item 62719... -
Page 13: Control Panel Layout
Power Cord: Plug the Power Cord into a properly grounded 120 V AC outlet, on at least a 20 amp dedicated circuit with delayed action type circuit breaker or fuses. Item 62719 For technical questions, please call 1-888-866-5797. Page 13... -
Page 14: Weld Settings Chart
WIRE FEED SPEED Wire 0.030" – 0.035" Flux-Core non-conductive Capacity 18 Ga. – 3/16" Steel Plate be used again, use shorter welding periods and Weldable surface) Mild, Low Alloy Steel Materials (Not for Aluminum or Stainless Steel) longer rest periods to prevent needless wear. GROUND 120V~ 60Hz Page 14 For technical questions, please call 1-888-866-5797. Item 62719... -
Page 15: Setting Up The Weld
Then, turn the Power Switch to ON. Specifications WIRE FEED SPEED Wire 0.030" – 0.035" Flux-Core Capacity 18 Ga. – 3/16" Steel Plate Weldable Mild, Low Alloy Steel Materials (Not for Aluminum or Stainless Steel) GROUND 120V~ 60Hz Item 62719 For technical questions, please call 1-888-866-5797. Page 15... -
Page 16: Basic Welding Technique
6. The welding wire should extend no more than " (up to ") past the tip. Weld Direction This distance is called stickout or CTWD – Contact Tip to Work Distance. Page 16 For technical questions, please call 1-888-866-5797. Item 62719... - Page 17 Capacity 18 Ga. – 3/16" Steel Plate Weldable Mild, Low Alloy Steel Materials (Not for Aluminum or Stainless Steel) GROUND 120V~ 60Hz 9. Set the Gun down on a heat-proof, electrically non-conductive surface. Unplug the Power Cord. concrete slab (or other heat-proof, non-conductive surface) Item 62719 For technical questions, please call 1-888-866-5797. Page 17...
-
Page 18: Welding Tips
3. A GOOD WELD will deform but not break, SCRAP as shown on top. workpiece A POOR WELD will be brittle and snap at the weld, as shown on bottom. POOR WELD snaps or cracks Page 18 For technical questions, please call 1-888-866-5797. Item 62719... - Page 19 WIRE FEED SPEED Wire 0.030" – 0.035" Flux-Core Capacity 18 Ga. – 3/16" Steel Plate 60Hz Weldable Mild, Low Alloy Steel Materials (Not for Aluminum or Stainless Steel) GROUND 120V~ Specifications 60Hz WIRE FEED SPEED Wire 0.030" – 0.035" Flux-Core Capacity 18 Ga. – 3/16" Steel Plate Weldable Mild, Low Alloy Steel Materials (Not for Aluminum or Stainless Steel) GROUND 120V~ Item 62719 For technical questions, please call 1-888-866-5797. Page 19 60Hz...
-
Page 20: Weld Problems
Hold gun at proper angles. 2. Insufficient weld heat: Increase current and/or wire feed speed. 3. Dirty workpiece: Clean workpiece down to bare metal. 4. Insufficient weld material: Increase wire feed speed. Page 20 For technical questions, please call 1-888-866-5797. Item 62719... - Page 21 POSSIBLE CAUSES AND SOLUTIONS 1. Inaccurate welding: Use two hands or rest hand on steady surface. 2. Inconsistent welding speed: Maintain steady weld speed. 3. Stickout too long: Reduce stickout. Item 62719 For technical questions, please call 1-888-866-5797. Page 21...
-
Page 22: Maintenance
4. Examine the shape of the hole at the end of the Contact Tip. It should be an even circle; Contact it should not be oblong or have any bulges in it. Page 22 For technical questions, please call 1-888-866-5797. Item 62719... - Page 23 Reduce duration or frequency of welding periods to help reduce wear on the Welder. Refer to Duty Cycle section on page 14. 2. Faulty or improperly connected Trigger: Qualified technician must check and secure/replace Trigger. Item 62719 For technical questions, please call 1-888-866-5797. Page 23...
-
Page 24: Weak Arc Strength
Check to ensure that all connections are tight. 5. Damaged Gun or loose connection within Gun: Have a qualified technician inspect and repair/replace as necessary. 6. Adjust current setting: Make sure setting matches recommended setting on chart. Page 24 For technical questions, please call 1-888-866-5797. Item 62719... -
Page 25: Parts List And Diagrams
Parts List and Diagrams Wiring Schematic 1 2 3 1 2 3 4 Item 62719 For technical questions, please call 1-888-866-5797. Page 25... -
Page 26: Please Read The Following Carefully
Note: If product has no serial number, record month and year of purchase instead. Note: Some parts are listed and shown for illustration purposes only, and are not available individually as replacement parts. Page 26 For technical questions, please call 1-888-866-5797. Item 62719... -
Page 27: Assembly Diagram
Assembly Diagram Part 9 Detail (hidden by part 9e) Item 62719 For technical questions, please call 1-888-866-5797. Page 27... -
Page 28: Warranty
Limited 90 Day Warranty Harbor Freight Tools Co. makes every effort to assure that its products meet high quality and durability standards, and warrants to the original purchaser that this product is free from defects in materials and workmanship for the period of 90 days from the date of purchase.
Need help?
Do you have a question about the 62719 and is the answer not in the manual?
Questions and answers