Table of Contents
Advertisement
Quick Links
Advertisement
Table of Contents

Related Manuals for Strong SRT 8900


Summary of Contents for Strong SRT 8900
- Page 1 Digital HD Terrestriell Mottaker SRT 8900 User manual...
-
Page 2: Table Of Contents
© 2008 Strong A/S. All rights reserved. Republication or redistribution of Strong content, including by framing or similar means, is prohibited without the prior written consent of Strong A/S. The Strong logo is registered trademark and trademark of Strong A/S. -
Page 3: Safety Recommendations
Safety recommendations Using equipment safely Your decoder has been manufactured to meet European safety standards, but care must be taken to ensure proper performance. It is important that you read this booklet completely, especially the safety instructions below. If you have any doubts about the installation, operation or safety of decoder, please contact your Customer Service. - Page 4 Environmental Information • The batteries use some hazardous substances which pollute the environment. Do not dispose them out with other articles. Take care to dispose them at special collecting points. • If you are not using the receiver for a long period (including overnight), please switch it over to standby.
-
Page 5: About Your Hd Decoder
High Definition (HD) feature, you will be the first in line to enjoy TV in premium quality! Equipped with the latest HD technology, your Strong SRT 8900 is ready for the latest standard and is also compatible with the traditional SD standard. -
Page 6: Connections
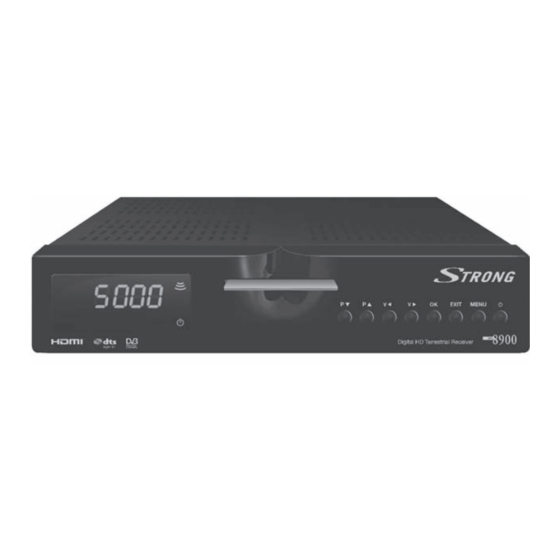
Connections Package content RF cable SRT 8900 set-top box Remote control with Batteries Scart lead Mains lead User manual Front panel controls SRT 8900 Green Stand-by LED on: set-top box on Red stand-by LED on: V-/C: Volume - / left... -
Page 7: Connections To Tv & Other Devices
Connections to TV & other devices Please follow figures 1 to 2 for a standard installation. Note: Before plugging in the receiver, you should connect at least the RF In antenna and the HDMI port. Other connections are optional. Figure 1: Connections to TV, VCR/DVD and Hi-Fi system. -
Page 8: Ensure The Best Hd Connection
Ensure the best HD connection To ensure the best image quality using an “HD ready” or “Full HD” TV screen, all you need is an HDMI lead to connect the HDMI port on your set-top box with the one on your TV. Your TV has no HDMI port but has one DVI-I port. -
Page 9: Remote Control
Remote control Power On / Stand-by. Open/closes access to the Electronic Program Guide (EPG). Toggles between TV and radio services. Displays the channel list. Increases/Decreases the volume level. Mutes to audio/Restore the previous audio volume. Opens the zapping banner / Opens the information banner / Closes the banner. Switches to the next/previous channel. -
Page 10: Quick Installation
Quick installation For a quick installation, please follow the steps below: 1. Check whether your set-top box is connected as shown in Figure 1 and 2 (page 6 and following). 2. Press the key on your remote to switch on your set. After a few seconds, a list of menu languages displays on screen. -
Page 11: Everyday Use
Everyday use Turning on/off Press the key on your remote to switch on or off your set. Note - To keep the Mini-Guide or the Electronic Programme Guide (EPG) updated, the set-top box should be left in standby, but if you are not going to use the set for a long period of time you should unplug it to save energy. Changing channels Press the P+/- key to switch to the next/previous channel or enter the channel number using the digit keys on your remote and press OK. -
Page 12: Using The Mini-Guide
To display the zapping banner: 1. Press the INFO key once. Advice: a basic zapping banner is automatically displayed when you tune to another channel. To change the display duration of the zapping banner go in MENU/Setup/Options and select Banner time out. To display the information banner: 2. -
Page 13: Menus
Menus Charts of the menu On/off, alarm time, timer list. Menu language, audio and subtitle preferences. Banner time out, transparency level, DC power, subtitling. Change PIN code, decoder lock. TV format and resolution, HDMI,TV/video standards, S/P-DIF and zoom mode. Automatic scanning or transport installation. Check whether a new software version is available on air. -
Page 14: Channel List
Channel list This menu gives access to all lists of channels: the All TV list and your favourite lists. You can view list content and modify the currently viewed list. Access to the list of channels 1. Press the MENU key. 2. -
Page 15: Channel Organizer
Channel organizer The channel organizer allows to create favourite lists and modify the different lists: rename, reorder or remove a list, add/remove channels, lock/unlock channels etc… Access to the channel organizer 1. Press the MENU key. 2. Using the s and t keys, select Channel organizer then press OK. Create a new list To create a new favourite list, highlight Create a new list using the s and t keys and press OK. -
Page 16: Setup
Setup Languages The menu, audio and subtitle languages can be set in Norwegian, Swedish, Danish, Finnish, English (if the corresponding track exist). Access to language settings 1. Press the MENU key. 2. Using the s and t keys, select Setup then press OK twice. Modify a language 1. -
Page 17: Connection
Connection The connection menu allows mainly settings TV formats, audio and video formats and HD resolutions. Access to the connection menu 1. Press the MENU key. 2. Using the s and t keys, select Setup then press OK. 3. Using the s and t keys, select Connection then press OK. Modify the connection settings Use the arrow keys to modify the connection settings. -
Page 18: Conax Ca
Conax CA The Conax menu allows getting information on your actual subscription, available tokens and changing the maturity rating. • The Subscription status menu informs on rights period on each general channel. • The Event status menu lists all PPV purchased programmes. •... -
Page 19: Main Features
Main features Strong SRT 8900 • MPEG-4 set-top box: be the first in line to enjoy TV in HD quality! Connections • HDMI interface. • RCA cinch audio outputs. • Electrical S/P-DIF digital audio output. • 2 Scarts:TV scart (CVBS/RGB) and VCR scart (CVBS). -
Page 20: Trouble Shooting
Trouble shooting Not every picture or sound problem is caused by a defect in your set-top box. If your unit does something unexpected while you are using it, please unplug it, wait a few seconds then plug it in again. Important –... -
Page 21: Glossary
Guarantee card Dear Customer, Thank you for purchasing this Strong product and for your confidence in our company. This product meets the applicable safety requirements and has undergone stringent testing during manufacture. However, in the event of defects occurring as a result of faulty workmanship or materials, please approach the dealer who sold you the product concerned and present this guarantee card, with the product type and serial number, as well as the original invoice or cash receipt indicating the date of purchase.The benefits of this... - Page 22 TCM:36523910...
Need help?
Do you have a question about the SRT 8900 and is the answer not in the manual?
Questions and answers