Advertisement
INTRODUCTION
Storage
Your device has been carefully checked and packed before shipping. When unpacking it, make sure that all the parts are included and keep the packaging away from children. We recommend that you keep the carton during the warranty period, to keep your device perfectly protected in the event of repair or warranty.
Equipment Set-up
Please follow the instructions below:
This user manual provides complete instructions for installing and using this product. The symbols will serve as follows:
 | Indicates warning information. |
| NOTE: | Indicates any other additional important or helpful information. |
| MENU | Represents a button on the remote control or the product. |
| Move to | Represents a menu item within a window. |
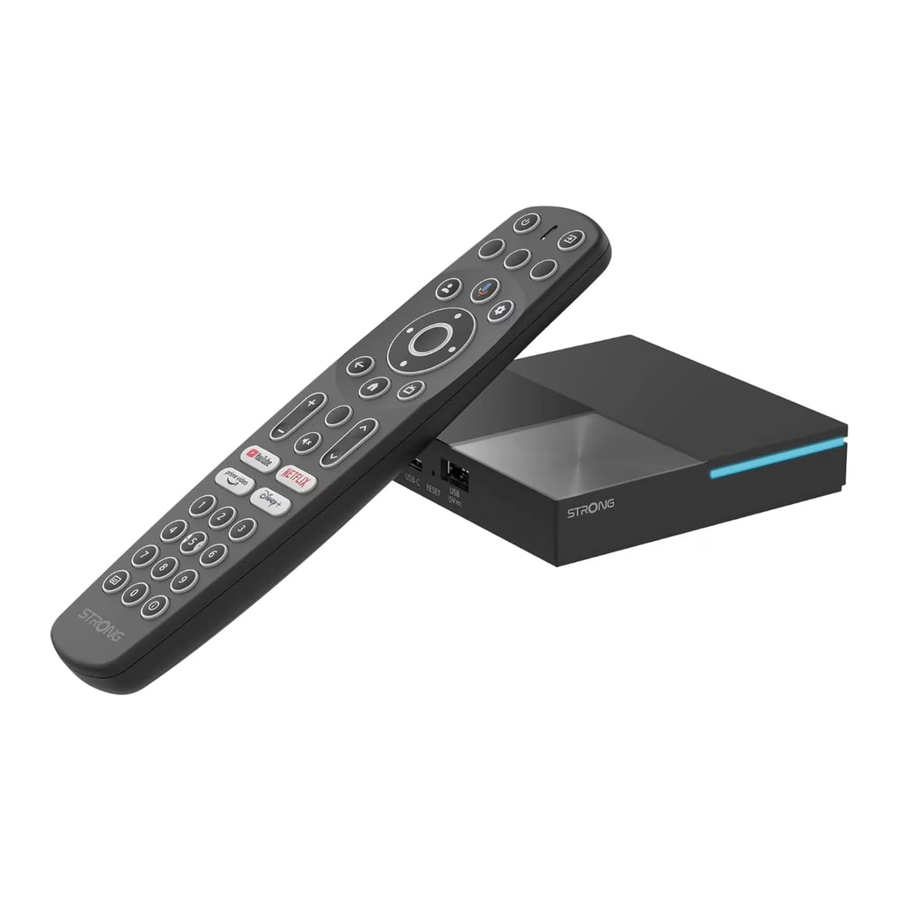
Package content
1x LEAP-S3 PRO box
1x Backlight Voice Enabled Remote
1x Power USB Adaptor 12V / 1A
2x AAA Batteries
1x Installation instructions
1x HDMI cable version 2.1
1x Safety and Warranty Instructions
The batteries should not be recharged, disassembled, electrically short- circuited, be mixed or used with other types of batteries. If rechargeable accumulators instead of batteries are going to be used (e.g. NiMH), we recommend using types with low self-discharge to ensure long time operation of your remote control.
DEVICE PANELS
Front Panel

See Fig. 1
On/Off Indicator: Green: Box On / Red: Box on Standby
Side Panel

See Fig. 2
| To connect a phone |
| To reset software back to factory settings |
| To connect a USB Key |
Rear Panel

See Fig. 3
| To connect to a digital or home cinema audio ampli er. |
| To connect your receiver with your TV set or Dolby Digital ampli er using a HDMI cable. |
| Connect to your Internet router to access the internet/apps. |
| To connect the original included 12Volt power adaptor of 1 Ampere. |
Remote control

See Fig. 4
| | Press to turn the TV/ Box to On, Standby or deep Standby. |
| | Select TV inputs after setup remote button configuration |
| | No function |
| | Call account menu to select between accounts |
| | Press to activate the voice control function*. |
| | Direct access to settings menu. |
| | Navigate the menu. Confirm the selection. |
| | Press to Exit. In menu: step back to previous menu. |
| | Enter the home desktop. |
| | Press to access the TV settings. |
| Adjust the volume up or down. |
| | No Function |
| | Press to mute or restore the volume. |
| | Change programs up or down. |
| Press for direct access to YouTube. |
| Press for direct access to Netflix** |
| Press for direct access to prime video***. |
| Press for direct access to Disney+****. |
| Choose channel directly. |
| Subtitles/Audio selection |
| Display information about the current source |


*Voice control and some other functions could work only when this RCU paired with your TV.
** Membership is not included. Netflix is available in selected countries. Streaming Netflix requires to set up an account. Broadband Internet required. See www.netflix.com/TermsOfUse for details.
*** Membership is not included. Prime is available in selected countries. Streaming prime video requires to set up an account. Broadband Internet required. See www.primevideo.com for details.
**** Membership is not included. Disney+ is available in selected countries. Streaming Disney+ requires to set up an account. Broadband Internet required. See www.disneyplus.com for details.
Installing the batteries

See Fig. 5
Open the cover on the remote control and insert 2x AAA batteries into the compartment. The correct position of batteries polar diagram is shown inside the batteries compartment.
- Open the cover.
- Insert the batteries.
- Close the lid.
The batteries should not be recharged, disassembled, electrically short- circuited, be mixed or used with other types of batteries.
CONNECTION GUIDE

See Fig. 6
Refer to the diagram above for connecting your LEAP-S3 PRO box to the HDMI input of TV.
NOTE: Before getting started, please turn off all devices to be connected.
NOTE: The LEAP-S3 PRO box also supports Wi-Fi 2.4GHz and 5GHz. To connect, go to Settings -> Network.
- Connect the LEAP-S3 PRO box to your television via the HDMI Cable. Advice: use (the included) type 2.1 as this is supporting UHD, HDR, Dolby Vision resolutions.
- Using an Ethernet Cable, connect the LAN Port of the LEAP-S3 PRO box to the LAN Port of your router or home broadband network.
- Connect the LEAP-S3 PRO box to power using the power adapter provided. You can then power on your device and begin.
NOTE: Before turning on your device, please switch the signal input of the TV to the correct source
SETTING UP YOUR DEVICE
You may turn on your LEAP-S3 PRO box after properly connecting all hardware.
To be able to use Google Assistant on your remote, you must first pair your Bluetooth Remote to your LEAP-S3 PRO Box. Please, follow the pairing instructions on the screen.

See Fig. 6
Press  and
and  together for 5 seconds. The LED will start blinking to start the pairing process. When successfully paired, it automatically switches to the next step, the Welcome Page.
- Language
Select your preferred language on the Welcome Page.
![]()
- Location Settings
Select the region or country where you are using this LEAP-S3 PRO Box.
![]()
- Set up with the Google Home App
Set up the LEAP-S3 PRO Box by downloading / opening the Google Home app on your phone.
Please, scan the QR code on your phone and follow the instructions to start this Google home.
Alternative, Start the set up on TV screen to type manually way by pressing down button to start with.
Please, follow the instructions on your TV screen.
![]()
- Wi-Fi
If you are not connected to the internet via an RJ45 cable, the Wi-Fi setup will appear. Select here to connect to your Wi-Fi Network.
![]()
- Google Account
Sign in with your Google Account and Password.
![]()
- Terms of Service & Privacy Policy
Read and accept the Terms of Services & Privacy Policy.
![]()
- Diagnostic Report Settings
Select whether to allow Google to estimate your location using Wi-Fi.
Choose whether to allow your LEAP-S3 PRO Box to send automatic diagnostic and usage data to Google. To proceed, select Accept and confirm by pressing OK. - Meet your Google Assistant
Activate the Google Assistant feature for it to work with your remote.
Choose whether you would like to use Assistant to search across all your TV applications.
![]()
- Choose your subscriptions
Select or de-select advised applications, which will. be used on home screen for recommendations. Some apps are forced and cannot de-selected.
Select Confirm to proceed - Setup remote buttons
If you like to set up some button functions from the connected device such as TV, Source, Volume. Select Set up remote and follow the instructions on screen.
As not all TV models are supported, we advise to set up this in later stage when you have more time. Please, select Not now as you can reach this setup again through the settings menu. - Personal settings of your Google TV
In this final step you can select to display photos from your Google Photo albums, set up multiple profiles and create a profile for children.
Select Go to Google Tv to start exploring your new LEAP-S3 PRO box.
![]()


SETTINGS

Press the settings button to open the Google TV menu. This menu allows you to directly access important items such as Wi-Fi, Bluetooth, accessibility, and notifications. Select "All settings" and press OK to view device information, add or remove accounts, and modify system settings.
Display and sound
Select Video settings for selection of Display mode to select resolution, HDR output Mode and Dolby Vision selection.
Select CEC-Inputs for setup connections and adjustments through CEC (Consumer Electronics Control).
Select Text scaling for text display size on screen.
Select Match content frame rate to adjust this with playback trough some applications.
Select Advance display settings for Game mode with belonging formats Select AISR for smooth scrolling trough pop-up highlight pictures in menu.
Select Audio to set up HDMI or S/PDIF audio output and Dolby Audio special settings
Network and Internet

Under Network Settings, select and enable Wi-Fi to connect to Wi-Fi network.
Once the device scans and lists nearby Wi-Fi networks, select the appropriate network name, if required put in the password and select Connect.
If you prefer to use wired RJ45 connection, disabled Wi-Fi.
Under IP settings you can find your wired settings to check or set up DHCP or Static IP address.
Adding Accounts

For new Google users: sign up for a new Google account using the TV for easier login and payment security. Add an account or switch accounts under Accounts in the Settings Menu.
Here, parents can create a child profile to personalize a safe space for their kids to access content they love, all under your control.
Privacy
Select which connected devices or apps like Google assistant may use access or permission. Set up Payment and purchases, Manage App updates and check Memory space.
Apps
Select to find the installed Apps, see permissions access, versions of applications and to remove apps from your TV box.
Bluetooth Pairing
Select Settings in the Menu Launcher, click Remote & Accessories, then select the device to be paired. Make sure that the device you want to pair with is in pairing mode. In this menu you can setup some remote buttons to control Volume, Power, Input sources on TV or Digital Home amplifiers.
Remove a Bluetooth Device
Select Settings from the Menu Launcher.
From the Remote & Accessories menu, select the Bluetooth device you want to remove. Click "Forget" to remove this device.
System
Select system to find information of software and android version, to check for system update and if you like to do full factory reset to remove all installed apps and accounts. As well to select menu language, date and time location and settings of power and energy modes.
About
You can check information about your device by clicking on ABOUT in the System Menu. This menu will show you the model of your device, version, firmware version and more. You can also update your system by clicking on System update from this menu.

Factory Reset

Under Settings, System > About > Reset
Click Factory data reset to erase everything back to factory settings.
Once this option has been selected, all manually installed apps and user data information will be deleted including your Google accounts from LEAP-S3 PRO box.
Alternative: On the left panel of the LEAP-S3 PRO box, between the USB ports, there is a small hole containing the RESET button. Press this button for 10 seconds while on the home screen to reset the device back to factory settings.
Date and Time
Under Settings > System > select Date and Time to change Time zone and to use 24-hour format.
Language
Under Settings > System > select Language to change the language previously set.
Keyboard
Under Settings > System > to select or change Keyboard type and the belonging language type.
Storage
Under Settings > System > to check used and available memory.
Power and energy
Select or change Standby mode definition to Sleep or total Shutdown.
Select the time when the box is inactive to start with photo gallery in Ambient mode.
Select Auto standby to select time to go automatically when the remote is not used.
Cast
Under Settings > System > Cast select if you want to show notification on all Android devices connected to your Wi-Fi network and to allow to let them control.
DOWNLOADING APPS

Apps are available for download on the Google Play Store.
Select in the upper part of Home screen APPS. Select the search bar "Search for apps and games" and type name or press microphone and tell name.
GOOGLE CAST
Cast from a Mobile Device
Certain apps allow you to cast onto your TV. To cast, simply follow the following steps:
Open a Google cast compatible app on your mobile device. Navigate to the screen you wish to cast.
Cast from Google Chrome
This device has Google Chromecast built-in. To cast from Google Chrome, click the Settings icon: located on the top right corner of the browser, then click "Cast".
GOOGLE ASSISTANT
Say it to Play it
Ask it to play your favorite show, video, or music or find the latest blockbuster to enjoy.
Movies & TV shows:
Play Emily in Paris on Netflix.
Video clips: Play cat videos. Apps: Open YouTube.
Search: Find comedy shows. Info: Tell me about the new Dune movie.
Control
Playback: Pause. Stop. Resume Volume: Louder. Softer. Power: Turn off.
Play music, news, or podcasts
Music: Play music by Sia. (Learn how to choose your music service provider.)
News: Play the news. What's the latest news from BBC?
Ask Google
Sports: How did the Patriots do? When is the next Warriors game?
Calculations: What's 20% of 80? Dictionary: What does "ludic" mean?
Find answers: How far away is the moon? How do you remove stains in a rug? Unit conversions: How many teaspoons in a cup?
Speak into the microphone of your Voice Search remote.
Learn more about the Google Assistant on assistant.google.com or say, "What can you do?" Just ask questions like:" How is the weather in Paris?".
To get started, press the Google Assistant button on your remote.
NOTE: To be able to use Google Assistant on your remote, must remote be paired to your LEAP-S3 PRO box.
SIMPLE TROUBLESHOOTING
| Issue | Possible Reason | Solution |
No LED after power on | The power adapter is not properly connected. | Make Sure the device is connected to the power. |
No Sound |
| Press the mute button to restore the sound and increase the volume. |
Failed to connect to network | Wi-Fi is turned off or the signal is too weak. | Restart the Wi-Fi or adjust the position of the device closer to the router. |
Remote Control Failure |
| Replace batteries. Switch main power OFF/ON and pair remote with BACK & HOME button press 5 seconds. Wait until pair screen appears, pair. |
No Picture on Screen | Wrong TV HDMI input. | Make sure that correct HDMI is selected as your TV input. Check if you not are using old HDMI cable. |
Voice search on remote is not working | Remote is not paired to the Google TV Box | See the Pairing Bluetooth Device section in this guide |
No Audio | Audio Settings not configured correctly for your TV | Settings> Display & Sound > Advanced sound settings |
TECHNICAL SPECIFICATIONS
| Video decoder | |
| Video resolution: | 480i, 480p, 576i, 576p, 720p, 1080i, 1080p24, 1080p30, 1080p60 4Kx2Kp30, 4Kx2Kp60, HEVC H.265, MPEG-4,MP@ML, MP@HL profiles, AV1, VC-1/VP8/VP9, HDR10+, HDR10, HLG, Dolby Vision |
| Audio decoder | |
| Audio decoding: | 32KHz to 192KHz sample rates, MPEG Audio Layers 1, 2 and 3, MS12, Dolby Digital Plus*, Dolby Atmos* |
| * Dolby, Dolby Audio, and the double-D symbol are trademarks of Dolby Laboratories Licensing Corporation. | |
| System & Memory | |
| Android Version: | 12 |
| CPU: | Amlogic RTD1325 Quad A55 20400 DMIPS 32K I/D cache 512KB L2 cache |
| GPU: | ARM G57 OpenGL ES 3.2 Graphics engine |
| SDRAM: | 4GB DDR4 |
| Flash: | eMMC: 32 GB |
| Connectors | |
| HDMI | Version 2.1 |
| Ethernet | RJ 45, 10/100 |
| 2x USB | Type A, 500Ma Type C, 500Ma |
| S/PDIF | Optical |
| DC IN | 12 V,1 A |
| General data | |
| Wi-Fi: | IEEE 802.11b/g/n, 2.4 GHz IEEE 802.11a/n/ac/ax, 5 GHz |
| Bluetooth: | 5.0 (LE 4.2) |
| Power supply: | 100 - 240 V AC, 50/60 Hz |
| Input voltage: | DC 12 V, 1 A |
| Power consumption working: | 4 W |
| Operating temperature range: | 0 ~ +40°C |
| Storage temperature: | -10 ~ +70°C |
| Dimensions (W x D x H) in mm: | 96 x 96 x 20 |
| Weight: | 158 g |
SAFETY INSTRUCTIONS
Read all the instructions before operating the device. Keep these instructions well for later use.
Only use attachments/accessories specified or provided by the manufacturer (such as the exclusive supply adapter, battery etc.).
- Please refer to the information on the product enclosure for electrical and safety information before installing or operating the apparatus.
![burn hazard]()
![shock hazard]()
To reduce the risk of fire or electric shock, do not expose this apparatus to rain or moisture.- The ventilation should not be impeded by covering the ventilation openings with items, such as newspaper, table-cloths, curtains, etc.
- The apparatus shall not be exposed to dripping or splashing and no objects filled with liquids, such as vases, shall be placed on the apparatus.
![shock hazard]() This mark indicates a risk of electric shock.
This mark indicates a risk of electric shock.- To prevent injury, this apparatus must be securely attached to the floor/wall in accordance with the installation instructions.
- Danger of explosion if the battery is incorrectly replaced. Replace only with the same or equivalent types.
- The battery (battery or batteries or battery pack) shall not be exposed to excessive heat such as sunshine, fire or the like.
- Excessive sound pressure from earphones and headphones can cause hearing loss.
- Listening to music at high volume levels and for extended durations can damage one's hearing.
- In order to reduce the risk of damage to hearing, one should lower the volume to a safe, comfortable level, and reduce the amount of time listening at high levels.
- The mains plug or appliance coupler is used as disconnect device, it shall remain readily operable. When not in use and during movement, please take care of the power cord set, e.g. tie up the power cord set with cable tie or something like that. It shall be free from sharp edges or similar which can cause abrasion of the power cord set. When put into use again, please make sure the power cord is not damaged. The absence of a light indication on the apparatus does not mean that it is fully disconnected from the mains. To disconnect the apparatus completely, the mains plug must be pulled out.
- Attention should be drawn to environmental aspects of battery disposal.
- No naked flame sources, such as lighted candles, should be placed on the apparatus.
![burn hazard]() To prevent the spread of fire, always keep candles or other open flames away from this product.
To prevent the spread of fire, always keep candles or other open flames away from this product.
![]()
- Equipment with this symbol is a Class II or double insulated electrical appliance. It has been designed in such a way that it does not require a safety connection to electrical earth.


Precautions
Never try to open the device. It is dangerous to touch the inside of the device due to high voltages and possible electrical hazards.
Opening the device will avoid the warranty of the product. Refer all maintenance or servicing to suitably qualified personnel.
When you are connecting cables, be sure that the device is disconnected from the mains supply voltage. Wait a few seconds after switching off the device before you move the device or disconnect any equipment.
It is a necessity that you only use approved extension and compatible wiring that is suitable for the electrical power consumption of the installed equipment. Please ensure that the electrical power supply corresponds with the voltage on the electrical identification plate at the back of the device.
 Risk of explosion if the battery is replaced by an incorrect type.
Disposing of a battery into the fire or a hot oven, or mechanically crushing or cutting a battery can result in an explosion.
Leaving a battery in an extremely high temperature surrounding environment can result in an explosion or the leakage of flammable liquid or gas.
A battery subjected to extremely low air pressure may result in an explosion or the leakage of flammable liquid or gas.
Operating Environment
- Do not install this equipment in a confined space such as a bookcase or similar unit.
- Do not use the set near damp and cold areas, protect the set from overheating.
- Keep away from direct sunlight.
- Do not use the set near dusty place.
- Do not place candles near the opening area, to avoid flammable foreign material from entering the device.
| SERVICE CENTER | |||
| AT | support_at@strong-eu.com 0820 400 150 (€ 0,12/Min. osterr, Festnetz) | HU | support_hu@strong-eu.com +36 1 445 26 10 |
| BG | support_bg@strong-eu.com +359 32 634451 | IT | support_it@strong-eu.com |
| CZ | support_cz@strong-eu.com 844 44 44 90 | NL | support_nl@strong-eu.com |
| DE | support_de@strong-eu.com 0800 7788 787 (Gebuhrenfrei) | PL | support_pl@strong-eu.com 801 702 017 |
| DK | support_dk@strong-eu.com | PT | support_pt@strong-eu.com +351 2 100 06 125 |
| ES | support_es@strong-eu.com | SK | support_sk@strong-eu.com 0850 15 05 50 |
| FR | support_fr@strong-eu.com | SL | +361 1 828 08 58 |
| HR | +385 1 344 57 66 | UA | support_ua@strong-eu.com +380 (44) 238 61 50 |
Supplied by STRONG Austria
Represented by STRONG Ges.m.b. H.
Teinfaltstraße 84.Stock
A-1010 Vienna, Austria
Email: support_at@strong-eu.com
Documents / Resources
References
Netflix Terms of Use | Netflix Help Center
![www.primevideo.com]() Amazon.com Sign up for Prime Video
Amazon.com Sign up for Prime Video![www.disneyplus.com]() Stream Unlimited Movies and TV Series - Disney+ United States
Stream Unlimited Movies and TV Series - Disney+ United States![www.strong-eu.com]() Home | Strong-eu.com
Home | Strong-eu.com![assistant.google.com]() Google Assistant, your own personal Google
Google Assistant, your own personal Google
Download manual
Here you can download full pdf version of manual, it may contain additional safety instructions, warranty information, FCC rules, etc.
Advertisement


Need help?
Do you have a question about the LEAP-S3 PRO and is the answer not in the manual?
Questions and answers