Medion PC Manual
Hide thumbs
Also See for PC:
- Manual (110 pages) ,
- Instruction manual (102 pages) ,
- Operating instructions manual (42 pages)
Table of Contents
Advertisement
Quick Links
N
T
M
OTES ON
HIS
ANUAL
Keep these instructions with your computer at all times. The
proper set up, use and care can help extend the life of your com-
puter. In the event that you transfer ownership of this computer,
please provide these instructions to the new owner.
This manual is divided into sections to help you find the informa-
tion you require. Along with the Table of Contents, an Index
has been provided to help you locate information.
In addition, many application programs include extensive help
functions. As a general rule, you can access help functions by
pressing F1 on the keyboard. These help functions are available to
®
you when you use the Microsoft Windows
operating system or
the various application programs.
We strongly recommend that you read the Online Manual for your
Notebook, which can be found in the Start Menu.
Information about your PC
This interactive manual is designed to provide additional informa-
tion about your Notebook as well as useful links accessible via the
World Wide Web.
xp
Windows
invites you to a tour (notes on the task bar) to famil-
iarize yourself with the operating system. We listed further useful
sources of information starting on page 57.
A
UDIENCE
These instructions are intended for both the novice and advanced
user. Regardless of the possible professional utilization, this Note-
book is designed for day-to-day household use. The functions
and applications for use with this Notebook have been designed
with the entire family in mind.
Advertisement
Table of Contents

Related Manuals for Medion PC


Summary of Contents for Medion PC
- Page 1 We strongly recommend that you read the Online Manual for your Notebook, which can be found in the Start Menu. Information about your PC This interactive manual is designed to provide additional informa- tion about your Notebook as well as useful links accessible via the World Wide Web.
-
Page 2: Serial Number
Place of Purchase ........UALITY Medion has selected the components in this computer for their high level of functionality, ease of use, safety and reliability. Through balanced hardware and software design we are able to provide you with an innovative personal computer useful for ap- plications relating to both work and leisure. -
Page 3: Table Of Contents
Table of Contents: SAFETY AND MAINTENANCE ............1 Safety Instructions..............3 Data Security ............... 3 Operational Safety ..............4 General Safety Information ............ 4 Important Additional Safety instructions........5 CD-ROM/CD-RW/DVD/DVD-RW Drive safety ......6 TFT Display Safety ..............6 Set-Up Location..............7 Ambient Temperature............ - Page 4 What is a network? ............. 48 Fast Ethernet-Network ............ 48 Wireless LAN..............51 Memory Card Connections ............52 The PC Card Slot..............53 32-bit CardBus Port............. 53 Use of PC-cards ..............53 Installing a PC card............54 Removing a PC card............54 Connection Options ..............
- Page 5 ® Windows XP Help and Support ........57 Software Help ..............58 Device Drivers..............58 Information about Your PC ........... 58 Digital Signatures ............... 59 Windows Activation............59 The BIOS Set-up-Program............ 60 Running the BIOS Set-up..........60 Navigating the BIOS Utility ..........60 FIRST AID .................
- Page 6 APPENDIX ................. 77 Standards ................79 Electromagnetic Compatibility..........79 Electrical Safety..............80 Ergonomics................ 80 Supplementary Information..........80 ISO 13406-2 Class II............80 FCC Compliance Statement ..........82 Warranty ................83 Limits of Liability ..............84 Local Law ................85 Making Copies of This Manual ..........85 Index ...................
-
Page 7: Safety And Maintenance
Safety and Maintenance Subject Page Data Security _______________________ Set-up Location______________________ Ambient Temperature ________________ Power Adapter_______________________ Modem ____________________________ Touch Pad __________________________ Battery Operation ____________________... - Page 8 A A F F E E T T Y Y A A N N D D A A I I N N T T E E N N A A N N C C E E...
-
Page 9: Safety Instructions
Please follow the instructions in this section for the safe operation of your Notebook: • DO NOT open the case of the Notebook, the battery or the power adaptor. When the case is open there is a danger of severe electric shock. •... -
Page 10: Operational Safety
PERATIONAL AFETY It is important to follow all of the safety instructions in this man- ual to ensure the safety of you and your Notebook. ENERAL AFETY NFORMATION If you find that: • the power cord/power adapter is worn or damaged. •... -
Page 11: Important Additional Safety Instructions
Replace batteries with a com- patible type as recommended by the manufac- turer. Lithium batteries are hazardous waste and require proper disposal. Contact the Medion Ser- vice Center for additional information on battery disposal. A A F F E E T T Y Y... -
Page 12: Cd-Rom/Cd-Rw/Dvd/Dvd-Rw Drive Safety
CD-ROM/CD-RW/DVD/DVD-RW D RIVE SAFETY • CD-ROM-/CDRW-/DVD-drives are Laser Class 1 devices. These lasers must remain in their sealed casing. • Danger — Invisible laser radiation when open. Avoid direct exposure to beam. This product is certi- fied by the manufacturer to comply with DHHS rules 21CFR, Chapter 1, Subchapter J, applicable at date of manufacturer. -
Page 13: Set-Up Location
• Never place objects on top of the Note- book that would exert any pressure on the display. There is a danger that even slight pressure may break the TFT dis- play. OCATION • Keep your Notebook and all connected peripherals away from moisture, dust, heat and direct sunlight. -
Page 14: Power Adapter
OWER DAPTER • Do not open the power adapter housing. When the housing is open there is a danger of severe electric shock. It contains no user-serviceable parts. • The electric outlet must be in the vicinity of the Notebook and within reach of the power adapter cables. -
Page 15: Cabling
COMPLIANCE OF WIRELESS The following low power radio equipment, which has separately been tested and approved according R&TTE guideline (1999/5/EC), is bundled with this PC: -Wireless Lan These radio devices are marked individually with the CE mark. The declarations of conformity of these radio devices are available under www.medion.com/conformity. -
Page 16: Battery Operation
ATTERY PERATION To extend the life and power of your battery and guarantee se- cure operation, the instructions below should be followed: • Never expose the battery to direct sunlight or heat for long periods. • Do not dispose of the battery by fire as they may explode. -
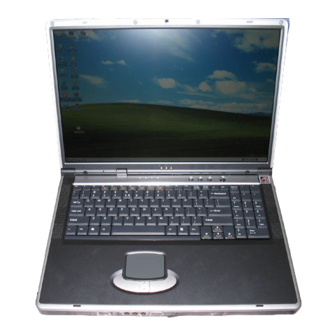
Page 17: Views Of The Notebook
Views of the Notebook Subject Page Open Notebook _____________________ Front view _________________________ Left Side ___________________________ Right Side __________________________ Rear Side __________________________ Power and Status Indicators____________ Hotkeys ________________________... - Page 18 I I E E W W S S O O F F T T H H E E O O T T E E B B O O O O K K...
-
Page 19: Views Of The Notebook
OTEBOOK TFT display p. 31) External Microphone Function LED Indicators p. 16) Status LED Indicators p. 16) Hotkeys p. 17) Power ON/OFF p. 25) Keyboard p. 34) Touch pad p. 35) I I E E W W S S O O F F T T H H E E O O T T E E B B O O O O K K... -
Page 20: Front View
USB port p. 55) 3 in 1 Card reader p. 52) PC card slot PCMCIA p. 53) PC card eject button p. 53) I I E E W W S S O O F F T T H H E E... -
Page 21: Right Side
IGHT Kensington lock p. 75) Power socket p. 25) Serial port p. 55) Parallel port p. 55) External monitor (VGA) p. 32) S-Video TV out port p. 33) PS/2 Port p. 55) Modem port (RJ-11) p. 47) LAN port (RJ-45) p. -
Page 22: Indicators
NDICATORS LED's indicate the power and operating system states of the Notebook. The meaning of each LED is: UNCTION OWER This LED lights when operation (battery / power). ATTERY This LED lights when the battery is charging. When the battery is charged the light goes out. IRELESS Display for wireless data exchange. -
Page 23: Hotkeys
OTKEYS Launches the E-Mail Program. Launches the Internet Browser. . Activate the user specified application. . ROGRAMMING THE OTKEYS To configure and specify an application for (the default setting is for the CD Player/Media Player application), you must follow the instruction below. 1. - Page 24 I I E E W W S S O O F F T T H H E E O O T T E E B B O O O O K K...
-
Page 25: Handling
Handling Subject Page Getting started ______________________ On/Off Button _______________________ Power Adapter ______________________ Battery Operation ____________________ Power Management __________________ Open and Closing the Display __________ Screen Resolution ____________________ Connecting an External Monitor _________ Connecting a TV _____________________ Keyboard __________________________ Touchpad __________________________... - Page 26 A A N N D D L L I I N N G G...
-
Page 27: Getting Started
Before you get started using your notebook, first take a few mo- ments to read the important section on Safety. This Notebook comes with software fully pre-installed. You do not have to install any of the CDs supplied. However, with many programs (e.g., telephone CDs or encyclopaedias) it is necessary to insert the corresponding CD to access the data that is stored on it. -
Page 28: License Agreement
Enter Personal Details In one of the initial start-up dialog boxes a request will appear on the screen for you to enter your personal details. Please enter the requested information in the white input fields. You can select the fields by clicking on them with the mouse. When you press Enter, or click on the Continue button you progress to the next window. -
Page 29: Xp Desktop
® XP D INDOWS ESKTOP ® After the login procedure the Windows XP desktop appears on your screen. (Your desktop might not look exactly like the one shown here.) 1. Start Button Clicking the Start button brings up a menu where you can ac- cess help, software programs, files, and settings. - Page 30 4. Information about your PC Click this button to receive important information about your Notebook as well as valuable hints and additional assistance. 5. Turn Off Computer ® Click this button to shut down Windows XP and the Note- book.
-
Page 31: Power Supply
UTTON The On/Off button is used to power up/down the Notebook. p. 13) Pressing the button briefly will turn off your computer using the operating system. This is the same as clicking Start then Turn Off Computer. If the button is held down for longer than 4 seconds, it will force the note- book to power down without going through the operating system shut down process. -
Page 32: Battery Operation
ATTERY PERATION The battery allows you to use your notebook computer while you are on the road or an electrical outlet is unavailable. Battery life varies depending on the applications and the configuration you're using. To increase battery life, let the battery discharge com- pletely before recharging. -
Page 33: Inserting The Battery
NSERTING THE ATTERY 1. Turn the notebook off, and turn it over. 2. Remove the screws from the battery cover marked in the pic- ture, and remove the cover. 3. Connect the battery cable carefully and put the battery into the battery bay. -
Page 34: Charging The Battery
HARGING THE ATTERY The battery pack automatically recharges when the AC adapter is attached and plugged into an electrical outlet. If the computer is powered on, and in use, it will take several hours to fully recharge the battery. When the computer is turned off but plugged into an electrical outlet, battery charge time is less. -
Page 35: Discharging The Battery
ISCHARGING THE ATTERY Use the computer with battery power until it shuts down due to a low battery. Don’t turn off the computer by yourself even when you see a message that indicates the battery is critically low, just let the computer use up all of the battery power and shut down on its own. -
Page 36: Power Management
OWER ANAGEMENT Your Notebook offers automatic and modifiable power saving functions that you can use to maximize battery life and reduce overall operating costs. The power saving modes are known as standby mode and suspend (hibernate) mode. TANDBY When in standby mode, the contents of the RAM of your Notebook are preserved while practically all other components of your Note- book are shut down, reducing your power consumption to a mini- mum. -
Page 37: Display
Unlike a normal monitor, the TFT display does not produce either radiation or flicker. PENING AND LOSING THE ISPLAY Display catches keep the display closed when the Notebook is not in use. To open, use your thumbs to push the bar then lift the display with your thumbs and index finger and position it as desired. -
Page 38: Connecting An External Monitor
ONNECTING AN XTERNAL ONITOR The Notebook has a VGA port for connecting an external monitor. To connect and configure an external monitor: 1. Shut down your notebook. 2. Connect the video signal cable of the external monitor to the VGA port of the Notebook p. -
Page 39: Connecting Atv
You can change the resolution and colour depth for either display in this screen. However, you may have to decrease the depth of colour if you increase the resolution since the video memory has a limited capacity. ONNECTING A The Notebook has a port for connecting a TV. To connect and configure the Notebook for a TV: 1. -
Page 40: Data Entry
EYBOARD By dual assignment of certain keys you have the same range of functions available to you as with a normal Windows keyboard. Some functions are input using the Fn key, which is normal on notebook computers. OTEBOOK PECIFIC OMBINATIONS Combination Description Fn + F3... -
Page 41: Touch Pad
OUCH The touch pad’s primary function is to move the cursor around or select items displayed on the screen with the use of your fingertip instead of a mouse. It is positioned in front of the keyboard . The pointer follows the direction which is specified by p. - Page 42 A A N N D D L L I I N N G G...
-
Page 43: Main Components
Main Components Subject Page Hard Drive _________________________ Optical Drive ________________________ Sound Card ________________________ Modem ____________________________ Network ___________________________ Memory Card Connections _____________ PC Card Slot ________________________ Connection Options __________________ Software ___________________________... - Page 44 A A I I N N O O M M P P O O N N E E N N T T S S...
-
Page 45: The Hard Drive
Local Disk Windows XP Software programs Your documents BOOT Drivers for internal PC components Installation files for software that came with your PC Recover Restore software H H E E A A R R D D D D R R I I V V E E... -
Page 46: Important Directories
MPORTANT IRECTORIES The most important directories preinstalled on your Notebook are shown below. These directories may vary from what is shown here. Caution: Don't delete files unless you know what they are. Win- dows XP might require these files for your computer to operate correctly. -
Page 47: The Optical Drive
CD-RW/DVD-ROM C OMBO RIVE Your Notebook has a CD-RW/DVD-ROM combo drive. This drive can play everything that a DVD-ROM drive can play: DVD movies, music CDs, and data DVDs and CDs. It can also run software pro- grams from CDs and DVDs. In addition, this drive can write data and music CDs and copy CDs. -
Page 48: Loading A Disc
OADING A Tip: Do not place protective foils or other stickers on your CD’s. To avoid damage to your drive, do not use deformed of damaged CD’s. Attention: Do not use scratched or dirty disks, discs with pieces broken off or disks of poor quality. Because of the high speeds in the drive the disks might break and damage your data as well as your drive. -
Page 49: Emergency Ejection Of A Blocked Disc
MERGENCY JECTION OF A LOCKED If the tray fails to open automatically, then the tray can be opened manually provided there is an opening for emergency ejection. p. 14) Restart your notebook and if the tray is still locked proceed as follows: 1. -
Page 50: Writing Cds
You can use your CD-RW/DVD-ROM combo drive to write ("burn") data and music CDs. A data CD is a compact disc (CD) used to store PC data (for ex- ample, files and folders you have on your hard disk). A music, or audio, CD is a compact disc (CD) used to record music that you can play on your home or car stereo CD player. - Page 51 5. Under CD Writing Tasks, click Write these files to CD. Win- dows displays the CD Writing Wizard. Follow the instructions in the wizard. Music jukebox and media player programs (such as Windows Me- dia Player) often offer alternatives for burning audio CDs. Refer to the help within the program for more information.
-
Page 52: The Sound Card
Your Notebook has an integrated stereo sound card (on-board) with 16-bit and 3D spatial sound effects (3D). The sound card is compatible with the industry standard Sound Blaster and Micro- soft Sound System Version 2.0. This guarantees optimal sup- port for all popular programs and games. If you wish to alter the base volume, click on the loudspeaker symbol in the task bar. -
Page 53: Modem
The modem is fitted with an RJ-11 interface, into which a stan- dard telephone lead can be plugged. WARNING! Use only with an analogue telephone line. The modem cannot withstand the voltage levels of digital telephone systems such PBX or lines such as ISDN or Broadband services. -
Page 54: The Network
THERNET ETWORK Your PC has a Fast Ethernet Network connection. You can use this to connect to a network. The Windows XP Help and Support Centre offers extensive infor- mation about networking your PC. You can access this information by clicking on Start, then Help. - Page 55 HAT DO YOU NEED FOR NETWORKING Some requirements have to be fulfilled to successfully network computers: 1. The Notebook must have a network card that supports the same network technology as the other computers on the net- work. Unless otherwise quoted, your Notebook will support the current Fast Ethernet (10/100 Mbit) standard.
- Page 56 ROUBLESHOOTING WITHIN THE ETWORK Why does an error message appear when I click on the network environment? The computer name must be unique on the net- work and may not be the same as the task group. It appears that the network boards are unable to com- municate.
-
Page 57: Wireless Lan
Wireless LAN is an optional feature. This function allows you to create a wireless network link with an access point or directly with another wireless-enabled PC. ATTENTION: Make sure the Wireless LAN option is switched OFF in any environment where it might in- terfere with critical and sensitive devices, e.g., on... -
Page 58: Memory Card Connections
Memory cards are media that are being used for a variety of pur- poses, especially in digital photography. They are increasingly replacing the floppy disk. The form and capacity of a memory card can vary according to the manufacturer. Your notebook supports the following formats: •... -
Page 59: The Pc Card Slot
ISDN-, Faxmodem-, Network- or SCSI-adapters. Some PC cards contain memory chips or hard disks for data stor- age. If you use such cards with your Notebook, the system as- signs the card a drive name, so that you may access the re- sources. -
Page 60: Installing A Pc Card
PC C NSTALLING A Follow the PC card installation instructions that are given for use ® under Windows and have the necessary driver software ready. ® Once you have started Windows , slip the card carefully into the slot provided. -
Page 61: Connection Options
ERIAL USB ports provide an easy way to connect many peripheral de- vices to your PC. You can use any USB device with any USB port. 3 USB ports are located at the left side of the Notebook for your convenience. -
Page 62: Ieee 1394 (Firewire ® )
® IEEE 1394 (F ® (optional feature) IEEE 1394 (also known as iLink® or FireWire ports provide an easy and high-performance way of connecting high-speed storage, imaging, and many new types of audio/video devices easily. NFRARED NTERFACE The IR port corresponds to the "IrDA Serial Infrared Data p. -
Page 63: Software
We recommend that all beginning users or users of ® previous versions of Windows read this information. It can be found with the CDs in the accessory box that came with your PC. ® XP T INDOWS ®... -
Page 64: Software Help
PC, as well as useful links to software tools and other resources. It also contains any last minute information about your PC that may not be in- cluded in this manual. A A I I N N... -
Page 65: Digital Signatures
Block prevents installation programs from installing device drivers without a digital signature. If you are logged on to your PC as an administrator, you can click Apply setting as system default to apply the selected setting as the default for all users of your PC. -
Page 66: The Bios Set-Up-Program
BIOS S ROGRAM In BIOS setup (Basic Configuration) there are a number of config- urable parameter settings available for your Notebook. For exam- ple, you can change the operating mode of the interfaces, security features or power management. WARNING! The Notebook is factory pre-set to guarantee optimum operation. -
Page 67: First Aid
First Aid Subject Page FAQ _______________________________ Data and System Security _____________ System Recovery ____________________ Troubleshooting _____________________ Maintenance ________________________ O O F F T T W W A A R R E E... - Page 68 I I R R S S T T I I D D...
-
Page 69: Faq - Frequently Asked Questions
– – When do I have to activate Windows? Your software has been preactivated in the factory. An activation will only be required, if ..several components are replaced by others..your installed a new motherboard..a different BIOS version has been installed.. - Page 70 Do I still have to install the enclosed CDs/DVDs? No. Basically all programs are already preinstalled. The disks are only intended as backup copies. When is the recovery of the factory setting recom- mended? This method should be chosen as the last resort. Read chapter “System recovery”...
-
Page 71: Data And System Security
The programs described below are part of your Windows operat- ing system. You will find additional information on these programs in the Windows Help file. ECURITY Back up data regularly on external media such as a CD-R or CD- RW. Windows offers both a Backup program and a Files and Settings Transfer Wizard. -
Page 72: System Recovery
• Restoring your system using the Application & Support Disc provided by Medion and powered by PowerQuest There are several options for recovery available using the Application & Support Disc, including the ability to restore you entire system to its original factory settings. -
Page 73: System Restore Powered By Powerquest
If your system is not functioning properly and Windows XP Sys- tem Restore did not solve the problem, then you should use the Application Support Disc provided by Medion to restore your sys- tem. This recovery mode provides several options. -
Page 74: Limits Of Restore Factory Settings (Restore Option 3)
2. Insert the “Application & Support” disc and restart (reboot) the Notebook. Caution: Do not use the “Medion Product Recovery” CD-ROM (a Windows XP CD for restoring Windows XP itself) for restora- tion purposes. This disc does not restore the original factory setup of the Notebook. - Page 75 5. Read the information screen that appears, and then press Enter to proceed. 6. Select option 1, 2, or 3 to perform a restore (the types of restore are described earlier in this chapter). Select option 4. Reboot to cancel the restore process. 7.
-
Page 76: Troubleshooting
OCALIZE THE AUSE Errors can have simple causes, but sometimes they are caused by faulty equipment. We would like to give you some tips to help solve common problems. Should these instructions not lead to success, please feel free to contact us. HECK ABLES AND ONNECTIONS... -
Page 77: Errors And Possible Causes
RRORS OSSIBLE AUSES The display is blank: Confirm that the system is not in stand-by mode. Press any key on the keyboard to test this. Wrong Date and Time: Double-click the clock on the taskbar and correct the date and time. -
Page 78: Additional Support
Notebook’s manufacture. Driver updates and the latest informa- tion on your product are available on the Internet. Visit Medion on the Web at www.medion.com I I R R S S T T... -
Page 79: Maintenance
AINTENANCE NSTRUCTIONS This section provides information on the proper maintenance and care of your Notebook. Following these measures can extend its lifetime. LEANING AND • Warning! There are no user-serviceable or user- cleanable parts inside the Notebook housing. Never open the Notebook housing. •... -
Page 80: Transporting The Notebook
RANSPORTING THE OTEBOOK Please use the following guidelines when transporting the Note- book: • Switch off the Notebook. This will prevent damage to the hard disk. When the Notebook is turned off, the hard disk heads are moved into a safe area. •... -
Page 81: Securing Your Notebook
ECURING YOUR OTEBOOK ETTING A ASSWORD You can prevent unauthorized access to your Notebook by setting a User Password. When starting the Notebook the password will be requested. The User Password is set in the BIOS. Attention: Keep your password in safety place. If you forget your password you do not have the pos- sibility to cancel it. -
Page 82: Notes For Service Engineers
OTES FOR ERVICE NGINEERS • Before opening the housing, disconnect the Notebook from all power sources and remove any connecting cables. If the Notebook has not been disconnected from the power outlet before being opened, there is a danger of severe electric shock. -
Page 83: Appendix
Appendix Subject Page Standards __________________________ Warranty __________________________ Index _____________________________ A A I I N N T T E E N N A A N N C C E E... - Page 84 P P P P E E N N D D I I X X...
-
Page 85: Standards
This Notebook meets the requirements of the following standards: LECTROMAGNETIC OMPATIBILITY This Notebook meets the following requirements for standards of electromagnetic compatibility and electrical safety: EN 55022 Information technology equipment - Radio disturbance characteristics - Limits and methods of measurement. EN 55024 Information technology equipment - Immunity character- istics - Limits and methods of measurement. -
Page 86: Ergonomics
LECTRICAL AFETY EN 60950 Safety of information technology equipment. • The connection of devices is limited to equipment that com- plies with EN60950 “Safety of information technology equipment” or EN60065 “Audio, video and similar electronic apparatus. Safety requirements” For U.S. / Canadian purposes: The Notebook should only be •... - Page 87 Pixelstructure Rows Blue Green Types of Pixel Failures: Type 1: A constantly lit pixel (a bright, white spot), even though it is not addressed A white pixel is caused when all three sub-pixel are lit. Type 2: A pixel that does not light up (dark, black spot), although it is addressed Type 3: Abnormal or defective red, green or blue sub-pixels.
-
Page 88: Fcc Compliance Statement
FCC C OMPLIANCE TATEMENT This equipment has been tested and found to comply with the limits for a Class B digital device, pursuant to Part 15 of FCC Rules. These limits are designed to provide reasonable protection against harmful interference in a residential installation. This equipment generates, uses, and can radiate radio frequency en- ergy and, if not installed and used in accordance with the instruc- tions, may cause harmful interference to radio communications. -
Page 89: Warranty
MEDION has marketed this product. The level of warranty service you receive may vary according to local standards. MEDION will not alter form, fit or function of the product to make it operate in a country for which it was never intended to function. -
Page 90: Limits Of Liability
PRODUCT TO YOU. Please note the following: Be sure to keep your purchase receipt in a safe place. MEDION, at its option, may require a copy of the receipt to validate the warranty period effective date (i.e. date of purchase). Warranty liability only applies to material or factory faults. It does not apply to damage due to breakage, for example, a crack in the housing. -
Page 91: Local Law
OCAL This warranty statement gives you legal rights. You may also have other rights that vary from jurisdiction to jurisdiction. To the extent this warranty statement is inconsistent with local law, certain disclaimers and limitations of this statement may not apply to the customer. AKING OPIES OF ANUAL... -
Page 92: Index
Memory Card ....52 Audio In......46 Microphone IN ....46 Audio Out......46 Modem ......47 Parallel ......55 PC Card ......53 PS/2 ....... 55 Battery Operation... 10, 26 Serial ......55 Battery LED ......28 TV ........33 Charging ......28 USB ........ - Page 93 Capital Lock ..... 16 Num Lock ......16 Power......16 Scroll Lock ....... 16 Wireless LAN ....16 Factory Settings Information about your PC ..24 Recovery......67 Infrared Interface ....56 FAQ........63 Inserting the Battery .... 27 Fast Ethernet-Network ..48 Installing a PC Card....
- Page 94 Recovery ......66 Optical drive ......14 Factory Settings....67 Windows ....... 66 Recovery Points ....66 Removing a PC Card..... 54 Removing the Battery ... 26 Parallel Interface ....55 Repairs....... 74 Partitions ......39 Restoring ......66 Password Reset Disk .....65 Limits......
- Page 95 Universal Serial Bus ..... 55 Power Adapter ....8 Upgrades and Repairs... 74 Set-Up location ....7 Use of PC Cards ....53 TFT Display Safety....6 Using a Safety Lock....75 Touch Pad ......9 Upgrades and Repairs ..74 Screen Resolution....31...
- Page 96 Stereo Speaker ....14 Windows Media Player ..43 S-Video TV Out Port...15 Windows TFT Display ......13 Control Panel....24 Touchpad ......13 Desktop......23 USB port ......14 help ........ 57 Views of the notebook...11 Help........ 24 Help and Support ....57 Interactive Training ...
Need help?
Do you have a question about the PC and is the answer not in the manual?
Questions and answers