Table of Contents
Advertisement
Quick Links
ES
MEDION Service Center
Visonic S.A.
c/ Miguel Faraday, 6
Parque Empresarial „La Carpetania", N-IV km. 13
28906 Getafe, Madrid
España
Hotline: 902196437
Fax: 914604772
homepage: www.medion.es/
E-mail: service-spain@medion.com
MSN 2004 7159
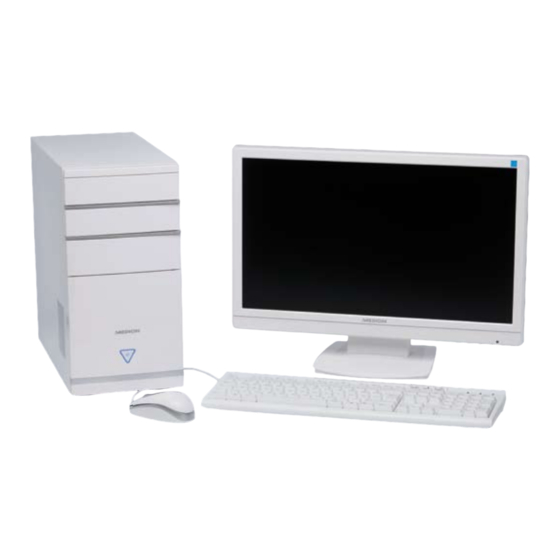
PC-complete set
with 50,8 cm/20" Widescreen LCD-Monitor
MEDION
®
AkOyA
®
P5310 D
Instruction manual
MD 8350
Advertisement
Table of Contents
Troubleshooting

Related Manuals for Medion AKOYA P5310 D


Summary of Contents for Medion AKOYA P5310 D
- Page 1 PC-complete set with 50,8 cm/20“ Widescreen LCD-Monitor MEDION ® AkOyA ® P5310 D MEDION Service Center Visonic S.A. c/ Miguel Faraday, 6 Parque Empresarial „La Carpetania“, N-IV km. 13 28906 Getafe, Madrid España Hotline: 902196437 Fax: 914604772 homepage: www.medion.es/ E-mail: service-spain@medion.com...
- Page 2 Description Rear Connectors Front page Optical drive (CD/DVD/CDRW/DVDRW) Eject button of optical drive eSATA Port Card reader Microphone input 13, 45 Front bezel On/off switch (switches the PC on/off) / Power LED PS/2 ports for mouse & keyboard IEEE 1394 (FireWire) 6-pole (e.g. camcorder) 14, 47 Gigabit network (RJ-45, 10/100/1000 Mbit/s) 14, 49...
- Page 3 Notes on this Manual Keep these instructions with your computer at all times. The proper set up, use and care can help extend the life of your computer. In the event that you transfer ownership of this computer, please give these instructions to the new owner. This manual is divided into sections to help you locate the information you require.
- Page 4 Quality Medion has selected the components in this computer for their high level of functionality, ease of use, safety and reliability. Through balanced hardware and software design we are able to provide you with an in- novative personal computer useful for applications relating to both work and leisure.
-
Page 5: Table Of Contents
Table of Contents Safety ......................1 Operational Safety ....................... 3 Data Security ......................4 Setting Up & Getting Started ................ 5 Included with your PC ....................7 Setting Up ........................8 Set-up Location ......................8 ... - Page 6 Surrounding Temperature ..................29 Power Supply......................29 Setting up ......................30 Connections on the back ..................30 Connecting the monitor ..................31 1 Connect signal cable ..................31 2 Connect audio cable ..................31 ...
- Page 7 ® Windows 7 – Getting Started ................55 ® Windows 7 - User Account Control ..............56 ® Windows 7 – Control Panel ................57 Windows Media Center ..................58 Installation of Software ..................61 ...
- Page 8 Pixel errors in the TFT monitor ................... 85 Index ......................... 88...
-
Page 11: Safety
Chapter 1 Safety Subject Page Operational Safety ............3 Data Security ..............4... - Page 12 English...
-
Page 13: Operational Safety
Operational Safety Please read this chapter carefully and observe all listed notes. This ensures a reliable operation and long life expectancy of your PC. Do not allow children to play unattended with electrical equipment. Children are incapable of judging potential risks properly. ... -
Page 14: Data Security
Data Security Attention! Every time you update your data make back-up copies on an external stor- age medium. The supplier does not assume liability for data loss or damage to data storage units, and no claims can be accepted for damages resulting from the loss of data or consequential losses. -
Page 15: Setting Up & Getting Started
Chapter 2 Setting Up & Getting Started Subject Page Included with your PC ............7 Setting Up ................ 8 Connecting ............... 9 Getting Started .............. 20... - Page 16 English...
-
Page 17: Included With Your Pc
Included with your PC Please check that the contents listed below are supplied with your package. You MUST provide your PC’s serial number when contacting a customer service representative. Your PC bundle should include the following components: PC and power cord ... -
Page 18: Setting Up
Setting Up Remember that choosing the proper location for your PC is just as important as connect- ing it correctly. Set-up Location Keep your PC and all units connected to it away from moisture, dust, heat and di- rect sunlight. Failure to observe these instructions can lead to malfunctions or dam- age to the PC. -
Page 19: Ergonomics
Ergonomics Note Ensure that the monitor is set up in such a way that reflections, glare and light/darkness contrast are avoided. You should not position the monitor in close proximity to a window as this is usually the brightest area of the room and may cause visual impairments during daylight hours. Always position the monitor in a line of sight that runs parallel to the window front (see picture). - Page 20 Overall: Change your position frequently and take regular breaks to avoid fatigue. Back: While sitting at your work surface, make sure your back is supported by the chair’s back- rest. This should be in an erect position or angled slightly backwards. Legs: Your thighs should be horizontal or angled slightly downward.
-
Page 21: Connecting
Connecting For a better guidance, open up the left inner page of the cover with the diagrams to find the location of the described connections. Note The devices listed are not necessarily included with your PC. All the connections listed are optional and will not inevitably be available on your PC. -
Page 22: Front Connectivity
Make sure that all connection cables have been connected to the peripheral devices associated with them, in order to avoid disruptive radiation. Remove unneeded ca- bles. The connection of devices is limited to equipment that complies with EN60950 “Safety of information technology equipment”... -
Page 23: Connecting Esata Devices
Connecting eSATA Devices Diagram reference: C eSATA stands for "external Serial ATA" and is used for connecting external hard disks. Unlike common USB standards, the transmission speed of an eSATA connection is higher than that of external USB hard disks. Note Take care that the connector and the socket fit exactly to avoid damaging the contacts. -
Page 24: Connecting Ieee 1394 (Fire Wire) Devices
Connecting IEEE 1394 (Fire Wire) Devices Diagram reference: I Warning! Connect your IEEE 1394 devices after initial set-up of your new PC. This will prevent unnecessary confusion during installation. These devices can generally be connected during operation. Read the manual for your periph- eral device first. -
Page 25: Connecting Speakers/Audio Output
Connecting Speakers/Audio Output Diagram reference: K Here you can connect your active speakers for replaying or audio connection cables for recording. Please refer to the user's guide of your stereo installation for information about which connector you should use (usually Line In or Aux). 1. -
Page 26: Connecting The Monitor
Connecting the Monitor Diagram reference: M Your PC is equipped with a VGA and a DVI connector. Note Always only connect one data cable, in order to avoid problems with the signal allocation, if your monitor has several inputs (e.g. VGA and DVI). Note Take care that the connector and the socket fit exactly to avoid damaging the contacts. -
Page 27: Connecting Usb Devices
Connecting USB Devices Diagram reference: O Warning! Connect your USB devices after initial set-up of your new PC. This will pre- vent unnecessary confusion during installation. These devices can generally be connected during operation. Read the manual for your peripheral device first. -
Page 28: Connecting Headphones
Connecting Headphones Diagram reference: P Here you connect headphones/earphones. 1. Connect the cable with the 3.5 mm stereo jack plug in the green socket at the front of your PC (diagram reference P). Caution! The use of headphones/earphones with a high volume can lead to lasting damage to your hearing. -
Page 29: Connecting The Power Supply
Connecting the Power Supply Diagram reference: N Finally, connect the power supply to your PC and monitor. 1. Plug the main connection cable into the plug socket and connect it with the main cable connection (N) of your PC. Observe the following safety precautions: Please note Even with the power switch switched off some parts of the device receive current. -
Page 30: Getting Started
Getting Started The software on this PC comes fully pre-installed. You do not have to load any of the CD's/DVD’s supplied. With many programs (e.g., telephone-CD's or encyclopaedias), however, it is necessary to insert the corresponding CD/DVD in order to call up the data which is stored on it. The software will ask you to do this as necessary. -
Page 31: Step 2: Starting Initial Setup
Step 2: Starting Initial Setup The PC starts and now goes through a number of phases: Note Ensure that there is no bootable CD (e.g. the Recovery-CD) in the CD-ROM drive. Such disks will prevent the operating system from loading directly off the hard drive. -
Page 32: Short Description Of The Windows Desktop
® Short Description of the Windows Desktop Start Button Clicking the Start button brings up a menu where you can access help, software pro- grams, files, and settings All Programs All of the software programs installed on your PC are ordinarily listed here. Click All Pro- grams to reveal an extensive menu. - Page 33 Logged in User This tells you which user is logged in to your PC. Control Panel You can use the icons in Control Panel to change the appearance and functionality of Windows®7. These icons represent options for configuring your PC. You should, however, consult “Help and Support“...
- Page 34 English...
-
Page 35: Operation
Chapter 3 Operation Subject Page Monitor ................27 The Mouse ................ 36 The Keyboard ..............37 The Hard Drive..............38 The Optical Drive .............. 40 The Card Reader ............... 43 The Graphics Card ............44 The Sound Card ..............45 The USB Port .............. - Page 36 English...
-
Page 37: Monitor
Monitor Use in accordance with regulations The TFT monitor serves exclusively to reproduce the video signals of external de- vices, such as computers, for example, of which the connections and image resolu- tions match the technical data of the TFT monitor given here. Any other use is not in accordance with regulations. -
Page 38: Repair
Do not touch the display unit with your fingers or with sharp objects, in order to avoid damage. Keep your TFT monitor and all the connected devices away from moisture and avoid dust, heat and direct solar radiation. Failure to comply with this information can lead to faults or damage to the TFT monitor. -
Page 39: Surrounding Temperature
Surrounding Temperature The TFT monitor can be operated at a surrounding temperature from 0° C to +35° C and at a relative ambient moisture level of < 80% (non-condensing). TFT monitor can be stored at -20° C to +60° C when it has been turned off. ... -
Page 40: Setting Up
Setting up Attach the stand of the TFT monitor as illustrated. Carry out this step before connecting the monitor. (Ill.: Installation of the monitor stand) Connections on the back (Ill.: Rear of the monitor) 1. POWER switch 2. Power supply (POWER IN) 3. -
Page 41: Connecting The Monitor
Connecting the monitor Ensure that the TFT monitor has not yet been connected to the electricity supply (mains plug not yet plugged in) and that neither the TFT monitor nor the computer has been switched on. Prepare your computer for the TFT monitor if necessary, so that the correct settings for it will be present. -
Page 42: Operating Elements
Operating elements (Ill.: Front operating elements) Ref. Button Description You will start the OSD (On Screen Display) with this button. Press this button again if you wish to leave the OSD. Power block, when the OSD is not activated OSD block, when the OSD is not activated Hold the key combination until the bar siplayed has moved from left to right completely, to activate/de-activate the block. -
Page 43: Operating The Osd Menu
Operating the OSD menu 1. Press the button, in order to activate the OSD. 2. Select the options from the Main Menu with the function selection but- tons. 3. Confirm your selection with the button. 4. Press the button, in order to leave the OSD. Important! The OSD will be faded out automatically if you have not operated any but- ton on the TFT monitor for the pre-set time. - Page 44 Menu Function / sub-menu point Automatic adjustment: Sets the horizontal and vertical position, phase (fine tune) and clock cycle (H size) automatically. Contrast: Sets the white value of the monitor foreground. Brightness: To adjust the brightness of the video. DCR: You can switch the DCR function (dynamic contrast) on and off here. Input select: The signal input will be switched.
- Page 45 OSD Position: Horizontal and vertical setting of the OSD posi- tion. H. Position: For the horizontal setting of the OSD posi- tion. V. Position: For the vertical setting of the OSD position. OSD time out: For switching off the On Screen Display (OSD) automatically after the expiry of a preset period of time.
-
Page 46: The Mouse
The Mouse The mouse has beside the two keys a wheel that can be used to scroll through a document or internet pages. Note The scroll wheel can be used as a button. The functionality depends on the application. In Word for example you can push the wheel to move up and down as a scroll function. -
Page 47: The Keyboard
The Keyboard This section contains useful information on using the keyboard. All diagrams are schematic. The Alt and Ctrl Keys The left Alt key performs certain functions in conjunction with other keys. The application program determines these functions. In order to enter a combination of keys that include the Alt key, hold the Alt key down while pressing the other key. -
Page 48: The Hard Drive
The Hard Drive The hard drive is the main storage medium combining large storage capacity and rapid data access. The hard drive contains the operating system of the computer, other application programs and backup files. These programs and files are pre-installed on your PC, so you may note that some of the space on your hard drive is already taken. -
Page 49: Important Directories
Important Directories In the following we have listed the most important directories and described their content. Attention! Do not delete or modify these directories or their contents since data could be lost or the functionality of the system could be at risk. The master directory of drive C: includes important files required to start Windows®. -
Page 50: The Optical Drive
The Optical Drive Diagram reference: A, B Loading a Disc Attention! Do not place protective foils or other stickers on your CD’s. To avoid dam- age to your drive, do not use deformed or damaged CD’s. Attention: Do not use scratched or dirty discs, discs with pieces broken off or discs of poor quality. -
Page 51: Playing Back And Retrieving Data From Discs
Playing Back and Retrieving Data from Discs Note Some disks start automatically upon insertion. This depends on the operat- ing system and the related settings. Your PC is able to playback and to retrieve Audio CDs, DVD Movies and Data discs. After loading the disc your operating system will open a selection window with different options for playback. -
Page 52: Subjects Concerning The Cd/Dvd-Rewriter
Subjects Concerning the CD/DVD-Rewriter Normal Discs are pressed from a digital, glass master and then sealed. In the case of blank disc, the information is burnt onto the disc with the laser of the Rewriter. Therefore these discs are more sensitive than normal CDs. Please avoid the following when using recordable/rewriteable discs - especially blanks - that have never before been used: ... -
Page 53: The Card Reader
The Card Reader Diagram reference: D If your PC is equipped with a card reader, you can handle different memory card types. The following table refers to the use of the card reader: Slot Card type Contacts Memory Stick pointing downwards Memory Stick Pro SD (Secure Digital) MMC (MultiMediaCard) -
Page 54: The Graphics Card
The Graphics Card Diagram reference: L, M Appearance and Personalization This program offers you the possibility of adjusting the presentation on your display. This includes the background image, the screensaver, Active Desktop (web) and additional settings of your display and your graphics card, for example. The program can be started in the following way: ... -
Page 55: The Sound System
The Sound System Diagram reference: E, K, P, Q, R Note The speaker outputs K are designed for active speaker systems or head- phones. Passive speakers cannot be used or if they are the quality will be significantly reduced. Click on Mixer, in order to open the volume mixer. - Page 56 By using the external connections you have the possibility to connect your PC with a sur- round system. Note Only connect the headphones/earphones to the front connector of your PC (diagram reference: P). Caution! The use of headphones/earphones with a high volume can lead to lasting damage to your hearing.
-
Page 57: Ieee 1394 (Fire Wire)
IEEE 1394 (Fire Wire) Diagram reference: I ® The IEEE 1394 connector, also known as iLink or Fire Wire, is a serial bus standard used for rapid digital data exchange. Application Options for IEEE1394 Connection of digital devices of the entertainment industry, such as set-top speak- ers, digital video and camcorder, ‘Digital Versatile Disk’... -
Page 58: Usb Port
USB Port Diagram reference: O Note Devices connected directly to the USB bus should not draw more than 500 mA. The voltage output is protected by a fuse (Limited Power Source ac- cording to EN 60950). Should the devices need more power than this, it will be necessary to provide a hub (distributor / booster). -
Page 59: The Network
The Network Diagram reference: J Your PC is provided with a Fast Ethernet-Network connector. You will find further information about networking in the Help section within the Start menu. What is a Network? A network means connecting your PC to another or several other PCs. Users can transfer information and data between computers and share resources such as printers, modems and hard disk drives. -
Page 60: Wireless Lan
Wireless LAN Your PC is equipped with WLAN. The components (Module, antenna) are already inte- grated and activated in your computer. You can turn off the wireless LAN function with the help of the Windows® Device Manager. This function allows you to create a wireless network link with a partner. Safety Note Attention! Don’t use this feature in environments where highly sensitive devices are... -
Page 61: Troubleshooting Within The Network
Troubleshooting within the Network Why does the network environment not show the releases? The network environment is delayed in time. Check the release by searching for the respective computer name. Why does an error message appear when I click on the network environment? The computer name must be unique on the network and may not be the same as the task group. -
Page 62: Software
Software This section concerns itself with software. We make a distinction between the operating system, the software (application program), Windows activation, BIOS and the security package BullGuard, which is delivered with the device. ® Getting to Know Windows With Windows® 7, Microsoft is launching the new operating system and successor to Vista®. - Page 63 Improved Desktop Windows® 7 simplifies working with the windows on the Desktop. This provides you with more intuitive possibilities for opening and closing, as well as for changing the size and for rearranging. Windows® 7 makes the performance of everyday tasks even simpler. For example, the Snaps function makes it easier than ever to compare two open windows.
-
Page 64: Windows ® 7 - Help And Support
® Windows 7 - Help and Support An answer to almost every question can be found in this pro- gram. This help function fully covers the Windows operating system. It is helpful for both beginners and professionals. You can print or bookmark the information, which is categorized into topics. -
Page 65: Windows
® Windows 7 – Getting Started Learn everything you need to know about the features of the PC. It is the aim of this feature to enable both beginners and experienced users to make addi- tional setting for the optimal use of Windows®7 after first bringing the PC into operation. -
Page 66: Windows ® 7 - User Account Control
Getting Started has been subdivided into many small groups of subjects, so that the user will have the possibility of adjusting the content optimally to his or her knowledge. There are some of the links in the following: Go online to find out what’s new in Windows®7 ... -
Page 67: Control Panel
® Windows 7 – Control Panel You can change Windows settings using the control panel. The settings control almost everything relating to Windows displays and functionalities, and they enable you to organ- ise Windows according to your requirements. When you first open the Control Panel, a few of the most frequently used elements of the Control Panel are displayed by category. -
Page 68: Windows Media Center
Windows Media Center The Windows Media Center is the platform for your individual home entertainment in Windows® 7. You will be able to record television, TV broadcasts, DVDs and music, look at photos and much more by a remote (not included in the scope of the delivery) or by a click of the mouse, with the Windows Media Center. - Page 69 Tasks Settings Adapt the Windows Media Center to your requirements and needs here. For example, make the settings for the protection of children here. Stand by You will not only close the Windows Media Center but you will be able to put the whole operating system in stand-by through this sub-menu.
- Page 70 Main menu Sub-menu Music Music library All the music titles stored in your PC will be located in the music library. You will be able to start the selected playback of an al- bum, an artist or a selected title here. Play back everything You will start the playback of all the files stored in your music library by means of this sub-menu.
-
Page 71: Installation Of Software
Installation of Software Note If your operating system is configured so that the installation procedure ac- cepts only signed drivers (default) and software an information screen will appear. The software included in delivery is already pre-installed in the factory. Attention! You may find that during the installation procedure important files may be changed or even cancelled. -
Page 72: Software Uninstallation
6. Click on “OK”. 7. Follow the instruction given by the program. Software Uninstallation In order to remove installed software from your PC, follow the next steps: 1. Click on Start 2. Click on Control Panel. 3. Then select the Programs option. -
Page 73: Windows Activation
Windows Activation Microsoft is committed to the protection of intellectual property rights and the reduction of software piracy. Therefore Windows® 7 contains software-based product activation technology. Your copy of Windows® 7 has already been activated for your PC. Product activation is needed if some components of your PC have been replaced or you use a non-authorized BIOS. -
Page 74: Bullguard Internet Security
BullGuard Internet Security The BullGuard Internet Security Package is a combination of the currently most up-to-date PC security technologies on the market and thus offers you 24-hour optimum protection. BullGuard is already installed, so that additional installation will not be necessary. If you nevertheless have to carry out an installation (e.g. - Page 75 The BullGuard Internet Security Package will be updated with the most up-to-date virus information for 90 days after the free registration. The registration window will only appear after your PC has been restarted. You can regis- ter by entering your email address. Note Keep your password in a secure place.
- Page 76 English...
-
Page 77: Customer Service & Self Help
Chapter 4 Customer Service & Self Help Subject Page Data and System Security ..........69 System Restore ............... 70 FAQ – Frequently Asked Questions ......... 73 Customer Service ............. 75 Upgrades and Repairs ........... 78 Recycling and Disposal ........... 79... - Page 78 English...
-
Page 79: Data And System Security
Data and System Security The programs described below are part of your Windows operating system. You can find additional information on these programs in the Windows Help file. Please also read the notes on page 4. Data Security Back up data regularly on external media such as a CD-R or CD-RW. Windows offers Back- up Status and Configuration. -
Page 80: System Restore
System Restore Windows® 7 provides a useful function (System Restore) enabling the storage of the so- called Recovery points. The system remembers the current configuration as a snapshot and returns to this, if nec- essary. The advantage is that an unsuccessful installation can be cancelled. Recovery points are created automatically by the system, but they can also be set manu- ally. -
Page 81: Windows® Update
Windows® Update Windows Update is the online updating of Windows. Use Windows Update to download elements such as security updates, important updates, the newest help files, drivers and Internet products from the Internet. The website is regularly augmented by new content, so that you can download the new- est updates and error corrections at any time, to protect the PC and guarantee its function- ing. -
Page 82: Windows Update Information For Data Security
Windows Update Information for Data Security Windows Update needs certain information about the respective PC, so that a suitable list with updates can be provided for you. This information will include the following: Version number of the operating system ... -
Page 83: System Restore
System Restore If your system is not functioning properly, you should use the Application Support Disc to restore your system. Limits of the Recovery Changes made to the original configuration (RAS, Desktop or Internet settings) and installed Software will be ignored by this Recovery and will not be reloaded. ... -
Page 84: Faq - Frequently Asked Questions
FAQ – Frequently Asked Questions Do I still have to install the enclosed discs? No. Basically all programs are already preinstalled. The discs are only intended as backup copies. Where can I find the drivers necessary for my PC? The drivers are on the second partition of the hard drive, in the Drivers and Tools directories. -
Page 85: Customer Service
Customer Service Troubleshooting Errors can have simple causes, but sometimes they are caused by faulty equipment. We would like to give you some ideas to solve common problems. Should these instructions not lead to success, please feel free to call us. Localise the Cause Visibly check all cables and connections. -
Page 86: Errors And Possible Causes
Errors and Possible Causes The monitor is blank. Confirm that the system is not in stand-by mode. Press any key on the keyboard to test this out. Wrong Date and Time: Click the clock on the taskbar and correct the date and time. After a system restart a new drive letter is assigned to the cards in the card slots. -
Page 87: Additional Support
PC’s manufacture. Driver updates and the latest information on your product are available on the Internet. Visit Medion on the Web at www.medion.com Transporting the PC Please observe the following guidelines when transporting the PC: ... -
Page 88: Cleaning And Care
Carry out system upgrades and changes in an ESD-protected workshop. If no such workshop is available, wear an antistatic wrist strap or touch a highly conductive metal object. Medion can repair damage sustained by inappropriate handling for a fee. ... -
Page 89: Notes On Laser Radiation
Notes on Laser Radiation Laser devices of Laser Class 1 to Laser Class 3b may be used in the PC. Where the PC housing remains closed, the device meets the requirements of Laser Class 1. By opening the PC housing you will gain access to laser devices of up to Laser Class When removing and/or opening laser devices, the following guidelines must be observed: ... -
Page 90: Battery Treatment
Battery Treatment Batteries may contain combustible materials. By misuse, this may cause battery leakage, heat, explosion or ignition, bringing about injury or damage to the device. Please observe strictly the following matters: Keep children away from batteries. If by any chance, the batteries are swallowed, consult a doctor immediately. ... -
Page 91: Appendix
Chapter 5 Appendix Subject Page Information about conformity .......... 83 Pixel errors in the TFT monitor .......... 85 Index ................88... - Page 92 English...
-
Page 93: Information About Conformity
The company declares herewith that these devices are in agreement with the fundamental requirements and the other relevant terms of the 1999/5/EG Guideline. Complete declara- tions of conformity are available under www.medion.com/conformity. -
Page 94: Fcc Compliance Statement
FCC Compliance Statement This equipment has been tested and found to comply with the limits for a Class B digital device, pursuant to Part 15 of FCC Rules. These limits are designed to provide reasonable protection against harmful interference in a residential installation. This equipment gener- ates, uses, and can radiate radio frequency energy and, if not installed and used in accor- dance with the instructions, may cause harmful interference to radio communications. -
Page 95: Pixel Errors In The Tft Monitor
There have been continuous approaches to define the number of permitted pixel errors in the past. However, these attempts have for the most part been very complicated and completely different from manufacturer to manufacturer. MEDION follows the strict and transparent requirement of the ISO 9241-307, Class II Norm, which are summarised in brief in the following, in the handling of guarantees for all TFT display products for this reason. - Page 96 Types of pixel error: Type 1: Pixels shining for a long time (bright, white point), although not activated. A white pixel arises because of the illumination of all three sub-pixels. Type 2: Pixels not shining (dark, black point), although activated ...
- Page 97 Error Class I is only used in the case of special applications, e.g. in the medical sector, and is associated with corresponding supplementary costs. Error Class II has become estab- lished as the standard for manufacturers conscious of quality and with very good display units.
- Page 98 Index Data security ........4 A Directories .......... 39 Ambient temperature ......8 Disc drive ........... 40 Appearance and Personalization ..44 Driver support ........77 Audio cable ........31 Autorun ..........61 E Ergonomics .......... 9 B Errors and possible causes ....76 Battery Treatment .......
- Page 99 Memory Stick ........43 Service engineers ....... 78 MMC ..........43 Set-up location ........8 Mouse ..........36 SmartMedia ........43 MultiMediaCard ......... 43 Software ..........52 Software uninstallation ...... 62 N Sound system ........45 Standards Network ..........49 FCC compliance statement ....
- Page 100 English...
Need help?
Do you have a question about the AKOYA P5310 D and is the answer not in the manual?
Questions and answers