Table of Contents
Advertisement
Advertisement
Table of Contents
Troubleshooting

Related Manuals for Medion AKOYA P9614


Summary of Contents for Medion AKOYA P9614
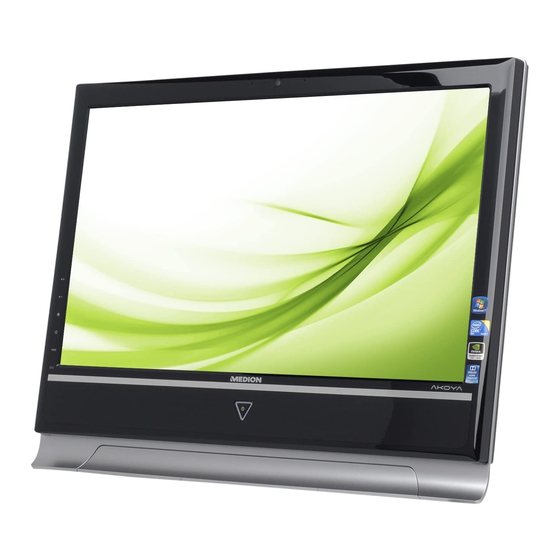
- Page 1 MEDION AKOYA ® ® P9614 Medion Electronics Ltd. 120 Faraday Park, Faraday Road, Dorcan Swindon SN3 5JF, Wiltshire Hotline: 0871 - 376 10 20 (Costs 7p/min from a BT landline, mobile costs maybe higher) FAX: 01793 - 715 716 www.medion.co.uk...
- Page 2 Notes on this Manual Keep these instructions with your computer at all times. The proper set up, use and care can help extend the life of your computer. In the event that you transfer owner- ship of this computer, please provide these instructions to the new owner. This manual is divided into sections to help you locate the information you require.
- Page 3 Quality Medion has selected the components in this computer for their high level of functional- ity, ease of use, safety and reliability. Through balanced hardware and software design we are able to provide you with an innovative personal computer useful for applications relating to both work and leisure.
-
Page 4: Table Of Contents
Table of contents Safety ......................1 Operational Safety ....................3 Power Supply ....................... 4 Cabling ......................... 4 Data Security ......................6 Battery Treatment ....................6 Ambient Temperature ..................7 Ergonomics ......................7 ... - Page 5 Connecting an External Monitor ................. 29 Duplicate the Desktop ..................30 Extend these displays ..................30 Only display the Desktop on 1 ................. 30 Only display the Desktop on 2 ................. 30 The Mouse ......................31 ...
- Page 6 Troubleshooting within the Network ..............54 Bluetooth (optional) ................... 55 Securing the All-In-One PC ..................56 Startup Password ....................56 Using a safety lock ....................56 Software ........................ 57 Getting to Know Windows® 7 ................57 ...
- Page 7 Notes on Laser Radiation .................. 84 Recycling and Disposal ................... 84 Appendix ....................85 Information about conformity ................87 ISO 13406-2 Class II .................... 87 Information about the Regulatory Compliance according to R&TTE ....89 ...
-
Page 8: Safety
Chapter 1 Safety Subject Page Operational Safety ............3 Power Supply ............. 4 Data Security ............. 6 Battery Treatment ............6... - Page 9 English...
-
Page 10: Operational Safety
Operational Safety Please read this chapter carefully and observe all listed notes. This ensures a reliable operation and long life expectancy of your All-In-One PC. Do not allow children to play unattended with electrical equipment. Children are incapable of judging potential risks properly. ... -
Page 11: Power Supply
Power Supply Do not open the housing of the mains adapter. Opening the housing may cause death by electrical shock. The housing contains no parts requiring maintenance. The mains adapter should only be operated using earthed sockets with AC 100- 240V~, 50/60 Hz. - Page 12 have a USB connector. Please follow the appropriate instructions for each de- vice. Keep the All-In-One PC at least one meter (approximately three feet) away from high frequency and magnetic interference sources (e.g., televisions, loud- speaker cabinets, mobile telephones, etc.) in order to avoid malfunctions and/or loss of data.
-
Page 13: Data Security
Data Security Attention! Every time you update your data make back-up copies on an external storage medium. The supplier does not assume liability for data loss or damage to data storage units, and no claims can be accepted for dam- ages resulting from the loss of data or consequential losses. -
Page 14: Ambient Temperature
Ambient Temperature The All-In-One PC can be operated at an ambient temperature of between 10° and 35°C (+41° and +95°F) and at a relative humidity of between 30% and 70% (without condensation). When powered off, the All-In-One PC can be stored at temperatures between - 20°... - Page 15 Sitting in one position for long periods can be uncomfortable. To minimize the poten- tial for physical discomfort or injury, it’s important that you maintain proper posture. Overall: Change your position frequently and take regular breaks to avoid fatigue. Back: While sitting at your work surface, make sure your back is supported by the chair’s backrest.
-
Page 16: Setting Up & Getting Started
Chapter 2 Setting Up & Getting Started Subject Page Included with your All-In-One PC ........11 Setting Up ..............12 Views ................14 Front View ..............14 Left and Right Side ............ 15 Rear Side ..............16 Getting Started .............. 17... - Page 17 English...
-
Page 18: Included With Your All-In-One Pc
Included with your All-In-One PC Please check that the contents listed below are supplied with your package. You MUST provide your All-In-One PC’s serial number when contacting a customer service repre- sentative. Your All-In-One PC bundle should include the following components: ... -
Page 19: Setting Up Of The All-In-One Pc
Setting Up of the All-In-One PC Forms of setting up You can set up the All-In-One PC with the stand supplied or attach the device to the wall with a VESA support. Setting the device up with the stand Unfold the foot on the back of the device. -
Page 20: Set-Up Location
2. Your All-In-One PC will be supplied with a decorative strip as an option. It is clicked in betwwn the two parts of the stand. 3. Attach your All-In-One PC to the wall support. Make sure that a minimum dis- tance of 7 mm is maintained between the wall and the All-In-One PC, in order to avoid overheating. -
Page 21: Views
Views Front View (Diagram the same) - Webcam ....................( p. 45) - Microphone ..................( p. 42) - Multi Touch Display ................( p. 27) - On/Off button ..................( p. 25) - Stereo speakers English... -
Page 22: Left And Right Side
Left and Right Side Diagram the same 6 - Multimedia card reader ................. ( p. 41) 7 - VGA-IN connector ................... ( p. 29) 8 - HDMI-IN connector ................. ( p. 29) 9 - USB port ....................( p. 46) 10 - Line In* .................... -
Page 23: Rear Side
* Ports with dual function. Configuration is set with the included software ( p. 42) Rear Side 26 28 - Hard drive slot for a second hard drive ® - Kensington lock ................. ( p. 56) - Power socket ..................( p. 26) - LAN port (RJ-45) ................. -
Page 24: Getting Started
Getting Started The software on this All-In-One PC comes fully pre-installed. You do not have to load any of the CD's/DVD’s supplied. With many programs (e.g., telephone-CD's or encyclopaedias), however, it is neces- sary to insert the corresponding CD/DVD in order to call up the data which is stored on it. -
Page 25: Step 3: Inserting Batteries In The Remote Control
Note Change the batteries if it is no longer possible to make entries smoothly. The operation of the mouse is described on page 31. Step 3: Inserting batteries in the remote control The remote control requires 2 batteries type Micro LR03/AAA, 1.5V. 1. -
Page 26: Step 6: Starting Initial Setup
Step 6: Starting Initial Setup The All-In-One PC starts and now goes through a number of phases: Note Ensure that there is no bootable CD (e.g. the Recovery-CD) in the CD- ROM drive. Such disks will prevent the operating system from loading di- rectly off the hard drive. -
Page 27: Short Description Of The Windows Desktop
® Short Description of the Windows Desktop Start Button Clicking the Start button brings up a menu where you can access help, software pro- grams, files, and settings All Programs All of the software programs installed on your All-In-One PC are ordinarily listed here. Click All Programs to reveal an extensive menu. - Page 28 Control Panel You can use the icons in Control Panel to change the appearance and functionality of Windows®7. These icons represent options for configuring your All-In-One PC. You should, however, consult „Help and Support“ on the potential effects of certain changes.
- Page 29 English...
-
Page 30: Operation
Chapter 3 Operation Subject Page Power Supply ..............25 Multi Touch Display ............27 The Mouse ............... 31 The Keyboard ..............32 Setting the frequency for keyboard and mouse ....34 The Hard Drive ..............35 The Optical Drive ............. 37 The Card Reader ............... - Page 31 English...
-
Page 32: Power Supply
Power Supply On/Off Button Power on or off your All-In-One PC by pressing the on/off button briefly. The operational indicator will inform you about the operational status of the All-In-One PC. The All-In-One PC will always be switched off, if the main switch is pressed for more than 4 seconds. -
Page 33: Power Adapter
Power Adapter Your All-In-One PC is supplied with a universal AC power adapter, which automatically adjusts to the available power source. The following levels are supported: AC 100-240V~/ 50-60 Hz. Please follow the power supply safety instructions found on page 4. The power adapter is connected via a power cord to an AC outlet. -
Page 34: The Multi Touch Display
The Multi Touch Display Your All-In-One PC is delivered with a touch-sensitive screen. To ensure optimal use, you should pay careful attention to the following notes: Operation To avoid damage, do not touch the display with sharp or sharp-edged objects. ... -
Page 35: On-Screen Keyboard
On-Screen Keyboard Using the On-Screen Keyboard application displays a virtual keyboard on the screen, allowing you to input data by means of a pointer or joystick, or directly, using the touch screen. To retrieve the on-screen keyboard, proceed as follows: 1. -
Page 36: Connecting An External Monitor
The following adjustment possibilities are available: Personalization Display Desktop Gadgets Taskbar and Start Menu Ease of Access Center Folder Options Fonts Connecting an External Monitor The All-In-One PC has a HDMI-OUT port for connecting an external monitor. 1. -
Page 37: Duplicate The Desktop
Select from the following options under Multiple displays: Duplicate these displays Extend these displays Show desktop only on 1 Show desktop only on 2 Duplicate the Desktop This Mode duplicates the display of the netbook on an external monitor. Information The same screen resolution must have been set on both devices in the case of this mode. -
Page 38: The Mouse
The Mouse The mouse has beside the two keys a wheel that can be used to scroll through a document or internet pages. Note The scroll wheel can be used as a button. The functionality depends on the application. In Word for example you can push the wheel to move up and down as a scroll function. -
Page 39: The Keyboard
The Keyboard This section contains useful information on using the keyboard. All diagrams are schematic. The Alt and Ctrl Keys The left Alt key performs certain functions in conjunction with other keys. The applica- tion program determines these functions. In order to enter a combination of keys that include the Alt key, hold the Alt key down while pressing the other key. -
Page 40: Multimedia Functions
Multimedia functions The allocation of a double function to certain keys provides you with a few multi-media functions. Some functions are input using the Fn-Key: Kombination Description Fn + Previous Track Use this key to skip backwards to the previous track/title in the active player. -
Page 41: Setting The Frequency For Keyboard And Mouse
Setting the frequency for keyboard and mouse 1. Push the ‘connect’ button located on top of the receiver. The indicator will start blinking. 2. Push the button on the bottom of the keyboard. The channel will be changed after the button is released. 3. -
Page 42: The Hard Drive
The Hard Drive The hard drive is the main storage medium combining large storage capacity and rapid data access. The hard drive contains the operating system of the computer, other application pro- grams and backup files. These programs and files are pre-installed on your All-In-One PC, so you may note that some of the space on your hard drive is already taken. -
Page 43: Important Directories
Important Directories In the following we have listed the most important directories and described their con- tent. Attention! Do not delete or modify these directories or their contents since data could be lost or the functionality of the system could be at risk. The master directory of drive C: includes important files required to start Windows®. -
Page 44: The Optical Drive
The Optical Drive Loading and Removing a Disc In contrast to optical drives in a desktop All-In-One PC, your All-In-One PC uses a holder to lock the disk. Attention! Do not place protective foils or other stickers on your CD’s. To avoid damage to your drive, do not use deformed or damaged CD’s. -
Page 45: How To Remove A Disc
Attention! The disc can be damaged when the drive drawer is pushed in, if it has not been positioned on the support correctly. 4. Push the tray back into the optical drive carefully. The ‘E’ drive letter will have been allocated to your optical drive in the delivery status. -
Page 46: Playing Back And Retrieving Data From Discs
Playing Back and Retrieving Data from Discs Note Some disks start automatically upon insertion. This depends on the op- erating system and the related settings. Your All-In-One PC is able to playback and to retrieve Audio CDs, DVD Movies and Data discs. After loading the disc your operating system will open a selection window with different options for playback. -
Page 47: Regional Playback Information For Dvd
Regional Playback Information for DVD The playback of DVD movies includes the decoding of MPEG2 videos, digital AC3 audio data and the deciphering of CSS protected contents. CSS (sometimes called copy guard) is the name of a data protection program incorpo- rated by the movie industry as an action against illegal copies. -
Page 48: The Card Reader
The Card Reader If your All-In-One PC is equipped with a card reader, you can handle different memory card types. The following table refers to the use of the card reader: SD: Secure Digital Memory Card MMC: Multimedia Card ... -
Page 49: The Sound System
The Sound System Your All-In-One PC has an integrated stereo sound card (on-board) with 16-bit and 3D spatial sound effects (3D). The sound card is compatible with the industry standard Sound Blaster and Microsoft Sound System Version 2.0. This guarantees optimal sup- port for all popular programs and games. -
Page 50: Configuration Of The Loudspeakers
Configuration of the Loudspeakers Connect the plug of one audio device with one of the audio sockets. The device will be recognised. The Sound System... - Page 51 In the Speakers dialogue, you can select the following settings under Speaker Con- figuration: Stereo: the audio sockets possess their basic functions. 5.1 Loudspeaker: The audio input is the loudspeaker output on the back; The audio output is the loudspeaker ouput on the front; The microphone connection is for the central loudspeaker and the subwoofer.
-
Page 52: Webcam
Webcam The built-in Webcam and associated microphone permit the use of various services, such as Windows® Messenger. Actual example using Windows Messenger 1. Start Windows Messenger and create a user account if you do not already have one. This service is free of charge. You only pay the cost of your Internet con- nection. -
Page 53: Usb Port
USB Port Note Devices connected directly to the USB bus should not draw more than 500 mA. The voltage output is protected by a fuse (Limited Power Source according to EN 60950). Should the devices need more power than this, it will be necessary to provide a hub (distributor / booster). On the USB it is possible to connect up to 127 devices which correspond to the USB standard (1.1 and 2.0 supported). -
Page 54: The Tv Tuner Card (Optional)
The TV Tuner Card (optional) The All-In-One PC is equipped with a TV card. Connect an aerial cable, in order to re- ceive television channels on the All-In-One PC. An analog or DVB-T aerial or a digital SAT device must have been connected, in order to receive a TV signal with the TV tuner. -
Page 55: The Remote Control (Optional)
The Remote Control (optional) This wireless remote control set can only be used to control the Media Center program on your All-In-One PC. In order for it to work, the following conditions must be met: The All-In-One PC must be booted up. ... -
Page 56: Button Layout
Button Layout Note The functions described here are standard functions. These Buttons can differ according to the operating mode (TV, video, photo, etc.). Start video text application. Activate the Energy-saving mode Special function Buttons red, green, yellow and blue (e.g.: for video text) TV recordings DVD Menu EPG function (Electronic Program Guide) -
Page 57: Programming The User-Defined Button
Rewind Starts playback. Fast forward Direct selection of the TV channels by means of num- bers. Number entry in the case of some functions (video text, etc.). Programming the user-defined button You can place any application that you would like to start directly by pressing a button on the user-defined button of the remote. -
Page 58: Av Inputs
AV inputs Connecting an external source to the All-In-One PC You will also have the possibility of using the All-In-One PC as an output device through the back HDMI and VGA outputs. Connect a fixed disk external DVD recorder, an HD multi-media player, a PC and/or another All-In-One PC. Proceed as follows to do this: Connecting an AV source ... -
Page 59: The Network
The Network Your All-In-One PC is provided with a Fast Ethernet-Network connector You will find further information about networking in the Help section within the Start menu. What is a Network? A network means connecting your All-In-One PC to another or several other All-In-One PCs. -
Page 60: Wireless Lan (Optional)
Wireless LAN (optional) Your All-In-One PC is equipped with WLAN. The components (Module, antenna) are already integrated and activated in your computer. You can turn off the wireless LAN ® function with the help of the Windows Device Manager. This function allows you to create a wireless network link with a partner. Safety Note Attention! Don’t use this feature in environments where highly sensitive devices are... -
Page 61: Troubleshooting Within The Network
Troubleshooting within the Network Why does the network environment not show the releases? The network environment is delayed in time. Check the release by searching for the respective computer name. Why does an error message appear when I click on the network envi- ronment? The computer name must be unique on the network and may not be the same as the task group. -
Page 62: Bluetooth (Optional)
Bluetooth (optional) Bluetooth wireless technology is designed to replace cables between devices, such as your printer, keyboard, and mouse. Bluetooth wireless technology operates over a short distance. Bluetooth devices use radio transmission, which enables your computer, mobile phone, printer, keyboard, mouse, and other devices to communicate with each other without cables. -
Page 63: Securing The All-In-One Pc
Securing the All-In-One PC Unauthorized access to software and hardware solutions will be made available to you with your new All-In-One PC. Startup Password You can protect your All-In-One PC against unauthorized use with a switching on password. Then, an invitation to enter the password will appear on the screen when the All-In-One PC is switched on. -
Page 64: Software
Software This section concerns itself with software. We make a distinction between the operat- ing system, the software (application program), Windows activation, BIOS and the security package BullGuard, which is delivered with the device. Getting to Know Windows® 7 With Windows® 7, is launching the new operating system and successor to Vista®. Windows®... - Page 65 Improved Desktop Windows® 7 simplifies working with the windows on the Desktop. This provides you with more intuitive possibilities for opening and closing, as well as for changing the size and for rearranging. Windows® 7 makes the performance of everyday tasks even simpler. For example, the Snaps function makes it easier than ever to compare two open windows.
-
Page 66: Windows ® 7 - Help And Support
Homegroup With homegroups, a new function of Windows® 7, the linking of home computers is really simple. A home network group is created automatically, for example, when you link the first All-In-One PC under Windows® 7 with the home network. The addition of additional All-In-One PCs with Windows®... -
Page 67: Windows ® 7 - Getting Started
® Windows 7 – Getting Started Learn everything you need to know about the features of the All-In-One PC. It is the aim of this feature to enable both beginners and experienced users to make additional setting for the optimal use of Windows®7 after first bringing the Notebook into operation. -
Page 68: Windows ® 7 - User Account Control
Getting Started has been subdivided into many small groups of subjects, so that the user will have the possibility of adjusting the content optimally to his or her knowl- edge. There are some of the links in the following: Go online to find out what’s new in Windows®7 ... -
Page 69: Windows ® 7 - Control Panel
® Windows 7 – Control Panel You can change Windows settings using the control panel. The settings control almost everything relating to Windows displays and functionalities, and they enable you to organise Windows according to your requirements. When you first open the Control Panel, a few of the most frequently used elements of the Control Panel are displayed by category. -
Page 70: Windows Media Center
Windows Media Center The Windows Media Center is the platform for your individual home entertainment in Windows Vista. You will be able to record television, TV broadcasts, DVDs and music, look at photos and much more by a remote (not included in the scope of the delivery) or by a click of the mouse, with the Windows Media Center. - Page 71 Main menu Sub-menu Tasks Settings Adapt the Windows Media Center to your requirements and needs here. For example, make the settings for the protection of children here. Stand by You will not only close the Windows Media Center but you will be able to put the whole operating system in stand-by through this sub-menu.
- Page 72 Main menu Sub-menu Music Music library All the music titles stored in your notebook will be located in the music library. You will be able to start the selected play- back of an album, an artist or a selected title here. Play back everything You will start the playback of all the files stored in your music library by means of this sub-menu.
-
Page 73: Installation Of Software
Installation of Software Note If your operating system is configured so that the installation procedure accepts only signed drivers (default) and software an information screen will appear. The software included in delivery is already pre-installed in the factory. Attention! You may find that during the installation procedure important files may be changed or even cancelled. -
Page 74: Software Uninstallation
6. Click on “OK”. 7. Follow the instruction given by the program. Software Uninstallation In order to remove installed software from your All-In-One PC, follow the next steps: 1. Click on Start 2. Click on Control Panel. 3. Then select the Programs option. -
Page 75: Windows Activation
Windows Activation Microsoft is committed to the protection of intellectual property rights and the reduc- tion of software piracy. Therefore Windows® 7 contains software-based product activa- tion technology. Your copy of Windows® 7 has already been activated for your All-In- One PC. -
Page 76: Bios Setup
BIOS Setup In the BIOS set up (your All-In-One PC’s Basic Configuration) you have a number of parameter settings available for your All-In-One PC. For example, you can change the operating mode of the interfaces, security features or power management. The All-In-One PC is factory pre-set to guarantee optimum opera- tion. - Page 77 English...
-
Page 78: Customer Service & Self Help
Chapter 4 Customer Service & Self Help Subject Page Data and System Security ..........73 System Restore .............. 74 FAQ – Frequently Asked Questions ......... 77 Customer Service ............79 Upgrades and Repairs ........... 83 Recycling and Disposal ........... 84... - Page 79 English...
-
Page 80: Data And System Security
Data and System Security The programs described below are part of your Windows operating system. You can find additional information on these programs in the Windows Help file. Please also read the notes on page 4. Data Security Back up data regularly on external media such as a CD-R or CD-RW. Windows offers Backup Status and Configuration. -
Page 81: System Restore
System Restore Windows® 7 provides a useful function (System Restore) enabling the storage of the so-called Recovery points. The system remembers the current configuration as a snapshot and returns to this, if necessary. The advantage is that an unsuccessful installation can be cancelled. Recovery points are created automatically by the system, but they can also be set manually. -
Page 82: Windows® Update
Windows® Update Windows Update is the online updating of Windows. Use Windows Update to download elements such as security updates, important updates, the newest help files, drivers and Internet products from the Internet. The website is regularly augmented by new content, so that you can download the newest updates and error corrections at any time, to protect the All-In-One PC and guarantee its functioning. -
Page 83: Windows Update Information For Data Security
Windows Update Information for Data Security Windows Update needs certain information about the respective All-In-One PC, so that a suitable list with updates can be provided for you. This information will include the following: Version number of the operating system ... -
Page 84: System Restore
System Restore If your system is not functioning properly, you should use the Application Support Disc to restore your system. Limits of the Recovery Changes made to the original configuration (RAS, Desktop or Internet settings) and installed Software will be ignored by this Recovery and will not be re- loaded. -
Page 85: Faq - Frequently Asked Questions
FAQ – Frequently Asked Questions When do I have to activate Windows? Your software has been preactivated in the factory. An activation will only be required, if ..several components are replaced by others..you install a new motherboard.. -
Page 86: Customer Service
Customer Service Troubleshooting Errors can have simple causes, but sometimes they are caused by faulty equipment. We would like to give you some ideas to solve common problems. Should these in- structions not lead to success, please feel free to call us. Localise the Cause Visibly check all cables and connections. -
Page 87: Errors And Possible Causes
Audio or video recordings need a great deal of memory (between 1 and 2 GB/hour). Safeguard files that you do not need on external media, such as DVD/CD-Rs or hard drives or other external media e.g. the MEDION hard drive HDDrive 2go. -
Page 88: Additional Support
(e.g., programs or hardware) that were not tested at the time of your All-In-One PC’s manufacture. Driver updates and the latest information on your product are available on the Internet. Visit Medion on the Web at www.medion.com Customer Service... -
Page 89: Transporting The All-In-One Pc
Transporting the All-In-One PC Please observe the following guidelines when transporting the All-In-One PC: To avoid damage during transport, store the All-In-One PC in its original pack- aging. Cleaning and Care The lifetime of the All-In-One PC can be extended by taking the following measures: Warning! There are no user-serviceable or user-cleanable parts inside the All-In- One PC housing. -
Page 90: Upgrades And Repairs
(ESD). Carry out system upgrades and changes in an ESD-protected workshop. If no such workshop is available, wear an antistatic wrist strap or touch a highly conductive metal object. Medion can repair damage sustained by inappropriate handling for a fee. ... -
Page 91: Notes On Laser Radiation
Notes on Laser Radiation Laser devices of Laser Class 1 to Laser Class 3b may be used in the All-In-One PC. Where the All-In-One PC housing remains closed, the device meets the re- quirements of Laser Class 1. By opening the All-In-One PC housing you will gain access to laser devices of up to Laser Class 3b. -
Page 92: Appendix
Chapter 5 Appendix Subject Page Information about conformity .......... 87 Conditions of Warranty ............ 91 Index ................96... - Page 93 English...
-
Page 94: Information About Conformity
Information about conformity The device fulfils electromagnetic compatibility and electricity safety requirements. Your device complies with the basic requirements and the relevant guidelines of the 2004/108/EU EMV Guidelines [electromagnetic compatibility] and the 2006/95/EU Guideline for low voltage devices. This device fulfils the basis requirements and the relevant regulation of the Ecodesign Guideline 2009/125/EG (Commission Regulation 1275/2008). - Page 95 Pixel structure Rows Blue Green Types of Pixel Failures: Type 1: A constantly lit pixel (a bright, white spot), even though it is not addressed. A white pixel is caused when all three sub-pixel are lit. Type 2: A pixel that does not light up (dark, black spot), although it is addressed ...
-
Page 96: Information About The Regulatory Compliance According To R&Tte
The company declares herewith that these devices are in agreement with the funda- mental requirements and the other relevant terms of the 1999/5/EG Guideline. Com- plete declarations of conformity are available under www.medion.com/conformity. Information about conformity... -
Page 97: Fcc Compliance Statement
FCC Compliance Statement This equipment has been tested and found to comply with the limits for a Class B digi- tal device, pursuant to Part 15 of FCC Rules. These limits are designed to provide rea- sonable protection against harmful interference in a residential installation. This equipment generates, uses, and can radiate radio frequency energy and, if not installed and used in accordance with the instructions, may cause harmful interference to radio communications. -
Page 98: Restricted Warranty
This warranty covers defects relating to workmanship and manufacture in MEDION products. The period during which this warranty is valid and during which claims against the warranty can be made to MEDION must be in accordance with the follow- ing terms in order to be considered eligible: ... - Page 99 MEDION for the reasonable costs of postage and packaging before MEDION will return the product to you. If so and you would still like MEDION to repair or replace the product, MEDION may do so but you will be charged MEDION’s standard rates for repair and replacement for this service.
- Page 100 MEDION reserves the right to invoice you for all reasonable costs in- curred by MEDION. These costs will be in relation to the return of the product, includ- ing reasonable administration costs, plus reasonable costs for materials used and la- bour provided when repairing or replacing the product.
- Page 101 MEDION does not guarantee the 100% accuracy of the maps provided with the Navi- gation device. It may be necessary to delete all data in the product in order to repair the MEDION product. PLEASE MAKE SURE THAT YOU HAVE A BACKUP COPY OF ALL DATA ON THE PRODUCT BEFORE RETURNING THE PRODUCT TO MEDION.
-
Page 102: Making Copies Of This Manual
You are responsible yourself for restoring the application software after the repair services have been carried out by MEDION or its authorised personnel. You must take all other necessary steps to enable MEDION or its authorised per- sonnel to carry out your order properly. ... -
Page 103: Index
Index FCC compliance statement ....90 A G All programs ........20 Ambient temperature ......7 Getting started Anpassung ........29 Connecting USB receiver ....18 Anzeige ........... 29 Inserting batteries in keyboard ..17 Appearance and Personalization ..28 Inserting batteries in mouse .. - Page 104 What is a network? ...... 52 FCC compliance statement ..90 Wireless LAN ........ 53 Start button ........20 System restore ......... 74 O T On/Off Button ......... 25 Transporting ........82 On-Screen Keyboard ....... 28 Troubleshooting ......74, 79 Operation TV Tuner Card .........
- Page 105 English...
Need help?
Do you have a question about the AKOYA P9614 and is the answer not in the manual?
Questions and answers