Table of Contents
Advertisement
Quick Links
Video Cassette Recorder
NV-SV121EB
Operating Instructions
TIMER REC
REC
CH
PULL OPEN
S-VHSET
Before connecting the device, operating it or adjusting settings please read these
operating instructions completely; especially the safety precautions on pages 2-3.
EJECT
.
SUPER LP 35x JET SEARCH
3D DNR
TBC
VHS
PAL
625
Contents
Panasonic Sales and Support Information
VCR Auto Setup with RF cable
Super VHS
S-VHS Recording /
ET
Editing
AUDIO mode / NICAM sound system
Page
2-3
4
5
6-7
8-9
10
12
14
15
16
17
19
20
21
22-23
24-33
24
S-VHS Expansion Technology
25
26
27-28
29
30-31
32
33
34-40
34
35
36
36
37
38
39
40
41
42
43
last page
Advertisement
Table of Contents

Subscribe to Our Youtube Channel
Related Manuals for Panasonic NV-SV121EB


Summary of Contents for Panasonic NV-SV121EB
-
Page 1: Table Of Contents
Contents Page Important Safety Warnings / CAUTION! Care and Maintenance Panasonic Sales and Support Information Included Accessories Front Panel VCR / Rear Panel VCR Remote control functions Video Cassette Recorder Connecting with RF cable NV-SV121EB VCR Auto Setup with RF cable... -
Page 2: Important Safety Warnings / Caution
Important Safety Warnings The moulded three pin mains plug is supplied for your safety and convenience and must NOT be cut off. Fuse cover A 5 amp fuse is fitted in the mains 1. Open the fuse plug. If the fuse has to be replaced, cover with a it must be of the same rating and screwdriver. -
Page 3: Care And Maintenance
Caution Avoid exposing the unit to direct sunlight or other heat sources. Avoid sudden change in temperature or humidity, dew or condensation may form, causing malfunction. Dispose of batteries in accordance with the instructions given in this book. Place the unit on a flat, stable surface. Do not place heavy object on top of the unit. Your attention is drawn to the fact that recording of pre-recorded tapes or discs or other published or broadcast materials may infringe copyright laws. - Page 4 For UK customers: 08705 357357. For Republic of Ireland customers: 01 289 8333. Visit our website for product information www.panasonic.co.uk. E-mail: customer.care@panasonic.co.uk. Direct Sales at Panasonic UK Order accessory and consumable items for your product with ease and confidence by telephoning our Customer Care Centre Mon - Friday 9:00am - 5:30pm (Excluding public holidays).
-
Page 5: Included Accessories
Included Accessories Included ccessories TRACKING/V-LOCK AV LINK INPUT SEL EXT LINK ShowView AUDIO STATUS RESET/CANCEL Batteries for the AC Mains Lead PROG PROG PLAY I-TIMER /CHECK Remote Control RJA0044-3C MENU EXIT R6 size ENTER JET REW PAUSE/SLOW INDEX REC MODE OFF-TIMER Remote control Operating Instructions TIMER... -
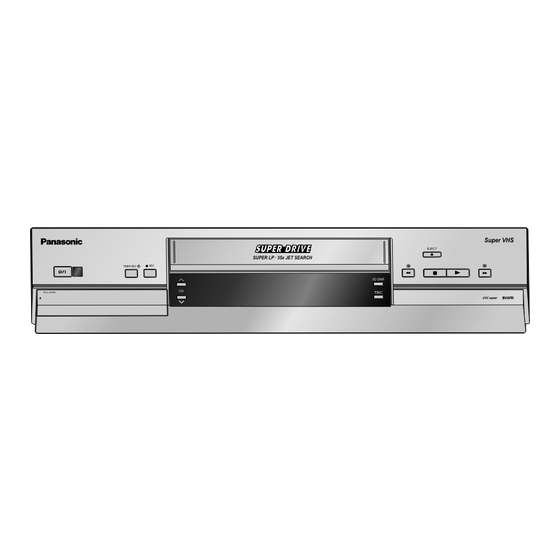
Page 6: Front Panel Vcr / Rear Panel Vcr
Front Panel VCR Super VHS EJECT VCR= Video Cassette Recorder SUPER LP 35x JET SEARCH TIMER REC Detailed information 3D DNR is available on the PULL OPEN specified pages. Page 9 10 11 Front AV (AV3) Stand-by/on switch /I. S-VIDEO IN (AV3) Selects a channel. - Page 7 Rear Panel VCR Rear Panel Connectors AV OUT VIDEO RF IN AV2 (DECODER/EXT) AV1 (TV) AC IN S VIDEO AUDIO RF OUT AV2 ( 2 3 4 AC IN~ (Power supply) AV1 (21-pin Scart socket) AV2 (21-pin Scart socket) S-VIDEO output RF IN = Aerial input VIDEO output...
-
Page 8: Remote Control Functions
Remote control functions TV Controls Some Panasonic television sets may be controlled with the remote control unit of this VCR. However, some of old Panasonic TVs cannot be operated using this remote control. TRACKING/V-LOCK Press to switch the TV from on to stand-by mode or vice versa. - Page 9 VCR Standard Controls AUDIO Stand-by/on switch Audio out settings. Press to switch the unit from on to stand-by mode or vice versa. In stand-by mode, the unit is still consuming a Selecting or storing settings. ENTER small amount of power. MENU Displays the menu.
-
Page 10: Connecting With Rf Cable
Connecting with RF cable You can connect the VCR to your TV set by using a RF cable. Aerial Follow the steps described below. RF IN (Aerial input) Ensure TV Power is disconnected AC IN~ from AC Mains socket. A 2 V ( Connect aerial to the RF IN (Aerial input) connector of the VCR. - Page 11 VCR Auto Setup with RF cable (Automatic tuning) Turn on your television set. VCR Display With the Stand-by/on switch turn on the VCR. Automatic tuning for all available TV stations begins. Approximate duration is 5 minutes. After Automatic tuning has finished, press EXIT. The Owner ID screen will appear. - While Auto Setup is running the first digit of the VCR display will flash.
-
Page 12: Connecting With 21-Pin Scart Cable
Connecting with 21-pin Scart cable (Fully wired) Aerial Follow the steps described below. 21-pin Scart socket RF IN (Aerial input) AC IN~ AC IN Ensure TV Power is disconnected from AC Mains socket. AV ( Connect aerial to the RF IN RF OUT RF cable (Aerial output) -
Page 13: Vcr Auto Setup With 21-Pin Scart Cable
VCR Auto Setup with 21-pin Scart cable (Automatic tuning) VCR Display Auto Setup Turn on your television set. With the Stand-by/on switch turn on the VCR. Automatic tuning for all available TV stations begins. Tuning : Ch 21 Approximate duration is 5 minutes. After Automatic tuning has finished, press EXIT. -
Page 14: Connecting To Satellite Receiver, Set Top Box
Connecting to Satellite Receiver, Set Top Box Follow the steps described below. You can connect a Set Top Box to receive digital Ensure TV Power, External unit Power and VCR broadcast by aerial (DVB-T) signals, a satellite receiver (digital/analogue) or a decoder to decrypt Power are disconnected from AC Mains socket. -
Page 15: Connecting With S-Video Cable
Connecting with S-Video cable RF IN Audio Output sockets (Aerial input) AC IN S-Video Output socket Aerial Aerial Input socket Audio Input sockets TV with S-Video Input socket AC IN~ AC IN V A 2 ( RF OUT RF cable (Aerial output) (supplied) AC mains... -
Page 16: Connecting Audio Systems
Connecting Audio Systems For details about the connection, also read the operating instructions of the Audio System. Be sure to keep the VCR, TV and Audio System disconnected from mains until you have finished all connections. Follow the steps described below. Ensure Audio Systems Power,... -
Page 17: Checking The Settings After Auto Setup
Checking the Settings To confirm that the TV stations have been tuned correctly by Auto Setup after Auto Setup MENU Press the MENU button to display the OSD Main menu on the TV screen. Press to select Tuning then press the ENTER button. Press to select Manual then press the ENTER button to display the list of Menu... -
Page 18: Removing Interference / Changing Rf-Output Channel
Removing Interference / Changing RF-output channel In some cases, interference (lines or patterning) or a very poor picture may appear on the TV when the VCR is connected. If this happens, follow the steps below to change the video playback channel (RF output channel) to remove the interference. -
Page 19: Menu System
Menu System Timer recording 1 / 3 Date Start Stop The cursor buttons on the remote control -- ---- -- / -- --:-- --:-- unit allow you to navigate through menus ENTER -- ---- -- / -- --:-- --:-- and change selected entries. -- ---- -- / -- --:--... -
Page 20: Playback
Playback Normal playback Repeat playback Turn on the VCR. The VCR repeats playback from Be sure the TV set is turned on and beginning to the end of the recording. tuned to the video playback channel. In stop or playback mode press PLAY Insert a video cassette. -
Page 21: Tracking Control
Tracking control Adjusting the playback picture Under normal conditions, the VCR automatically adjusts the tracking for optimum performance. However, in some cases it may be necessary to adjust it manually. If the picture contains noise bars and it is not clear to see (tracking adjustment): If noise bars appear during normal playback, slow playback or still playback, follow the operations below. -
Page 22: General Convenient Functions / Tape Care
General convenient functions INDEX Auto-Start Quick search for a beginning of a recording When inserting a cassette the VCR will automatically While playing back or in stop-mode. switch on. INDEX tape winds forward / INDEX tape rewinds. Every time you press the button (max. 20 times) the Automatic rewinding VCR will find the start of the next recording. - Page 23 When inserting a video cassette the tape counter will automatically reset to [0:00.00]. Use a good quality branded tape, such as Panasonic. The tape counter may also be reset to [0:00.00] by Keep in the box supplied with the tape, or a video case, pressing the RESET/CANCEL button.
-
Page 24: Recording
Recording S-VHS Recording Recording functions For recordings that you intend to play back on this VCR or another S-VHS VCR, we recommend that you record in the S-VHS format to take S-VHS Recording advantage of this system’s superior picture quality. Be sure to use a 24 25 cassette bearing the S-VHS logo. -
Page 25: S-Vhs / Vhs
S-VHS / VHS The following table lists the playback formats that are compatible with this VCR’s recording standard. Recording Cassette Recording format Compatible Playback Equipment VHS, S-VHS, (SP/LP/EP) VHS with SQPB*1 S-VHS ET S-VHS*2, (SP) VHS with SQPB VHS, S-VHS, (SP/LP/EP) VHS with SQPB S-VHS... -
Page 26: Recording
Recording Instant recording Set the TV set to the video channel and insert a cassette into the VCR; make sure that the cassette’s protection tab is intact. Select channel to record from. When recording from an external device, select from Scart inputs AV1, AV2. -
Page 27: Timer Recording
Timer recording The Timer recording allows you to programme the recording time of TV programmes up to 1 month in advance. Use the on-screen menu to programme a maximum of 16 recordings. Do not forget to verify that there is enough tape left. - Page 28 Timer recording Automatic SP/LP selection PROG Checking the timer programme /CHECK A: If, at the beginning of a timer programme, there is not Press PROG/CHECK, enough tape left to complete it, the SP/LP function will the Timer recording menu appears. automatically run the tape at LP speed.
-
Page 29: Recording With Intelligent Timer
Recording with The INTELLIGENT TIMER allows you to easily time the recording of INTELLIGENT TIMER programmes broadcasted by the same TV station at the same daytime at different days. To use the INTELLIGENT TIMER function, at least one recording session must be programmed in the Timer recording menu (page 27). -
Page 30: Recording With Video Plus
Recording with VIDEO Plus+ Programming recordings with the VIDEO Plus+ function The VIDEO Plus+ code simplifies entering programme information to record TV Video Plus+ and SAT programmes. The recording time may be slightly longer than the TV programme. 8 3 5 4 2 - - - - VIDEO Plus+ Press VIDEO Plus+. - Page 31 Recording with VIDEO Plus+ VIDEO Plus+ Codes for Satellite Receivers / Set Top Box This VCR is not designed to control (switch on or change channel) your satellite receiver or Set Top Box, however, it can be taught to recognise VIDEO Plus+ Codes for Satellite stations.
-
Page 32: Recording With External Recording Controls
Recording with external EXT LINK recording controls The AV2 input of this VCR is equipped for use with external equipment having external timer recording control such as digital satellite receivers. The AV2 input can be set to EXT LINK 1 or EXT LINK 2 depending on the equipment to be Receiver Aerial connected. - Page 33 Editing Assemble Editing Assemble editing is the process of copying scenes from an external source (e.g. video movie camera or another VCR) to this VCR. These scenes can be assembled in the order of your choice to create your own unique composition. TIMER REC Connect the external source to this VCR with an audio/video cable or a 21-pin Scart cable, PULL OPEN...
-
Page 34: Manual Functions
Manual Functions This VCR has 99 programme positions that can be tuned to receive TV stations. In certain circumstances you may wish to tune in a station manually or rename a TV station. Manual Tuning Tuning Press MENU, the Menu screen appears. Pos Name Pos Name Ch Select the Tuning menu by pressing... -
Page 35: Changing The Name Of Tv Stations
Manual Functions Changing the name of TV stations Tuning Press MENU, the Menu screen appears. Pos Name Pos Name Ch With select the Tuning menu, confirm with ENTER. 1 BBC1 7 - - - - - - - 2 BBC2 Confirm [Manual] with ENTER. -
Page 36: Creating A New Station Table
Manual Functions Creating a new station table Tuning Press MENU, the Menu screen appears. Manual With select the Tuning menu, confirm with ENTER. Auto Setup Shipping condition With select [Auto Setup], confirm with ENTER. Owner ID Press ENTER to confirm. The Auto Setup menu will be displayed. -
Page 37: Others Menu
Manual Functions Tape length AUTO Sets the tape length of the cassette you use. E - 240 E - 195, E - 260, E - 300 Others Menu Selects the type of external unit connected to the VCR's AV2 21-pin scart socket DECODER: If a decoder is connected. -
Page 38: Owner Id
Manual Functions Tuning Owner ID Press MENU and select Tuning Manual Auto Setup Press ENTER. Shipping condition Select Owner ID and press ENTER. Owner ID Use the Numeric buttons or to enter the current PIN number. After entering the correct PIN number, you can change the Name, House No and Postcode. -
Page 39: Clock Setting
Manual Functions Clock setting The clock will normally be set correctly during Auto-Setup however, in some circumstances the VCR cannot set the clock automatically. In this case, follow the operation steps below to manually set the clock. Menu To manually adjust the clock Timer recording Press MENU and select Clock set Tuning... - Page 40 Manual Functions AUDIO Audio mode (L/R) At each press of the AUDIO button, the selected sound output is indicated with L (Left) and R (Right). Stereo playback Display: LR Left audio channel playback Display: L - Right audio channel playback Display: - R Playback of normal audio (Mono) sound : Display: - -...
-
Page 41: Before Requesting Service
Before requesting service Please contact our after sales service centre if you fail to remove problems by yourself (see Guarantee Information). I HAVE AN ON SCREEN MESSAGE. THE PICTURE OF A RECORDED PROGRAMME IS DISTORTED OR MISSING. You have attempted to carry out a function, which is not possible at this time. It may be that no tape is inserted and you have pressed PLAY or that you The aerial or connection is defective tried to change the details of a timer recording whilst it was being carried out. -
Page 42: 21-Pin Scart Socket
21-pin Scart Socket The 21-pin Scart socket transmits both input and output signals for picture and sound. TVs equipped with the same type of socket can be connected here. This type of socket is also called Peritel, Euro Connector and Euro AV. AV1 Scart Socket (NORMAL) AV1 Scart Socket (S-VIDEO) AV2 Scart Socket... -
Page 43: Specifications
220-240 V AC, 50/60 Hz NV-SV121EB Power consumption in operation multifunctional remote control (VCR and Panasonic TV) / Controls VCR direct controls (main functions) Video and Audio heads (helical scanning system) 4 heads (Super Ferrite Head) / 2 heads Hi-Fi Tape speed SP: 23.39 mm/s, LP: 11.7 mm/s... -
Page 44: Index
Digital Receiver 14,32 PROG PLAY Dimmed CR display uick Erase 6,23 VIDEO Plus+ 30,31 rasure protection ecording 26,32 External Devices 14,37 Remain EXT LINK 32,37 Remote actory defaults Repeat Playback NDEX INTELLIGENT TIMER Matsushita Electric Industrial Co., Ltd. F30A04-0 http://www.panasonic.co.jp/global/ RQTD0086-B...
Need help?
Do you have a question about the NV-SV121EB and is the answer not in the manual?
Questions and answers