Table of Contents
Advertisement
Advertisement
Table of Contents

Related Manuals for Miele K 8952 SD ed-1


Summary of Contents for Miele K 8952 SD ed-1
- Page 1 Operating and installation instructions Refrigerator with Dynamic cooling K 8952 SD ed-1 To avoid the risk of accidents or damage to the appliance, it is essential to read these instructions before it is installed and used for the first time.
-
Page 2: Table Of Contents
Contents Description of the appliance ......... 4 Caring for the environment . - Page 3 Contents Installation ............29 Location .
-
Page 4: Description Of The Appliance
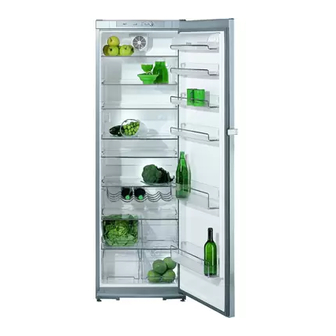
Description of the appliance a Dynamic cooling button and c Super cool button and indicator light indicator light d On/Off and temperature selector dial b Temperature display... - Page 5 Description of the appliance a Fan b Butter and cheese compartment c Egg tray d Interior lighting e Shelves f Bottle rack * g Door shelf h Condensate channel and drain hole i Fruit and vegetable containers j Divider* * depending on model...
-
Page 6: Caring For The Environment
Caring for the environment Disposal of the packing Disposal of your old appliance material Please ensure that the appliance presents no danger to children while The transport and protective packing being stored for disposal. has been selected from materials which are environmentally friendly for It should be unplugged or disposal, and can normally be... -
Page 7: Warning And Safety Instructions
Warning and Safety instructions Technical safety This appliance complies with all This appliance contains the coolant relevant legal safety requirements. Isobutane (R600a), a natural gas Improper use can, however, present which is environmentally friendly. a risk of both personal injury and Although it is flammable, it does not material damage. - Page 8 Warning and Safety instructions Before connecting the appliance to manufacturer will not be held liable. the mains supply make sure that Ensure current is not supplied to the the rating on the data plate appliance until after maintenance or corresponds to the voltage and repair work has been carried out.
- Page 9 Warning and Safety instructions Observe the "use by" dates given The appliance is designed for use on food to avoid the risk of food within certain climate ranges poisoning. (ambient temperatures), and should not Storage times will depend on several be used outside this range.
- Page 10 Warning and Safety instructions Disposal of your old appliance Before disposing of an old appliance, first make the door latch or lock unusable. This way you will prevent children from accidentally locking themselves in and endangering their lives. Disconnect the appliance. Cut off the cable and render any plug unusable.
-
Page 11: How To Save Energy
How to save energy Normal energy consumption Increased energy consumption Installation site In a ventilated room. In an enclosed, unventilated room. Protected from direct sunlight. In direct sunlight. Not situated near to a heat source Situated near to a heat source (radiator, oven). - Page 12 How to save energy Normal energy Increased energy consumption consumption Defrosting Defrost the freezer when a layer of A layer of ice hinders the cold ice one centimetre thick has built from reaching the frozen food, and causes an increase in energy consumption.
-
Page 13: Switching On And Off
Switching off conditioning agent for stainless steel, ^ Using a coin, turn the On/Off dial in such as Neoblank (available from the Miele UK Spare Parts Department). an anti-clockwise direction back to Follow the manufacturer’s instructions the "0" position. and apply with an even pressure in All the indicator lights go out and the the direction of the grain. -
Page 14: The Correct Temperature
The correct temperature Setting the temperature It is very important to set the correct temperature for storing food in the The temperature is set using the appliance. Micro-organisms will cause temperature dial. food which is not stored at the correct temperature to deteriorate rapidly. -
Page 15: Super Cool And Dynamic Cooling
Super cool and Dynamic cooling Dynamic cooling m Super cool The Super cool function can be used to When the Dynamic cooling function is rapidly reduce the temperature in the not switched on, the natural circulation refrigerator to its lowest setting of air in the appliance will cause (depending on the room temperature), different temperature zones in the... - Page 16 Super cool and Dynamic cooling Switching off Dynamic cooling ^ Press the Dynamic cooling button m. The Dynamic cooling indicator light will go out. The fan automatically switches off when the door is open.
-
Page 17: Using The Refrigerator Efficiently
Using the refrigerator efficiently Different storage zones Do not store explosive materials in Due to the natural circulation of the air the appliance or any products in the appliance, there are different containing propellants (e.g. spray temperature zones in the refrigerator. cans). -
Page 18: Storing Food Correctly
Using the refrigerator efficiently Storing food correctly Unpacked meats and vegetables Store food covered or packaged. This Different types of unpacked meats and will prevent food smells or tastes from vegetables must be kept separate. To affecting other foods, and prevent food avoid any microbiological from drying out and also any cross-contamination, these foods may... -
Page 19: Adjusting The Interior Fittings
Adjusting the interior fittings Moving the shelves Adjusting the door shelves ^ Push the door shelf upwards, then The shelves can be adjusted according to the height of the food. remove it by pulling it forwards. ^ Raise the shelf at the front, pull it out ^ Replace the door shelf at the half way, and then lift it out. -
Page 20: Automatic Defrost
Automatic defrost Condensate and frost can build up on the back wall of the refrigerator whilst it is in use. These are automatically removed and defrosted by the appliance. The condensate is drained away via a channel and drain hole into an evaporation system at the back of the appliance. -
Page 21: Cleaning And Care
^ The stainless steel trim can be pulled conditioning agent for stainless steel off the front edge of the shelves for such as Neoblank (available from cleaning. the Miele UK Spare Parts Department). Follow the manufacturer’s Cleaning the outer casing, the instructions and apply with an even... -
Page 22: Ventilation Gaps
^ Insert the plug in the socket and without the use of chemicals. These switch the appliance back on. are available from the Miele UK ^ Place food back in the appliance and Spare Parts Department, and from good retail outlets. -
Page 23: Problem Solving Guide
If it has, contact the Miele Ser- this is applicable. vice Department..the temperature in the refrigerator is too low. - Page 24 ^ Clean the condensate channel and drain hole. If you still cannot remedy the fault having followed these suggestions, please contact the Miele Service Department. To prevent unnecessary loss of temperature it is advisable not to open the door while waiting for the...
-
Page 25: Noises
Noises Normal noises What causes them Brrrrr... Humming noise made by the motor (compressor). This noise can get louder for brief periods when the motor is switching on. Blubb, blubb..A gurgling noise can be heard when coolant is circulating through the pipes. -
Page 26: After Sales Service
In the event of a fault which you cannot correct yourself, or if the appliance is under guarantee, please contact: – your Miele Dealer – the Miele Service Department (see back cover for address). When contacting your Dealer or the Service Department, please quote the model and serial number of your appliance. -
Page 27: Electrical Connection Irl, U.k., Za
Electrical connection IRL, U.K., ZA All electrical work should be carried out Non-rewireable plugs (BS 1363) by a suitably qualified and competent The fuse cover must be re-fitted when person in strict accordance with current changing the fuse, and if the fuse cover local and national safety regulations is lost, the plug must not be used until a (BS 7651 in the UK). -
Page 28: Electrical Connection Aus, Nz
Electrical connection AUS, NZ All electrical work should be carried out WARNING by a suitably qualified and competent THIS APPLIANCE MUST BE person in accordance with local and EARTHED national safety regulations. The appliance is supplied with a mains cable and moulded plug ready for connection to 220-240 V 50 Hz supply. -
Page 29: Installation
Installation with the risk of food deteriorating and Do not place any appliance which going off. gives off heat, such as a toaster or microwave oven, on top of this Side-by-side installation appliance, as this would increase To avoid a build-up of condensation the appliance’s energy consumption. -
Page 30: Installation
Installation Installation ^ Remove any cable clips from the back of the appliance. ^ Check that all parts at the back of the appliance are unhindered. Carefully remove any hindrance. ^ Carefully push the appliance into position. The appliance can be placed directly against a wall. -
Page 31: Changing The Door Hinging
Changing the door hinging ^ Remove the cover caps from the The appliance is supplied right-hand hinged. If left-hand door hinging is opposite side, and fit them into the required, follow the instructions below. empty holes. Removing the door handle: Changing over the door: ^ Open the appliance door. - Page 32 Changing the door hinging ^ Open the door, tilt it downwards and Keep it in a safe place just in case take it off. you ever decide to change the door hinging back to right hand hinging. ^ Screw the tappet supplied n into the opposite side using the same screw ^ Hang the door on hinge pin h and then close the appliance door.
- Page 33 Changing the door hinging ^ Align the door with the appliance ^ Then tighten all 4 fixing screws b. housing using the long slot in hinge ^ Slide the side section of the handle plate f. Then tighten screw c. d into the guides on the mounting plate until it clicks into place.
-
Page 34: Building In The Appliance
Building in the appliance The air inlet and outlet must not be covered or blocked in any way. They should be dusted on a regular basis. When built into a kitchen run (max. depth 580 mm) the appliance can be installed directly next to a kitchen furniture housing unit. - Page 36 Alteration rights reserved / 4705 M.-Nr. 06 777 840 / 00 en - GB K 8952 SD ed-1...
Need help?
Do you have a question about the K 8952 SD ed-1 and is the answer not in the manual?
Questions and answers