Miele KFNS 37432 iD Operating And Installation Instructions
Fridge-freezer combination
Hide thumbs
Also See for KFNS 37432 iD:
- Operating and installation instructions (104 pages) ,
- Operating instructions manual (92 pages) ,
- Installation instructions manual (32 pages)

Related Manuals for Miele KFNS 37432 iD


Summary of Contents for Miele KFNS 37432 iD
- Page 1 Operating and Installation Instructions Fridge-freezer Combination To prevent accidents and machine damage, read these instructions be- fore installation or use. en-US M.-Nr. 10 951 390...
-
Page 2: Table Of Contents
Contents IMPORTANT SAFETY INSTRUCTIONS .............. 5 Caring for the environment ................ 13 How to save energy..................... 14 Guide to the appliance .................. 16 Control panel ......................16 Explanation of symbols ..................17 Accessories ......................19 Accessories supplied .................. 19 Optional accessories.................. 20 Switching on and off ................... - Page 3 Contents Carbon filter replacement indicator ..............39 Storing food in the refrigerator section............. 41 Various cooling zones ................... 41 Food which is not suitable for storage in the refrigerator section ......42 What to be aware of when shopping for food............43 Storing food correctly....................
- Page 4 Contents Warranty ........................ 69 Information for dealers .................. 70 Demo mode ......................70 Electrical connection .................. 72 Installation information .................. 74 Side-by-side ......................74 Installation location ....................74 Climate class .................... 75 Ventilation ......................75 Cabinet doors......................77 Calculation of cabinet door size ............... 77 Before installing the appliance ................
-
Page 5: Important Safety Instructions
The appliance is not suitable for use in areas where there is a risk of explosion. Miele cannot be held liable for damage resulting from improper or in- correct use of the appliance. - Page 6 In the event of any damage: – avoid open flames and anything that creates a spark, – disconnect the appliance from the electrical power supply, – ventilate the room where the appliance is located for several min- utes, and – contact Miele Technical Service.
- Page 7 Reliable and safe operation of this appliance can only be assured if it has been connected to the electricity supply. If the power cord is damaged, it must be replaced by a Miele au- thorized technician in order to protect the user from harm. ...
- Page 8 Any manufacturer's warranty will be void if the appliance is not re- paired by a Miele approved service technician. Defective components should only be replaced by Miele original parts. Only with these parts can the manufacturer guarantee the safety of the appliance.
- Page 9 Observe the manufacturer's “use-by” dates and storage in- structions. Use only genuine original Miele parts. If parts or accessories from other manufacturers are used, the warranty may become invalid.
- Page 10 IMPORTANT SAFETY INSTRUCTIONS Cleaning and maintenance Do not use any oil or grease on the door seals. They can cause the seals to deteriorate over time. Never use a steam cleaner to clean the appliance. The steam can reach the electrical components and cause a short circuit.
- Page 11 IMPORTANT SAFETY INSTRUCTIONS Transport To avoid damage to the appliance, always transport it upright and in its packaging. DANGER of injury and damage. The appliance is very heavy and must be transported by two people. Disposal of your old appliance ...
- Page 12 IMPORTANT SAFETY INSTRUCTIONS – kinking any pipework, – scratching the surface coating. Symbol on the compressor (depending on model) This information is only relevant for recycling. In normal operation there is no risk. The oil in the compressor can be fatal if swallowed or if it pene- trates the airways.
-
Page 13: Caring For The Environment
Consult with local authorities, dealers or Miele in order to dispose of and recycle electrical and electronic appliances. Miele assumes no responsibility for deleting any personal data left on the appliance being disposed. -
Page 14: How To Save Energy
How to save energy Normal Increased energy consumption energy consumption Installation / In a well-ventilated room. In an enclosed, poorly venti- Maintenance lated room. Protected from direct sun- In direct sunlight. light. Away from heat sources (ra- Near a heat source (radiator, diator, range/oven). - Page 15 How to save energy Normal Increased energy consumption energy consumption The drawers and shelves are in the original arrangement. Only open the door when Frequent opening of the necessary and for as short a door for long periods will time as possible. Store food cause a loss of coldness.
-
Page 16: Guide To The Appliance
For selecting and deselecting set- for the whole appliance tings mode b Optical interface i For deactivating the temperature/ (for Miele Service only) door alarm c For selecting the refrigerator or j Display with temperature and sym- freezer section... -
Page 17: Explanation Of Symbols
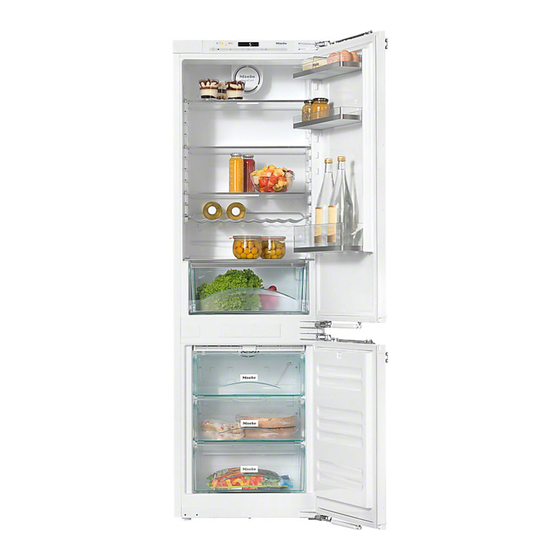
Guide to the appliance Explanation of symbols Symbol Meaning Function Safety lock Prevents the user from unintentionally turn- ing off the appliance, adjusting the temper- ature, turning on the automatic SuperCool/ SuperFreeze functions or entering settings Audible signals Selection options for the button tone and the door and temperature alarm tone ... - Page 18 Guide to the appliance a Control panel b Fan c Egg tray/door shelf d Adjustable rack e Shelf with lighting (FlexiLight) f Bottle shelf g Bottle rack h Interior lighting for fruit and vegetable drawer i Fruit and vegetable drawer j Condensate channel and drain hole k Freezer drawers...
-
Page 19: Accessories
Guide to the appliance Cool pack Accessories Accessories supplied Bottle holder The cool pack prevents the temperature in the freezer rising too quickly in the event of a power outage. This can help prolong the storage time. The cool pack will be at its most effec- tive after it has been in the freezer for approx. -
Page 20: Optional Accessories
Guide to the appliance Optional accessories KKF-FF Active AirClean carbon filter with holder A range of useful Miele accessories and care products are available for your ap- Carbon filters neutralize unpleasant pliance. odors in the refrigerator section for im- proved air quality. -
Page 21: Switching On And Off
Switching on and off Before first use Operating the appliance A light touch on the sensors is all that is Packaging material required to operate this appliance. Remove all packaging material from A tone will sound each time a sensor is the inside of the appliance. - Page 22 Switching on and off When the refrigerator door is opened, Individual settings can be set for each the interior lighting comes on and the zone. LED lighting on the adjustable shelves becomes brighter until it reaches its maximum brightness. When the appliance is switched on for the first time, the sensor button for the ...
-
Page 23: Switching Off The Appliance
Switching on and off Turning the refrigerator section back Switching off the appliance on again The refrigerator section can be turned on separately. Touch the on/off button. If this is not possible, the safety lock is activated. The temperature shown on the display ... -
Page 24: Turning Off For Longer Periods Of Time
Switching on and off Turning off for longer periods of time If, during a long absence, the ap- pliance is switched off but not cleaned and the door(s) left shut, there is a danger of bacteria building up inside the appliance. It is essential to clean the appliance. -
Page 25: The Correct Temperature
The correct temperature It is very important to set the correct . . . in the refrigerator section temperature for storing food in the ap- We recommend a temperature of 39°F pliance. Bacteria will cause food which (4°C) in the refrigerator section. is not stored at the correct temperature to deteriorate rapidly. -
Page 26: Temperature Display
The correct temperature Temperature display Setting the temperature for the refrigerator/freezer section In normal operation the display shows The temperatures for the refrigerator the current average refrigerator and freezer sections are set separately. temperature and the current tempera- ture in the warmest part of the freezer. - Page 27 The correct temperature The following information appears on If you have adjusted the temperature, the display when the sensors are wait for approx. 6 hours if the appli- touched: ance is not very full and for approx. 24 hours if the appliance is full before –...
-
Page 28: Using Automatic Supercool And Superfreeze
Using Automatic SuperCool and SuperFreeze Turning off automatic SuperCool The automatic SuperCool func- tion The automatic SuperCool function turns off automatically after approx. 12 hours. The automatic SuperCool function can The appliance will then continue to op- be used to rapidly reduce the tempera- erate at normal power. -
Page 29: Automatic Superfreeze Function
Using Automatic SuperCool and SuperFreeze Turning on automatic SuperFreeze Automatic SuperFreeze func- tion For freezing small quantities of food, the automatic SuperFreeze function should For best results, turn on automatic Su- be turned on 6 hours beforehand. If perFreeze before putting fresh food in you are freezing the maximum load of the freezer. - Page 30 Using Automatic SuperCool and SuperFreeze Turning off SuperFreeze The automatic SuperFreeze function will switch itself off automatically after ap- prox. 30 - 65 hours. The quantity of fresh food placed in the freezer deter- mines just how long the SuperFreeze function stays on. The SuperFreeze symbol will then go out and the appli- ance will run at normal power again.
-
Page 31: Temperature And Door Alarm
Temperature and door alarm Your appliance is equipped with a warn- If the temperature in the freezer ing system to ensure that temperature remains above 0°F (-18 °C) for a long increases in the freezer section do not time, check that the frozen food has go unnoticed and also prevents energy not started to defrost. -
Page 32: Door Alarm
Temperature and door alarm Cancelling the door alarm Door alarm If the alarm is disturbing you, it can be The appliance is fitted with a warning switched off. system to avoid increased energy con- sumption and food becoming warm if the door is left open. -
Page 33: Selecting Additional Settings
Selecting additional settings Certain settings for the appliance can Safety lock only be selected in settings mode. The safety lock can be activated to pre- vent: While you are in settings mode, the door alarm and any other fault mes- –... -
Page 34: Temperature Unit (Celsius Or Fahrenheit)
Selecting additional settings Temperature unit (Celsius or Fahrenheit) The temperature can be displayed in ei- ther Fahrenheit °F or Celsius °C. De- By touching the or sensor, you grees Fahrenheit °F is the factory set- can now select whether the safety ting. - Page 35 Selecting additional settings Setting the temperature display to Fahrenheit You can now select °C by touching the or button. Touch the settings button. All symbols available for selection will appear on the display and the sym- bol will flash.
-
Page 36: Acoustic Signals
Selecting additional settings Acoustic signals The appliance has acoustic signals such as the button tone and the door and temperature alarms. You can now select °F by touching the or button. You can turn the button tone and the door alarm on and off, but you cannot turn off the temperature alarm. -
Page 37: Display Brightness
Selecting additional settings Display brightness You can adjust the brightness of the display to suit the ambient light condi- tions in the room. By touching the or sensors you can now select the following: The display brightness can be adjusted 0 : Sensor tone off;... -
Page 38: Sabbath Mode
Selecting additional settings Sabbath mode The appliance offers a Sabbath mode for the purposes of religious obser- vance. By touching the or sensor, you can now alter the brightness of the The following are switched off: display: – The interior lighting when the appli- 1 : Dimmest setting ance door is opened, 2 : Medium setting... -
Page 39: Carbon Filter Replacement Indicator
Selecting additional settings As soon as the symbol goes out in Turning on Sabbath mode the display after 3 seconds, Sabbath mode is switched on. Turn off Sabbath mode after the Sab- bath has passed. Touch the Settings sensor. Turning off Sabbath mode All symbols available for selection will appear in the display and the ... - Page 40 Selecting additional settings Activating the carbon filter replace- ment indicator or resetting the counter Touch the OK sensor button to con- firm the selection. The selected setting is applied; the Touch the settings sensor button. symbol flashes. All symbols available for selection will appear on the display and the ...
-
Page 41: Storing Food In The Refrigerator Section
Storing food in the refrigerator section Various cooling zones Do not load more than a maximum of 35 lb (16 kg) of food in the appliance Due to natural air circulation there are door. different temperature zones in the re- frigerator section. ... -
Page 42: Food Which Is Not Suitable For Storage In The Refrigerator Section
Storing food in the refrigerator section Coldest area Food which is not suitable for storage in the refrigerator sec- The coldest area in the Fridge Zone is directly above the fruit and vegetable tion drawer and at the back of the appli- Not all food is suitable for refrigeration ance. -
Page 43: What To Be Aware Of When Shopping For Food
Storing food in the refrigerator section What to be aware of when Storing food correctly shopping for food Ensure that food stored in the refrigera- tor section is in packaging or covered The freshness of food when first placed properly. This will prevent food smells in the appliance is the most important from affecting other foods, food from factor in determining how long it stays... -
Page 44: Adjusting The Interior Fittings
Adjusting the interior fittings Shelf with lighting Adjusting the door shelf/bottle shelf The LED lighting is located on the stain- less steel trim of the shelf. By adjusting Danger of injury! the position of the shelf in the refrigera- Only move the door shelves/bottle tor section, you can change the illumi- shelves in the door when they are nation in this section as required. -
Page 45: Moving And Fitting The Bottle Holder
Adjusting the interior fittings Moving and fitting the bottle Removing and replacing the holder fruit and vegetable drawer The fruit and vegetable drawer is on telescopic runners and can be removed for filling, emptying, or cleaning pur- poses: Pull out the drawer as far as it will go, and then lift it up and out. -
Page 46: Moving The Carbon Filter
Adjusting the interior fittings Moving the carbon filter The carbon filter with KKF-FF holder (Active AirClean) is available as an op- tional accessory (see “Accessories - Optional accessories”). When you are storing very strong- smelling food (e.g., cheese): – Place the holder with the carbon fil- ters on the adjustable shelf where this food is being kept. -
Page 47: Freezing And Storing Food
Freezing and storing food If food is frozen quickly, the cells have Always observe USDA food safety less time to lose moisture, so they guidelines. shrink less. As there is not so much moisture loss, it is easier for the food to ... -
Page 48: Home Freezing
Freezing and storing food – Placing hot food or drink in the Home freezing freezer causes food that is already Only freeze food that is fresh and in frozen to partially thaw and increases good condition. energy consumption. Allow hot food and drink to cool down before plac- Tips for home freezing ing it in the freezer. - Page 49 Freezing and storing food Before placing food in the freezer - Freezing the maximum amount (see data plate) When freezing more than 4.5 lbs (2 kg) of fresh food, switch on the au- Ensure ventilation slots at the back tomatic SuperFreeze function some of the freezer section are always free time before placing food in the freezer from obstruction.
-
Page 50: Defrosting
Freezing and storing food Storage time for frozen food Defrosting The storage life of food is very variable, Frozen food can be thawed in various even at a constant temperature of 0°F ways: (-18°C). Decomposition processes also – in the microwave, take place in frozen food, albeit at a very reduced speed. -
Page 51: Adjusting The Interior Fittings
Freezing and storing food Once frozen, use a blunt instrument, Cooling drinks quickly for example a spoon handle, to re- Risk of injury from broken glass! move the ice cube tray from the Bottles and cans of drinks, particu- freezer if it is stuck. -
Page 52: Automatic Defrosting
Automatic defrosting Freezer Zone WARNING! DANGER of injury and damage! The appliance is equipped with a Do not use any mechanical or other “NoFrost” system. The freezer defrosts types of aids which are not recom- automatically. mended by the manufacturer to ac- The moisture generated in the appli- celerate the defrosting process. -
Page 53: Cleaning And Care
Cleaning and care Cleaning agents WARNING! DANGER of electric shock! Cleaning and conditioning agents Unplug the appliance or trip the cir- used inside the appliance must be cuit breaker. food safe. To avoid damaging the surfaces of your WARNING! Fire hazard! appliance, do not use Do not damage the coolant... -
Page 54: Preparing The Appliance For Cleaning
Cleaning and care Dismantling the shelves / shelves Preparing the appliance for with lighting cleaning Switch the appliance off. The stainless steel trim with LED lighting must not be placed in water. The display goes out and cooling is Clean the stainless steel trim with turned off. - Page 55 Cleaning and care Dismantling the bottle and door shelves The stainless steel trim on the bottle and door shelves is not suit- able for dishwashers. Remove the trim before cleaning the door shelves in a dishwasher. To remove the stainless steel trim, pro- ...
-
Page 56: Cleaning The Interior And Accessories
Cleaning and care The following parts can be cleaned in Cleaning the interior and ac- the dishwasher: cessories The maximum temperature of the Clean the appliance at least once a dishwashing program selected must month. not exceed 131°F (55°C). Clean up any spills, stains or food im- Contact with natural dyes from car- mediately. -
Page 57: Cleaning The Door Seal
A build-up of dust will increase the en- 0°F (-18°C) or colder. ergy consumption of the appliance. The air vents should be cleaned on a regular basis with a brush or vacuum cleaner (you could use a Miele vac- uum cleaner dusting brush, for exam- ple). -
Page 58: Replacing The Carbon Filters
Remove both carbon filters and place the new filters with the surrounding Replacement KKF-RF carbon filters edge pointing downward in the can be obtained from the Miele Tech- holder. nical Service, from your dealer, or from Miele's website. Tip: The carbon filter holder is dish- washer safe. -
Page 59: Frequently Asked Questions
Check whether the fuse has tripped. There could be a fault with the appliance, the household electrical wiring or another electrical appliance. Contact a qualified electrician or Miele Technical Service for assistance. The compressor comes Not a fault. The temperature setting is too high. - Page 60 Frequently Asked Questions Problem Possible cause and solution The compressor is turn- The ventilation grille is obstructed or dusty. ing on more frequently Do not block the ventilation gaps. and for longer periods Clean the ventilation gaps on a regular basis to re- of time;...
- Page 61 LED indicator light. The door seal is dam- No tools are required to change the door seal. aged and needs to be Contact Miele Service. replaced. Ice or condensation has The door seal has come out of its groove.
- Page 62 Frequently Asked Questions Messages in the display Message Possible cause and solution The symbol lights up The safety lock has been activated. in the display. You can- Completely deactivate the safety lock (see “Select- not switch the appli- ing additional settings”, section “Activating and de- ance off.
- Page 63 If it has, cook it before freezing it again. “F0 to F9” appears in There is a fault. the display. Contact Miele Technical Service. There is a fault. “FE*” appears on the Contact Miele Service. display.
- Page 64 Frequently Asked Questions The interior lighting is not working. Problem Possible cause and solution The interior lighting is The appliance has not been turned on. not working. Turn the appliance on. Sabbath mode is on: The display is black and the ap- pliance is cooling.
- Page 65 Danger of electric shock. There are live electrical components under the lighting cover. The LED lighting may only be repaired or replaced by Miele Service. Risk of injury from LED lighting. Light intensity corresponds to laser beam class 1/1M.
- Page 66 Push in the shelf until it clicks into position. Close the appliance door. When the door is opened again, the interior lighting will come on. If this does not happen, there is a fault. Contact Miele Service.
- Page 67 Frequently Asked Questions Other problems Problem Possible cause and solution The door to the freezer This is not a fault. The suction caused by opening section will not open and closing the door is preventing the door from because it has been opening.
-
Page 68: Causes Of Noises
Causes of noises Normal Cause noises Brrrrr... A humming noise is made by the motor (compressor). This noise can get louder for brief periods when the motor switches on. Blub, blub... A gurgling noise can be heard when the coolant circulates through the pipes. -
Page 69: Technical Service
Contact in case of fault In the event of a fault which you cannot remedy yourself, please contact your Miele dealer or Miele Technical Service. Contact information for Miele Techni- cal Service can be found at the end of this document. -
Page 70: Information For Dealers
Information for dealers Demo mode The appliance can be demonstrated in the showroom or at exhibitions in “Demo mode”. In this mode, the control Touch and hold the button. panel and interior lighting are active but the compressor remains off. Turning on demo mode ... - Page 71 Information for dealers Turning off Demo mode The symbol is illuminated in the dis- play. Touch the or sensor so that the symbol 0 appears in the display (meaning: Demo mode is inactive). Touch the settings sensor. All symbols available for selection will appear in the display and the symbol flashes.
-
Page 72: Electrical Connection
Electrical connection Wait for 1 hour after installation before Danger of electric shock! plugging the appliance into the power The appliance must only be switched supply. This allows coolant and refriger- on when it has been installed in ac- ator oil to settle in accordance with reg- cordance with the installation in- ulations. - Page 73 Electrical connection The outlet must be easily accessible in Do not connect the appliance to an in- an emergency so that the appliance can verter such as those used with an au- be quickly disconnected from the elec- tonomous energy source e.g. solar trical supply in case of an emergency.
-
Page 74: Installation Information
Installation information – The plug and power cord must not Side-by-side touch the back of the appliance as The appliance has two side-wall heaters they could be damaged by vibrations encased in foam and can be installed from the appliance. side-by-side with other appliances. -
Page 75: Climate Class
Installation information Climate class The air at the back wall of the appliance warms up. Therefore the cabinet must The appliance is designed for use within be constructed in such a way that en- a certain climate range (ambient tem- sures unhindered ventilation (see “Built- peratures) and should not be used out- in dimensions”). - Page 76 Installation information Lower ventilation slit If you wish to fit a grille in the ventila- tion openings, the ventilation open- The appliance can be ventilated via the ings must be larger than 31 square cabinet plinth with the ventilation grille inches.
-
Page 77: Cabinet Doors
The cabinet door must be fitted cor- cabinet cabinet rectly and not under tension. door door Tip: Please also see the diagram and KFNS 37432 iD 37 lb 26 lb information on the following pages on (17 kg) (12 kg) calculating the cabinet door height. - Page 78 Installation information Cabinet door dimensions / height of freezer section cabinet door / height of refrigerator section cabinet door Refrigerator section cabinet door Freezer section cabinet door Refrigerator section appliance door Freezer section appliance door Fitted unit cover panel Fitted unit cabinet base...
- Page 79 Installation information – Height of freezer section cabinet 27 3/8" (695 mm) door 9/16" (15 mm) 1. The freezer section cabinet door 24 3/4" (629 mm) must be at least A = 27 3/8" (695 mm) to cover the bottom section 38 15/16" (989 mm) of the appliance. 70 3/8" (1788 mm) 2.
-
Page 80: Before Installing The Appliance
Installation information Before installing the appliance Before installation, remove the bag of installation and other accessories from the appliance and remove the profile strip from the outer appliance door. Do not remove the following from the back of the appliance ... -
Page 81: Wall Spacer At The Back
Installation information Wall spacer at the back At a furniture depth of less than 21 3/4'' (553 mm), you can remove the wall spacer from the back of the appli- ance so that you can push the appli- ance right into the niche. Removing the wall spacer can in- crease energy consumption as there is then a smaller ventilation area. -
Page 82: Installation Dimensions
If the appliance is suitable for installation in a niche, ensure before installation that it has precisely the correct dimensions. The specified ventilation grille dimen- sions must be observed to ensure that the appliance functions correctly. Niche height Freezer Zone KFN 37432 iD, KFNS 37432 iD 69 3/4"-70 3/8" 27 3/8" (1,772–1,788 mm) (695 mm) -
Page 83: Limiting The Opening Angle Of The Appliance Doors
Limiting the opening angle of the appliance doors The door hinges are set ex factory to al- low the appliance doors to be opened wide. However, if the opening angle of the doors needs to be limited for any rea- son, the hinge can be adjusted to ac- commodate this. -
Page 84: Changing The Door Hinges
Changing the door hinges Open both appliance doors. Always change the door hinging with the assistance of another person. Remove the door shelves/bottle shelves from the appliance door. The appliance is supplied with right- hand hinging. If left-hand hinging is re- quired, the hinges must be changed: To change the door hinging, you will need the following tools:... - Page 85 Changing the door hinges Undo the screws completely. Danger of injury! The hinges can snap closed. Fit the bracket on the opposite Leave them open. side and attach the screws loosely . Slightly loosen the hinge screws Undo the screws completely and and .
- Page 86 Changing the door hinges Unscrew the soft-close mechanism The soft-close mechanism folds in when dismantled. Place the door with the front facing down on a stable surface. Using a screwdriver, remove the ball joint and screw it into the adjacent hole.
- Page 87 Changing the door hinges Fastening the soft-close mechanism Now turn over the appliance door so that the outer side faces downwards. Screw the mount onto the hinge and firmly tighten. Pull the soft-close mechanism so ...
-
Page 88: Building In The Appliance
Building in the appliance To install the appliance, you will need Two people are required to install the the following tools: appliance. Install the appliance in a stable, solid housing unit, positioned on an even and level floor. Secure the cabinetry against tipping. ... - Page 89 Building in the appliance Parts required for installation: – For installing the cabinet doors: All installation parts are number-coded. This coding is also used in the installa- tion instructions. – For building the appliance into the niche: All installation instructions given are for a right-hand hinged appliance.
- Page 90 Building in the appliance Preparing the appliance Position the appliance directly in front of the cabinet niche. Use the Allen key to screw the fix- ing brackets into the pre-drilled holes in the appliance door. Screw a second pair of fixing brack- ets ...
- Page 91 Building in the appliance With 5/8" (16 mm) thick unit walls only: Clip the spacers and onto the right of the hinges. Remove the cover . Open the appliance doors. Screw the fixing place loosely into the top left of the appliance using the screws .
- Page 92 Building in the appliance Building in the appliance If the appliance is pushed too far into the niche, the doors may not close properly once the cabinet doors have been installed. This can cause ice to build up, condensate to accumulate, and cause the appliance to malfunc- tion.
- Page 93 Building in the appliance Important for cabinetry with door fittings (e.g., knobs, raised seals, etc.): The dimension of these must be taken into account to ensure there is a gap of 1 5/8" (42 mm) all round. Pull the appliance forwards by the appropriate dimension.
- Page 94 Building in the appliance Securing the appliance in the niche Push the loose securing bracket against the cabinet wall. Fix securing bracket to the cabinet Push the appliance onto the cabinet wall with screw . Pre-drill the hole wall on the hinge side.
- Page 95 Building in the appliance To give the appliance additional security in the niche push the batons supplied between the appliance and the cabinet base: Snap off any protruding ends from the securing bracket. They are no longer required and can be disposed ...
-
Page 96: Fitting The Cabinet Doors
Fitting the cabinet doors An installation set or an extra pair of securing brackets is available from Miele Service or from specialist retail- ers for the installation of large and di- vided cabinet doors. Complete the following steps on both doors. - Page 97 Building in the appliance Place the cabinet door with the outer side downwards on a stable surface. Push side cover onto the mounting frame opposite the hinge side. Turn the cabinet door over and attach the handle (if required). ...
- Page 98 Building in the appliance Open the appliance door. Adjusting the position of the door Hang the cabinet doors on adjusting - Adjusting the sides (X) bolts . Adjust the cabinet door. Screw nuts loosely onto the ad- - Adjusting the height (Y) justing bolts.
- Page 99 Building in the appliance Tighten nuts on the appliance Pre-drill fixing holes in the cabinet doors with ring spanner while door and fasten screws . Make sure counter-holding adjusting bolts both metal edges are flush (// sym- with a screwdriver. bol).
- Page 100 Building in the appliance The appliance is properly installed in the niche if: – The doors close properly. – The doors are not sitting against the cabinet carcase. – The seal on the top corner of the handle side is firmly seated. ...
- Page 103 Technical Service. U.S.A. Canada Miele, Inc. Importer Miele Limited National Headquarters 9 Independence Way Headquarters and Miele Centre Princeton, NJ 08540 161 Four Valley Drive Phone: 800-843-7231 Vaughan, ON L4K 4V8 609-419-4298 Fax: www.miele.ca www.mieleusa.com...
- Page 104 KFNS 37432 iD en-US M.-Nr. 10 951 390 / 00...
Need help?
Do you have a question about the KFNS 37432 iD and is the answer not in the manual?
Questions and answers
How do I get rid of the demo mode as the fridge is not getting cold
To disable demo mode on the Miele KFNS 37432 iD fridge, follow these steps:
1. Check if Demo Mode is Active: If the appliance is not cooling but the controls and interior lighting are working, demo mode may be on.
2. Turn Off Demo Mode: Refer to the section “Information for dealers - Demo mode” in the manual for specific instructions.
If further assistance is needed, consult the user manual or contact Miele Technical Service.
This answer is automatically generated