Table of Contents
Advertisement
Advertisement
Table of Contents

Related Manuals for KIP 2050


Summary of Contents for KIP 2050
- Page 1 User's Manual Ver E.2...
-
Page 2: Before Use
We highly appreciate your purchasing our Image Scanner K-75 series (KIP2050, 2080, 2120 and 2160). This USER'S MANUAL contains functional and operational explanation of the Image Scanner K-75 series. Read this USER'S MANUAL carefully before use in order to understand the K-75 series fully and to use more efficiently. - Page 3 WARNINGS FOR THE SAFETY (OBSERVE THESE WARNING) Following warnings are very important to use this equipment safely and to prevent the operator from danger and his/her property from being damaged. Hazardous or damage degree is classified and shown as follows when this machine is erroneously used ignoring this USER'S MANUAL.
- Page 4 WARNINGS Connect the scanner and Ground with each other surely with the grounding wire. Otherwise, it is dangerous for you if you receive an electric shock or at the time of lightning. If the outlet does not have a Grounding Terminal or if it is impossible to connect, call the vendor or service professional for the installation.
- Page 5 CAUTIONS Do not install the machine at the following places. 1. Humidified or dusty place. 2. Unstable floor. When the machine comes down, it may cause the injury. Be careful not to catch your hand between Upper Unit and Main Unit when you close the Upper Unit.
-
Page 6: Table Of Contents
TABLE OF CONTENTS Chapter 1 Before Use Page Required Conditions for the Installation Place 1- 1 1- 2 Originals Prohibited to Copy 1.2.1 Prohibited items by the law 1- 2 1.2.2 Special items to be cared 1- 2 1.2.3 Items protected by the copyright 1- 2 1- 3 Features... - Page 7 Chapter 3 Operation Page Introduction 3- 1 3- 2 Basic Screen 3.2.1 Copy Count setting (Number of copies) 3- 5 3- 6 Copying Media Settings 3.3.1 Roll media feeding 3- 7 A. Automatic roll selection (Auto Paper Mode) 3- 7 B.
- Page 8 Set Copy Mode 3-98 3.8.1 Explanation for Set Copt Job 3-100 3.8.2 Set Copy in the Layout Mode 3-102 3.8.3 Set Copy in the Sort Mode 3-112 3.8.4 Concurrent Print Mode (Check Set) 3-120 3-121 Mode Memory 3.9.1 Calling the Mode Memory 3-122 3.10 Menu Settings 3-124...
- Page 9 Chapter 5 Maintenance and Adjustments Page Usual Maintenance 5- 1 5- 4 LCD Adjustments 5.2.1 LCD contrast adjustment 5- 4 5.2.2 Touch panel positioning 5- 6 5- 9 Pin Layout and Rating of Interface Connector A75UMCON (Ver. E.2)
- Page 10 Chapter 1 Before Use Page 1- 1 Required Conditions for the Installation Place 1- 2 Originals Prohibited to Copy 1.2.1 Prohibited items by the law 1- 2 1.2.2 Special items to be cared 1- 2 1.2.3 Items protected by the copyright 1- 2 1- 3 Features...
-
Page 11: Required Conditions For The Installation Place
Required Conditions for the Installation Place Following conditions have to be satisfied. 1. The power source should be rated from 100V to 240V plus or minus 10%, more than 6A and 50 or 60Hz. Scanner’s voltage condition is automatically corresponded to the voltage of outlet (from 100V to 240V) if only you connect the power plug. -
Page 12: Originals Prohibited To Copy
Originals Prohibited to Copy It is not necessarily allowed to copy every kind of original. You may be punished by the law if only you possess the copy of some kind of original. We recommend you to consider enough before you copy such original. 1.2.1 Prohibited items by the law 1. -
Page 13: Features
Features An image scanner for a large original K-75 series is available to scan 36 inches wide original in maximum. The scanning speed is any of 50.95mm (per a second), 80mm, 120mm and 160mm. When you connect the K-75 series with such digital printers as KIP1230E, KIP2720E, KIP3620E, and KIP9010, they will work as a digital copier. -
Page 14: Specifications
KIP2050 : 50.95mm (per a second) KIP2080 : 80mm KIP2120 : 120mm KIP2160 : 160mm Resolution 400DPI Tone Line, Line/Photo and Photo Interface KIP IF- 8 (For printer) RS232C SCSI-2 (Option) Memory capacity From 64MB (standard) to 320MB (option) Power consumption 190W Environmental conditions Temperature From 10 to 32.5 degrees centigrade... -
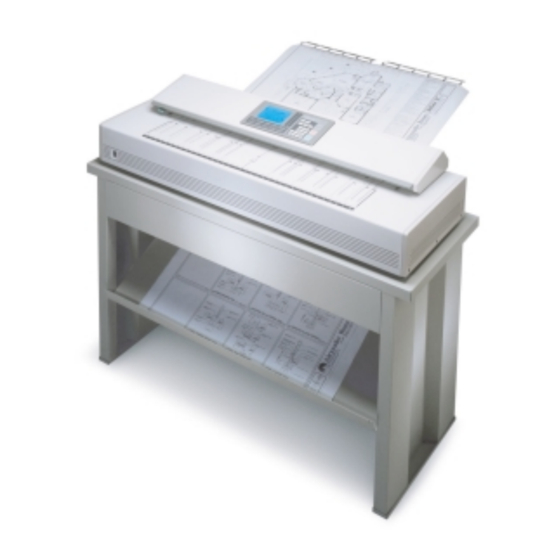
Page 15: Name Of Each Part And Its Function
Name of Each Part and Its Function 1.5.1 Front view Lever Operation Panel Trays Pull up the Lever to unlock and open the Upper Unit. Original Table Power Switch Original Guide Original Receivers Move the original along the Original Guide to avoid original's skewing. 1.5.2 Rear view Ground... -
Page 16: Operation Panel
1.5.3 Operation Panel 26 25 24 2322 21 20 19 PO W ER INTERRUPT RESET SAVE CONCU RREN T RE C OPY SET CO PY PR IN T SAMPLE AUTO ZOOM AUTO PAPER ROTATE STOP/ EJECT START MENU BASIC SCR EEN PAPER ZOOM IM AGE QU ALITY... -
Page 17: Power Indicator And Ready Indicator
Power Indicator and Ready Indicator Power Indicator The Power Indicator lights up with green when you turn on the machine. Ready Indicator The Ready Indicator blinks when the printer is warming up (not ready). It lights up when the printer gets ready for copying. It is put out when some error occurs on either scanner or printer. - Page 18 Error Indicator The Error Indicator lights up with red when the printer has some error. Some Error Message is indicated on the LCD at this time as the following figure. Refer to "Error Message and Treatments" on page 4-1. Upper unit is open Image Paper Zoom...
-
Page 19: How To Operate The Lcd
How to Operate the LCD If you push some of keys (A) below the LCD, the corresponding setting screen is indicated on the LCD. If you push the Paper Key (B), for example, the Paper Setting Screen is indicated which concerns to the settings of copying media as the following right figure. - Page 20 2. If the setting value is indicated in the setting screen and its frame is thick, it is possible to change that setting value. If some setting values are indicated as the following Zoom Setting Screen and you wish to change one of them, press the setting value that you will change in order to make its frame thick.
- Page 21 4. Some setting screen such as Layout/Sort Setting Screen has a subordinate setting screen. If you press “Back”, it is possible to go back to the precedent screen. Print (Layout) Scan Scan Print(Sort) Sort Back Print (Layout) Scan Print(Sort) Scan Back Sort 1-11...
-
Page 22: Difference Of Action At The Time Of Memory Full
Difference of Action at the Time of Memory Full It is possible to connect the K-75 series with each digital printer KIP1230E, KIP2720E, KIP3620E and KIP9010 The machine acts differently at the time of “Memory Full” depending whether or not speeds of scanner and printer are same with each other, whether or not the printer is ready at the time you scan the original, or whether or not the former Copy Job exists in the memory at the time you scan the original. -
Page 23: Scan Mode
[Function] Scan Mode is a mode to send the scanned image data to the computer. We have a scanning software “Kip Scan Client” which is corresponded to the scanner K-75 series. Also it is available to use another scanning software. -
Page 24: Simple Copying
Chapter 2 Simple Copying Page 2- 1 Turning on the Scanner Applicable Original 2- 3 Explanation for Copy Job 2- 4 2- 6 Setting the Original to the Scanner Copying by the Roll Media Feeding 2- 8 2-11 Copying by the Sheet Media Feeding 2-15 Pre-scan 2-17... -
Page 25: Turning On The Scanner
Turning on the Scanner 1) Make sure to connect the power plug to the outlet firmly. WARNINGS 1. Do not handle the power plug with wet hand since it will cause to receive an electric shock. 2. Make sure to connect the machine to the ground. - Page 26 4) When the scanner gets ready, the LCD indicates the Basic Screen as the following figure. All settings are in default conditions at this time. If the printer is not ready for copying although the scanner has been ready, the Ready indicator blinks.
-
Page 27: Applicable Original
Applicable Original The scanned original must satisfy the following requirements. 1. Thickness is from 0.05mm to 1.6mm. (50g to 120g/centare) 2. Width is from 210mm to 940mm. 3. Length is from 210mm to 16,000mm. Note : When you scan an original which is thicker than 0.12mm, make sure to select 50% or larger zoom ratio. -
Page 28: Explanation For Copy Job
Explanation for Copy Job There are 2 kinds of jobs such as Copy Job and Set Copy Job. The Copy Job consists of the image data of one original. The Set Copy Job consists of image data of some sheets of original. This section explains only Copy Job. - Page 29 When the printer has finished to print out the Copy Job A, it starts printing out the next Copy Job B. Copy Job B Copy Job C Copy Job D (On printing) (Waiting) (Waiting) Memory [Maximum storable number of Copy Jobs] If you scan originals successively, it is possible to store 99 sheets of originals (99 Copy Jobs) in maximum.
-
Page 30: Setting The Original To The Scanner
Setting the Original to the Scanner 1) There are marking lines for original size on the Original Table. Move the Original Guide to the required size mark according to the width of scanned original. 2) Push in the original with face down under the Upper Unit along the Original Guide until the leading edge touches the Original Feeding Roller. - Page 31 (Reference) The scanner decides original’s size by detecting its width. Display of original size Original width (Inch) (Reference) It is possible to change the displayed original size with another one manually. As for the detail, refer to “Original” on the page 3-125. A75UM2E1 (Ver.
-
Page 32: Copying By The Roll Media Feeding
Copying by the Roll Media Feeding You have 2 ways to select the roll media that you use for copying. One is “automatic roll selection” and another is “manual roll selection”. We will introduce the way of copying by the “manual roll selection” here since it is simpler than “automatic roll selection”. - Page 33 4) There are sources of copying media (Roll Numbers from “1” to “4” and “Bypass”) under “Roll” of the Paper Setting Screen. Both size and material of roll media are shown for each Roll Number. Press any of Roll Number according to your requirement. The selected Roll Number is colored showing that it is valid now.
- Page 34 7) Push the Start Key. The scanner starts carrying the original to scan it. STOP/ LED lamp of the Start Key lights up with yellow EJECT during scanning, and it is put out after scanning. Note : Right after starting to copy pushing the Start Key, sometimes the original is carried back to the trailing edge side, and then START...
-
Page 35: Copying By The Sheet Media Feeding
Copying by the Sheet Media Feeding When you do copying by the sheet media feeding, it is needed to decide sheet size setting and material setting according to the used sheet media. There are 2 ways to decide the sheet size such as “automatic sheet size selection” and “manual sheet size selection”. - Page 36 4) If “Auto” below “Size” is validated, press it to cancel. Roll Size Media Roll Size Media 1:36" Plain 1:36" Plain 36" 18" 36" 18" Auto Auto Plain Paper Paper Plain Paper Paper 2:30" 2:30" Vellum Vellum 34" 17" 34" 17"...
- Page 37 7) Change several settings such as zoom ratio, cutting size and Copy Count as you like. As for the way to change these settings, refer to the corresponding page in the chapter 3. 8) When you have finished to change and decide all settings, push the Basic Screen Key to go back to the Basic Screen.
- Page 38 [Setting the sheet media to the printer] 1. If scanner’s speed and printer’s one are same, the Set a sheet on the printer LCD indicates “Set a sheet on the printer” when you Image Paper Zoom set the original to the scanner. Quality So, set the media to the printer, and then push the Bypass...
-
Page 39: Pre-Scan
Pre-scan [Function] Even if the printer is not ready for copying, it is possible to scan the original in advance. The image data of the original is stored and kept in the memory as Copy Job until the printer gets ready. - Page 40 4) Set the original to the scanner when the Ready Indicator is blinking, and then push the Start Key. The original is scanned as usual, but the copy is not printed out at present. 5) When the printer gets ready for copying, the Ready Indicator stops blinking but lights up and the scanned image is printed out automatically.
-
Page 41: Treatment Against Roll Empty During Copying
Treatment against Roll Empty during Copying When the roll media of the selected Roll Media has been emptied during multiple sheets of copying (including Set Copy), the rest of copies are printed out in different 2 ways whether or not another Roll Deck has roll media of same size and material. -
Page 42: No Roll Deck Has Same Roll Media
2.8.2 No Roll Deck has same roll media If the used roll media is emptied during a multiple sheets of copying (including Set Copy) and no Roll Deck has the same roll media, the LCD indicates such error message as “Roll 1 is empty” and the Roll Empty Indicator lights up. -
Page 43: Turning Off The Scanner
Turning off the Scanner 1) Confirm that both original and copies have been ejected completely, and that the printer has stopped printing action. 2) Push the “O” side of the Power Switch to turn off the scanner. 3) LCD indicates no information and all LED lamps on the Operation Panel are put out. Image Paper Zoom... - Page 44 Chapter 3 Operations Page 3- 1 Introduction 3- 2 Basic Screen 3.2.1 Copy Count setting (Number of copies) 3- 5 Copying Media Settings 3- 6 3.3.1 Roll media feeding 3- 7 A. Automatic roll selection (Auto Paper Mode) 3- 7 B.
- Page 45 Date Stamp Settings 3-84 3.7.1 How to print the Date Stamp 3-85 3.7.2 Main position of Date Stamp 3-90 3.7.3 Rotation of Date Stamp 3-91 3.7.4 Horizontal shift and vertical shift of Date Stamp 3-92 3.7.5 Order of date and time 3-95 3.7.6 Type of Date Stamp...
-
Page 46: Introduction
Introduction The Operation Panel can be divided into two parts such as LCD/Key Part and Key Part. POWER INTTERUPT RESET SAVE CONCURRENT RE COPY SET COPY PRINT SAMPLE ROTATE AUTO ZOOM AUTO PAPER STOP/ EJECT MENU START BASIC SCREEN PAPER ZOOM IMAGE QUALITY REFERENCE... -
Page 47: Basic Screen
Basic Screen [Function] The Basic Screen indicates basic information for copying such as original size, copy size, Copy Count, copying media, zoom ratio and so on. The Basic Screen is indicated on the LCD firstly whenever you turn on the machine. It is possible to decide the Copy Count only in the Basic Screen. - Page 48 3. Original size (C) Original:24" Image (Example : 24” original) Paper Zoom Quality 1:36" Line Plain Paper Background 100.0% Synchro [Threshold] Auto 4. Sheet media size (D) Original:24" Copy:24" Image (Example : 24” sheet media) Paper Zoom Quality Bypass Line Plain Paper Background 100.0%...
- Page 49 7. Layout/Sort (G) When either Layout or Sort is done, “Layout/Sort” is indicated in the Basic Screen. Image Paper Zoom Quality (Note) 1:36" Line Plain Paper If you select “Layout a” or “Sort a”, however, Background 100.0% “Layout/Sort” is not indicated in the Basic Screen. Synchro As for the detail, refer to “Set Copy Mode”...
-
Page 50: Copy Count Setting (Number Of Copies)
3.2.1 Copy Count setting (Number of copies) Decide the Copy Count in the following way. Note that it is possible to decide the Copy Count only in the Basic Screen. 1) Push the Basic Screen Key to indicate the Basic Screen on the LCD. Image Paper Zoom... -
Page 51: Copying Media Settings
Copying Media Settings If you push the Paper Key below the LCD, the Paper Setting Screen is indicated on the LCD and it becomes possible to change and decide the following settings. The LED lamp of the Paper Key lights up when the LCD is indicating the Paper Setting Screen. 1. -
Page 52: Roll Media Feeding
3.3.1 Roll media feeding Since the printer has some pieces of roll media, you have to select one of them for copying by way of “automatic roll selection” or “manual roll selection”. Note : In case of the roll media feeding, it is impossible to decide the material setting (plain paper, vellum and film) and format setting (either Engineering and Architecture) on scanner’s side. - Page 53 3) Set the original to the scanner. If the printer has a roll media that matches the reduced or enlarged copy image size, it is selected automatically. Original:36" Image Paper Zoom Quality 4:18" Line Plain Paper Background 50.0% Synchro [Threshold] Auto Example : Since the original size is 36”...
- Page 54 [How to cancel the Auto Paper Mode] You have 2 ways to cancel the Auto Paper Mode. 1. Push the Auto Paper Key when its LED lamp is lighting up. The Auto Paper Mode is cancelled and the LED lamp is put out. CONCURRENT CONCURRENT SET COPY...
-
Page 55: Manual Roll Selection
B. Manual roll selection [Operation] 1) Push the Paper Key to indicate the Paper Setting Screen on the LCD. Roll Cut Mode Size 1:36" Synchro 48" 30" 12" Plain Paper MENU BASIC SCREEN PAPER 2:30" Standard 44" 24" 11" Vellum 3:24"... -
Page 56: Sheet Media Feeding
3.3.2 Sheet media feeding If you do copying by the sheet media feeding, it is needed to decide both sheet size setting and material setting according to the used sheet media. The sheet size is decided by way of “automatic sheet size selection” or “manual sheet size selection”. A. - Page 57 3) If “Auto” is not selected, press “Auto” to enter the Auto Sheet Size Mode. “Auto” is colored when selected. Roll Size Media Roll Size Media 1:36" 1:36" Plain Plain 36" 18" 36" 18" Auto Auto Plain Paper Paper Plain Paper Paper 2:30"...
- Page 58 6) Decide the zoom ratio making reference to “Zoom Settings” on the page 3-27. Required sheet size is indicated automatically as [Copy : 18”] calculating from original size and zoom ratio. (Required sheet size) Original:36" Copy:18" Mode Zoom 50.0% Media Size Zoom Program...
- Page 59 2. When you use a smaller (narrower) sheet media than the sheet size setting, only original’s central image will be copied. (Result of copy) Original Copy Lost image Lost image 3-14 A75UM3E3 (Ver. E.2)
-
Page 60: Manual Sheet Size Selection
B. Manual sheet size selection This way of selection is suitable when the sheet size is already decided. [Operation] 1) Push the Paper Key to indicate the Paper Setting Screen on the LCD. Roll Cut Mode Size 1:36" Synchro 48" 30"... - Page 61 4) Select same size and material with the used sheet media. Note : There may be the case that the Ready Indicator blinks right after you changed the material setting. This is because the printer is changing the fusing temperature according to the selected material setting since the proper temperature is different among plain paper, vellum and film.
-
Page 62: Cut Modes
3.3.3 Cut Modes It is possible to select either Synchro Cut or Standard Cut in the Paper Setting Screen. These Cut Modes are effective only in the roll media feeding. A. Synchro Cut [Function] Roll media is cut as long as the Output Image Length. Synchro Cut is suitable when the original is not standard sized. - Page 63 [How to select the Synchro Cut] 1) Push the Paper Key to indicate the Paper Setting Screen on the LCD. Roll Cut Mode Size 1:36" Synchro 48" 30" 12" Plain Paper MENU BASIC SCREEN PAPER 2:30" Standard 44" 24" 11" Vellum 3:24"...
-
Page 64: Standard Cut
B. Standard Cut [Function] Roll media is cut in some length of standard size such as 36 inches and 22 inches. Standard Cut is suitable when you copy the original of standard size with Standard Zoom Ratios such as “133.3%” and “66.7%”. It is possible to select any of standard cut sizes 48, 44, 42, 36, 34, 30, 18, 17, 12, 11, 9 and 8.5 inches regardless of the width of selected roll media. - Page 65 [How to select the Standard Cut] 1) Push the Paper Key to indicate the Paper Setting Screen on the LCD. Roll Cut Mode Size 1:36" Synchro 48" 30" 12" Plain Paper MENU BASIC SCREEN PAPER 2:30" Standard 44" 24" 11" Vellum 3:24"...
- Page 66 4) Select any of standard cut sizes from 8.5 inches to 48 inches. The selected cut size is colored. Roll Cut Mode Size Roll Cut Mode Size 1:36" Roll 1:36" Synchro Synchro 48" 30" 12" 48" 30" 12" Plain Paper Plain Paper 2:30"...
-
Page 67: Divide Mode
3.3.4 Divide Mode [Function] The copy image of a long original can be divided and printed on some sheets of copying media. The roll media is cut in the length of standard size such as “22 inches” and “36 inches”. You can not select the Synchro Cut. - Page 68 2) Press your required Roll Number. Roll Cut Mode Size Roll Cut Mode Size 1:36" 1:36" Synchro Synchro 48" 30" 12" 48" 30" 12" Plain Paper Plain Paper 2:30" 2:30" Standard Standard 44" 24" 11" 44" 24" 11" Vellum Vellum 3:24"...
- Page 69 [How to cancel the Divide Mode] You have 2 ways to cancel the Divide Mode. 1. Cancel the Divide Mode pressing “Divide” when it is colored. Roll Cut Mode Size Roll Cut Mode Size 1:36" 1:36" Synchro Synchro 48" 30" 12"...
- Page 70 [References] 1. If you need some sets of divided copies, it is possible to sort them if you do Divide Copy with Set Copy Mode and Sort Mode as the following example 2. As for the way to do Set Copy in the Sort Mode, refer to “Set Copy in the Sort Mode” on the page 3-112.
- Page 71 2. If you do re-copying after you have done Divide Copy normally, only the last one (only 3rd copy in case of the following example) of divided copies are printed out again. Original Scanning direction Divide Copy Re copy If you do Divide Copy with Set Copy Mode even if the Copy Count is “1”, however, it is possible to re-copy all pages from the 1st one to the last one.
-
Page 72: Zoom Settings
Zoom Settings It is possible to change the zoom ratio within the range from 25.0% to 400.0%. If you push the Zoom Key below the LCD, the Zoom Setting Screen is indicated on the LCD and it becomes possible to change and decide the zoom ratio in any of the following modes. The LED lamp of the Zoom Key lights up when the LCD is indicating the Zoom Setting Screen. -
Page 73: Auto Zoom Mode
3.4.1 Auto Zoom Mode [Function] If only you set the original to the scanner and decide the size of media, the Auto Zoom Mode automatically selects a proper zoom ratio so that the copy image matches the size of the media. A. - Page 74 3) Push the Paper Key to indicate the Paper Setting Screen on the LCD, and then select your required roll media. Original:36" Roll Cut Mode Size 1:36" Synchro 48" 30" 12" Plain Paper MENU BASIC SCREEN PAPER 2:30" Standard 44" 24"...
- Page 75 [How to cancel the Auto Zoom Mode] You have 2 ways to cancel the Auto Zoom Mode. 1. Push the Auto Zoom Key when its LED lamp is lighting up. The Auto Zoom Mode is cancelled and the LED lamp is put out. CONCURRENT CONCURRENT SET COPY...
-
Page 76: In Case Of The Sheet Media Feeding
B. In case of the sheet media feeding 1) Push the Auto Zoom Key to enter the Auto Zoom Mode. The LED lamp of the Auto Zoom Key lights up showing that the Auto Zoom Mode is valid now. Note : When the Auto Zoom Mode is valid, both Auto Paper Mode and Rotate Mode are always cancelled. - Page 77 4) Push the Basic Screen Key to indicate the Basic Screen on the LCD. The Basic Screen indicates the zoom ratio that the Auto Zoom Mode selected. Example : Original size is 36 inches. 24 inches sheet media is used. Therefore, 66.7% is selected.
-
Page 78: Standard Zoom Ratio
3.4.2 Standard Zoom Ratio [Function] The following zoom ratios are called Standard Zoom Ratios that are used often for reduction and enlargement of standard size as “24 inches to 36 inches” and “18 inches to 12 inches”. It is possible to choose these zoom ratios easily pressing “Reduce”, “100%” and “Enlarge” in the Zoom Setting Screen. - Page 79 3) Press any of “Reduce”, “100%” and “Enlarge” according to your requirement. 100% The zoom ratio becomes 100.0% when you Mode Zoom press “100%”. 100.0% Media Size Zoom Program Reduce 100% Enlarge XY Zoom Reduction Whenever you press “Reduce”, you can choose the Mode Zoom following reduction standard zoom ratios orderly.
-
Page 80: Mode (Direct Selection Of Percentage)
3.4.3 % Mode (Direct selection of percentage) [Function] It is possible to input your required zoom ratio directly pushing Ten Keys. Zoom range is from 25.0% to 400.0%, and the setting unit is 0.1%. [Operation] 1) Push the Zoom Key to indicate the Zoom Setting Screen on the LCD. Mode Zoom 100.0%... - Page 81 3) Input your required zoom ratio pushing Ten Keys. It is also possible to select your preferable zoom ratio pressing on the LCD. (Example : 250.0%) Mode Zoom 100.0% Media Size Zoom Program Mode Zoom 250.0% Reduce 100% Enlarge Media XY Zoom Size Zoom...
-
Page 82: Media Size Mode (Ratio Between Original Size And Media Size)
3.4.5 Media Size Mode (Ratio between original size and media size) [Function] If only you decide original’s size and required copy size, the Media Size Mode automatically selects the necessary zoom ratio. Both original size and copy size must be standard size such as “36 inches” and “12 inches”. [Operation] 1) Push the Zoom Key to indicate the Zoom Setting Screen on the LCD. -
Page 83: Zoom Program Mode
3.4.6 Zoom Program Mode [Function] If you decide the ratio between original and copy, the Zoom Program Mode selects the necessary zoom ratio automatically. Measure the actual image size of the original to utilize it as an outline to decide the ratio. (Example) If the image size on the original is 4 inches, and if you 4 inches... - Page 84 3) When the frame of setting value is thick, it is possible to change the value. Change the value of original size pressing It is also possible to change the value inputting directly with Ten Keys. Mode Program Mode Program Original Copy Original...
-
Page 85: Xy Zoom Mode
3.4.7 XY Zoom Mode [Function] Since this scanner has XY Zoom Mode, it is possible to do copying although horizontal zoom ratio (X) and vertical one (Y) are different from each other. The XY Zoom Mode is used together with either “% Mode” or “Zoom Program Mode”. Zoom (X) is 140.0%. - Page 86 [Operation] 1) Push the Zoom Key to indicate the Zoom Setting Screen on the LCD. Mode Zoom 100.0% PAPER ZOOM IMAGE QUALITY Media Size Zoom FUNCTION DATE STAMP LAYOUT/SORT Program Reduce 100% Enlarge XY Zoom (Zoom Key) (Zoom Setting Screen) 2) Select either % Mode or Zoom Program Mode.
- Page 87 4) Since it is possible to change the setting value when its frame is thick, press the setting value that you will change to make its frame thick. (% Mode) (Zoom Program Mode) Mode Program Mode Zoom Original Copy 100.0% 10.0"...
- Page 88 [How to cancel the XY Zoom Mode and to clear decided zoom ratios (X) and (Y)] There are 2 ways to cancel the XY Zoom Mode and to cancel the decided zoom ratios (X) and (Y). 1. Cancel the XY Zoom Mode pressing “XY Zoom” when it is colored. Since the decided zoom ratios (X) and (Y) are still valid (In case of the % Mode, only the zoom ratio X is valid) even after canceling the XY Zoom Mode, select some zoom ratio in any of zoom setting modes in order to cancel zoom ratios (X) and (Y).
-
Page 89: Image Quality Settings
Image Quality Settings If you push the Image Quality Key below the LCD, the Image Quality Setting Screen is indicated on the LCD and it becomes possible to change and decide the following settings. The LED lamp of the Image Quality Key lights up when the LCD is indicating the Image Quality Setting Screen. -
Page 90: Selecting Original's Image Type
3.5.1 Selecting original’s image type [Function] Select any of the following modes according to the type of original’s image. 1. Line Mode All images become either black or white. If the original has such images as letters and lines which are evenly in high concentration, select the Line Mode. - Page 91 [Operation] 1) Push the Image Quality Key to indicate the Image Quality Setting Screen on the LCD. Original Threshold Line PAPER ZOOM IMAGE QUALITY Line/Photo Auto Photo FUNCTION DATE STAMP LAYOUT/SORT Sharpness Density Background Despeckle (Image Quality Key) (Image Quality Setting Screen) 2) Press any of “Line”, “Line/Photo”...
-
Page 92: Background Mode
3.5.2 Background Mode [Function] Some kind of original such as newspaper or blue print has unnecessary foggy background image. In the Background Mode, this kind of image is converted to the “white image” at the time of scanning. As the result of it, it is possible to gain a copy having no background image. If you set the original to the scanner when both “Background Mode”... - Page 93 2) Select either Line Mode or Line/Photo Mode pressing either “Line” or “Line/Photo”. Original Threshold Original Threshold Line Line Line/Photo Line/Photo Auto Auto Photo Photo Sharpness Density Sharpness Density Background Background Despeckle Despeckle 3) If “Background” is not colored, press “Background” to select the Background Mode. “Background”...
- Page 94 6) In most cases you will gain a proper copy that have no foggy background image. If the copy still has some degree of foggy background image or if the necessary image is lost, however, adjust the Threshold Level manually by doing the following 7) and 8). ABCDE ABCDE 12345...
- Page 95 [How to cancel the Background Mode] You have 2 ways to cancel the Background Mode. 1. Cancel the Background Mode pressing “Background” when it is colored. The Auto Threshold is also cancelled at this time. Original Threshold Original Threshold Line Line Line/Photo Line/Photo...
-
Page 96: Despeckle Mode
3.5.3 Despeckle Mode [Function] Supposing there is an isolated speckle image on the original. If you select the Despeckle Mode, it judges the speckle as unnecessary image (dirt) and converts the speckle image to the “white image” at the time of scanning. As the result of it, it is possible to gain a proper copy without speckle images. - Page 97 2) Select either Line Mode or Line/Photo Mode pressing either “Line” or “Line/Photo”. Original Threshold Original Threshold Line Line Line/Photo Line/Photo Auto Auto Photo Photo Sharpness Density Sharpness Density Background Background Despeckle Despeckle 3) Press “Despeckle” to select the Despeckle Mode. Original Threshold Original...
- Page 98 [How to cancel the Despeckle Mode] You have 2 ways to cancel the Despeckle Mode. 1. Cancel the Despeckle Mode pressing “Despeckle” when it is colored. Original Threshold Original Threshold Line Line Line/Photo Line/Photo Auto Auto Photo Photo Sharpness Density Sharpness Density Background...
-
Page 99: Threshold
3.5.4 Threshold By changing the Threshold Level, it is possible to change the result of copy. The function of Threshold Level is different among image type modes such as Line Mode, Line/Photo Mode and Photo Mode although the way to change the Threshold Level is same in all of these modes. It is mentioned on and after the page 3-56 how the result of copy varies in each image type mode if you change the Threshold Level. - Page 100 4) The scanner has 17 Threshold Levels. The left end LED lamp of Threshold Indicator is the Threshold Level 1, and the right end one is the Threshold Level 17. Threshold Threshold Threshold Auto Auto Auto Threshold Level 1 Threshold Level 2 Threshold Level 3 Threshold Threshold...
-
Page 101: Function Of Threshold Level In The Line Mode
A. Function of Threshold Level in the Line Mode We will use the following original to explain how the result of copy varies in each image type mode if you change the Threshold Level. It has some unnecessary light images such as “Dirt”, “Foggy background” and “Speckles”. Letters (Black) Foggy background ABCDE... - Page 102 2. If the selected Threshold Level is proper, it is possible to gain a proper copy since such images as “Foggy background”, “Dirt” and “Black dots” are judged “unnecessary light images” and are converted to “white images” as the following example 3. (Example 3 : Threshold Level is proper.) Threshold (Original)
-
Page 103: Function Of Threshold Level In The Line/Photo Mode
B. Function of Threshold Level in the Line/Photo Mode Letters (Black) Foggy background ABCDE Letters (Gray) (Like a newspaper) 12345 Solid black Dirt ABCDE 12345 Halftones ABCDE Black dots (Dirt) 12345 Solid Black ABCDE 12345 Lines (Gray) Line image The purpose to change the Threshold Level in the Line/Photo Mode is to remove unnecessary light images from the copy similar to the case of the Line Mode. - Page 104 2. If the selected Threshold Level is proper, it is possible to gain a proper copy since such images as “Foggy background”, “Dirt” and “Black dots” are judged “unnecessary light images” and are converted to “white images” as the following example 3. (Example 3 : Threshold Level is proper.) Threshold (Original)
-
Page 105: Function Of Threshold Level In The Photo Mode
C. Function of Threshold Level in the Photo Mode Letters (Black) Foggy background ABCDE Letters (Gray) (Like a newspaper) 12345 Solid black Dirt ABCDE 12345 Halftones ABCDE Black dots (Dirt) 12345 Solid Black ABCDE 12345 Lines (Gray) Line image The purpose to change the Threshold Level in the Photo Mode is to make all copy images evenly darker or lighter. - Page 106 Threshold (Original) (Result of copy) ABCDE ABCDE Auto 12345 12345 ABCDE ABCDE 12345 12345 ABCDE ABCDE 12345 12345 ABCDE ABCDE 12345 12345 A75UM3EA (Ver. E.2) 3-61...
-
Page 107: Sharpness
3.5.5 Sharpness [Function] Weak copy image such as thin line or small letter is copied clearly and sharply. This scanner has 5 Sharpness Levels such as “weaker” “weak”, “normal” “strong” and “stronger”. Sharpness Level “weak” and “weaker” Weak (light) images as thin line or small letters are not so sharpened, but the background image becomes not so evident. - Page 108 [How to change the Sharpness Level] 1) Push the Image Quality Key to indicate the Image Quality Setting Screen on the LCD. Original Threshold Line PAPER ZOOM IMAGE QUALITY Line/Photo Auto Photo Sharpness Density FUNCTION DATE STAMP LAYOUT/SORT Background Despeckle (Image Quality Key) (Image Quality Setting Screen) 2) Pressing...
-
Page 109: Density
3.5.6 Density [Function] All of copy images become evenly darker or lighter if you change the Density Level. This scanner has 5 Density Levels. The left end LED lamp of the Density Indicator in the Image Quality Screen is the Density Level 1, and the right end one is the Density Level 5. - Page 110 [How to change the Density Level] 1) Push the Image Quality Key to indicate the Image Quality Setting Screen on the LCD. Original Threshold Line PAPER ZOOM IMAGE QUALITY Line/Photo Auto Photo Sharpness Density FUNCTION DATE STAMP LAYOUT/SORT Background Despeckle (Image Quality Key) (Image Quality Setting Screen) 2) Pressing...
-
Page 111: Function Settings
Function Settings If you push the Function Key below the LCD, the Function Setting Screen is indicated on the LCD and it becomes possible to change and decide the following settings. The LED lamp of the Function Key lights up when the LCD is indicating the Function Setting Screen. 1. -
Page 112: Shift And Centering
3.6.1 Shift and Centering [Functions] A. Shift It is possible to shift the whole copy image to either left or right. If the image goes out of the copying media by the result of Shift, it is lost. (Maximum amount of Shift) 35.40 inches for both right shifting and left shifting (Unit of setting) 0.01 inches... -
Page 113: Shift
A. Shift [How to decide the amount of Shift] 1) Push the Function Key to indicate the Function Setting Screen on the LCD. Shift Margin Folder L. Edge Centering 0.00" MENU BASIC SCREEN PAPER 0.00" T. Edge 0.00" REFERENCE MODE MEMORY FUNCTION Mirror Negative... - Page 114 4) Select your required amount of Shift pressing Or input the amount directly pushing Ten Keys. The selected amount is indicated on the LCD. (Examples of indication) R2.00” 2 inches of right shifting L10.0” 10 inches of left shifting. CONCURRENT SET COPY PRINT AUTO ZOOM...
- Page 115 [How to clear the amount of Shift] You have 2 ways to clear the decided amount of Shift. 1. When the frame of the amount of Shift is thick, push the Clear Key. The amount becomes 0.00”. CONCURRENT Shift Margin Folder SET COPY PRINT...
-
Page 116: Centering
B. Centering [How to select the Centering] 1) Push the Function Key to indicate the Function Setting Screen on the LCD. Shift Margin Folder L. Edge Centering 0.00" MENU BASIC SCREEN PAPER 0.00" T. Edge 0.00" REFERENCE MODE MEMORY FUNCTION Mirror Negative (Function Key) - Page 117 [How to cancel the Centering] You have 2 ways to cancel the Centering. 1. Cancel the Centering pressing “Centering” when it is colored. Shift Margin Folder Shift Margin Folder L. Edge L. Edge Centering Centering 0.00" 0.00" 0.00" 0.00" T. Edge T.
-
Page 118: Leading Edge And Trailing Edge
3.6.2 Leading Edge and Trailing Edge [Function] Leading Edge Leading Edge (+) : Some amount of margin is provided to the leading edge of copy. Leading Edge ( - ) : Some amount of original’s leading image is prevented from being copied. (Maximum amount of Leading Edge) 4.00 inches for both plus and minus (Unit of setting) - Page 119 Trailing Edge Trailing Edge (+) : Some amount of margin is provided to the trailing edge of copy. Trailing Edge ( - ) : Some amount of original’s trailing image is prevented from being copied. (Maximum amount of Trailing Edge) 4.00 inches for both plus and minus (Unit of setting) 0.01 inches...
- Page 120 [Reference] In case of the plus setting, the decided amount of leading/trailing margin is simply provided to the copy regardless of the zoom ratio. Plus setting 2.40 inches 2.40 inches 100.0% 2.40 inches 2.40 inches 50.0% 200.0% 2.40 inches 2.40 inches In case of the minus setting, however, the decided amount of leading/trailing image is deleted from the Output Image from the view point of 100.0% zoom, and then the Output Image is reduced or enlarged according to the zoom ratio.
- Page 121 [How to decide the amount of Leading Edge and Trailing Edge] 1) Push the Function Key to indicate the Function Setting Screen on the LCD. Shift Margin Folder L. Edge Centering 0.00" MENU BASIC SCREEN PAPER 0.00" T. Edge REFERENCE MODE MEMORY FUNCTION 0.00"...
- Page 122 4) Select your required amount of Leading Edge pressing Or input the amount directly pushing Ten Keys. The selected amount is indicated on the LCD. CONCURRENT SET COPY PRINT AUTO ZOOM AUTO PAPER ROTATE Shift Margin Folder L. Edge Centering 1.00"...
- Page 123 [How to clear the amount of Leading/Trailing Edge] You have 2 ways to clear the decided amount of Leading/Trailing Edge. 1. When the frame of the amount of Leading/Trailing Edge is thick, push the Clear Key. The amount becomes 0.00”. CONCURRENT Shift Margin...
-
Page 124: Folder Setting
3.6.3 Folder Setting [Function] If the Folder is used to fold the printout, it is possible to select your preferable folding method. This scanner has 4 kinds of folding method. [How to change the folding method] 1) Push the Function Key to indicate the Function Setting Screen on the LCD. Shift Margin Folder... -
Page 125: Mirror Image Mode
3.6.4 Mirror Image Mode [Function] Copy image is printed being turned over as if it was mirrored. Original Copy [How to select the Mirror Image Mode] 1) Push the Function Key to indicate the Function Setting Screen on the LCD. Shift Margin Folder... - Page 126 [How to cancel the Mirror Image Mode] You have 2 ways to cancel the Mirror Image Mode. 1. Cancel the Mirror Image Mode pressing “Mirror” when it is colored. Shift Margin Folder Shift Margin Folder L. Edge L. Edge Centering Centering 0.00"...
-
Page 127: Negative Image Mode
3.6.5 Negative Image Mode [Function] White and black of the copy image are converted with each other. Original Copy [How to select the Negative Image Mode] 1) Push the Function Key to indicate the Function Setting Screen on the LCD. Shift Margin Folder... - Page 128 [How to cancel the Negative Image Mode] You have 2 ways to cancel the Negative Image Mode. 1. Cancel the Negative Image Mode pressing “Negative” when it is colored. Shift Margin Folder Shift Margin Folder L. Edge L. Edge Centering Centering 0.00"...
-
Page 129: Date Stamp Settings
Date Stamp Settings It is possible to print the Date Stamp (present date and time) on the copy if you validate the Date Stamp Mode. If you push the Data Stamp Key below the LCD, the Date Stamp Setting Screen is indicated on the LCD and it becomes possible to change and decide the following settings. -
Page 130: How To Print The Date Stamp
3.7.1 How to print the Date Stamp [Function] When you validate the Date Stamp Mode, the Date Stamp is printed on the copy according to your date stamp settings if only you do copying in the usual way. It is explained on later pages how to change each date stamp setting such as position and format. Reading this section, please understand the way to print the Date Stamp first. - Page 131 [References] 1. If the Date Stamp Mode is valid, the Date Stamp is printed in each Re-copy, Set Copy, Concurrent Print and Sample Copy. The time that is printed is decided for each of these copy methods as follows. Re-copy The time you start scanning the stored image data pushing the Start Key (Not the time you pushed the Re-copy Key) Set Copy...
- Page 132 (c) Negative Image Mode Date Stamp becomes white. 1999/01/31 SCANNER SCANNER (d) Settings to provide margin (Centering, Shift, Leading Edge and Trailing Edge) Date Stamp is printed not in the margin but in the copy image. (The following example is Centering.) 1999/01/31 SCANNER SCANNER...
- Page 133 (f) Layout Mode (Layout b or c) Sometimes the copy may have a margin depending on the selected zoom ratio. The Date Stamp is not stamped in this margin area but in the output image. The following upper example is the copy of the Layout b and the lower one is that of Layout c. If you stamp the Date Stamp on “right rear”, the results will be as follows.
- Page 134 [How to cancel the Date Stamp Mode] You have 2 ways to cancel the Date Stamp Mode. 1. Cancel the Date Stamp Mode pressing “Print” when it is colored. Date Stamp Date Stamp Print Print Position Rotate Position Rotate Y/M/D Y/M/D X Shift Y Shift...
-
Page 135: Main Position Of Date Stamp
3.7.2 Main position of Date Stamp [Function] It is possible to print the Date Stamp on any of 4 main positions. 1999/01/31 1999/01/31 SCANNER SCANNER SCANNER SCANNER 1999/01/31 1999/01/31 Left front Right front Left rear Right rear [How to select the main position] Whenever you press “Position”, you can select the main position of Date Stamp in the following order. -
Page 136: Rotation Of Date Stamp
3.7.3 Rotation of Date Stamp [Function] According to the direction of original’s image, rotate the Date Stamp. It is possible to choose any of 0 degree, 90 degrees, 180 degrees and 270 degrees arc rotation. 1999/01/31 1999/01/31 SCANNER SCANNER SCANNER SCANNER 0 degree 90 degrees... -
Page 137: Horizontal Shift And Vertical Shift Of Date Stamp
3.7.4 Horizontal shift and vertical shift of Date Stamp [Function] After deciding the main position of Date Stamp, it is possible to shift the Date Stamp horizontally (X shift) and vertically (Y shift). (Example of use) If Date Stamp and copy image overlap each other and it is hard to distinguish between them, for example, shift the Date Stamp. - Page 138 When the rotation of Date Stamp is “90 degree” or “270 degree” and when it is placed at each main position, the horizontal range (X) is from -0.50 inches to +0.50 inches, and the vertical one (Y) is from -1.00 inch to +1.00 inch. Namely, you can place the Date Stamp anywhere in the gray zone of the following figure.
- Page 139 2) Change the amount of shift pressing It is also possible to input your required amount of shift directly pushing Ten Keys. If you wish to input some “minus” value, please push the “-/L” Key before inputting the value. CONCURRENT SET COPY PRINT AUTO ZOOM...
-
Page 140: Order Of Date And Time
3.7.5 Order of date and time [Function] It is possible to select your preferable order of date and time. Choose any of the following order. (Example : Today is 15 December 1999 and the time is at 12:00 o’clock.) Y/M/D 1999/12/15 M/D/Y 12/15/1999... -
Page 141: Type Of Date Stamp
3.7.6 Type of Date Stamp [Function] It is possible to change the type of Date. (Examples) Today is 1 January 2000 and the time is at 12:00 o’clock. The order of date and time is “D/M/Y H:M”. / . - It is possible to choose any of “slash”, “period”... - Page 142 2) Press “Change” under each item to change the setting of that item. It is possible to go back to the Date Stamp Setting Screen pressing “Back”. Date Stamp Date Stamp 2000/01/21 12:00 2000.01.21 12:00 Year Month Format Year Month Format 2000 /01/...
-
Page 143: Set Copy Mode
Set Copy Mode [Function] In the Set Copy Mode, it is possible to scan a lot of originals without printing out in order to store their image data in the memory as the Set Copy Job. When you have finished to make the Set Copy Job by scanning all necessary originals, it is possible to print out this Set Copy Job at one time by pushing the Start Key just once. - Page 144 [Outline of the Set Copy Mode] 3-99 A75UM3EF (Ver. E.2)
-
Page 145: Explanation For Set Copt Job
3.8.1 Explanation for Set Copy Job In the Set Copy Mode, it is possible to scan some sheets of original successively to store their image data as one group in the memory without printing out. This group of stored image data is called Set Copy Job. Different from Copy Job of normal copy, one Set Copy Job consists of some image data of several originals. - Page 146 If you push the Start Key, the stored Set Copy Job is printed out from the printer depending on your set copy setting. It is possible to store new Set Copy Jobs in the memory by scanning originals when the printer is printing out the former Set Copy Job.
-
Page 147: Set Copy In The Layout Mode
3.8.2 Set Copy in the Layout Mode [Function] Layout Mode is a function to print images of the Set Copy Job on one sheet of copying media. There are 3 ways of layout including “OFF Mode”. 1. “Layout a.” (OFF Mode) Images are printed on separate sheets of copying media. - Page 148 2. “Layout b.” Images are printed on one sheet of copying media in 1 row. Normally “Layout b.” is used together with the Auto Zoom Mode since you may have variant width of originals but it is preferable to print these images as wide as the copying media. If originals are different in width each other, therefore, they are scanned in different zoom ratios one by one automatically so that each image should be as wide as the copying media.
- Page 149 3. “Layout c.” Images are printed on one sheet of copying media in 2 rows. “Layout c.” is used together with the Auto Zoom Mode normally in order to reduce or enlarge each image to be half of copying media in width. If originals are different in width each other, they are scanned in different zoom ratios one by one automatically similar to the case of “Layout b.”.
- Page 150 [How to do Set Copy in the Layout Mode] 1) Push the Paper Key to indicate the Paper Setting Screen on the LCD, and then select a roll media of your required size. (Paper Key) (Paper Setting Screen) 2) Push the Set Copy Key to enter the Set Copy Mode. The LED lamp of the Set Copy Key lights up in the Set Copy Mode.
- Page 151 4) Press any way of layout “a.”, “b.” and “c.”. The selected way of layout is colored. If you select either “Layout b.” or “Layout c.”, the Auto Zoom Mode is automatically selected and the LED lamp of the Auto Zoom Key lights up. Note : If you select either “Layout b.”...
- Page 152 6) Push the Basic Screen Key to indicate the Basic Screen on the LCD. “Layout/Sort” is indicated if you selected either “Layout b.” or “Layout c.”. (Basic Screen Key) (Basic Screen) 7) Push the Start Key to scan the original. Since the scanned image is not printed out but simply is stored in the memory, set the next original and scan it.
- Page 153 9) Decide how many copies are printed. Input the number with Ten Keys in the same way as you decide the Copy Count. The maximum number is 999. 3 copies are printed. 10) Push the Start Key when no original is set to the scanner.
- Page 154 [How to cancel the Set Copy Mode] There are 3 ways to cancel the Set Copy Mode. 1. If you print out the stored Set Copy Job normally pushing the Start Key, the Set Copy Mode is automatically cancelled. 2. If you have never scanned any original since you had entered the Set Copy Mode, it is possible to cancel the Set Copy Mode pushing the Set Copy Key again.
- Page 155 [Reference] If you select either “Layout b.” or “Layout c.”, the Auto Zoom Mode is automatically selected and it decides the proper zoom ratio for each original one by one. However, it is possible not to use the Auto Zoom Mode but to decide the zoom ratio manually. Be careful of the following matters in this case.
- Page 156 2. In case of the “Layout c.” The left half of used roll media is shared by left row image and right half is shared by right row image. If the used roll media is 36 inches wide as the following example, 18 inches wide area of the left half is the share of left row images and that of right half is right row’s share.
-
Page 157: Set Copy In The Sort Mode
3.8.3 Set Copy in the Sort Mode [Function] It is possible to print out necessary sets of copies sorting the pages. There are 4 ways of sort such as “Sort a.”, “Sort b.”, “Sort c.” and “Sort d.”. It is necessary to select “Layout a.” to select these ways of sort. Sort a. - Page 158 [How to do Set Copy in the Sort Mode] 1) Push the Paper Key to indicate the Paper Setting Screen on the LCD, and then select a roll media of your required size. Roll Cut Mode Size 1:36" Synchro 48" 30"...
- Page 159 4) Since it is necessary to select the “Layout a.” in order to select “Sort”, press “Layout a.” if not selected. “Sort” in the LCD is validated. Scan Print(Layout) Scan Print(Layout) Sort Sort 5) Press “Sort” to select the Sort Mode. The Sort Setting Screen is indicated on the LCD.
- Page 160 7) Change several settings such as Threshold Level and Density if required. Note : If you wish to change such image quality settings as Original Type, Background Mode, Despeckle Mode, Threshold and Sharpness (Density is excluded), make sure to change them before you scan the original since these settings work at the time of scanning in order to process the image data before it is sent and stored in the memory as the Set Copy Job.
- Page 161 (Notes) 1. It is possible to scan originals to make the Set Copy Job although the printer is printing out another Copy Job. 2. If the memory is fully occupied with the image data during scan of some original, the LCD indicates the error message “Memory is full”.
- Page 162 10) Push the Start Key when no original is set to the scanner. STOP/ The scanned image data is printed out in the selected EJECT way of sort. The Set Copy Mode is cancelled automatically, and the LED lamp of the Set Copy Key is put out at the time you push the Start Key.
- Page 163 [Reference] If originals are different in width each other, we recommend you to use either Auto Paper Mode or Auto Zoom Mode when you do Set Copy in the Sort Mode. 1. If you select the Auto Paper Mode, the suitable roll media is automatically selected for each copy image.
- Page 164 2. If you select the Auto Zoom Mode, all images are automatically reduced or enlarged so that they should become as wide as the used roll media. As the result, printed copies are same in width. (Example) Original’s width 18”, 36” and 12” Used roll media 24 inches wide roll Way of Sort...
-
Page 165: Concurrent Print Mode (Check Set)
3.8.4 Concurrent Print Mode (Check Set) [Function] In the Set Copy Mode, the scanned image data is not printed out but is stored in the memory as the Set Copy Job. Therefore, it is impossible to know the result of scan until you print it out pushing the Start Key. If you scan originals in the Set Copy Mode validating the Concurrent Print Mode, however, one sheet of copy is printed out per an original while storing the image data in the memory. -
Page 166: Mode Memory
Mode Memory If you push the Mode Memory Key below the LCD, the Mode Memory Selection Screen is indicated on the LCD and it becomes possible to select and call your preferable Mode Memory. The LED lamp of the Mode Memory Key lights up when the LCD is indicating the Mode Memory Selection Screen. -
Page 167: Calling The Mode Memory
3.9.1 Calling the Mode Memory [Function] Mode Memory is a convenient function to change several user settings easily to your preferable conditions that you registered in advance. If you often do copying changing several settings in a specific state, it is possible to register that state of settings as the Mode Memory (Creation of Mode Memory). - Page 168 2) Press your required Mode Memory Number. That Mode Memory Number is colored. Since the LCD indicates states of user settings registered to that Mode Memory Number, check these states. Mode Memory Mode Memory Count :10 Count :1 Roll 2 Roll 3 Synchro Standard...
-
Page 169: Menu Settings
3.10 Menu Settings If you push the Menu Key below the LCD, the Menu Screen is indicated on the LCD. The LED lamp of the Menu Key lights up when the LCD is indicating the Menu Screen. The Menu Screen has 4 kinds of main menu. You can change and decide the following settings in each menu. -
Page 170: Original
3.10.1 Original [Function] When you set the original to the scanner, the scanner automatically detects its width and indicates the detected size on the LCD. If you select another original size than the detected one here, it is possible to place the copy image at another place on the copying media, and it is also possible to copy only some part of original’s image. - Page 171 (Example 2) If you copy an 36 inches wide original using an 18 inches wide copying media by 100% zoom, only the right front image is copied as follows normally. Original (36 inches) Copy (18 inches) If you select “18 inches” as the original size at this time, it is possible to copy the central front image.
- Page 172 [Operation] 1) Set the original to the scanner. Original’s size is detected automatically and is indicated on the LCD. Original:24" Image Paper Zoom Quality 1:36" Line Plain Paper Background 100.0% Synchro [Threshold] Auto 2) Push the Menu Key to indicate the Menu Screen on the LCD. Original:24"...
- Page 173 4) Press your required original size. The selected original size is colored, and the original size indicated at the top of the LCD is changed. Original:24" Original:18" Original Size Original Size 36" 18" 36" 18" 34" 17" 34" 17" 30" 12"...
-
Page 174: Edit Function
3.10.2 Edit Function [Function] In the Set Copy Mode, scanned image data of several originals are stored in the memory as the Set Copy Job. By the Edit Function, it is possible to do the following works for the stored Set Copy Job. Re-edit It is possible to call back the Set Copy Job which has been printed out already. - Page 175 2) Press “Edit” to indicate the Page Edit Screen. Menu Page Edit Original P.1/10 Edit Delete Insert Replace Setting Command Re Edit All Cancel Back (Page Edit Screen) Note : If the Set Copy Mode is cancelled, all setting items except for “Back” becomes invalid. Page Edit Delete Insert...
-
Page 176: Re-Edit
A. Re-edit [Function] Even if you have printed out the Set Copy Job pushing the Start Key, it is still stored in the memory. It is possible to call back the Set Copy Job by the Re-edit Function to make it possible to print it out again or to edit it by such functions as Delete, Insert and Replace. - Page 177 3) If you would like to print out the called Set Copy Job without editing, push the Start Key since the LED STOP/ lamp of it lights up. EJECT START 4) If you would like to edit the Set Copy Job by Delete, Insert and Replace, refer to the later pages. 3-132 A75UM3EJ (Ver.
-
Page 178: Delete
B. Delete [Function] If you do not satisfy the result of scan of some original because the selected Threshold Level was not proper or because the original was skewed, for example, it is possible to delete its image data from the Set Copy Job. - Page 179 [How to delete the image data] (Example) You have a Set Copy Job that has image data of 10 originals. Now you will delete the image data of 5th original from the Set Copy Job. 1) The Page Edit Screen indicates the contents of the Set Copy Job as “P.1/10”. “P.1”...
-
Page 180: Insert
C. Insert [Function] Whenever you scan the original, its image data is normally provided to the Set Copy Job as the last image data. If you use the Insert Function, it is possible to insert the newly scanned image data not to the last of Set Copy Job but to the middle of it. - Page 181 [How to insert the image data] (Example) You have a Set Copy Job that has image data of 10 originals. Now you will provide the image data of original “A” to the Set Copy Job inserting between 4th and 5th images.
- Page 182 3) Scan the original to add its image to the Set Copy Job. It is provided to the Set Copy Job as 5th image. Since the Set Copy Job has 11 images totally after the insertion, the Page Edit Screen indicates “P.5/11”.
-
Page 183: Replace
D. Replace [Function] It is possible to replace some image data in the Set Copy Job with the image data of newly scanned original. If you do not satisfy the result of scan of some original because the selected Threshold Level was not proper or because the original was skewed, for example, replace that image with the rescanned one. - Page 184 [How to replace the image data] (Example) You have a Set Copy Job that has image data of 10 originals. Now you will replace the image data of 5th original with that of newly scanned original “A”. 1) Press “Replace” in the Page Edit Screen to validate the Replace Function. “Replace”...
- Page 185 3) Scan the original. Its image data is replaced with the 5th image of the Set Copy Job. 4) If you have more original to replace, do it in the same way. 5) When you have finished to replace, press “Replace” to cancel the Replace Function. Page Edit Page Edit P.5/10...
-
Page 186: All Cancel
E. All Cancel [Function] It is possible to delete the stored Set Copy Job from the memory as well as to cancel the Set Copy Mode. If you do All Cancel, therefore, it becomes impossible to call back and to re-edit the Set Copy Job by the Re-edit Function. -
Page 187: Setting
3.10.3 Setting [Function] It is possible to change the following settings concerning to the condition of usage as you like in the Setting Screen. 1. Register Zoom Ratio Setting Register 2. Original Format Memory Zoom Ratio 3. Auto Start Original 4. -
Page 188: How To Register The Setting
A. How to register the setting If you have changed the setting of some item in the Setting Screen, it is possible to register that setting. If you do so, that setting will be valid later on even if you turn off the machine unless you change it again in the Setting Screen. - Page 189 5) When you have finished to change the setting, press “Back” in each screen to go back to the Setting Screen. The item of which setting you have changed is colored at this time. Standard Mode Setting Register Memory Count :1 Zoom Ratio Roll 1 Synchro...
-
Page 190: Register Zoom Ratio
B. Register Zoom Ratio [Function] The following zoom ratios are called Standard Zoom Ratios that have been registered to the Standard Zoom Frame as the default setting at factory forwarding. It is possible to select them easily pressing “Reduce” or “Enlarge” in the Zoom Setting Screen since they are used often for reduction and enlargement of standard size as “24 inches to 36 inches”... - Page 191 2) Indicate your preferable zoom ratio in the Register Zoom Ratio Setting Screen pressing Or input the zoom ratio directly with Ten Keys. (Example : You will register 120.0%.) Register Zoom Ratio 100.0% Reduce 100% Enlarge Register Zoom Ratio 120.0% Delete Reset Back...
- Page 192 [How to delete the Register Zoom Ratio from the Standard Zoom Frame] 1) Indicate the zoom ratio you will delete in the Register Zoom Ratio Registered Zoom Ratio Setting Screen pressing “Reduce” and “Enlarge”. 120.0% Reduce 100% Enlarge Delete Reset Back 2) Press “Delete”...
-
Page 193: Original Format
C. Original Format [Function] If you set the original to the scanner, its size is automatically detected and displayed on the LCD as 18”, 17”, 22” and 24”. Distinction between Engineering and Architecture is done based on the original format setting decided here. -
Page 194: Auto Start
D. Auto Start [Function] When you set the original to the scanner, it is automatically scanned without pushing the Start Key if the Auto Start is validated. When the Auto Start is valid, it is possible to decide how many seconds later the Auto Start function should start scanning since you have set the original. - Page 195 3) Decide how many seconds later the Auto Start function should start scanning since you have set the original. The time can be changed pressing on the LCD or pushing Ten Keys. (Example : Auto Start will start scanning 8 seconds later.) Auto Start 2Sec Auto Start...
-
Page 196: Standard Mode
E. Standard Mode [Function] When the following user settings are reset, they are initialized according to the Standard Mode to which default conditions of the following settings are registered. (If you push the Reset Key to initialize these settings, they become always same default conditions. For example, the zoom ratio becomes “100.0%”... -
Page 197: Rotate Mode
Concerning to image quality setting Registrable item Default condition at factory forwarding Original’s image type Line Background Despeckle Threshold (Auto or Threshold Levels from 1 to 17) Auto Sharpness Density Concerning to function setting Registrable item Default condition at factory forwarding Centering (On or OFF) Shift 0.00”... - Page 198 [How to check the contents of Standard Mode] Before you change default conditions of user settings, check how they are currently registered to the Standard Mode. 1) Push the Reset Key to reset all user settings. Note : Since the following Standard Mode Setting POWER RESET INTERRUPT...
- Page 199 [How to register default conditions to the Standard Mode] Register your preferable default conditions of user settings to the Standard Mode in the following way. Register without anxiety since it is possible to recover default conditions decided at factory forwarding. 1) Firstly change each setting to the condition you will register to the Standard Mode.
- Page 200 4) Press “Standard Mode” in the Setting Screen to indicate the Standard Mode Setting Screen on the LCD. Since the present conditions of settings are indicated in the screen, confirm that the changes you have done are indicated on the screen. Note : Conditions of some setting items such as the Auto Paper Mode are not indicated in the Standard Mode Setting Screen.
- Page 201 [How to reset the Standard Mode] Press “Reset” to reset the Standard Mode. Standard Mode If you reset the Standard Mode, you can recover default conditions decided at factory forwarding. Count :1 Roll 1 Synchro 200.0% Line Background Sharpness :3 Threshold :Auto Density :3 Negative :OFF...
-
Page 202: Mode Memory (Creation And Deletion Of Mode Memory)
F. Mode Memory (Creation and deletion of Mode Memory) [Function] Mode Memory is a convenient function to change several user settings easily to your preferable Conditions that you registered in advance. Similar to the Standard Mode, it is possible to register your preferable condition of settings to the Mode Memory. -
Page 203: Memory
[How to create the Mode Memory] 1) Firstly change each setting to the condition that you wish to register to the newly created Mode Memory. Change as many settings as you need in the usual way. Example : You will register “Roll 2”, “18inches Standard Cut” and “Photo Mode” to the created Mode Memory. - Page 204 4) Press “Mode Memory” in the Setting Screen to indicate the Mode Memory Setting Screen on the LCD. Since the present conditions of settings are indicated in the screen, confirm that the changes you have done are indicated on the screen. Note : Conditions of some setting items such as the “Landscape cut”...
- Page 205 6) Press “Set” to create the Mode Memory on the selected Mode Memory Number registering the condition of settings indicated on the LCD. The Mode Memory Number is underlined when the Mode Memory is created. Mode Memory Mode Memory Count :1 Count :1 Roll 2 Roll 2...
-
Page 206: G. Memory
G. Memory [Function] The image data is stored in the memory after scanning in order to make it possible to re-copy. If you wish to delete it from the memory right after scanning since it is an important or secret data, delete it by either “Auto Clear”... - Page 207 [How to do Clear] When you have finished to scan the original, indicate the Memory Memory Setting Screen on the LCD and press “Clear”. The image data is deleted from the memory soon by this operation. Clear Auto Clear Back 3-162 A75UM3EN (Ver.
-
Page 208: Date / Time
H. Date / Time [Function] It is possible to adjust date and time Data and time decided here can be printed on the copy by the Date Stamp Mode. As for the Data Stamp Mode, refer to “Date Stamp Settings” on the page 3-84. [How to adjust date and time] 1) Press “Date/Time”... - Page 209 3) Change the value pressing Or input the value directly with Ten Keys. If you inputted a wrong number, clear it pushing the Clear Key. Date/Time Date: 1999 Time: Date/Time Date: 1999 Back Time: CONCURRENT SET COPY PRINT AUTO ZOOM AUTO PAPER ROTATE Back...
-
Page 210: Scsi
I. SCSI [Function] It is possible to do SCSI setting. When you use the Scan Mode, it is required to connect the scanner to the computer with the SCSI Cable. In order that the computer recognizes each SCSI device, each SCSI device should have its own ID Number. And it is required to settle “Terminator”... - Page 211 3) If this scanner is the terminal one of SCSI devices, settle the Terminator pressing “Terminator”. “Terminator” is colored. SCSI SCSI Terminator Terminator Back Back 4) If you wish to let the SCSI setting be valid later on even if you turn off the machine, register it making reference to “How to register the setting”...
-
Page 212: Command
3.10.4 Command [Function] It is possible to do Initial Cut and Wire Cleaning in the Command Screen. It is also possible to know the information about scanner. 1. Initial Cut 2. Wire Cleaning 3. Information Command Initial Cut Wire Cleaning Information Back (Command Screen) - Page 213 A. Initial Cut [Function] The leading part of selected roll media is cut off in 210mm long in order to straighten the leading edge. Do Initial Cut before you use a new roll media. (Note) It is impossible to do Initial Cut when the printer is not ready. Wait until it gets ready.
- Page 214 3) Press “Command” in the Menu Screen to indicate the Command Screen on the LCD. Command Menu Initial Cut Original Wire Cleaning Information Edit Setting Command Back (Command Screen) 4) Press “Initial Cut” in the Command Screen. Command The selected roll media is carried and cut automatically.
- Page 215 B. Wire Cleaning [Function] It is possible to work printer’s wire cleaning function to clean the corona wire. Note : If the connected printer does not have the wire cleaning function, it is impossible to use this function. [How to do Wire Cleaning] 1) Push the Menu Key to indicate the Menu Screen on the LCD.
-
Page 216: Information
C. Information [Function] Information for Scan Count, Memory and PROM Version is indicated in the Information Screen. 1. Scan Count The total length of originals that have been scanned up to the present is indicated. It is also indicated how many originals have been scanned totally up to the present. 2. - Page 217 3) Press “Information” in the Command Screen to indicate the Information Screen on the LCD. Information for Scan Count, Memory and PROM Version is indicated in the Information Screen. Information Command Initial Cut Scan Count > 82m 252 Count Wire Cleaning Memory >...
-
Page 218: Reference Screen
3.11 Reference Screen [Function] The Reference Screen indicates “Count” and “Job Count”. Count : When the printer is printing out certain Copy Job at present, the Copy Count decided for it is indicated. And it is also indicated which copy of it is now on printing. Job count : It is indicated how many Copy Jobs exist in the memory including the one now on printing. - Page 219 [How to indicate the Reference Screen] Push the Reference Key to indicate the Reference Screen on the LCD. The LED lamp of the Reference Key lights up. Reference MENU BASIC SCREEN PAPER 3 Count REFERENCE MODE MEMORY FUNCTION JOB Count (Reference Key) (Reference Screen) [Several indications]...
- Page 220 In the Set Copy Mode The Reference Screen indicates as the right figure when the Set Copy Job is printed out. Reference “JOB Count : 3” means the memory has 3 Set Copy Set Copy Jobs at present. “10 Page x 5 Count” means the Set Copy Job now on printing has 10 original images and the Set Copy Job 10 Page x 5 Count : 10...
-
Page 221: Power Save Function
3.12 Power Save Function [Function] Power Save is a function not to consume so much power if you do no operation for a long time. This scanner has 4 kinds of mode and any of them is selected always. If you wish to change the current mode with another one, or if you wish to change the waiting time that is required until each Power Save Mode starts working, call your service engineer. - Page 222 4. Multi-Power Save Mode If you do no operation for a decided time, the Warm Power Save Mode is worked automatically at first. If you do no operation for a decided time also in the Warm Power Save Mode, the Cold Power Save Mode is worked automatically.
-
Page 223: Scanner Power Save
3.13 Scanner Power Save [Function] If you do no operation for a decided time, the Scanner Power Save works automatically. All LED lamps except for Power Indicator and LED lamp of Power Save Key are put out in the Scanner Power Save so as not to consume so much power. Note that the printer consumes as much power as usual since only the scanner gets into low power condition but the printer is always ready for printing. -
Page 224: Auto Reset Function
3.14 Auto Reset Function [Function] If you do no operation for some decided time, the Auto Reset Function automatically works to initialize all user settings according to the Standard Mode. It is possible to change the waiting time that is required until the Auto Reset Function works from 1 minute to 60 minutes in 1 minute increment. -
Page 225: Interrupt Mode
3.15 Interrupt Mode [Function] If you validate the Interrupt Mode when the printer is printing out some Copy Job (including the Set Copy), the printer stops printing the present Copy Job (Interrupted copy). You can scan another original and print out that Copy Job (Interrupting copy) with priority. [How to do interrupting copy] 1) Push the Interrupt Key to enter the Interrupt Mode when the printer is printing out some Copy Job. -
Page 226: Reset
3.16 Reset [Function] It is possible to initialize all user settings according to the Standard Mode if you push the Reset Key. (As for the Standard Mode, refer to “Standard Mode” on the page 3-151.) In you have changed many settings and it is not necessary any longer after copying, the Reset Key is convenient since you can recover the default condition of all settings by just one operation. -
Page 227: Re-Copy
3.17 Re-copy [Function] If you push the Re-copy Key, the image data stored in the memory is printed out again. In case of the normal copy, the image data (Copy Job) scanned at the latest opportunity is printed out. In case of the Set Copy, the Set Copy Job registered at the latest opportunity is printed out. It is impossible to change the following settings and apply them to the re-copy image since these settings affect when the original is scanned. - Page 228 3) Push the Re-copy Key. The stored image is printed out again according to the newly decide settings. POWER RESET INTERRUPT SAVE CONCURRENT RE COPY SET COPY PRINT SAMPLE ROTATE AUTO ZOOM AUTO PAPER 3-183 A75UM3EO (Ver. E.2)
-
Page 229: Sample Copy
3.18 Sample Copy [Function] If you push the Sample Key, it is possible to copy only the leading 210mm long image of original. It is recommended to do Sample Copy before you copy a long original since it is possible to know the result of copy in advance without consuming so much toner or copying media. -
Page 230: Rotate Mode
3.19 Rotate Mode [Function] The scanned image is printed being rotated in a 90 degrees arc counter-clockwise in the Rotate Mode. Original Copy Note : If you do not select a roll media of proper width, the copy will have a margin or some part of image will be lost from the copy as follows. -
Page 231: Chapter 4 Error Indications And Treatments
Chapter 4 Error Indications and Treatments Page Error Message and Treatments A75UM4E1 (Ver. E.2) -
Page 232: Error Message And Treatments
Error Message and Treatments If either scanner or printer has some error, some Error Message is indicated on the LCD. Clear the error by the following treatments. (Examples) Upper unit is open An error occurred (1) Image Paper Zoom Quality 1:36"... - Page 233 Error message Treatments An error occurred (2) Scanner has an abnormal error. Since the operator can not fix it, call your service personnel. An error occurred (2) An error occurred (3) Scanner has an abnormal error. Since the operator can not fix it, call your service personnel.
- Page 234 Error message Treatments An error occurred (6) Something is sticking on the central part of the White Roller where the Pointer LED throws light. Clean it off. An error occurred (6) White Roller If this error code is indicated again even after the cleaning, the scanner has an abnormal error.
- Page 235 Error message Treatments An error occurred (8) 1. Something is sticking on the central part of the Original Glass where the Pointer LED throws light. Clean it off. An error occurred (8) 2. Something is sticking on the central part of the White Roller where the Pointer LED throws light.
- Page 236 Error message Treatments Printer is offline Turn off both scanner and printer. Check whether or not they are connected each other with the cable. If not, connect them and then turn them on again. There is no suitable roll This is indicated when you do copying in the Auto Paper Mode but no roll media matches the output image size because the selected zoom ratio is not proper.
- Page 237 Error message Treatments Door open Any door of printer is opened. Close it. Inner Feed Unit is open Inner Feed Unit in the printer is opened. Close it making reference to printer’s manual. Remove the media This is indicated when the media is remaining in the printer after Initial Cut.
- Page 238 [Service Call Errors] Error message Treatments Original feeding motor error Connected printer has some error. The Error Indicator on the Operation Panel lights up at this Web is empty time. Web feeding error Cutter Unit error Wire cleaning motor error Exposure lamp error POWER Copy number counter error...
- Page 239 [Mis-feed Errors] Error message Treatments Original mis-feed Open the Upper Unit and remove the original. Printer mis-feed (Roll Deck) Mis-feed of copying media occurs in the printer. Mis-feed Indicator on the Operation Panel lights up at this Pr. mis-feed (Inner Feed Unit) time.
- Page 240 Chapter 5 Maintenance and Adjustments Page 5- 1 Usual Maintenance 5- 4 LCD Adjustments 5.2.1 LCD contrast adjustment 5- 4 5.2.2 Touch panel positioning 5- 6 5- 9 Pin Layout and Rating of Interface Connector A75UM5E1 (Ver. E.2)
-
Page 241: Usual Maintenance
Usual Maintenance Clean the following parts once per a week or when a dirty copy is printed out. Note : Make sure to turn off the machine before starting to clean. Original Glass Wipe the Original Glass with a soft cloth impregnated with a little water or neutral detergent, and then wipe it with a dry soft cloth. - Page 242 Original Feeding Rollers and White Roller Wipe these rollers with a soft cloth impregnated with a little water or neutral detergent, and then wipe them with a dry soft cloth. White Roller Original Feeding Rollers Original Feeding Rollers (1) White Roller Wipe all the surface of White Roller (A) rotating the Roller (B).
- Page 243 (2) Original Feeding Rollers at the front Rotating the Roller (C), wipe all of 4 Original Feeding Rollers (D). Wipe Rubber Rollers (E) on the bottom of Upper Unit also. (3) Original Feeding Rollers at the rear Wipe Original Feeding Rollers (F) rotating them by hand.
-
Page 244: Lcd Adjustments
LCD Adjustments 5.2.1 LCD contrast Adjustment Adjust the contrast of LCD in the following way. 1) Press and hold the Menu Key, and then push “1” of Ten Keys to enter the LCD Contrast Adjustment Mode. The LCD indicates “LCD contrast adjustment”. CONCURRENT SET COPY PRINT... - Page 245 3) When you have finished to adjust, press and hold the Menu Key, and then push “1” of Ten Keys to cancel the LCD Contrast Adjustment Mode. CONCURRENT SET COPY PRINT ROTATE AUTO ZOOM AUTO PAPER MENU BASIC SCREEN PAPER REFERENCE MODE MEMORY FUNCTION...
-
Page 246: Touch Panel Positioning
5.2.2 Touch panel positioning When you select some setting item on the LCD, that item may not be selected sometimes. Or another item may be selected although you selected the different one. (Example 1) 34” is not selected and is not colored although you pressed it. Roll Size Media... - Page 247 1) Press and hold the Menu Key, and then push “2” of Ten Keys to enter the Touch Panel Position Adjustment Mode. The LCD indicates “touch panel positioning”. CONCURRENT SET COPY PRINT ROTATE AUTO ZOOM AUTO PAPER MENU BASIC SCREEN PAPER REFERENCE MODE MEMORY...
- Page 248 3) Press and hold the “+” mark on the LCD until “Completed” is indicated. touch panel positioning touch panel positioning Press and hold here Completed 4) When you have finished to adjust, press and hold the Menu Key, and then push “2” of Ten Keys to cancel the Touch Panel Position Adjustment Mode.
-
Page 249: Pin Layout And Rating Of Interface Connector
Pin Layout and Rating of Interface Connector RS232C Interface Connector Printer Interface Connector SCSI Interface Connector (CN501A) (CN2103) (CN501A) Pin Number Voltage (V) Pin Number Voltage (V) Pin Number Voltage (V) 0.0118 -9.1 +9.0 SCSI Connector SCSI Connector Printer Connector RS232C Connector A75UM5E1 (Ver. - Page 250 Version C.0 (Issued on 17 February 2000) 1. According to the advice from KIP Europe, LCD indications are corrected. 2. According to the request from KIP America, both metric version and inch version of User’s Manuals are created. Version D.0 (Issued on 13 April 2000) 1.
- Page 251 (Page 1-4) 3. Almost all sentences are deleted from “1.10 Scan Mode”. We will create new User’s Manual for “KIP Scan Client” in the near future. (Page 1-13) 4. It becomes possible to input Leading Edge amount and Trailing Edge amount separately.
- Page 252 Version E.2 (Issued on 16 January 2001) New error messages such as “An error occurred (6), (7) and (8)” are added. (Pages 4-3 and 4-4) A75UMREC (Ver. E.2)
Need help?
Do you have a question about the 2050 and is the answer not in the manual?
Questions and answers