Advertisement
Quick Links
Advertisement

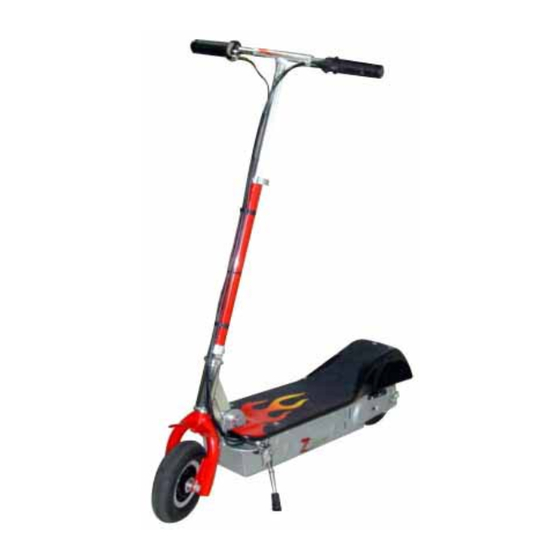
Summary of Contents for Rad2Go ZZ Cruiser
- Page 1 Owner’s Manual...
- Page 2 Important Note To Parents About Safe Riding Your child's safety will depend on your commitment to always provide a safe riding environment and a properly maintained vehicle. As with any moving vehicle there are possible safety risks; be sure to heed to the following precautions. 1.
- Page 3 Safety Precautions 1. Review all the instructions carefully before operations. 2. Follow all rules and regulations in your area for operating an electric scooter. 3. Do not allow others to use the scooter without proper instructions. 4. Ride only in good weather and on smooth surfaces. 5.
- Page 4 List of Parts Throttle - A Brake Handle - B Airless Tires - C Brake Cable - D Deck - E Front Fork - F Hub/Rim - G Kickstand - H Folding Quick Release – I Handle Bar Quick Release - J Rear Tire Assembly - K Switch Box - L Tool Kit - M...
- Page 5 Assembly Instructions 1. Carefully take your scooter out of the box. 2. Assemble the Handle Bar. ** See Photo’s on Page 6 Lift Handle Bar up. Do not put any pressure on the front tire while raising the Handle Bar. (See Figure A) b.
-
Page 7: Maintenance
Charging 1. Turn Power Switch in the ‘off’ position. 2. Do not plug the charger into the outlet first, for safety reasons plug the charger cord into the scooter first, then into a 110 V outlet. 3. Charge your scooter for 6-8 hours. The LED will be red during charging and once it is fully complete the LED will turn to green. - Page 8 Procedure for changing rear tire of ZZ Cruiser • Tools Required: - Phillips screwdriver - 8mm wrench - 2 x 16mm wrench Ensure power switch is in the "off" position before beginning any work on the scooter. Fig. 1 Step 1) Remove the 3 screws from the deck, use the Medium size Allen wrench to remove screws as shown in Figure 1.
- Page 9 Fig. 3 Step 3.) Remove the axle nut located on the right side of the rear tire as seen in Fig 3. Fig. 4 Step 4.) Loosen the brake adjustment bolt as seen in Fig 4. Do not completely remove this bolt. It should loosen to the point where the line traveling through the “brake spring”...
- Page 10 Fig. 5 Step 5.) Remove the axle bolt from the rear wheel; take not of where the spacers are located. Fig. 6 Step 6.) Remove the Allen bolts from the rim of the tire; you must first cut ½” off of the medium size Allen wrench (use hack saw).
- Page 11 Fig. 7 Step 7.) Place the brake shield back on the wheel’s slide axle brake into the tire and remember to place the pacer between the brake shield and brake drum. Fig. 8 Step 8.) Next place the wheel hub back into the rear fork and reinstall the drive belt. Retighten the axle bolts.
- Page 12 Fig. 9 Step 9.) Insert the “L”-shaped bracket onto the brake shield. The hole for this bracket is located farthest from the wheel axle on the bracket itself. The bracket should be placed on the “tire-side” of the shield (as opposed to the outer side).
-
Page 13: Troubleshooting Chart
Troubleshooting Chart Problem Cause Solution The power light by the on/off 1. Battery is discharged. 1. Recharge your switch does not light up 2. Loose connection inside the scooter. when the scooter is turned on. scooter. 2. Remove (3) screws that hold the deck on and remove the deck. - Page 14 List of Parts Throttle (1) Small Star Screws (2) Lock Washers (2) Drive Belt (1) Controller (1) Brake Handle (1) Airless Tires (2) Valve Extension (1) Brake Cable (1) Deck (1) Front Fork (1) Front Tire Assembly (1) Hub/Rim (2) Kickstand (1) Motor 300 Watt (1) Folding Quick Release (1)
- Page 15 YOUR INSURANCE POLICIES MAY NOT PROVIDE COVERAGE FOR ACCIDENTS INVOLVING THE USE OF THIS SCOOTER. TO DETERMINE IF COVERAGE IS PROVIDED, YOU SHOULD CONTACT YOUR INSURANCE COMPANY OR AGENT...
- Page 16 Rad2Go Owner’s Manual. This warranty does not apply to any damage to the Rad2Go Product that is the result of improper maintenance or to any Rad2Go Product that has been altered or modified so as to adversely affect the product’s operation, performance or durability or that has been altered or modified so...
-
Page 17: Manufacture's Warranty
Rad2Go, Inc., within 10 days of the date of purchase for warranty entitlement. This warranty is void if the serial number or the safety warning labels on your Rad2Go Electric Scooter are altered, defaced, or removed. Modifications to your Rad2Go Electric Scooter or its components shall void this warranty. - Page 18 Rad2Go Electric Scooter to reduce the risk of potential injury. _________ Do not operate the Rad2Go Electric Scooter in traffic or on wet, frozen, oily, pitted or rough surfaces. Avoid potholes, surface cracks, obstacles, and riding at night.
- Page 19 _________ Modifications or alterations to the manufacture’s original product or its components void all warranties. We stand behind our products: All Rad2Go products are fully warranted to be free from defects in both parts and workmanship for a period of 30 days from the time of purchase.

Need help?
Do you have a question about the ZZ Cruiser and is the answer not in the manual?
Questions and answers