Table of Contents
Advertisement
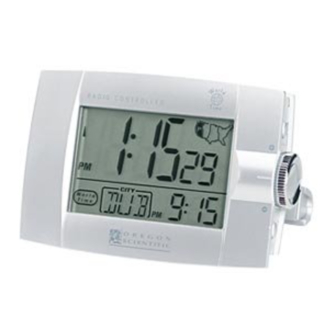
RADIO-CONTROLLED ALARM
CLOCK WITH WORLD TIME
MODEL NO.: RM932/RM932U
USER'S MANUAL
INTRODUCTION
Congratulations on purchasing the RM932/RM932U
Radio-controlled Clock with World Time.
This Clock is a compact device for both home-users as well as
travellers. The RM932 --- the Central Europe model --- is designed
to automatically synchronize its current time and date when brought
within an approximate 1500km radius of the radio signal generated
from Frankfurt, Germany (DCF77). The RM932U --- the UK
model --- will do the same when brought within range of the MSF-
60 radio signal from Rugby, UK.
In addition to the local time and calendar display, the user can also
select to display the corresponding time of
This Clock also comes with
favourable
function, multilingual day-of-the-week display, EL back-light,
hourly chime and dual alarm with 8-minute snooze function.
130
major world cities.
features including key-lock
CONTROL BUTTONS:TOP PANEL
1
1.
MODE BUTTON
- Press to change between the clock and calendar display modes
- Press and hold for 2 seconds to enter the clock and calendar
setting mode
2.
[SNOOZE/LIGHT] BUTTON
- Press to turn on the back-light for 5 seconds
- Press to activate the Snooze function when the alarm goes
off
- Press and hold for 3 seconds to turn off the alarm when the
alarm goes off
3.
[ALARM ON/OFF] BUTTON
- Press to activate/deactivate the corresponding alarm in display
1
3
2
Advertisement
Table of Contents

Related Manuals for Oregon Scientific RM932


Summary of Contents for Oregon Scientific RM932
- Page 1 Radio-controlled Clock with World Time. This Clock is a compact device for both home-users as well as travellers. The RM932 --- the Central Europe model --- is designed to automatically synchronize its current time and date when brought within an approximate 1500km radius of the radio signal generated from Frankfurt, Germany (DCF77).
-
Page 2: Control Buttons:side/Rear Panel
[RF CLOCK] BUTTON CONTROL BUTTONS:SIDE PANEL - Press and hold for 3 seconds to activate/deactivate the auto- reception of RF clock signal CONTROL BUTTONS:REAR PANEL [ALARM] BUTTON [RESET] BUTTON (inside battery compartment) - Press to toggle among the calendar, weekday alarm and single - Press to return all settings to default values alarm modes - Press and hold for 2 seconds to enter the setting modes of the... -
Page 3: Battery Installation
When the battery power level is low, the low battery indicator BEFORE YOU BEGIN ] will light up. Replace the batteries accordingly. Before operation, remember to slide the key-lock switch to the left to release all key operations. ACTIVATING THE BACK-LIGHT Press [SNOOZE/LIGHT] button to turn on the back-light for 5 seconds. -
Page 4: About Radio Reception
ABOUT RADIO RECEPTION - Strong This clock is designed to automatically synchronize its calendar clock once it is brought within range of the radio signal. When the - Weak unit is within range, its radio-control mechanism will override all manual settings unless auto-reception of radio signal has been manu- ally deactivated. -
Page 5: Setting The Clock And Calendar
Day-of-the-week SETTING THE CLOCK AND CALENDAR Language Monday Tuesday Wed. Thursday Friday Saturday Sunday CLOCK MANUALLY English 1. Press and hold [MODE] button for 2 seconds. German 2. Select the local city by using the rotary knob [UP]/[DOWN] button (for city names abbreviation, please refer to the section French “Selecting the World Time”). -
Page 6: Setting The Alarm
SETTING THE ALARM ALARM AND SNOOZE FUNCTION This clock is equipped with 2 alarms: Weekday Alarm and Single An alarm will go off for 2 minutes in two-step crescendo patterns if Alarm. For the Weekday Alarm, alarm will only sound out at the undisturbed. - Page 7 World City Abbreviations Reference Table Time Offset Country Name City code DST Period (GMT = 0) Addis Ababa, Ethiopia No DST Adelaide, Australia From Last Sunday in October to Last Sunday in March Auckland, New Zealand From 1st Sunday in October to 3rd Sunday in March Ankara, Turkey From Last Sunday in March to Last Sunday in October Algiers, Algeria...
- Page 8 Brussels, Belgium From Last Sunday in March to Last Sunday in October Brasilia, Brazil From 2nd Sunday of October to 3rd Sunday of February Buenos Aires, Argentina No DST Budapest, Hungary From Last Sunday in March to Last Sunday in October Cairo, Egypt From Last Friday in April to Last Friday in September Casablanca,...
- Page 9 Houston TX, USA From 1st Sunday in April to Last Sunday in October Indianapolis, IN, USA No DST Istanbul, Turkey From Last Sunday in March to Last Sunday in October Jakarta, Indonesia No DST Johannesburg, South Africa No DST Kabul, Afghanistan No DST Khartoum, Sudan No DST...
- Page 10 Montreal, Canada From 1st Sunday in April to Last Sunday in October Moscow, Russia From Last Sunday in March to Last Sunday in October Montevideo, Uruguay No DST Nassau, Bahamas From 1st Sunday in April to Last Sunday in October Nairobi, Kenya No DST New York NY, USA...
- Page 11 San Francisco CA, USA From 1st Sunday in April to Last Sunday in October Shanghai, China No DST Singapore, Singapore No DST San Jose, Costa Rica No DST San Juan, Puerto Rico No DST Salt Lake City UT, USA From 1st Sunday in April to Last Sunday in October Sofia, Bulgaria From Last Sunday in March to Last Sunday in October Sao Paulo, Brazil...
-
Page 12: The Reset Button
THE RESET BUTTON WALL-MOUNT OR TABLE-STANDING The [RESET] button is used to enhance synchronization of signals This unit is designed specially to facilitate table-standing or wall- after battery replacement or when the unit is operating in an mounting. unfavourable way or malfunctioning. Use a blunt stylus to hold Wall-Mount: down the button. -
Page 13: Maintenance
MAINTENANCE SPECIFICATIONS Proposed operating range -5.0 C to +50.0 C When handled properly, this unit is engineered to give you years of (23.0 F to 122.0 F) satisfactory service. Here are a few product care instructions: Radio Control Auto synchronize current time 1. -
Page 14: Ec Declaration Of Conformity
EC-DECLARATION OF CONFORMITY This product complies with the essential requirements of Article 3 of the R&TTE 1999/5/EC Directives, if used for its intended use and that the following standard(s) has/have been applied: Efficient use of radio frequency spectrum (Article 3.2 of the R&TTE Directive) applied standard(s) N / A Electromagnetic compatibility... - Page 15 Additional information: The product therefore conforms with the Low Voltage Directive 73/ 23/EC, the EMC Directive 89/336/EC and R&TTE Directive 1999/ 5/EC (appendix II) and carries the respective CE marking. CAUTION VS-Villingen / Germany August 2001 The contents of this manual and technical specifications are subject...
-
Page 16: Troubleshooting
TROUBLESHOOTING GUIDE --- RM932/RM932U Remedy Trouble Possible Cause Unlock the rear switch All function keys are disabled Rear slide switch is locked Reception icon "Antenna" is not shown Auto-reception of clock radio signal has been Enable this function by following the instruc- disabled tions in the User’s Manual...
Need help?
Do you have a question about the RM932 and is the answer not in the manual?
Questions and answers