
Related Manuals for Oregon Scientific RM962U


Summary of Contents for Oregon Scientific RM962U
-
Page 1: Front Cover
Radio Controlled Clock With Indoor Thermometer Model : RM962 / RM962U User Manual FRONT COVER © 2004 Oregon Scientific. All rights reserved. P/N.: 086-002663-056 BACK COVER... -
Page 2: Description Of Parts
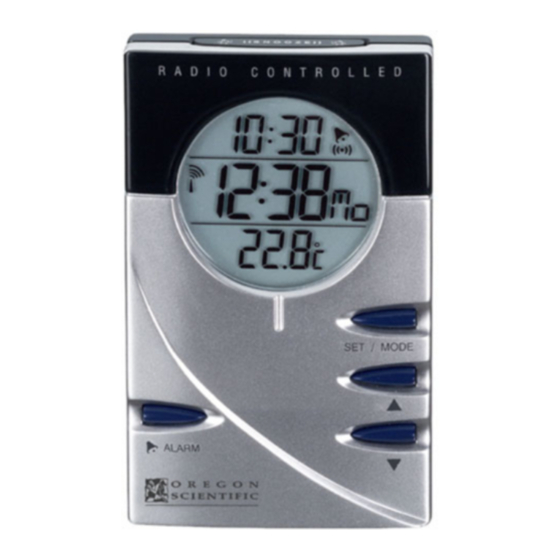
1500 km radius of the radio signal DCF77 generated from Frankfurt, Germany (RM962U - the UK version from MSF-60 Rugby, England). Features of this unit include: indoor temperature display, current... -
Page 3: Battery Installation
2. Insert the batteries strictly according to the polarities shown that highly-accurate time is maintained and manual adjustments to therein. the time and date are not be required. 3. Replace the battery compartment door. (RM962U - UK version within a 1500km radius of radio signal... - Page 4 (MSF-60) from Rugby, England) ] and [ ] buttons for 2 seconds. The antenna icon will disappear to show this deactivation. When the batteries are first installed, the unit will automatically search for a radio signal. To activate the auto-reception again, press and hold both buttons for 2 seconds again and the antenna icon will re-appear.
-
Page 5: The Alarm
3. Press MODE to confirm and proceed to set the day, display CALENDAR AND ALARM TIME DISPLAY language, day-of-the-week, hour and minute. 4. For the display language, you can choose between (E) for English The calendar and the alarm-time share the same section of the (D) for German (F) for French, (I) for Italian and (S) for Spanish. -
Page 6: Indoor Temperature
2. Enter the value for the hour digits. Press ALARM to confirm and The button is required only when the unit is not operating in a go to the minute digits. Enter the value and press ALARM to favorable way, such as in the rare case of a malfunction. confirm. - Page 7 TROUBLESHOOTING GUIDE — RM962 Trouble Possible Cause Remedy Reception icon “Antenna” is not Auto-reception of clock radio signal has Enable this function by following the shown been disabled instructions in the User’s Manual Displayed Temperature data is (1) The measurement method is different (1) Use the same instruments with different from other measuring consideration of the tolerance of...
-
Page 8: Specifications
General Specification SPECIFICATIONS Battery Type : Two (2) UM-4 or “AAA” size Operating Temperature : 5° C to 50° C 1.5V battery Unit Dimension : 104 x 64 x 21 mm (H x W x D) Clock Functions Unit Weight : 80 g (without battery) Radio Control : Auto synchronize current time and... -
Page 9: About Oregon Scientific
Electromagnetic compatibility We hope you will find all the information you need on our website, (Article 3.1.b of the R&TTE Directive) however if you'd like to contact the Oregon Scientific Customer Care Applied Standards ETSI EN 301 489-1-3 (Ver.1.4.1) :2002-08 department directly, please visit www2.oregonscientific.com/serv-... -
Page 10: Descrizione Dei Componenti
A. LCD a 3 sezioni raggio di 1500 km del segnale radio generato da Francoforte (DCF77). (RM962U — la versione per il Regno Unito — opera Visualizza l’ora, la data, l’ora della sveglia e la temperatura invece nel raggio del segnale radio MSF-60 generato da Rugby, interna. -
Page 11: Inserimento Delle Pile
F. Pulsante MODE Alterna le modalità di visualizzazione dell’orologio-calendario o attiva la modalità di regolazione dell’orologio calendario. G. Pulsanti SU [ ] e GIÙ [ Permettono di aumentare o ridurre il valore di un’impostazione. H. Pulsante ALARM Visualizza l’ora o regola l’ora della sveglia. Nota: la durata delle pile può... - Page 12 ] per 2 secondi. L’icona dell’antenna regolazioni manuali di data e ora. scompare per indicare questa disattivazione. (RM962U — Versione UK, da MSF-60 Rugby, Inghilterra) Per attivare nuovamente la ricezione, tenere premuti entrambi i pulsanti per 2 secondi; l’icona dell’antenna ricompare.
- Page 13 due secondi. Il valore del mese inizia a lampeggiare. VISUALIZZAZIONE DEL CALENDARIO E 2. Impostare il valore del mese usando i tasti [ ] e [ ]. Per far DELL’ORA IMPOSTATA PER L’ALLARME/ scorrere velocemente le cifre, tenere premuti questi tasti. SVEGLIA 3.
- Page 14 il valore e premere [ALARM] per confermare. È necessario usare questo pulsante solo se l’unità non funziona correttamente. 3. L’allarme/sveglia viene attivata automaticamente. Per disattivarla, premere [ALARM] una volta. PRECAUZIONI ALLARME/SVEGLIA E FUNZIONE Questa unità è studiata per offrire molti anni di funzionamento SNOOZE soddisfacente a condizione che venga maneggiata con cura.
- Page 15 PROBLEMI E SOLUZIONI – RM962 Problema Causa possibile Soluzione L’icona di ricezione La ricezione automatica del segnale radio è Abilitare questa funzione seguendo le istruzioni “Antenna” non appare. stata disabilita. Riportate nel manuale. I dati relativi alla (1) Il metodo di misurazione è differente (1) Usare gli stessi strumenti con considerazione temperatura sono diversi da per la tolleranza dei rilevamenti...
-
Page 16: Dati Tecnici
Dati generali DATI TECNICI Alimentazione : 2 pile ministilo di formato UM-4 o Temperatura di : da -5°C a +50°C AAA da 1,5 V funzionamento Dimensioni : 104 x 64 x 21 mm (A. x L. x P.) Peso : 80 g (pile escluse) Funzioni dell’orologio Con astuccio da trasporto Ricezione... -
Page 17: Informazioni Su Oregon Scientific
Questo prodotto è conforme ai requisiti essenziali dell’articolo 3 della Direttiva 1999 / 5 / CE di R&TTE se utilizzato per l’uso previsto e se vengono applicati Per avere maggiori informazioni sui nuovi prodotti Oregon Scientific, i seguenti standard: come le fotocamere digitali, il lettori MP3, i computer didattici per ragazzi, gli orologi con proiezione dell'ora, le stazioni barometriche, Requisiti essenziali sulla sicurezza dell’apparecchio... -
Page 18: Description Des Elements
1500 kilomètres, avec le signal radio DCF77 généré par Francfort, Allemagne (RM962U - ou avec le signal radio MSF-60 de Rugby, pour la version U.K.). A. 3 lignes ACL Les caractéristiques de cette unité... -
Page 19: Installation Des Piles
F. Bouton MODE Passage entre les différents modes d’affichage du réveil calendrier ou activation du mode de réglage du réveil calendrier. G. Boutons UP [ ] et DOWN [ Pour augmenter ou diminuer les valeurs de réglage. H. Bouton ALARM Affiche l’heure d’alarme ou règle l’état d’alarme. - Page 20 ] et [ ]. Maintenez-les enfoncés pendant deux secondes. L’icône antenne disparaîtra, indiquant que l’auto réception (RM962U - Version anglaise, dans le rayon de Rugby (MSF-60)) est désactivée. Quand les piles sont mises en place pour la première fois, il Pour activer à...
- Page 21 2. Entrez le mois en utilisant les boutons [ ] et [ ]. Maintenez CALENDRIER ET AFFICHAGE DE les boutons enfoncés pour une avance ou un recul rapide. L’HEURE D’ALARME 3. Appuyez sur le bouton MODE pour confirmer, et continuez de la même façon pour le réglage du jour, de la langue, du jour du Le calendrier et l’heure d’alarme partagent la même section de mois, des heures et des minutes.
- Page 22 4. Ne pas modifier les composants internes de l’appareil. Ceci aurait pour effet d’annuler la garantie de l’appareil et risquerait La température est indiquée en centigrades (°C). Le RM962/RM962U de causer des dommages inutiles. L’appareil ne renferme pas de peut relever les températures entre -5°C à +50°C. Si la température parties réparables par l’utilisateur.
- Page 23 GUIDE DES DEPANNAGE DU RM962 Panne Cause possible Dépannage L’icône «Antenne» ne s’affiche L’auto réception du signal radio du réveil Réactivez cette fonction en suivant les a été désactivée indications fournies dans le manuel de l’utilisateur Les données température (1) La méthode de mesure est différente (1) Utilisez les mêmes instruments en prenant affichées sont différentes de en compte la tolérance des lectures...
-
Page 24: Specifications Du Produit
Précision des relevés : 0,1°C SPECIFICATIONS DU PRODUIT Exactitude des relevés : -5°C à 0°C +/- 2,0°C Température de fonctionnement : -5°C à 50°C 0°C à 40°C +/- 1,0°C 40°C à 50°C +/- 2,0°C Fonctions de réveil Radio-commande : Auto-synchronise l'heure et Spécifications générales la date sur les signaux radio Type de piles... -
Page 25: A Propos D'oregon Scientific
En consultant notre site internet (www.oregonscientific.fr), vous R&TTE 1999 / 5 / EC : si il est utilisé à bon escient et si la ou les normes suivantes sont pourrez obtenir des informations sur les produits Oregon Scientific: respectées: photo numérique; lecteurs MP3; produits et jeux électroniques éducatifs;... - Page 26 Zeitanzeige und das Datum mit dem Funkzeitsignal DCF 77, sobald sich das Gerät in einem Umkreis von 1500 Km vom Zeitsignalsender in Frankfurt, Deutschland (DCF77) befindet. (RM962U - Die UK-Version synchronisiert mit dem MSF Zeitsignal des Senders in Rugby, England). A 3-zeilige LCD-Anzeige Dieses Gerät verfügt über folgende Funktionen: Innen- und...
-
Page 27: Einlegen Der Batterien
F MODE-Taste Umschalten zwischen den verschiedenen Anzeigemodi undbestätigen der Eingaben bei der Einstellung. G AUFWÄRTS- und ABWÄRTS-TASTEN [ ] und [ Anzeigewert aufwärts oder abwärts einstellen. H ALARM-Taste Hinweis: Die Batterielebensdauer kann durch den Anzeige der Alarmzeit oder Einstellen der Alarmfunktion wiederholten Einsatz der Anzeigebeleuchtung stark verkürzt SNOOZE -Taste... - Page 28 Datums erübrigt. den automatischen Zeitsignalempfang zu deaktivieren. Der Empfangsindikator erlischt nun. (RM962U - UK Version: in Rugby (MSF-60 Zeitsender)) Halten Sie die Tasten nochmals 2 Sekunden lang gedrückt, um den Nach dem Einlegen der Batterien sucht das Gerät automatisch nach Empfang des Funkzeitsignals wieder zu aktivieren;...
- Page 29 Die Datumsanzeige erfolgt im Tag-Monat-Format. 4. Wählen anschließend Sprache für Wochentagabkürzungen, (E) für Englisch, (D) für Deutsch, (F) für Französisch, (I) für Italienisch und (S) für Spanisch aus. Donnerstag Sprache Datums-Modus Alarm-Modus Montag Dienstag Mittwoch Donnerstag Freitag Samstag Sonntag Umschalten zwischen Datums- und Alarmzeitanzeige: Englisch •...
- Page 30 ein und bestätigen Sie die Einstellung mittels der ALARM- funktionieren sollte. Taste. 3. Die Alarmfunktion wird automatisch aktiviert. Betätigen Sie die VORSICHTSMASSNAHMEN [ALARM]-Taste einmal, um die Alarmfunktion zu deaktivieren Bei ordnungsgemäßer Handhabung ist über Jahre hinweg ein einwandfreier Betrieb des Gerätes gewährleistet. Hier einige ALARM- UND SCHLUMMERFUNKTION Vorsichtsmassnahmen: (SNOOZE)
- Page 31 FEHLERSUCHE-HINWEISE - RM962 Störung Mögliche Ursache Abhilfe Kein Funksignal-Indikator. Der automatische Funkzeitempfang wurde Aktivieren Sie den Funkzeitempfang, indem Sie die deaktiviert. Hinweise der Bedienungsanleitung beachten. Die Temperaturanzeige (1) Das Messverfahren ist unterschiedlich. (1) Verwenden Sie baugleiche Geräte und beachten Sie stimmt nicht mit den von die Toleranzgrenzen.
-
Page 32: Technische Daten
Genauigkeit der Anzeige : 5°C bis 0°C +/- 2.0°C TECHNISCHE DATEN 0°C bis 40°C +/- 1.0°C 40°C bis 50°C +/- 2.0°C : -5°C bis 50 °C Betriebstemperatur Allgemein Funktionen der Uhr Batterietyp : 2 Batterien des Typs UM4 oder Funkuhr : Anzeige für Zeit und Datum “AAA”;... -
Page 33: Über Oregon Scientific
Bei bestimmungsgemäßer Verwendung entspricht dieses Produkt den grundlegenden Besuchen Sie unsere Website (www.oregonscientific.de) und Anforderungen des Artikels 3 der R&TTE 1999 / 5 / EG Richtlinie.Folgende(r) erfahren Sie mehr über unsere Oregon Scientific-Produkte wie Standard(s) wurde(n) angewandt: zum Beispiel Digitalkameras, MP3-Player, Kinderlerncomputer und Spiele, Projektionsfunkuhren, Produkte für Gesundheit und... -
Page 34: Omschrijving Van De Onderdelen
RADIO GESTUURDE KLOK MET TEMPERATUUR MODEL: RM962/RM962U GEBRUIKSAANWIJZING INTRODUCTIE Gefeliciteerd met de aanschaf van de RM962/RM962U Radio gestuurde klok met thermometer. Kenmerken van de RM962/RM962U: Radio gestuurde klok en kalender via het DCF77 signaal vanuit Franfurt-Duitsland (of het radiosignaal MSF-60 van Rugby, Engeland voor de Britse versie) A. -
Page 35: Batterij Installatie
1500 km wordt geplaatsts.(of het radio- signaal MSF-60 van Rugby, Engeland voor de Britse versie) 2. Plaats de batterijen en let hierbij op de + en – tekens in het Als de RM962/RM962U binnen het bereik van het signaal is, worden battervakje. - Page 36 alle handmatige instellingen overschreden. Om de automatische ontvangst uit te schakelen houd u de [ Als het radio signaal ontvangen wordt begint het radio ontvangst en [ ] toetsen tegelijkertijd 2 seconden ingedrukt. Het antenne symbool te knipperen. symbool verdwijnt uit de display. Normaal gesproken duurt de ontvangst tussen de 2 en 10 minuten, afhankelijk van de sterkte van het radio signaal.
- Page 37 3. Druk op de [MODE] toets om te bevestigen en stel op dezelfde DATUM EN ALARM UITLEZING wijze de dag, display taal, weekdag, uren en minuten in. 4. Voor de display taal kunt u kiezen uit (E) Engels, (D) Duits, (F) De datum en alarm uitlezing maken gebruik van hetzelfde deel in Frans, (I) Italiaans en (S) Spaans.
- Page 38 De temperatuur uitlezing is in graden Celsius (°C). De RM962/ 4. Probeer een eventueel defect niet zelf te verhelpen, maar laat dit RM962U heeft een temperatuurbereik van -5°C tot +50°C . over aan personen die hiertoe bevoegd zijn, anders hebt u kans Als de gemeten waarden onder of boven het bereik komen toont de dat uw garantie vervalt.
- Page 39 PROBLEEM OPLOSSING HANDLEIDING - RM962 Probleem Mogelijke oorzaak Oplossing Het signaalpictogram “Antenne” De automatische ontvangst van het radioklok Zet deze functie aan als uitgelegd in de is niet zichtbaar signaal is uitgezet instructies in de gebruiksaanwijzing De aangegeven temperatuur is (1) De gebruikte meetmethode verschilt (1) Gebruik dezelfde instrumente en houd anders dan die aangegeven door...
- Page 40 Algemene Specificatie SPECIFICATIES Batterij Type : 2 stuks UM4 of “AAA” 1.5V alkaline batterij Werkings temperatuur : 5°C tot 50°C Afmetingen : 104 x 64 x 21 mm (H x B x D) Klok functies Gewicht : 80 g (zonder batterij) Radio gestuurd : Door het DCF77 radiosignaal Inclusief...
-
Page 41: Over Oregon Scientific
Bezoek onze website (www.oregonscientific.com) om meer te weten richtlijnen 1999 / 5 / EC, indien gebruikt als aangewezen en dat volgende over uw nieuwe product en andere Oregon Scientific producten normen werden toegepast: zoals digitale fototoestellen, gezondheids- en fitnessuitrusting en weerstations. -
Page 42: Descrição Dos Componentes
1500 km dos sinais de rádio DCF77, emitidos de Frankfurt, na Alemanha. (O RM962U – modelo para o Reino Unido – fará o A Ecrã de cristais líquidos (LCD) de 3 secções mesmo quando se encontra dentro do raio de acção do sinal MSF-... -
Page 43: Instalação Das Pilhas
F Botão de MODE Percorre os modos do ecrã do relógio calendário ou activa o modo de definição do relógio calendário G Botões para UP [ ] e para DOWN [ Aumenta ou diminui o valor de uma definição H Botão de ALARM Indica a hora do alarme ou define a situação do alarme Nota: A duração das pilhas pode ficar reduzida pelo uso I Botão de repetição... - Page 44 (RM962U-Versão para o Reino Unido, num raio de acção de 1500 Se quiser desactivar a auto-recepção RF prima ambos os botões km do sinal de frequência rádio (sinal de rádio MSF-60) emitido de ] e [ ] durante 2 segundos. O ícone de antena desaparece para Rugby, Inglaterra).
- Page 45 2. Introduza o mês, utilizando os botões [ ] e [ ] . Pressione VISUALIZAÇÃO DO CALENDÁRIO E um dos botões para aumentar ou diminuir o valor. HORA DO ALARME 3. Prima modo MODE para confirmar e proceder ao acerto do dia, do idioma de apresentação, do dia da semana, das horas e dos O calendário e a hora do alarme partilham a mesma secção do ecrã.
-
Page 46: Temperatura Interior
2. Introduza o valor dos dígitos das horas. Prima alarme ALARM O botão é usado quando o aparelho não está a funcionar para confirmar e seguir para os dígitos dos minutos. Introduza adequadamente, como no caso de avaria. o valor e prima alarme ALARM para confirmar. PRECAUÇÕES 3. - Page 47 RESOLUÇÃO DE PROBLEMAS – RM962 Problema Causa Possível Resolução Não aparece o ícone de recepção A auto-recepção do sinal de rádio do relógio Active esta função seguindo as instruções do foi desactivada. Manual do Utilizador. A Informação de Temperatura (1) O método de medição não é diferente. (1) Use os mesmos instrumentos tendo em apresentada é...
- Page 48 Especificações Gerais ESPECIFICAÇÕES Tipo de Pilhas : Duas (2) pilhas alcalinas UM-4 Temperatura de Funcionamento : -5,0°C até + 50,0°C ou “AAA” de 1,5V Dimensões do Aparelho : 104 x 64 x 21 mm (A x C x L) Funções do Relógio Peso do Aparelho : 80 g (sem pilhas) Controlo de Rádio...
-
Page 49: Sobre A Oregon Scientific
SOBRE A OREGON SCIENTIFIC DECLARAÇÃO DE CONFORMIDADE - EC Este produto está em conformidade com os requerimentos essenciais do artigo Visite nosso site (www.oregonscientific.com.br) para 3 da diretriz R&TTE 1999 / 5 / EC, se usado para seu uso pretendido e os aprender mais sobre nossos outros produtos, tais como seguintes padrões foram aplicados:... -
Page 50: Descripción De Las Partes
1500 km aproximadamente de la señal de radio DCF77 generada desde Francfort, Alemania (RM962U – la versión británica recibe la señal MSF-60 desde Rugby, A Pantalla de 3 líneas Inglaterra). -
Page 51: Instalación De Las Pilas
F Botón MODE Alterna entre los modos de presentación del reloj calendario o activa el modo de ajuste del reloj calendario. G Botones UP [ ] y DOWN [ Aumenta o disminuye el valor de un ajuste. H Botón ALARM Muestra la hora de alarma o establece el estado de la alarma. - Page 52 El icono de antena desaparecerá para indicar esta desactivación. (RM962U - Versión británica: dentro del radio de Rugby (MSF-60)) Para activar de nuevo la recepción automática, pulsar y mantener Cuando está en modalidad de búsqueda, el icono de antena oprimidos ambos botones otros 2 segundos y el icono de antena ] parpadeará.
-
Page 53: Ajuste Manual Del Reloj
Para ajustar manualmente el reloj: VISUALIZACIÓN DEL CALENDARIO Y 1. Cuando el calendario aparece en la pantalla, pulsar y mantener DE LA HORA DE ALARMA oprimido MODE dos segundos. El valor del mes empezará a destellar. El calendario y la hora de la alarma comparten la misma sección de la pantalla. - Page 54 COMO AJUSTAR Y ACTIVAR CÓMO REAJUSTAR LA UNIDAD LA ALARMA El botón RESET le permite restaurar todos los ajustes a sus valores de fábrica. 1. Para ajustar la hora de alarma, pulsar y mantener oprimido el botón [ALARM] durante dos segundos mientras se visualiza la El botón es solamente necesario cuando la unidad no funciona bien.
- Page 55 GUÍA DE LOCALIZACIÓN DE FALLOS – RM962 Problema Causa posible Remedio El icono de recepción “Antena” La recepción automática de la señal de Activar esta función de acuerdo con las no aparece en pantalla radio del reloj está desactivada. instrucciones del manual de usuario. Los datos de temperatura en (1) El método de medición es diferente.
-
Page 56: Especificaciones Del Producto
Exactitud de la temperatura : -5°C a 0°C +/- 2,0°C ESPECIFICACIONES DEL PRODUCTO 0°C a 40°C +/- 1,0°C 40°C a 50°C +/- 2,0°C Temperatura de servicio : -5°C a 50°C Especificación general Funciones del reloj Tipo de pila : 2 pilas tamaño UM4 o “AAA” Control de radio : Autosincronización de la hora y la de 1,5 V... -
Page 57: Sobre Oregon Scientific
Visite nuestra página web (www.oregonscientific.com) para conocer R&TTE 1999 / 5 / EC siempre que cumpla los siguientes parámetros: más sobre los productos de Oregon Scientific tales como: Reproductores MP3, juegos y productos de aprendizaje electrónico La seguridad de equipo de tecnología de información para niños, relojes de proyección, productos para la salud y el... - Page 58 RM962 är en multifunktionell radiostyrd klocka. Den kan automatiskt synkronisera tid och datum inom en radie av cirka 1500 kilometer från signalen DCF77 som sänds från Frankfurt i Tyskland (RM962U – UK-modellens signal genereras från MSF-60 Rugby i England). Den här modellen har följande funktioner: inomhustermometer, datumvisare, signalökande dagligt alarm med 8-minuters...
- Page 59 F MODE-knapp Visar kalenderns och klockans olika displaylägen eller aktiverar klockinställningar. G UPP [ ] och NER [ ] knappar Ökar eller minskar värdet på en inställning H ALARM knapp Visar alarmtid eller ställer in alarmstatus SNOOZE knapp OBS: Batteriernas livslängd kan reduceras genom flitigt bruk Snoozeknappen aktiverar alarmrepetitionen då...
- Page 60 (RM962U – UK-modellen: automatisk inställning inom en radie av För att stänga av den automatiska radiosignalen, tryck och håll inne 1500 kilometer från signalen (MSF-60) som sänds från Rugby i både [ ] och [ ] knappen i 2 sekunder. Symbolen för England).
-
Page 61: Att Ställa Klockan Och Kalendern Manuellt
3. Tryck MODE för att bekräfta och spara och ställ på samma sätt DISPLAY: KALENDER OCH ALARM in datum, språk, veckodag, timme och minut. 4. De språk som finns tillgängliga är: (E) Engelska, (D) Tyska, (F) Kalender och alarmtid visas i samma fält på displayen Franska, (I) Italienska och (S) Spanska. - Page 62 2. Ställ in timmar och tryck ALARM för att bekräfta och spara. Knappen bör användas endast då klockan inte fungerar Ställ därefter in minuter och tryck ALARM igen för att bekräfta tillfredsställande, t ex vid eventuella tekniska fel. och spara. 3.
- Page 63 FELSÖKNINGSGUIDE: RM962 Problem Möjlig orsak Åtgärd Antennsymbolen visas inte Den automatiska radiomottagningen har Aktivera funktionen genom att följa blivit frånkopplad anvisningarna i användarmanualen (1) Mätmetoden är annorlunda (1) Använd samma typ av instrument med Temperaturen som klockan avseende på mättolerans. visare skiljer sig från andra (2) Området som mäts skiljer sig eller mätinstrument...
-
Page 64: Teknisk Specifikation
Generella data TEKNISK SPECIFIKATION Batterityp : 2 st UM-4 eller “AAA” Arbetstemperatur: : 5° C till 50° C 1.5 batterier Storlek : 104 x 64 x 21 mm (H x B x D) Klockans funktioner Vikt : 80 g (utan batterier) Radiostyrning : Automatisk synkronisering av tid och Skyddande tygpåse medföljer... -
Page 65: Om Oregon Scientific
OM OREGON SCIENTIFIC FORSAKRAN OM OVERENSSTAMMELSE Den här produkten överensstämmer med de viktigaste kraven i “Artikel 3 i R&TTE 1999 / 5 Besök vår hemsida (www.oregonscientific.com) för att se mer av / EC-direktiven” om den används för avsett bruk och följande standards har tillämpats: våra produkter såsom digitalkameror;...
Need help?
Do you have a question about the RM962U and is the answer not in the manual?
Questions and answers