Table of Contents
Advertisement
Advertisement
Table of Contents

Related Manuals for Hoover HDB 642


Summary of Contents for Hoover HDB 642
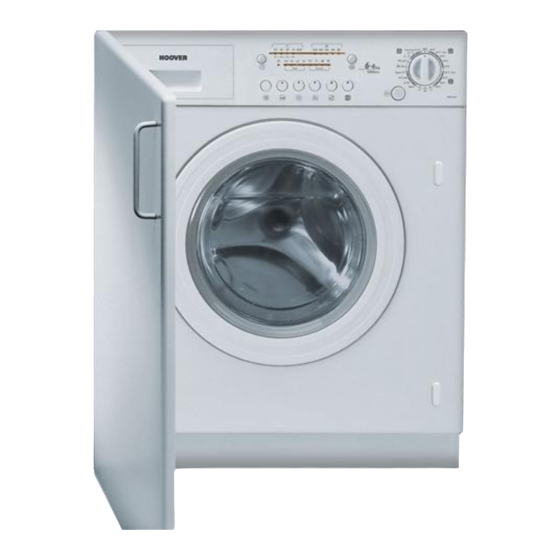
- Page 1 ® Washer Dryer Instructions for use HDB 642...
-
Page 2: Table Of Contents
Introduction Contents Page Please read these instructions for use carefully and all other information Introduction enclosed with the washing machine. General delivery notes Keep all documentation in a safe place for future reference or for any Safety notes future owners. Quick start Description of controls Note: this machine is solely for domestic use. -
Page 3: General Delivery Notes
B) Turn off the tap washing, select the programme required using the Drying C) Hoover equips all its appliances with earthing. Ensure that the mains supply is earthed, Selection button. and if it is not, seek assistance from a qualified person. -
Page 4: Description Of Controls
Description of controls Door open button Important: Fig. 1 A special safety device prevents the door from opening at the end of the wash/spin cycle. At the end of the spin phase wait up to 2 minutes before opening the door. C E M G F PROGRAMME selector with "OFF"... - Page 5 “SPIN SELECTION” button “DELAY START button” Appliance start time can be set with this button, delaying the start by 3, 6 or 9 hours. The spin cycle is very important to remove as much water as possible from the laundry without Proceed as follows to set a delayed start: damaging the fabrics.
- Page 6 “SENSITIVE CARE” button USEFUL TIPS: The 30 minute drying programme is recommended for small loads (less than 1 kg) or slightly damp loads. By pressing this button you can activate a special new wash cycle in the Cotton and Mixed Your washer-dryer ends the cycle automatically when it reaches the drying level selected.
- Page 7 START/PAUSE button When a programme is selecting, wait for the “STOP” indicator light to flash before pressing the "Start/Pause" button. Press to start the selected cycle (according to the selected cycle one indicator lights will go on) . NOTE: When the "Start/Pause" button has been pressed, the appliance can take few seconds before it starts working.
- Page 8 TABLE OF PROGRAMMES PROGRAM FOR: PROGRAMME WEIGHT TEMP. CHARGE DETERGENT SELECTOR ON: °C Resistant fabrics 90° Whites Cotton, linen Cotton, mixed Whites with 60° resistant Prewash 60° Fast coloureds Cotton, mixed Please read these notes 40° Non fast coloureds When washing heavily soiled laundry it is recommended the load is reduced to 4 kg maximum. 30°...
-
Page 9: Programme Selector
This programme drains out the water. SPORT SPECIAL SILK PROGRAMME Hoover has given sports items their own wash care programme. This washing machine also has a gentle Silk and Hand Wash programme The washing machine has a unique Sportswear programme. It is specially cycle. -
Page 10: Detergent Drawer
Detergent drawer DRYING Note: Dispensers used for concentrated powders and liquid detergents must be removed from the drum before commencing the tumble drying programmes. The detergent drawer is split into 3 compartments: - the compartment labelled "I" is for prewash detergent; The drum changes direction during the drying cycle to prevent the laundry from tangling and hence produce even drying. -
Page 11: Detergents, Washing Aids And Amounts To Use
Dosages Detergents, washing aids and amounts to use Only use detergents which are suitable for use in a washing machine. You will obtain the best results from your wash with the minimum use of chemical products Choice of detergent and the best care for your laundry if you take into consideration the degree of soiling as well General purpose detergents as the type of detergent to choose. -
Page 12: Sorting Laundry
Main wash Useful advice for users Sorting the laundry - It is recommended you wash only items which are machine washable with water and Tips on using your domestic appliance in the most environmentally-friendly and economical detergent and not dry-clean items. - If you need to wash rugs, bedspreads or other heavy items, it is best not to spin them. -
Page 13: Drying
The correct way to wash DRYING Preparing the laundry A) Select the laundry. DON’T DRY GARMENTS MADE FROM FOAM RUBBER Loading the laundry OR FLAMMABLE MATERIALS. B) Open the porthole. C) Put the laundry in the washing machine. IMPORTANT: Close the porthole again, ensuring that no items of THIS DRYER CAN ONLY BE USED FOR LAUNDRY laundry are obstructing the lock. -
Page 14: Automatic Washing/Drying Cycle
Drying cycle Automatic washing/drying The correct way to dry: - Open door. - Fill with up to 4 kg - in case of large items (e.g. sheets) or very absorbent items (e.g. Warning: only a maximum 4 kg of dry laundry can be loaded towels or jeans), it is a good idea to reduce the load. -
Page 15: Cleaning And Routine Maintenance
Cleaning and routine maintenance Table of drying times (in minutes): Do not use alcohol-based scourers and / or thinners on the outside of your washing machine, just a wipe with a damp cloth will suffice. The washing machine needs very little maintenance: PROGRAMME COTTON MIXED... -
Page 16: Investigating Malfunctions
Note: The use of environmentally-friendly, phosphate-free detergents can have the following effects: - waste water from rinsing may be cloudier because of the presence of zeolites held in Investigating malfunctions suspension, without the rinse performance being adversely affected; What might be the cause of… - presence of white powder (zeolites) on laundry after washing, which is not absorbed by Defects you can remedy yourself the fabric and does not alter the colour of the fabric. -
Page 17: Technical Data
SETTING UP + INSTALLATION Remove the polystyrene base and place the machine near its permanent position (diagram 1). Carefully cut through the hose retaining clip at the rear of the appliance (diagram 2). Remove the 3 fixing screws marked (A) and remove the 3 spacers marked (B) (diagram 3). -
Page 18: Water Connection
Note: we recommend you keep the screws to Note: it is advisable to turn off the tap after each wash immobilise the machine for future transit. to isolate the washing machine from the water supply. The Manufacturers will not be responsible for any possible damage to the machine caused by not The appliance must not be installed behind a lockable door, a sliding door or a door with a following the rules relating to releasing the mechanism. - Page 20 The manufacturer declines all responsibility in the event of any printing mistakes in this booklet. The manufacturer also reserves the right to make appropriate modifications to its products without changing the essential characteristics.
- Page 21 ® This appliance is marked according to the European directive 2002/96/EC on Waste Electrical and Electronic Equipment (WEEE). By ensuring this product is disposed of correctly, you will help prevent potential negative consequences for the environment and human health, which could otherwise be caused by inappropriate waste handling of this product.
Need help?
Do you have a question about the HDB 642 and is the answer not in the manual?
Questions and answers