Advertisement
Available languages
Available languages
Quick Links
iNSTALLATiON
AND
SERVICE MUST BE PERFORMED
BY A QUALiFiED
iNSTALLER.
iMPORTANT:
SAVE FOR LOCAL ELECTRICAL
iNSPECTOR'S
USE.
READ AND
SAVE THESE iNSTRUCTiONS
FOR FUTURE
REFERENCE.
FOR YOUR SAFETY:
Do not store or use gasollne or other flammable
vapors
and liquids in the vicinity
of this or any other appliance.
U.S.A.
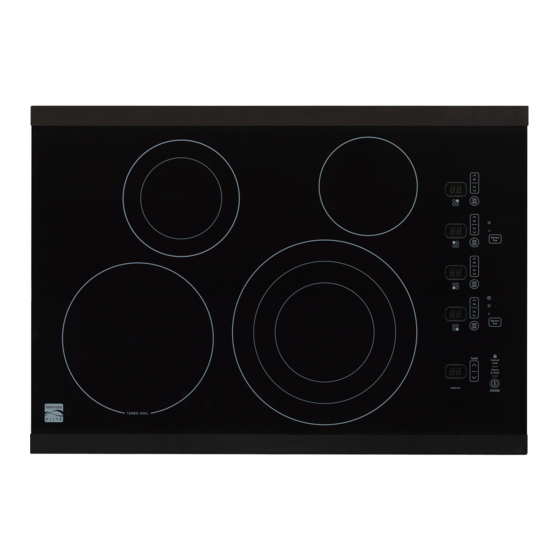
Cooktop
Dimensions
A
iMPORTANT
iNSTALLATiON
iNFORMATiON
° Aii electric
cooktops
run off: a single phase_ three-wire
or four-wire
cable_ 240/208
voit_ 60 hertz_ AC only
electrical
supply with ground.
° Please note minimum
distance between
cooktop and
adjacent
and overhead
unprotected
cabinetry
is 30"
(76.2 cm).
30" (76.2 cm) min. for unprotected
cabinet.
24" (61 cm) min. for protected
surface.
The corners of this unit are
fragile.
Carefully
install the cooktop
by
its sides. When
instaliing_ never let the
weight
of the unit rest on any one corner.
Cooktop
Cutout
Dimensions
G
4"
X 8" (10.2
cm
x 20.3
cm)
opening
at the
right
rear
to route
armored
cable
if a panel
is present.
F
Figure 1 - 30" Model shown only
30" Ceramic Model
303¼ (78.1)
211/2(54.6)
51/2 (14)
3V4 (8.3)
29 (73.7)
191/2(49.5)
36" Ceramic Model
363_ (93.3)
211/2(54.6)
51/2 (14)
31/4 (8.3)
34 5/8 (8Z9)
191/2(49.5)
........................................................
........
..........................................
MAx ......................................
....................................
..................
.................
..............
............
30" Ceramic Model
2934 (75.6)
30 1/8 (76.5)
20 3/8 (51.8)
203¼ (52.7)
6 (15.2)
36" Ceramic Model
351/2 (90.2)
35 7/8 (91.1)
20 3/8 (51.8)
203_ (52.7)
6 (15.2)
All dimensions
are in inches (cm).
Allow 2" (5 cm) space below cooktop
to clear the electric
cable and allow for
installation of the junction
box on the wall at the back of the cooktop.
Printed in United States
P/N 318205416
(1007)
Rev. B
English - pages 1-8
Espa_ol - pages 9-16
Advertisement

Related Manuals for Kenmore 79044373001


Summary of Contents for Kenmore 79044373001
- Page 1 U.S.A. iNSTALLATiON SERVICE MUST BE PERFORMED BY A QUALiFiED iNSTALLER. iMPORTANT: SAVE FOR LOCAL ELECTRICAL iNSPECTOR'S USE. READ AND SAVE THESE iNSTRUCTiONS FOR FUTURE REFERENCE. FOR YOUR SAFETY: Do not store or use gasollne or other flammable vapors and liquids in the vicinity of this or any other appliance.
- Page 2 Overhead Cabinet Should Not Exceed a Maximl,m Depth of 13" (33 cm) Min. 30" (76.2 cm) Min. Clearance Between " the Top of the Cooking Recommended Distance Between Platform and the Bottom Rear Edge of of an Unprotected 10" Cutout and Nearest Wood or Metal...
- Page 3 important Notes to the installer An extension cord must not be used with Read all instructions contained in these installation this appliance. Such use may result in a fire, electrical instructions before installing the cooktop. shock, or other personal injury. Remove all packing material before connecting...
- Page 4 Electrical connection Where local codes permit connecting the appllance- grounding conductor to the neutral (white) wire: It is the responsibility and obligation of the consumer contact a quaNfied instaNer to assure that the electrical if your cooktop has a 3-wlre cable to be connected installation...
- Page 5 If the appliance is used in a new branch circuit if your cooktop has a 4 wire cable (see figure installatlon (1996 NEC), mobile home, recreational 1. Disconnect the power supply. vehicle, or where local codes DO NOT permit 2. Separate the green (or bare copper) and white grounding...
- Page 6 Cooktop Installation Visually inspect the cooktop for damage. Also make sure all cool<top screws are tight (see Figure 8). 2. Install the retainer brackets (See Figure 9). 2 Nylon spacers _JJ__The corners of this unit are fragile. Carefully install the cooktop by its sides.
-
Page 7: Cutout Dimensions
For typical under counter installation of an electric built-in oven see Figure below. Only certain cooktop models may be installed Note 1: 4" x 4" (10.2cm X 10.2cm) opening to route over certain built-in electric oven models. armored cable from cooktop to junction box. - Page 8 Notes...
- Page 9 LA INSTALACION Y EL SERVICIO DEBEN SER EFECTUADOS POR UN INSTALADOR CALIFICADO. Estados Unidos IMPORTANTE: GUARDE ESTASINSTRUCCIONESPA_ USO DEL INSPECTORLOCAL DE ELECTRICIDAD. LEA Y GUARDE ESTAS INSTRUCCIONES PARA REFERENCIA FUTURA, PARA SU SEGURIDAD: No almacene nl u£lce gasoina u otrosvapores y iquldos inflamables en la proximldad de este o de cualquler otto a#efacto.
- Page 10 EJ armario superior no debe sobrepasar una profundidad m6xima de 13" (33 cm) Min. 30'; (76.2 cm) min. de espacio entre 2" (5 ..ia parte superior recomendada entre dei fog6n y ia borde trasero del corte parte inferior de un y el compartimiento armario de madera...
- Page 11 NOTA: Los tama_os y ias conexiones del aiambre deben Notas importantes para el instalador conformarse con el tama_o del fusible y el cjrado de la Lea todas las instrucciones contenidas en este manual aplicaci6n de acuerdo con el c6dicjo El_ctrico Nacional antes de instaiar la estufa.
-
Page 12: Puesta A Tierra
Conexi6n el_ctrica alambradodela casa. La capacidad decorrientedeI conductor est6 gobernada por la calificaci6n de la El usuario tiene la responsabilidad personal y obligaci6n temperatura deI aisiamiento akededor deI alambre de utilizar un instaiador caiificado, para asegurar que la vez de solamente eI calibre deI alambre. - Page 13 Si su cocina tiene un cable de 4 hilos (ver figura 7): Cable desde el suministro de energfa Desconecte el suministro el_ctrico. Alambre Separe el aJambre verde (o cobre desnudo) y eJ blanco (neutral) negros- alambre blanco del electrodom6stico. Alambre En el interruptor autom6fico, caja de fusibles o caja...
- Page 14 Instalaci6n de la estufa 1. Visuaimente inspecciones la estufa para da_os. Verifique adem6s que todos los tornillos de la estufa est_n bien ajustados (Figura 2. Instale las m_nsuias de sost_n. Ver Ficjura 9 2 espaciadores. de nil6n 2 M_nsulas de_,_/"Z_.k._,. -..
- Page 15 Instalaci6n tipica para una estufa el_ctrlca encima de un homo de pored instalada debaja del mastradar Nora 1: Apertura de 4" x 4" (10.2 x 10.2 cm) para S6io ciertos modelos de tapas de cocina se pueden cjuiar el cable blindado de la cubierta a la caja de...
- Page 16 Notas...
Need help?
Do you have a question about the 79044373001 and is the answer not in the manual?
Questions and answers