Advertisement
Available languages
Available languages
Quick Links
Operation
Manual
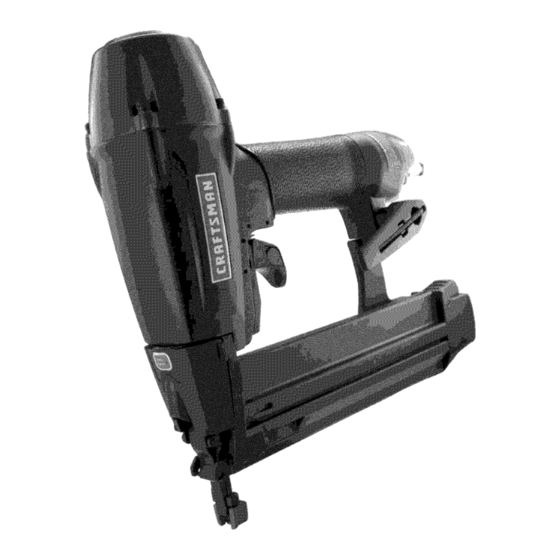
CRRFr MRN
MAGNESIUM COMBINATION
NAILER/STAPLER
KIT
t8 Gauge
5/8" - t-1/2"
Brad Nailer
& 5/8" - t-9/16"
Stapler
Model 142.18894
CAUTION:
Read, understand
and
follow all Safety Rules and Oper-
ating Instructions in this manual
before using this product.
PRECAUCION:
Lea, comprenda
y siga
todas las reglas de seguridad
y las in-
strucciones
de operaci6n
en este manual
antes de operar este producto
•
Safety
•
KnowYour
Nailer
•
Operation
•
Maintenance
•
Troubleshooting
•
Espa_ol
•
Parts List
Sears
Brands
Management
Corporation,
Hoffman
Estates,
IL 60179 U.S.A.
www.craftsman.com
Advertisement

Related Manuals for Craftsman 142.18894


Summary of Contents for Craftsman 142.18894
- Page 1 Operation Manual CRRFr MRN MAGNESIUM COMBINATION NAILER/STAPLER t8 Gauge 5/8" - t-1/2" Brad Nailer & 5/8" - t-9/16" Stapler Model 142.18894 • Safety CAUTION: Read, understand • KnowYour Nailer follow all Safety Rules and Oper- ating Instructions in this manual •...
- Page 2 Keep others at a safe distance from rented to another person. For 90 DAY commercial the tool while the tool is in operation. use terms, see listing on Craftsman warranty • Always remove finger from trigger when not driving page. This warranty...
-
Page 3: Led Light
Selectable Trigger Male Coupling Rear Exhaust with Muffler Dust Cap Tool-free Depth Adjustment (See Figure 8) LED Light Reversible Belt Hook With Hex Wrench storage Quick Jam Magazine Cover Release Latch Tool Noseplate No-Mar Tip Storage (Reverse Side of Tool) Magazine Cover LED LIGHT FEATURES... - Page 4 accidental discharge and possible injury, NEVER remove the male coupling to replace with a female coupling. DESCRIPTION To connect tool to air supply: TheCraftsman 18Gauge Combination Nailerand Firmly hold tool by its handle with one hand. Be Stapler d rivesbrads from5/8"to2"longand1/4" sure to point tool away from you and others in crown staples from5/8"to 1-1/2"...
- Page 5 NAILING ANDSTAPLING OPERATION LoadNails:Placenailstripso thatthechisel pointsrestonthebottom ofthemagazine. (See SeeFigures 8 -10(Pages 5 &6) Figure 5) WARNING: R eadandfollowallsafetyrulesand operating instructions i nthismanual a ndonwarning label o ftoolbefore using tool.Keepthismanual with thetool. WARNING: D onotusethistoolwithout s afety warn- inglabel.If labelis missing, damaged o r unreadable, contact 1 -800-469-4663 toobtaina newlabel.
-
Page 6: Clearing Ajammed Fastener
• recess facingthethreenailicon.Hold thetrigger depressed a ndpushcontact tripagainst w ork- piece. A fastener w illbedriven eachtimethe contact t ripis pushed against t heworkpiece. This operating procedure p rovides r apid-fire fastener driving. N ever o perate toolunless contact t ripis in contact withworkpiece. -
Page 7: Cold Weather Operation
COLDWEATHER OPERATION SAFETY MECHANISM CHECK CAUTION: Donotstorein coldenvironment. Frost inspect contact trip safety mechanism daily for proper or icecouldforminsidetoolaffecting operation and operation. Do not operate tool if mechanism is not damaging tool.Usea coldtemperature l ubricant, operating properly. suchas ethylene glycol, when operating tool in freez- With the red trigger switch in the rapid-fire mode, ing temperatures. - Page 8 90 DiAS, vea la lista en ia pagina web de de mantenimiento a la herramienta, al momento de garantias de Craftsman. Esta garantfa le brinda dere- librar un sujetador atorado, al salirse det area de tra- chos legales especificos...
- Page 9 • Nointente c tavar lossujetadores enmateriates duros • Et s ervicio d ebe setrealizado potparte depersonal niquebradizos, tales como etconcreto, acero, nilos calificado enlasreparaciones. azulejos. • Durante etmantenimiento delaherramienta, uses61o • Nointente a tcanzar demasiado tejos.Siempre p6n- partes d ereparaci6n identicas. •...
- Page 10 La ctavadora de espigas y engrapadora de combinaci6n • AsegOrese que todas las conexiones en et sistema de de calibre 18 de Craftsman ctava espigas de 5/8" a 2" de suministro de aire esten seltadas con et fin de prevenir una largo y grapas de corona ¼"...
- Page 11 Figura 4- Abra la cubierta det dep6sito alimentador Figura 7- Cierre el dep6sito alimentador OPERAClON DE CLAVADO Y DE ENGRAPE • Carga de ctavos: Coloque ta tira de ctavos para que Vet tas figuras 8 a 10 los puntos det cincel reposen sobre ta parte inferior det ADVERTENClA: Lea y comprenda todas las reglas de dep6sito alimentador (Vet la figura 5)
- Page 12 OPERAClON DEDBPARO SENClLLO: PUNTA ANTI-RAYAS La herramienta viene equipada con una punta anti-rayas ta Para ta operaci6n de disparo sencilto, empuje et lado que previene que se rayen tas superficies acabadas por ta redondo det interruptor de disparo rojo conducido por traba de seguridad durante ta operaci6n normal, La punta resorte y gire et lado en forma de tagrima con et fin de...
- Page 13 Presione y jale et disparador. Empuje la traba de seguridad contra ta pieza de trabajo donde se requiera un sujetador. La herramienta debera ctavar s6to un sujetador cada vez que la traba de seguridad este em- pujado contra la pieza de trabajo. Si el mecanismo de la traba de seguridad no opera de forma adee- uada, discontinue inmediatamente...
- Page 14 SINTOMA AcCION CORRECTIVA POSlBLE(S) CAUSAS 1. Anillo en O daSado El tap6n del disparador tiene una 1. Revise y reponga el anillo en O daSado fuga de aire 2. Eje de valvula, sello o sellos en O 2. Revise y reponga el eje, sello o sellos en O...
- Page 15 CRAFTSMAN MAGNESIUM COMBINATION NAILER/STAPLER NO. 142.18894 The model number is also found on the nameplate attached to the tool. Always mention the model number when ordering parts. To purchase parts, call 1-800-469-4663 _ ii_t ! _i_ iii ITEM PARTS NO...
- Page 16 Sears Brands Management Corporation Hoffman Estates, IL 60179 U.S.A. www.craftsman.com...
- Page 17 Operation Manual CRRFr MRN MAGNESIUM COMBINATION NAILER/STAPLER t8 Gauge 5/8" - t-1/2" Brad Nailer & 5/8" - t-9/16" Stapler Model 142.18894 • Safety CAUTION: Read, understand • KnowYour Nailer follow all Safety Rules and Oper- ating Instructions in this manual •...
- Page 18 Keep others at a safe distance from rented to another person. For 90 DAY commercial the tool while the tool is in operation. use terms, see listing on Craftsman warranty • Always remove finger from trigger when not driving page. This warranty...
- Page 19 Selectable Trigger Male Coupling Rear Exhaust with Muffler Dust Cap Tool-free Depth Adjustment (See Figure 8) LED Light Reversible Belt Hook With Hex Wrench storage Quick Jam Magazine Cover Release Latch Tool Noseplate No-Mar Tip Storage (Reverse Side of Tool) Magazine Cover LED LIGHT FEATURES...
- Page 20 accidental discharge and possible injury, NEVER remove the male coupling to replace with a female coupling. DESCRIPTION To connect tool to air supply: TheCraftsman 18Gauge Combination Nailerand Firmly hold tool by its handle with one hand. Be Stapler d rivesbrads from5/8"to2"longand1/4" sure to point tool away from you and others in crown staples from5/8"to 1-1/2"...
- Page 21 NAILING ANDSTAPLING OPERATION LoadNails:Placenailstripso thatthechisel pointsrestonthebottom ofthemagazine. (See SeeFigures 8 -10(Pages 5 &6) Figure 5) WARNING: R eadandfollowallsafetyrulesand operating instructions i nthismanual a ndonwarning label o ftoolbefore using tool.Keepthismanual with thetool. WARNING: D onotusethistoolwithout s afety warn- inglabel.If labelis missing, damaged o r unreadable, contact 1 -800-469-4663 toobtaina newlabel.
- Page 22 • recess facingthethreenailicon.Hold thetrigger depressed a ndpushcontact tripagainst w ork- piece. A fastener w illbedriven eachtimethe contact t ripis pushed against t heworkpiece. This operating procedure p rovides r apid-fire fastener driving. N ever o perate toolunless contact t ripis in contact withworkpiece.
- Page 23 COLDWEATHER OPERATION SAFETY MECHANISM CHECK CAUTION: Donotstorein coldenvironment. Frost inspect contact trip safety mechanism daily for proper or icecouldforminsidetoolaffecting operation and operation. Do not operate tool if mechanism is not damaging tool.Usea coldtemperature l ubricant, operating properly. suchas ethylene glycol, when operating tool in freez- With the red trigger switch in the rapid-fire mode, ing temperatures.
- Page 24 90 DiAS, vea la lista en ia pagina web de de mantenimiento a la herramienta, al momento de garantias de Craftsman. Esta garantfa le brinda dere- librar un sujetador atorado, al salirse det area de tra- chos legales especificos...
- Page 25 • Nointente c tavar lossujetadores enmateriates duros • Et s ervicio d ebe setrealizado potparte depersonal niquebradizos, tales como etconcreto, acero, nilos calificado enlasreparaciones. azulejos. • Durante etmantenimiento delaherramienta, uses61o • Nointente a tcanzar demasiado tejos.Siempre p6n- partes d ereparaci6n identicas. •...
- Page 26 La ctavadora de espigas y engrapadora de combinaci6n • AsegOrese que todas las conexiones en et sistema de de calibre 18 de Craftsman ctava espigas de 5/8" a 2" de suministro de aire esten seltadas con et fin de prevenir una largo y grapas de corona ¼"...
- Page 27 Figura 4- Abra la cubierta det dep6sito alimentador Figura 7- Cierre el dep6sito alimentador OPERAClON DE CLAVADO Y DE ENGRAPE • Carga de ctavos: Coloque ta tira de ctavos para que Vet tas figuras 8 a 10 los puntos det cincel reposen sobre ta parte inferior det ADVERTENClA: Lea y comprenda todas las reglas de dep6sito alimentador (Vet la figura 5)
- Page 28 OPERAClON DEDBPARO SENClLLO: PUNTA ANTI-RAYAS La herramienta viene equipada con una punta anti-rayas ta Para ta operaci6n de disparo sencilto, empuje et lado que previene que se rayen tas superficies acabadas por ta redondo det interruptor de disparo rojo conducido por traba de seguridad durante ta operaci6n normal, La punta resorte y gire et lado en forma de tagrima con et fin de...
- Page 29 Presione y jale et disparador. Empuje la traba de seguridad contra ta pieza de trabajo donde se requiera un sujetador. La herramienta debera ctavar s6to un sujetador cada vez que la traba de seguridad este em- pujado contra la pieza de trabajo. Si el mecanismo de la traba de seguridad no opera de forma adee- uada, discontinue inmediatamente...
- Page 30 SINTOMA AcCION CORRECTIVA POSlBLE(S) CAUSAS 1. Anillo en O daSado El tap6n del disparador tiene una 1. Revise y reponga el anillo en O daSado fuga de aire 2. Eje de valvula, sello o sellos en O 2. Revise y reponga el eje, sello o sellos en O...
- Page 31 CRAFTSMAN MAGNESIUM COMBINATION NAILER/STAPLER NO. 142.18894 The model number is also found on the nameplate attached to the tool. Always mention the model number when ordering parts. To purchase parts, call 1-800-469-4663 _ ii_t ! _i_ iii ITEM PARTS NO...
- Page 32 Sears Brands Management Corporation Hoffman Estates, IL 60179 U.S.A. www.craftsman.com...
Need help?
Do you have a question about the 142.18894 and is the answer not in the manual?
Questions and answers