Adam A3X Operation Manual
Ax series
Hide thumbs
Also See for A3X:
- Operation manual (52 pages) ,
- Operation manual (32 pages) ,
- Operation manual (32 pages)

Related Manuals for Adam A3X


Summary of Contents for Adam A3X
- Page 1 Operation Manual / Bedienungsanleitung English / deutsch AX Series A77X A77X...
-
Page 2: Safety Instructions
Safety Instructions Please read the following safety instructions before setting up your system. Keep the instructions for subsequent reference. Please heed the warnings and follow the instructions. Caution Risk of electrical shock Do not open Risque de shock electrique Ne pas ouvrier CAUTION: TO REDUCE THE RISK OF FIRE OR ELECTRIC SHOCK, DO NOT REMOVE BACK COVER OR ANY OTHER PART. - Page 3 Safety Instructions Protect the cord from being walked on or pinched. Always use fully checked cables. Defective cables can harm your speakers. They are a common source for any kind of noise, hum, crackling etc. Always keep electrical equipment out of the reach of children. Always unplug sensitive electronic equipment during lightning storms.
-
Page 4: Table Of Contents
Table of contents Safety Instructions ..........2-3 Introduction ............5 Quick Start ............6 Important Information ........6 Quick Start ............6 Connecting the Speaker ........7 Basic Connections ..........7 The Stereo Link ..........8 Speaker Placement ..........8-10 Vertical set up ...........8 Horizontal set up ..........8 Tweeter at height of ears ........9 The stereo triangle ..........9 Surround placement ..........10 Stand/Wall mounting ........10... -
Page 5: Introduction
You are invited to share your experience with our products by joining us on Facebook and also, if you don’t want to miss out on the latest info on ADAM Professional Audio, come and follow us on Twitter! We hope very much that you really enjoy your new loudspeakers, and wish you many delightful hours with them. -
Page 6: Quick Start
2. Quick Start Important Information for set up After having unpacked your loudspeaker, please allow the system to acclimate to the temperature of the room for approximately an hour. It is important to ensure the speakers sit firmly on a solid surface! We recommend that you retain the original packaging, as it is the best way to guarantee safe transportation should the need to do so arise. -
Page 7: Connecting The Speaker
On the front side of the unit functioning as master, a corresponding white LED will illuminate as soon as a mono RCA plug is connected to the Stereo Link output. Unlike the common ‘master-slave-configuration’, any A3X or A5X that is connected accordingly can function as either a master or a slave unit. -
Page 8: Speaker Placement
4. Speaker Placement Please make sure that there are no obstacles in the way from the monitor to your ears. You should be able to see the speakers completely. Vertical set up The AX-series have been designed for a vertical set up (except the A77X). The speakers must be positioned on a solid surface or a stand. -
Page 9: Tweeter At Height Of Ears
4. Speaker Placement A77X only: The A77X has been designed for a horizontal set up. Please note that there are two different versions, A and B (see label on the rear panel). The difference is that the two woofers reproduce different frequency bands. While both of them are responsible for the bass frequencies up to about 400Hz, only one of them reproduces the midrange. -
Page 10: Surround Placement
A3X/A5X only: Stand/Wall Mounting On the A3X and the A5X speakers you will find two M6 (6 mm) metric strew threads for stand/wall mounting on the rear side. Further equipment for mounting is also available. Please contact us for more information. -
Page 11: Speaker Adjustment
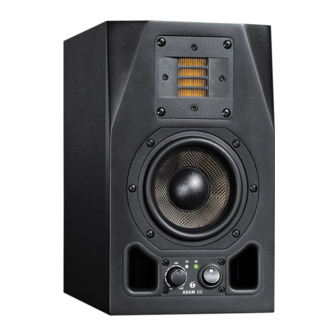
5. Speaker Adjustment Controls On the rear side you will find controls that allow de- IN-/ OUTPUTS CONTROLS tailed fine-tuning of your loudspeakers to your particu- lar room acoustics and personal listening preferences. OUTPUT The following tips are intended to assist you at using STEREOLINK the controls in the best manner. -
Page 12: Troubleshooting
6. Troubleshooting All ADAM products are designed and manufactured to the highest quality standards. However, if any problems with your speaker occur, we recommend to proceed as fol- lows: Problem: The LED shows normal operation (green) but there is either no or only a distorted audio signal. -
Page 13: Maintenance
Experience has shown that it is very dif- ficult to avoid damage if you have to send them without these. ADAM Audio can not be held responsible for damages due to improper packaging. -
Page 14: Eu Declaration Of Conformity
Ederstr. 16, 12059 Berlin, Germany declare under our sole responsibility that the products: A3X, A5X, A7X, A8X, A77X comply with the EU Electro-Magnetic Compatibility (EMC) Directive 89/336/EEC, in pursuance of which the following standards have been applied:... -
Page 15: Limited Warranty
Service may be supplied by your ADAM Audio national distributor in the country of residence. In this case, the service costs have to be paid for by the owner of the product whereas the costs for parts to be repaired or replaced are free of charge. -
Page 16: Technical Data
12. Technical Data/Technische Daten 1 = long term IEC 265-8-Wrms / 10 min 2 = nominal IEC 265-8 = Peak Power 5 µsec A77X Tweeter/Hochtöner X-ART X-ART X-ART X-ART X-ART Velocity transfer ratio/Ge- schwindigkeitstransformation Equivalent diaphragm ø/Äquiva- 56 mm / 2“ 56 mm / 2“... - Page 17 ADAM Audio USA Inc. email: usa-info@adam-audio.com tel: +49 30-863 00 97-0 fax: +49 30-863 00 97-7 ADAM Audio China email: info@adam-audio.com email: china-info@adam-audio.com A3X/A5X/A7X/A8X/A77X Manual/Bedienungsanleitung. Version 06.2012 English/deutsch. All data subject to change without prior notice. Änderung der technischen Daten ohne Vorankündigung vorbehalten.
Need help?
Do you have a question about the A3X and is the answer not in the manual?
Questions and answers