Table of Contents
Advertisement
Quick Links
Advertisement
Table of Contents

Related Manuals for Caple C3370


Summary of Contents for Caple C3370
- Page 2 Dear Customer, Thank you for selecting one of our products. We are certain it will respond fully to your needs and expectations, giving perfect results every time. Please read this manual carefully. The instructions it contains will enable you to use the appliance correctly and to best advantage.
-
Page 3: Safety Precautions
SAFETY PRECAUTIONS - To avoid any possible hazard, the appliance may be installed by qualified personnel only. - Any repairs by unqualified persons may result in electric shock or short circuit. In order to avoid possible injuries to your body or to the appliance, do not attempt any repairs by unqualified service personnel. -
Page 4: General Information
GENERAL INFORMATION The oven data plate remains accessible following installation, and is exposed to view simply by opening the door. It shows all details needed to identify the appliance, and these must be indicated when ordering replacement parts. MADE IN EUROPE NUM. -
Page 5: Cooking Functions
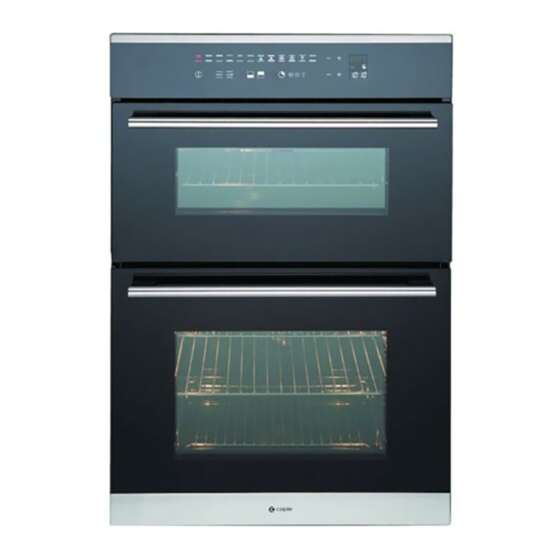
CONTROL PANEL View of front console Cooking functions The control makes a total of fourteen specific cooking functions available! Every function has a preset temperature. The user can change the temperature according to his personal preference. - Page 6 POSSIBLE ACTIONS WITH THE OVEN SWITCHED OFF The actions possible when the oven is switched off are: - Switching on the oven light The oven light is activated/deactivated by pressing While the light is on, if the oven will be switched on, the oven light will switch off. If the user does not switch it off, it is automatically deactivated after 30 minutes TO SAVE ENERGY.
- Page 7 HOW TO SWITCH ON THE OVEN The oven is switched on using the ON/OFF symbol shown in the figure. The control activates all the symbols, illuminating the background. NOTE: remember that the oven can only be switched on if the key function is deactivated. The control will wait eight seconds after the switch-on of a cooking function.
-
Page 8: Oven Interior Light
After switching on the oven, select the TOP OVEN using the key , and MAIN OVEN using the key: When 2 ovens are working simultaneously, the key will flash to show which oven has been selected. A complete description of all functions is listed below. TOP OVEN The oven offers these following cooking: functions: ON/OFF... - Page 9 MAIN OVEN The oven offers these following cooking: functions: ON/OFF Oven interior light Top heating element. Thermostat setting from 50°C to 200°C. Lower heating element Set the required temperature between 50 and 250 °C. This setting is used typically for food to be reheated or warmed. Conventional cooking Set the required cooking temperature between 50 and 250 °C.
-
Page 10: Fan-Forced Cooking
Fan-forced cooking The fan and the relative heating element come into operation, and the heat will be distributed uniformly around the entire chamber at the temperature selected with the thermostat, between 50 and 250 °C. The oven should be pre-heated before any food is put in to cook. Different types of food can be cooked simultaneously. -
Page 11: Special Functions
SPECIAL FUNCTIONS Boost (quick preheat) This special function can be activated after a cooking function has been selected and it is used to reduce the time required to reach the set cooking temperature. This period of time is known as preheating, and is required in practically all recipes. It is possible to disconnect the boost heat function or change cooking function at any time. -
Page 12: Electronic Programmer
ELECTRONIC PROGRAMMER Warning: both the ovens can be programmed in the cooking times after selecting them by switching on the TOP and MAIN symbols. The cooking time sequences are independent. The programming of the oven offers three modes to controlling the cooking time. They are available with the standard cooking functions. - Page 13 The count begins now and the symbol will flash. When the time is over, the oven will make a beeping sound, the heating elements will be switched off and cooking will stop. Press any button to stop the beeping sound. After eight seconds, the oven switches off automatically unless other cooking functions are programmed.
- Page 14 The count begins and the symbol will flash. When the set time is reached, the oven will give off a beep, the heating elements will be switched off and cooking will stop. Press any button to stop the beeping sound. After eight seconds, the oven switches off automatically unless other cooking functions are programmed.
- Page 15 Change the cooking end time to make it coincide with the time you require. In our example this is 1.00 p.m. The oven now enters into stand-by mode and the oven light switches off. When it is time to start cooking, the light will not be automatically switched on (it is logical to assume that the delayed start coincides with your absence, so it is pointless to leave the light on for no reason).
- Page 16 COOKING TABLE FOR TOP OVEN - CONVENTIONAL COOKING It is recommended to preheat the oven 10 min. DISHES LEVEL TEMPERATURE COOKING TIME Yorkshire Puddin 30 - 40 min 200°C Fatless Sponge Cake 25 - 30 min 180°C Small Cakes 15 - 20 min 190°C Fruit Plate Tart 200°C...
- Page 17 COOKING SELECTIONS Select the desired cooking function. Preheat the oven, setting the thermostat to the required temperature. Once the oven has been heated to the selected temperature, the symbol °C will stop flashing and the electronic module will perform 2 beep sounds. Remove the drip tray when using the oven for conventional baking, roasting etc.
-
Page 18: Roasting Guide
ROASTING GUIDE - Frozen meat should be thoroughly thawed before cooking. For large sizes it is advisable to thaw overnight. - Frozen poultry should be thoroughly thawed before cooking, the time required depends on the size of the poultry e.g. a large turkey may take up to 48 hours to thaw. - Adjust the shelf position so the meat or poultry will be in the centre of the oven. -
Page 19: Defrosting And Cooling
DEFROSTING AND COOLING To defrost frozen foods, select the defrost key, place the food in the centre of the oven and close the door. Be safe X DO NOT defrost stuffed poultry using this method. X DO NOT defrost larger joints of meat and poultry over 2kg.(4lb) using this method. X NEVER place uncooked food for defrosting next to cooked food which is to be cooled, as this can lead to cross contamination. -
Page 20: General Instructions
INSTRUCTIONS FOR USE General instructions CAUTION: the oven door becomes hot during use. Be sure to keep children away! Do not use the oven as a room heater. Always be very careful when connecting other electrical appliances to the power supply if these are situated near the oven: the power cables must not come into contact with hot parts of the oven. -
Page 21: Installation
INSTALLATION CAUTION: THIS APPLIANCE MUST BE INSTALLED BY A PROFESSIONAL ELECTRICIAN, ACCORDANCE WITH MANUFACTURER’S INSTRUCTIONS BEFORE CARRYING OUT ANY ADJUSTMENT OR REPAIR ON THE APPLIANCE, MAKE CERTAIN IT IS DISCONNECTED FROM THE ELECTRICAL POWER SUPPLY Statutory regulations, technical standards, directives The appliance must be installed in conformity with current statutory regulations and in accordance with applicable safety standards. -
Page 22: Electrical Connection
Electrical connection Make certain the nominal a.c. power supply voltage corresponds to that indicated on the identification data plate. The appliance must be connected to the supply by way of an isolating switch with minimum contact separation of 3 mm. Suitable isolating components include automatic breakers, fuses and relays. -
Page 23: Cleaning And Maintenance
CLEANING AND MAINTENANCE Never clean the oven with the high- pressure steam cleaning device, as it may provoke short circuit. Before cleaning switch the cooker off and let it cool down completely. Front side of the casing To clean the frontal part of the cooker use conventional cleaning agents and follow the manufacturer’s instructions. -
Page 24: Technical Data
CLEANING AND MAINTENANCE IMPORTANT: before carrying out any maintenance operations on the oven, disconnect the appliances from the main power. The oven’s side runners can be easily removed by disconnecting them from the peg in the bottom. To put them back in place, reverse this procedure. Clean the side grids only with conventional detergents. - Page 25 MAIN oven (4F) Nominal electrical input in W (toll. +5 /-10%) - interior light 25 W - radial fan unit 30 W - tangential fan unit, large oven 10 W - circular heating element 2300 W - grill element 2000 W - Maximum electrical input 2365 W - Maximum overall electrical input...
-
Page 26: Interior Light: Replacing The Lamp
INTERIOR LIGHT: REPLACING THE LAMP CAUTION: Disconnect the appliance from the po- wer supply. To replace the lamp of the oven interior light, first unscrew and remove the protective cover A. Renew the lamp, and refit the cover A. Max power 25 W. -
Page 27: Removing The Oven Door
REMOVING THE OVEN DOOR The door is easily removed, as follows: - open the door completely; - raise the two hinge levers as indicated in the drawing; - close the door again until a click is produced by the levers raised previously; - lift the door upward and away from the front of the oven to free it from the sockets;...
Need help?
Do you have a question about the C3370 and is the answer not in the manual?
Questions and answers