
Related Manuals for Valor DD-858W


Summary of Contents for Valor DD-858W
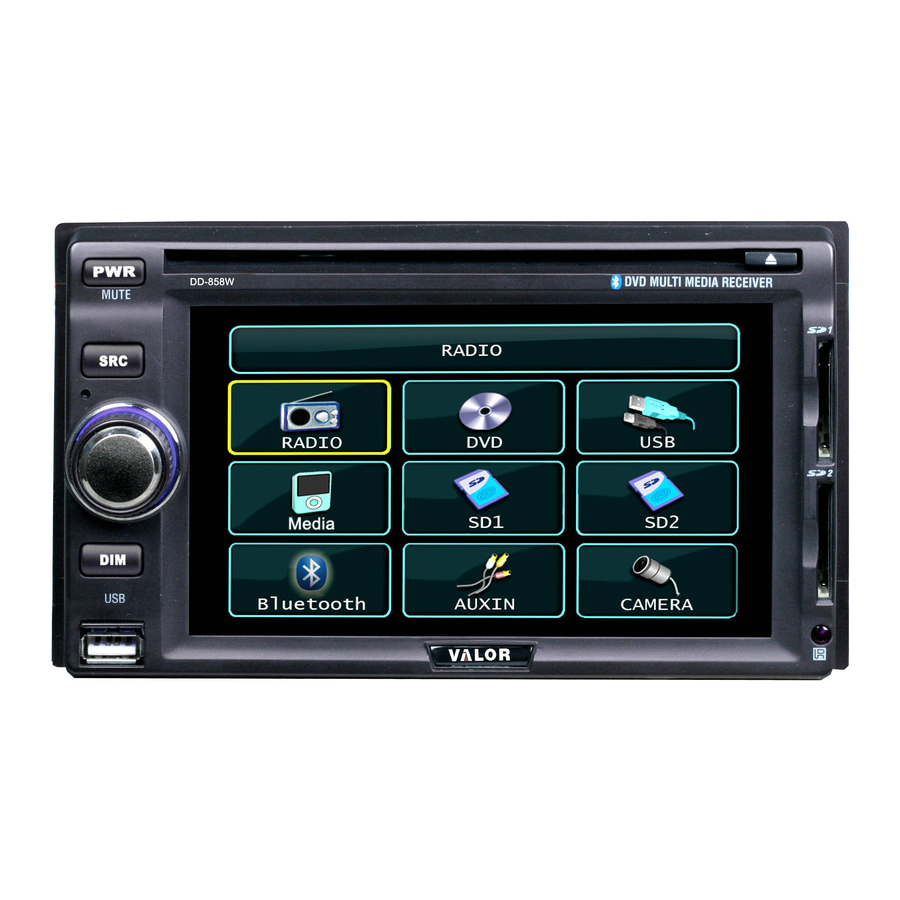
- Page 1 USER MANUAL 5.8" 2 DIN Multimedia System with Touch Screen LCD Monitor MODEL: DD-858W )) [ ( PWR J l:::::'===============~==~~~ DD-858W DVD MULTI MEDIA RECEIVER MUTE I!il V/1LOR...
-
Page 2: Table Of Contents
Congratulation on your purchase of this high quality DD-858W Car Multimedia Player. Before installing or using this unit, please read this manual carfully to ensure current operation. Keep the manual at hand for future reference. Contents ···3 Features ···· ·.. · ··... -
Page 3: Features
- Bluetooth Connection compatible (option) - Media playable (option) It's a good idea to read all instructions before installation. We recommend having your DD-858W installed by an authorized installer or reputable installation center. Equipment needed for installing the unit - Wire cutters and strippers - Tools to remove existing radio (screwdriver, socket wrench set, etc.) - Page 4 Remove Old Unit 1. Remove dash panel to expose radio chassis. 2. Remove the screws from the mounting bracket and remove the unit. 3. Disconnect wiring harness. 4. Unscrew factory mounting brackets. Install Brackets...
- Page 5 1. Install brackets to the new unit supplied by car. 2. Or you can use the bracket supplied with the unit. Wire Connection 1. Connect wiring adapter to existing wiring harness. 2. Connect antenna lead. Final Installation...
- Page 6 1. Carefully slide the unit and frame into dash opening. 2. Attach one end of the perforated support strap (supplied) to the screw stud on the rear of the chassis using the hex nut provided. Fasten the other end of the perforated strap to a secure part of the dashboard either above or below the unit using the screw and hex nut provided.
-
Page 7: Wire Connection
Wire~ Connection <> _--B::..:I=ue=------~ Block Front BI<lCk Green with White Stripe Gray aID- _-----.:P..:..:il"l..::.:.k__ f.t.t\ Rear While/Block (-) Gray/BloCk (-) Gray Whit. Vlolet/Block (-) Green/Block (-} Green '/ool"t... - Page 8 Connection 1. AUX IN L/RNIDEO 2. Rear Monitor 2, Camera 3. Bluetooth Microphone 4. Power Antenna Wire(Blue): Connect to a motorized (power) antenna and/or to a remote turn-on lead for an amplifier. 5. Front and Rear RCA Outputs(Black/Gray) 6. Left Front Speaker(White, White/Black) 7.
-
Page 9: Main Unit Display
The buttons located on the DD-858W front display and the remote control that perform the same function are assigned the same number for reference on the diagrams and in the text. DD-858W DVD MULTI MEDIA RECEIVER MUTE r - - I - - - s ..'... -
Page 10: Remote Control
Remote Contol DD-858W has a remote control: a full featured hand-held IR(infra-red) remote control. It uses a CR2025 Lithium battery. The battery compartment is located on the back of the remote control near the bottom edge. To replace the battery, pull the compartment out, as indicated on the remote control. -
Page 11: General Operation
General Operation Note: Some DVDs require specific operation or allow only limited operation during playback which may not respond to all operating commands. When this occurs, the symbol appears on the TFT screen, indicating that the operation is not permitted by the player or the disc. POWER 1. - Page 12 At any mode, you can see EO at the down-left corner in screen. Once you touch the EO icon or press A.SEL button(12) on the remote control, screen will show Adio Adjust menu display. - EO : Press by EO on screen to select Equalizer among User, Classical, <l l I I Rock, Jazz, Pops.
-
Page 13: Main Setup
MAIN SETUP Enter/Exit Main Setup Mode 1. Press MAIN SETUP in the mode selection display. 2. Press in upside on screen to exit setup mode and ruturn to the last mode. Or if no touch on screen for 10 seconds it automatically returns to the last mode. GENERAL Once you enter the main set up mode, General setup menu will be displayed on the screen. - Page 14 Touch Screen Calibrate 1. Press TS Calibrate menu bar on screen to open the TS Calibrate window as below which asks Yes/No for start. 2. Press Yes to start touch screen calibration. 3. Press at up-left, dwon-Ieft, down-right and up-right corner on screen as displayed below.
- Page 15 User Default Settings 1. Press User Default Settings menu bar on screen to open the window which asks Yes/No. 2. Press Yes for start resetting. The unit will be resetted and automatically off. ASP (Audio Setup) Enter the Main Setup mode and press ASP at downside of screen to display audio setup menu.
- Page 16 Camera Image <lllII, ~ Press by Camera Image menu bar on screen to select Normal or Mirror. If you select "Mirror", the image reflected by camera will be reversed as the image seen through mirror.
-
Page 17: Radio Operation
Radio Operation Switch to Radio Mode When you turn on the unit, radio mode will displays on screen first. When switching the other mode to radio mode, press MODE button(9) in the remote control or touch the mode icon at up-right side of screen to go to the mode selection display, and press radio mode icon. - Page 18 Adjust Sensitibity 1. OX is default as displayed on screen. When selected LOC, the sensitivity will decrease of 20dB. You can select LOC when operating SEEK near broadcasting station. 2. Press LOC/OX at downside in dispay to change the sensibility. Stereo Broadcast (ST) When ST appears at upside of display, it's stereophonic broadcasting.
-
Page 19: Rbds Operation
RBDS Operation TA (Traffic Announcement) TA lets you receive traffic announcements automatically, no matter what source you are listening to at the moment. TA can be activated for both a TP station or an enhanced other networks TP station. - To turn TA off/on, touch TA in screen. - When recieving Traffic Announcement, if the volume is low than 16, it will be changed to 16. - Page 20 :,l} AM 06: BAND SCAN SETUP TAVolume 0-39. -You can select volume between Clock Tune -Select "On", when you drive to different place, the clock can adjust automatically. TA Option -Seek/Alarm. TA Retune -Long/Short. RADIO...
-
Page 21: Cd Player Operation
CD Player Operation Switching to CD Mode Press MODE button(9) in remote control or touch the mode icon at up-right corner of screen to go to the mode selection display, and press DVD mode icon. (DVD mode icon is only activated when already inserted a disc.) Disc Insert/Eject 1. - Page 22 Fast Forward/Fast Reverse 1. Press button(17) in remote control or NEXT, in screen for fast reverse, increasing playback speed rate at X2, X4, X8, X16, Play(normal) by pressing more. 2. Press button(18) in remote control or NEXT, in screen for fast forward, increasing playback speed rate at X2, X4, X8, X16, Play(normal) by pressing more.
- Page 23 MP3IWMA Player Operatan You can play MP3/WMA files stored in disc/SO card/USB. Functions as play, pause, stop, track selection, fast forward/reverse, repeat play, intro scan, random play, etc. are the same for MP3/WMA with CD operation. Please see the CD player operation section for the instruction about these functions.
-
Page 24: Dvd Player Operation
DVD Player Operation Note: When the unit is properly installed, DVD video cannot be displayed on the main TFT screen unless the parking break is applied. If you attempt to playa DVD while the vehicle is moving, the TFT screen displays "PICTURE OFF FOR YOUR SAFETY"... - Page 25 Display DVD Information Press INFO in screen or DISP button(1 0) in the remote control to display DVD information as title, chapter, audio, subtitle, etc. on screen. Section A-B Repeat Play You can set a section in track and play the section repeatedly. 1.
- Page 26 Zoom Press NEXT, in screen for zooming in screen. L[4J GOTO (Direct Access) You can select the desired track directly. 1. Press GOTO button(34) in remote control for opening direct access display. Title search menu highlighted and selected first in the display. 2.
-
Page 27: Dvd Setup
DVD SETUP 1. When playing DVD/CD, press SETUP button(20) in remote control or press SETUP in screen to show DVD SETUP display. 2. After set up, to go back to DVD playback, press SETUP button(20) in remote control or at up-right side of screen. Or no response for 10 seconds, it will automatically go back to DVD playback. - Page 28 activated in screen. If it is deactivated at the setup menu display, you cannot select this menu option, while it is already applied "On" automatically by unit. ~ ,~ 2. Press by Downmix menu bar in screen to select On/Off. Dolby Prologic II Dolby Prologic II technology processes any high quality stereo (2CH) movie and music audio into five playback channels(5.1 CH) of full-bandwidth surround...
- Page 29 Video Type ~, ~ 1. Press by Video Type menu bar in screen to select one type among Fill / Original/Height Fit / Width Fit / Auto Fit / Pan Scan. Disc Language Setup After language setup at DVD setup mode, when playing disc, the selected language will be applied/shown.
- Page 30 Test Tones Press ... , by Test Tones in screen to select a speaker and perform test. Bass Manage 1. Press T at leftside of Speaker setup display to turn to the second page menu. 2. Press ... , by Bass Manage menu bar to select Off/On. 3.
- Page 31 Here are some tips for OSD(ON Screen Display). It is convenient for operation. We can divide the screen into several areas as below. Touch A area, launcher MENU will appear. RADIO MAIN SETUpl • • MEDIA It.. AUXIN BLU ETOOTH Tounch B area, SETUP MENU will be showned(27).
-
Page 32: Vcd Player Operation
VCD Player Operation VCD is played at DVO mode. Switching mode and playback functions are the same for CO/OVD player operation. Audio When playing VCD, press NEXT, PSC in screen to select the audio speaker effect. (Left Right Stereo) When playing VCD, press NEXT, PSC in screen to go to VCO starting menu display. -
Page 33: Jpeg Operation
You can see JPEG file stored in disc/SO card/USB. When using a disc, it should be operated in OVO mode. When using SO CARO or USB, select the corresponding mode at mode selection display. Slide Show Operation 1. When JPG mode is played, slide show will be operated automatically. A slide stops for 5 seconds and goes to next file in alphabetical/number order of file name. -
Page 34: Usb/ So Card Operation
USB I SO Card Operation Switching to USB / SO Card Mode Press MODE button(2) or press the current mode icon at up-left of screen to go to mode selection display and press USB / SO card mode icon. Play Each Source According to the source stored in USB or SO card, you can play it. -
Page 35: Bluetooth Operation
Bluetooth Operation This unit supports Bluetooth wireless connection with a bluetooth cellular phone. Note: - Before using the bluetooth function in unit, please check microphone installed to this unit. & - Digital noise echo suppression system built-in. - Provides the best sound clarity with little or no distortion. (Echo and side-tone might be sensible depending upon cellular phone's characteristics or service networks) - Full duplex conversation... - Page 36 Pairing 1. Click Pair in screen to have the unit prepare starting pairing. It will display "Waiting for Pairing" in screen. 2. Enable your cellular phone's bluetooth pairing. If the cellular phone requires the pin code, enter 1 2 34. 3.
- Page 37 Transfer a Call between Unit and Phone During conversation, for privacy or any other reason, you can transfer the call between the unit and your cellular phone by pressing in screen. A2DP The function to play audio files stored in cellular phone In this mode, operate the following 5 functions .
-
Page 38: Media Operation
Media Operation Note: - You should connect your Media with this unit first using the cable supplied. - After connecting Media Player, the current mode will change to Media mode and the unit will start playing the selected list or play all files registered on the Media if no selected list. - Page 39 SETUP 1. Press SETUP in screen to open iPod setup menu display. <llIII, ~ 2. Press by Auto Connect menu bar to select On/Off. The default is On. If you select Off, when you connect iPod to this unit, the mode will not automatically be changed, while you should switch the mode manually.
-
Page 40: Troubleshooting
Troubleshooting· Problem Cause Corrective Action Check/replace fuse(s) in vehicle No power to unit Fuse(s) blown fuse box Speakers are not wired Connect speaker harness; correctly check speaker wires No sound can be heard Speaker wires shorting to Check splices, insulate all bare wires chassis ground or to each or the volume is low other... -
Page 41: Specifications
Specifications CEA Power Ratings Power Output: 18watts RMS x 4channels into 4-ohms @ < 1 THD+N Signal to Noise Ratio: 70dBA below reference (Reference: 1watt, 40hms) Dynamic Power: 36watts @ 40hms x 4channels Frequency Response: 20Hz - 20kHz (-3dB), AudioNideo input used as source reference Standard Power Supply: 14.4 VDC CO/OVO Player Compatible Disc: CD-R, CD-RW, DVD-R, DVD-RW... - Page 42 FM Tuner Tuning Range: 87.5 - 107.9MHz Mono Sensitivity (-30dB): 9dBf Quieting Sensitivity (-50dB): 15dBf Alternate Channel Selectivity: 70dB Signal to Noise Ratio @ 1kHz: 58dB Image Rejection: 60dB Stereo Separation @ 1kHz: > 30dB Frequency Response: 50Hz - 15kHz, -3dB AM Tuner Tuning Range: 530 - 1720kHz Sensitivity (-20dB): 30uV...
- Page 44 Place Postage Here V,lLOR MULTIMEDIA Valor Warranty Validation Dept V,lLOR 18061 ArenthAve City of Industry . CA 91748 ONE YEAR LIMITED WARRANTY...
- Page 45 MULTIMEDIA MULTIMEDIA Please complete all fields to validate your Valor Multimedia limited warranty. Remember to include a copy of your dated sales invoice. Failure to return this card will result in warranty coverage starting on the date ONE YEAR LIMITED WARRANTY of manufacture based on your serial number.
Need help?
Do you have a question about the DD-858W and is the answer not in the manual?
Questions and answers