Table of Contents
Advertisement
Advertisement
Table of Contents

Related Manuals for Bajaj Auto Chetak

Summary of Contents for Bajaj Auto Chetak
- Page 1 Owner’s Manual & Service Records...
- Page 3 The essential features Dealer of the type described and illustrations herein remaining unaltered, Bajaj Auto Limited reserves the right to carry out at any moment, without being obliged to bring this booklet up-to-date, modifications on the vehicle, parts or accessories as may be convenient and necessary.
- Page 5 Delivery Certificate Customer’s Name : Address Date Purchased : Dealer To be removed & retained by dealer.
- Page 6 Delivery Certificate • The above vehicle was inspected/test driven by me/my Vin # representative at the time of taking delivery and it was found to be acceptable and free from any operational or Chassis # : visual defects. • A copy of the owner’s manual containing service Engine # : requirements, five service record pages, and a warranty statement was given to me along with the vehicle.
- Page 7 Pre Delivery Inspection l Check and correct tire pressure including that of Spare Wheel. l Check and tighten nuts for front/rear shock absorber bolts, engine foundation bolts, handle bar lock bolt and front/rear wheel nuts. l Check transmission and engine oil level and top up if necessary. l Check for smooth operation of accelerator and choke operation.
-
Page 8: Important Precautions
Important Precautions The following precautions must be observed if your vehicle is fit with a catalytic converter. If you are unsure whether your scooter has a catalytic converter or not, check with your dealer. The catalytic converter, which is installed inside the silencer, reduces the exhaust emissions and is required in some states. - Page 9 Hello ! Dear Customer, We wish to congratulate you for choosing The “Bajaj Chetak 4 Stroke”, coming from Bajaj Auto the world’s largest manufacturer of scooters. “Chetak 4 Stroke” will give you value for your money, for years! We are sure that you will be proud of its performance.
-
Page 10: Table Of Contents
Table of Contents Description Identification Data Technical Specifications Location of Controls and Components General Information Running In Periodic Maintenance Chart Lubrication Chart Changing Tires Safety Recommendation Service Records... -
Page 11: Identification Data
Identification Data and Vehicle Identification Number Engine Number Chassis Number VIN Number There are three unique numbers assigned to your scooter. The engine and chassis serial numbers are used by the factory to identify the exact model. Please cite both of these numbers whenever you are ordering replacement parts. -
Page 12: Technical Specifications
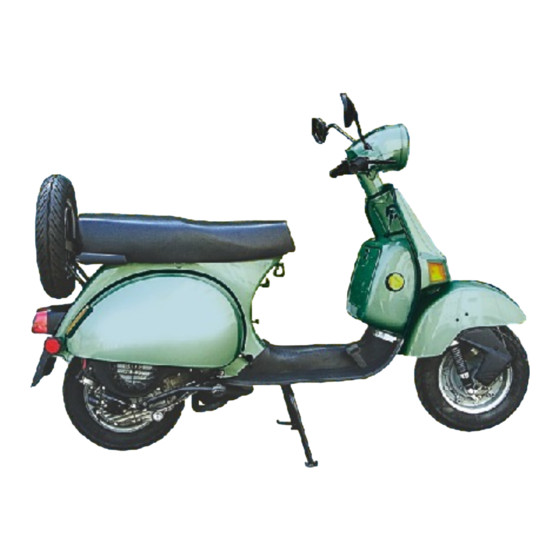
Technical Specifications Engine 4 stroke, single cylinder, forced air cooled, spark ignition Engine Displacement 145.45 cm Max. Net Power 9.00 HP at 6000 r/min of engine Ignition System Electronic ignition (C.D.I.) Spark Plug Champion : PL 7 YC (To be used with resistor spark plug cap) Lubrication Wet sump forced lubrication Transmission... - Page 13 Location Of Controls / Speedometer / Rear View Mirrors 1. Clutch Lever 10. Accelerator 2. Mirror LH 11. Gear Shifter 3. Speedometer 4. Mirror RH 5. Luggage box lock 6. Fr. Brake Lever 7. RH Switch 8. Steering Lock / Ignition Switch 9.
- Page 14 The Steering Lock / Ignition Switch is located on the right hand side below the handle bar. It has three positions. Key Position Function Key Removal Steering locked LOCK Ignition OFF Key can be removed Steering unlock Ignition OFF Ignition ON Key can not be removed Steering Lock / Ignition Switch To Lock the Steering...
- Page 15 Fuel Tank Warning: Never mix oil in the • It has capacity of 1.32 gal. gasoline. To do so can lead to • Location of fuel tank is as shown in the engine failure and subsequent accident with potentially figure. serious injury or even death.
- Page 16 A : Tool Box Lock Choke Lever Choke Lever A : Seat Lock • It is located near the fuel cock lever. Seat Lock : Tool Box Lock : • It is located on left hand side of the • It is located as shown in the figure A. •...
- Page 17 Right Hand Switch A Starter switch : Press the button to start the engine. B Supplementary engine stop switch : Move to the ‘Run’ position before starting engine. Move to the ‘Off’ position to stop engine. Left Hand Switch This scooter is equipped with lights that Right Hand Switch illuminate whenever the ignition is turned on.
- Page 18 Spare Wheel : Spare wheel is located Warning: Proper tire pressure is behind seat on bracket. For removing the very important to the handling of wheel : your scooter, and to your safety. • Remove the wheel cap. Never ride your scooter with tires •...
- Page 19 Battery (12V - 9Ah) • Battery is located at LH side inside the Cowl. • Check & ensure that the electrolyte level is between the upper and lower level lines in each cell. • If the electrolyte level is below the lower level in any cell, fill to upper level with distilled water only.
-
Page 20: General Information
General Information A : Oil Filler Location B : Oil Level Indicator C : Upper Level D : Lower Level Engine Oil: Check engine oil level recommende d oil up to upper level mark daily. If the oil level is too high i.e. Above the upper level mark, drain some oil from For proper functioning of cylinder block/piston, crankshaft, tappets,... - Page 21 Lubrication of the antidive front suspension A grease nipple is provided on Brake panel at location “A” (Ref. fig.) for lubrication of Brass bushes fitted inside Front brake panel assly. These Bushes are recommended to be greased after every 2000 miles. ANTIDIVE FRONT SUSPENTION To lubricate Bush inner fitted inside Antidive link assly at...
- Page 22 Spark Plug Tire Pressure • Using compressed air, blow any loose dirt away Always maintain the tire pressure as indicated in from around the spark plug. the table below. • Remove the spark plug using the special spark Warning plug wrench, clean the spark plug using a wire Failure to maintain proper tire pressure can lead to brush, or a proprietary spark plug cleaner.
- Page 23 Starting Procedure (Kick Start) after starting or in neutral gear. If the engine is reved to • Ensure the transmission is in neutral. (Neutral lamp in higher RPMs immediately after starting it may lead to speedometer console should be illuminated) severe engine damage as lubricating oil take some time to •...
- Page 24 • Moving from ‘Stand Still Position’ Difficult gear shifting as the gear box is constant mesh Pull the clutch lever to its full travel and twist the shift type which requires rotation of gears for ease of engagement. lever tube upwards in one smooth motion to put the vehicle in 1 gear.
-
Page 25: Running In
Running In Running In • First 500 miles is designated as a running in period. The maximum vehicle speed recommended during running in: Distance in miles Max. vehicle speed in gears (mph) 0 - 500 • Never exceed the specified running in speed. •... - Page 26 Safety and Maintenance Tips - Service the carburetor and adjust idling speed as recommended. Vehicle Condition: - If there is a power loss, then contact an authorized • Warning: There is a serious danger of fire if gasoline is Bajaj Dealer and get the vehicle properly tuned. leaking from any portion of your vehicle.
-
Page 27: Periodic Maintenance Chart
Periodic Maintenance Chart Recommended Odometer Reading Operation in miles Service Intervals 1200 3000 6000 9000 12000 15000 Air filter element cleaning Spark plug : Cleaning & gap setting : Replacement Check and adjust valve clearance Clean inline fuel filter Carburetor cleaning/overhaul l Indicates operation to be performed. -
Page 28: Lubrication Chart
Lubrication Chart Recommended Odometer Reading Lubricant Operation in miles to be used 1200 3000 6000 9000 12000 15000 Every 3000 miles Engine oil replacement SAE 15W50 Oil filter cleaning Every 3000 miles Fire Proof Solvent Replace oil filter Brake, clutch lever GREASE Speedo flex drive, pinion GREASE... - Page 29 Front Wheel Removal • Put the vehicle on stand. • Remove nuts securing wheel to the axle flange by using box spanner, while loosening these nuts hold the wheel by hand or apply front brake. • Take out spring washers. •...
- Page 30 3) Dismantle/Assemble the rear wheel. Engage the wheel nuts by hand (Do not tighten). 4) Remove the jack . 5) Put the vehicle in 1st gear and tighten the wheel nuts. Rear Wheel Installation • Reverse the above sequence. • Tighten the nuts securely. •...
- Page 31 Tire Change For replacing a flat tire, unscrew the nuts, which secure the wheel to brake drum and slide off the wheel. Repair the tube or fit on the spare wheel. In case of rear wheel, use the jack as described in previous page. For removing a tire &...
- Page 32 Recommendations for safe and proper operation of and the center of gravity is higher and further to the rear. vehicle This makes it more likely that the front wheel will come off the ground, especially during acceleration. Therefore you Warning: Do not overload your scooter. Attach luggage or should avoid hard acceleration and hard braking.
- Page 33 Recommendations for safe and proper Carburetor Specifications functioning of vehicle Make and Type AS/VCS setting from • Continued use of original Bajaj replacement fully closed position parts by an authorized Bajaj Dealer. Keihin PB 20 2 ¼ ± ½ turns •...
- Page 34 Service Record To maintain your vehicle’ s warranty, regular The first service interval should be performed between 300 and inspection and maintenance by your 500 miles or the first 30 days whichever comes first. See authorized Bajaj Dealer is required. reverse for required service.
- Page 35 First Service l Check and correct tire pressure. l Flush and refill engine oil. l Check & clean oil strainer. l Check & adjust valve clearance. l Clean & adjust spark plug gap. l Check and tighten nuts for front/rear shock absorber bolts, engine foundation bolts, handle bar lock bolt and front/rear wheel nuts.
- Page 36 Service Record To maintain your vehicle’ s warranty, regular inspection The second service interval should be performed and maintenance by your authorized Bajaj Dealer is between 1200 and 1500 miles. See reverse for required. required service. Owner’s Name : Vin # Date of Sale Date of Service : Mileage...
- Page 37 Second Service l Check and correct tire pressure. l Check engine oil level, top up if necessary. l Check & adjust valve clearance. l Clean & adjust spark plug gap. l Check and tighten nuts for front/rear shock absorber bolts, engine foundation bolts, handle bar lock bolt and front/rear wheel nuts.
- Page 38 Service Record To maintain your vehicle’ s warranty, regular inspection The third service interval should be performed between and maintenance by your authorized Bajaj Dealer is 2800 and 3100 miles. See reverse for required service. required. Owner’s Name : Vin # Date of Sale Date of Service : Mileage...
- Page 39 Third Service l Check and correct tire pressure. l Flush and refill engine oil. l Check & clean oil strainer & inline fuel filter. l Check & adjust valve clearance. l Clean & adjust spark plug gap. l Clean the air filter. l Clean the carburetor and adjust idling.
- Page 40 Service Record To maintain your vehicle’ s warranty, regular inspection The fourth service interval should be performed and maintenance by your authorized Bajaj Dealer is between 6000 and 6300 miles. See reverse for required. required service. Owner’s Name : Vin # Date of Sale Date of Service : Mileage...
- Page 41 Fourth Service l Check and correct tire pressure. l Flush and refill engine oil. l Check & clean oil strainer & in-line fuel filter. Replace if required. l Check & adjust valve clearance. l Clean & adjust spark plug gap. Replace if required. l Clean the air filter.
- Page 42 Service Record To maintain your vehicle’ s warranty, regular inspection The fifth service interval should be performed between and maintenance by your authorized Bajaj Dealer is 9000 and 9300 miles. See reverse for required service. required. Owner’s Name : Vin # Date of Sale Date of Service : Mileage...
- Page 43 Fifth Service l Check and correct tire pressure. l Flush and refill engine oil. l Check & clean oil strainer & in-line fuel filter. l Check & adjust valve clearance. l Clean & adjust spark plug gap. l Clean the air filter. l Clean the carburetor and adjust idling.
- Page 44 Bajaj Auto Ltd. - Emission Control System Warranty Statement Your Warranty Rights and Obligations Manufacturer’s Warranty Coverage The California Air Resources Board and Bajaj Auto Ltd. • Class I motorcycle (50-169 cc) (hereinafter Bajaj) are pleased to explain the emission...
- Page 45 Owner’s Warranty Responsibilities • As the motorcycle owner, you are responsible for the performance of the required maintenance listed in your owner’s manual. Bajaj recommends that you retain all receipts covering maintenance on your motorcycle, but Bajaj cannot deny warranty solely for the lack of receipts or for your failure to ensure the performance of all scheduled maintenance.
- Page 46 Bajaj USA - Limited Warranty on Emission Control System Bajaj USA, 526 Eccles Avenue, South San Francisco, CA 94080 (hereinafter Bajaj) warrants that each new 2002 and later Bajaj motorcycle, that includes as standard equipment a headlight, taillight and stoplight, and is street legal: A.
- Page 47 In the State of California only, emission related warranted parts are specifically defined by the state’s Emission Warranty Parts List. These warranted parts are: Carburetor and internal parts; Intake manifold; Fuel tank; Fuel injection system; Spark advance mechanism; Crankcase breather; Air cutoff valves; Fuel tank cap for evaporative emission controlled vehicles;...
- Page 48 II. Limitations: This Emission Control System warranty shall not cover any of the following: A. Repair or replacement required as a result of • accident, • misuse, • repairs improperly performed or replacements improperly installed, • use of replacement parts or accessories not conforming to Bajaj specification which adversely affect performance and or •...
- Page 49 Bajaj shall not be liable for any other expenses, loss or damage, whether direct, incidental, consequential or exemplary arising in connection with the sale or use of or inability to use the Bajaj motorcycle for any purpose. Some states do not allow the exclusion or limitation of any incidental or consequential damages, so the above limitations may not apply to you.
- Page 50 The warranty period begins on the date the motorcycle is delivered to an ultimate purchaser. Manufacturer: Bajaj Auto Ltd., Akurdi, Pune, India Importer: Bajaj USA, 526 Eccles Avenue, South San Francisco, CA 94080...
- Page 51 Owner’s Manual Notice - ‘Reporting of Safety Defects’ If you believe that your vehicle has a defect which could cause a crash or could cause injury or death, you should immediately inform the National Highway Traffic Safety Administration (NHTSA) in addition to notifying (manufacturer). If NHTSA receives similar complaints, it may open an investigation, and if it finds that a safety defect exists in a group of vehicles, it may order a recall and remedy campaign.
- Page 52 Noise Emission Warranty: Bajaj Auto Ltd. warrants that this exhaust system, at the time of sale, meets all applicable U.S. EPA Federal noise standards. This warranty extends to the first person who buys this exhaust system for purposes other than resale, and to all subsequent buyers. Warranty claims should be directed to: Bajaj...
- Page 53 Among those acts presumed to constitute tampering are the acts listed below: (1) Removal of, or puncturing the muffler, baffles, header pipes or any other component which conducts exhaust gases. (2) Removal or puncturing of any part of the intake system. (3) Lack of proper maintenance.
-
Page 54: Warranty Statement
Every possible care and precaution has been taken to ensure quality in respect of material and workmanship in the vehicles manufactured by Bajaj Auto Ltd. Bajaj USA will replace or repair, at their authorized workshop/s, free of charge, within a period of 12 months from the date of sale of the vehicle to the first owner or until the vehicle has been driven for 6000 miles, which ever shall occur first, such part or parts thereof as may be found, on examination, to have manufacturing defect. - Page 55 Auto Ltd. in the course of manufacture, Bajaj USA reserves the right to carry out the replacement by a part or parts of any such alternative brand/s. This warranty and any claim arising there from are subject to United States of America jurisdiction only. No claim for exchange or repair will be considered unless the customer: (a) Ensures that immediately upon discovery of the defect, he/she approaches any nearest Authorized Bajaj Vehicle dealer.
- Page 56 been used in conjunction with parts and equipment not manufactured or recommended for use by Bajaj USA. (4) Parts of the vehicle that been altered and modified or replaced in an unauthorized manner. (5) Vehicles which are not being serviced by Authorized Bajaj vehicle dealers as per the service schedule described in the owner’s manual or which have not been operated or maintained in accordance with the instructions mentioned in the owner’s manual.
Need help?
Do you have a question about the Chetak and is the answer not in the manual?
Questions and answers
bajaj stridenin beyin kablo baglantısı nasıl olmalı
bajaj chetax beyin kablo baglantısı