Table of Contents
Advertisement
Quick Links
1
Insert plugs into
unused holes.
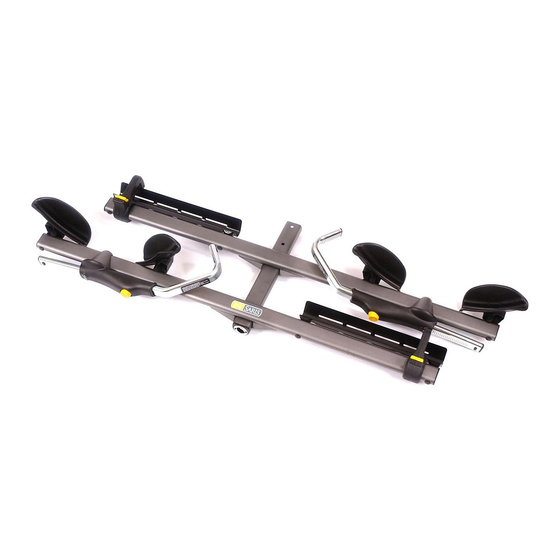
ASSEMBLE FRONT WHEEL TRAYS - Determine which holes you
will use to mount the front wheel trays (Fig. 1A). For 20" tires inner-
most holes must be used(20" tire bikes cannot be mounted on the
#4012 add on kit).
2
Insert hitch pin and lock into place as shown above. (Note:
Do not stick locking cable through hole, only hitch pin.)
C C y y c c l l e e - - O O n n P P r r o o
Please READ and FOLLOW all instructions carefully.
4017 (1 1/4" RECEIVER) OR 4018 (2" RECEIVER)
1A
Standard wheel
tray mount
20" wheel
tray mount
Steel Pin
MUST use 2 wheel trays per wheel.
See Picture 4B.
Tube
Front Wheel
Tray
Bolt
Tube
Bolt
Insert bolt through tube, slide wheel tray on, fasten with washer
and nut (Fig. 1B). Tighten nut until it is snug, where wheel tray
pivots freely. Repeat for each of the 2 front wheel trays.
2
3
1
Pin with
Lanyard
Next attach the rack to the tilt bracket. Assemble in stepped
order (step 1, 2, 3) as shown above. Tighten knob at end of
bracket until bracket is tight in receiver.
USER MANUAL
1B
Nut
Washer
Nut
Washer
Front Wheel
Tray
2B
Knob
Advertisement
Table of Contents

Related Manuals for Saris Cycle-On Pro


Summary of Contents for Saris Cycle-On Pro
- Page 1 C C y y c c l l e e - - O O n n P P r r o o USER MANUAL Please READ and FOLLOW all instructions carefully. 4017 (1 1/4” RECEIVER) OR 4018 (2” RECEIVER) MUST use 2 wheel trays per wheel. See Picture 4B.
- Page 2 Rotate clamp between spokes closing onto rear wheel tray. ***Note: For bicycles with odd rims or 40 spoke or greater wheels, additional straps (available through Saris) should be used in replace of the rear wheel clamp. Thread strap into rear wheel tray slots and secure bicycle.
- Page 3 Remove clevis pin Rotate rack and replace clevis pin Rotate rack up to stop position, insert pin into lower hole, Pull cotter pin from clevis pin, remove clevis pin. and insert cotter pin into clevis pin. Rack is now stowed. Note: Rack arms must be in stowed position...
- Page 4 This carrier has been designed to carry bicycles on specific vehicles. Before installation, user must read and follow current Vehicle/Carrier Compatibility Guide recommendations (available through Saris dealer or the Saris Web site www.sarisproducts.com) and enclosed instruc- tions. Fit recommendations are based on vehicle's standard features; optional features may affect the fit recommendations. User must attach carrier correctly to the vehicle, check its attachment before each use, and inspect carrier parts for wear.
Need help?
Do you have a question about the Cycle-On Pro and is the answer not in the manual?
Questions and answers