Advertisement
Model No. WLEX19940
Serial No.
Serial
Number
Decal
QUESTIONS?
If you have questions, or if there
are missing or damaged parts,
we will guarantee complete sat-
isfaction through direct assis-
tance from our factory.
TO AVOID UNNECESSARY
DELAYS, PLEASE CALL DIRECT
TO OUR TOLL-FREE CUSTOMER
HOT LINE. The trained techni-
cians on our customer hot line
will provide immediate assis-
tance, free of charge to you.
CUSTOMER HOT LINE:
1-866-699-3756
Mon.–Fri., 6 a.m.–6 p.m. MST
Patent Pending
CAUTION
Read all precautions and instruc-
tions in this manual before using
this equipment. Keep this manual
for future reference.
USER'S MANUAL
Visit our website at
www.weslo.com
new products, prizes,
fitness tips, and much more!
Advertisement
Table of Contents

Subscribe to Our Youtube Channel
Related Manuals for Weslo Pursuit E45 Bike


Summary of Contents for Weslo Pursuit E45 Bike
- Page 1 Mon.–Fri., 6 a.m.–6 p.m. MST Patent Pending CAUTION Visit our website at Read all precautions and instruc- tions in this manual before using www.weslo.com this equipment. Keep this manual new products, prizes, for future reference. fitness tips, and much more!
-
Page 2: Table Of Contents
TABLE OF CONTENTS IMPORTANT PRECAUTIONS ..............2 BEFORE YOU BEGIN . -
Page 3: Before You Begin
BEFORE YOU BEGIN Congratulations for selecting the new WESLO ® Service Department toll-free at 1-866-699-3756, PURSUIT E45 exercise cycle. Cycling is one of the Monday through Friday, 6 a.m. until 6 p.m. Mountain most effective exercises for increasing cardiovascular Time (excluding holidays). To help us assist you,... -
Page 4: Assembly
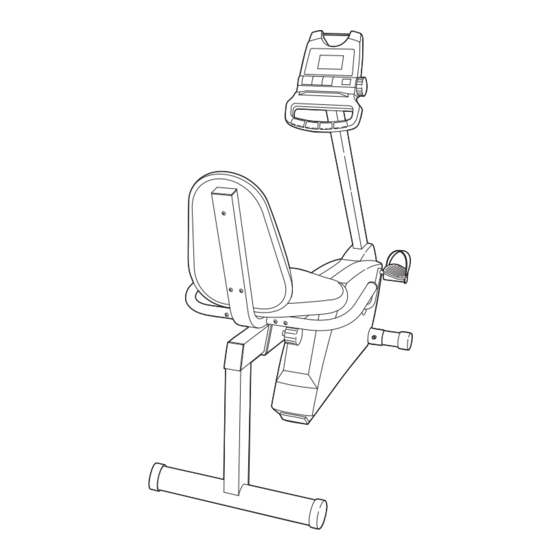
ASSEMBLY Assembly requires two persons. Place all parts of the exercise cycle in a cleared area and remove the packing materials. Do not dispose of the packing materials until assembly is completed. Assembly requires the included tools and your own adjustable wrench and Phillips screw- driver Use the part drawings below to identify the small parts used in assembly. - Page 5 1. Attach the Front Stabilizer (2) to the front of the Frame (1) with two M10 x 75mm Carriage Bolts (35) and two M10 Nylon Locknuts (45). 2. The Console (9) requires three “AA” batteries (not included); alkaline batteries are recommended. Insert three batteries into the Console as shown.
- Page 6 4. While another person holds the Upright (6) in the posi- tion shown, connect the console wire to the Reed Switch Wire (20). Next, connect the console cable to the Lower Cable (65) in the following way: • See inset drawing A. Pull up on the metal bracket on the Lower Cable (65), and insert the tip of the con- sole cable (CC) into the wire clip inside of the metal bracket.
- Page 7 7. Insert the lower end of the Backrest Frame (8) into the Seat Frame (27). Attach the Seat Frame and the Backrest Frame to the Seat Carriage (11) with four M8 x 38mm Button Bolts (24). 8. Slide a Seat Handle (61) onto one side of the Backrest Frame (8).
- Page 8 10. Attach the Backrest (13) to the Backrest Frame (8) with three M6 x 38mm Button Bolts (14) and three M6 Washers (54). 11. Identify the Left Pedal (40), which is marked with an “L.” Using an adjustable wrench, firmly tighten the Left Pedal counterclockwise into the left Crank Arm (19).
-
Page 9: How To Operate The Exercise Cycle
HOW TO OPERATE THE EXERCISE CYCLE HOW TO ADJUST THE POSITION OF THE SEAT FEATURES OF THE CONSOLE For effective exer- cise, the seat Seat should be in the proper position. As you pedal, there should be a slight bend in your knees when the pedals are in the farthest Seat... - Page 10 HOW TO USE THE MANUAL MODE To cancel the scan mode, Note: If there is a sheet of clear plastic on the console, press the Mode remove it. button. The mode bar below the word SCAN Turn on the console. will disappear.
- Page 11 HOW TO USE A PACE PROGRAM target pace indicator changes in height during the program, adjust your pedaling pace so that both indicators are the same height. If your pedaling Turn on the console. pace is slower than the current target pace set- ting, an arrow will appear next to the pace indica- See step 1 on page 10.
-
Page 12: Maintenance And Troubleshooting
MAINTENANCE AND TROUBLESHOOTING Inspect and properly tighten all parts of the exercise remove the M4 x 16mm Screw (21). Slide the Reed cycle regularly. To clean the exercise cycle, use a Switch slightly closer to or away from the Magnet, and soft, damp cloth. -
Page 13: Conditioning Guidelines
CONDITIONING GUIDELINES The following guidelines will help you to plan your Burning Fat exercise program. Remember that proper nutrition and adequate rest are essential for successful results. To burn fat effectively, you must exercise at a relative- ly low intensity level for a sustained period of time. During the first few minutes of exercise, your body WARNING: uses easily accessible carbohydrate calories for ener-... -
Page 16: Part List
• The SERIAL NUMBER of the product (see the front cover of this manual) • The KEY NUMBER and DESCRIPTION of the part(s) (see the PART LIST on page 14). WESLO is a registered trademark of ICON IP, Inc. LIMITED WARRANTY ICON Health &...
Need help?
Do you have a question about the Pursuit E45 Bike and is the answer not in the manual?
Questions and answers
Weslo Pursuit E45, need to find out if it needs a new batery. Nothing shows up on the display. Can't seem to find the right thing in the online manual.
The document does not explicitly state that the Weslo Pursuit E45 Bike requires a new battery if nothing shows up on the display. However, it does mention that when the batteries are replaced, the unit of measurement can be reset. This implies that the display is battery-powered, and if nothing appears on the display, replacing the batteries may be necessary.
This answer is automatically generated
How do I change the battery in the panel
To change the battery in the panel of the Weslo Pursuit E45 Bike, follow these steps:
1. The console requires three “AA” batteries (not included), and alkaline batteries are recommended.
2. Insert three batteries into the console as shown in the diagram inside the console.
3. Ensure that the batteries are oriented correctly according to the diagram.
This will power the panel correctly.
This answer is automatically generated