
Subscribe to Our Youtube Channel
Related Manuals for Primera RX900


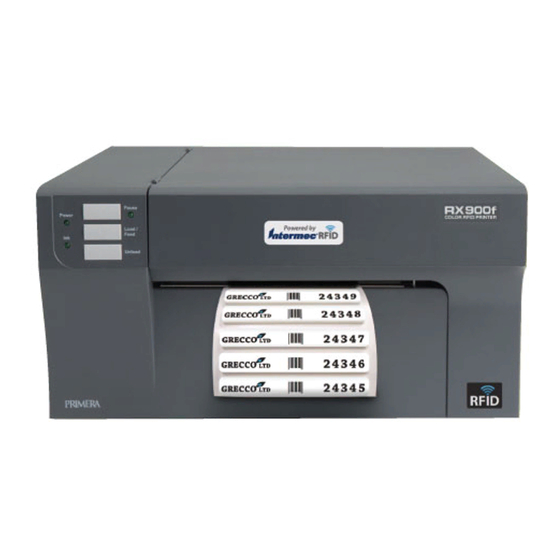
Summary of Contents for Primera RX900
- Page 1 052512-511287 User's Manual © 2012 All rights reserved For the most recent version of this manual please visit http://www.primera.com/manuals.html...
- Page 2 Interactive Feature in this PDF Document There are interactive features that will allow you to jump to different locations within the document. Each listing in the Table of Contents is interactive. Place the cursor on either the words or the page number. A small hand with a pointing finger icon appears.
-
Page 3: Table Of Contents
Table of Contents Section 1: Getting Started ................1 A. Choosing a Good Location ..............1 B. Unpacking and Inspection ..............2 C. Identifying the Parts ................3 D. Computer Specifications ..............5 Section 2: Label Stock ..................6 A. Label and Roll Specifications ............6 B. Installing Label Stock .................9 C. -
Page 5: Section 1: Getting Started
INDEX Section 1: Getting Started THANK YOU… ...for choosing an RX900 Color RFID Printer or the RX900f Color RFID Printer. The RX900 Printer Series will print razor- sharp text and barcodes, vibrant colors, and even stunning photo-realistic photographs directly onto RFID label stock and a variety of other approved media. -
Page 6: Unpacking And Inspection
INDEX B. UNPACKING AND INSPECTION While unpacking your printer, inspect the carton to ensure that no damage has occurred during shipping. Make sure that all supplied accessories are included with your unit. The following items are included in the supply box: ... -
Page 7: Identifying The Parts
INDEX C. IDENTIFYING THE PARTS This illustration shows the front of the printer with its control buttons and LED indicator lights. Top Cover Pause LED Pause Button Power LED Load/Feed Button Ink Low LED Unload Button Label Tear Bar The Pause Button pauses the printer AFTER the printing of the current label has finished to allow for loading of label stock and ink cartridge. - Page 8 INDEX This illustration shows the input ports and power switch found on the rear panel of the printer. USB Port Power Switch Auxilary Port Power Input Port This illustration shows the interior of the printer. Fixed Throat Roll Stop Guide Roll Arm Movable Throat Guide...
-
Page 9: Computer Specifications
INDEX Actual RFID Reader/Writer Position RFID Reader/Writer Position Adjustment Slide Bar RFID Label Antenna Tear Bar D. COMPUTER SPECIFICATIONS Recommended PC Specifications For optimal printing speed you must have a PC with the following recommended specifications: • Pentium Dual Core Processor •... -
Page 10: Section 2: Label Stock
A wide variety of label stock can be used in the Printer. Refer to the specifications and settings in the following sections before ordering custom stock from Primera or any stock from another company. Important! Test all custom made label stock with the intended printer before ordering large quantities! Primera will only assume responsibility for custom label stock ordered from Primera. - Page 11 (6.35mm) gap between the edge of the liner and the foam label. The RX900 does not have a requirement but the standard distance for label stock is 1/16" (1.6 mm). With either printer it will...
- Page 12 For these reasons the weight or thickness of the liner is a variable that can not easily be defined. Primera recommends and uses 40# liner with all label stock. It is important to test all label stock with the intended printer...
-
Page 13: Installing Label Stock
INDEX INSTALLING LABEL STOCK The following steps will guide you through loading label stock in your printer: Make sure power is connected and printer is on. 1. Open the Top Cover. Lift Here 2. Lower the Roll Guide and pull it outward to make room for your label stock. - Page 14 INDEX 3. Remove any shipping tape from your label stock roll to ensure that it can unroll freely, making certain that no adhesive portion is exposed. It is important to note that any exposed adhesive surface can attach itself the inner workings of the print mechanism and cause a media jam.
- Page 15 If the label stock is pinched by the guides, poor print quality or feeding problems could result. 9A. RX900 - Feed the label stock further into the printer until it senses the label and automatically feeds it through the printer. If the printer fails to feed the label stock, press the Load/Feed button on the front panel while continuing to guide the label stock into the printer.
- Page 16 INDEX 9B. RX900f ONLY! The RX900f requires adjustment of a secondary guide in the print area. Move the guide until the position ruler matches the liner width of your label stock. THE LINER WIDTH IS NOT THE SAME AS YOUR LABEL WIDTH.
- Page 17 INDEX Once the guide is set, continue feeding the stock further into the printer until it senses the label stock and automatically feeds it through the printer. At this point, you can make any final adjustments to the internal guide. The liner edge should be under the metal guides on the either side of the print area.
-
Page 18: Adjusting The Label Stock Tof (Top Of Form) Sensor
INDEX C. ADJUSTING THE LABEL STOCK (TOP OF FORM) SENSOR If you are using label stock other than standard square / rectangular diecut labels such as circular die-cut labels or through-hole stock use the instructions below to adjust the position of the label stock sensor. The sensor can be adjusted using the slide bar on the inside of the printer. - Page 19 INDEX The sensor can only be moved a maximum of 2.3 inches from the left side of the printable area. This means that the maximum diameter circular label that can be printed is 4.6 inches. For circular labels larger than 4.6 inches in diameter, you must have a black mark printed on the back of the label...
-
Page 20: Set The Stock Sensor
2. Go to Start - Programs - Primera Technology - PTStatus. 3. Click on the Alignment Tab (3rd tab from top). -
Page 21: Set The Output Mode
2. Go to Start - Programs - Primera Technology - PTStatus. 3. Click on the Alignment Tab (3rd tab from top). - Page 22 INDEX There are two different output modes: Present (Default). This setting will cause the printer to feed the last label printed forward so that it and the previously printed labels can be torn off using the tear bar. If no other jobs are sent to the printer within one second after the last label has printed, the last printed label will present for tear off.
-
Page 23: Section 3: Using Rfid
Follow these instructions each time you load a new roll of RFID Label Stock. 1. Load your RFID label stock according to the instructions printed on the inside cover of your RX900 and found in Section 2B. 2. Before you start printing, adjust the slide bar so the Reader/Writer marker is approximately 1/8"... - Page 24 Select the Writing Test button to start. The RX900 will write to the same label continuously until "Stop Test" is selected. The results of each test will be displayed in PTStatus. During this time you can adjust the Slide Bar if necessary until you receive a successful test.
-
Page 25: Printing And Encoding
INDEX If write failures continue even after adjusting the position of the writer, try adjusting the Antennae Power. First select Stop Test. Now increase or decrease the power using the up and down arrows. Click Set to send the setting to the printer. Try a Writing Test again. -
Page 26: Other Functions
INDEX C. OTHER FUNCTIONS Batch Reading Test. (Optional) After printing and encoding labels you may run a Batch reading test to verify that each label was encoded successfully. Simply load the printed roll, open the status monitor and choose Batch Reading Test on the RFID tab. - Page 27 INDEX Advanced Options. Access advanced options by clicking the icon on the top right side of the status monitor. Click the options button. Print 'XXXX' on RFID Failure. By default a series of XXXXs will automatically be printed on the label to indicate that it was not encoded properly.
-
Page 28: Troubleshooting Rfid Encoding Problems
INDEX Unpresent Location. This is the position the label stock moves to after the unpresent time has elapsed. This should be set to RFID Tag when printing and encoding RFID labels. Calibration Loop Sensor. If a loop is not being created consistently causing the labels to slip as they feed through the printer, calibrate the loop sensor fix this condition. - Page 29 3. Radio Interference. It is possible other electronic devices are interfering with the encoding process. Make sure the cover of the RX900 or RX900f is closed. You could also try moving the printer to a different location. Using RFID...
-
Page 30: Section 4: Ink Cartridges (Status Monitor)
2. Go to Start - Programs - Primera Technology - PTPStatus Once open, the Status Monitor consist of four tabs that are arranged on the left side of the window. -
Page 31: Monitoring Ink Levels
INDEX A: MONITORING INK LEVELS Ink levels can be monitored at any time by using the Status Monitor. Immediately after printing starts the Status Monitor will display the ink levels in the lower right corner of your screen. The print status will also be displayed on the top bar. In the example above the label name "Strawberry.lbl"... -
Page 32: Using The Cost Estimator
However, you can also access it at any time as long as the printer is turned on and communicating by going to Start - Programs - Primera Technology - PTStatus. Ink cost is automatically and continuously calculated based on the black and color cartridge costs entered. -
Page 33: Replacing Ink Cartridges/Low Ink Warning
INDEX C. REPLACING INK CARTRIDGES / LOW INK WARNING You can replace cartridges at any time or wait for the Low Ink Warning to prompt you to replace cartridges. Low Ink Warnings occur at the following levels: 10% - If any cartridge is lower than 10% at the beginning of a job you will be prompted to change that cartridge. - Page 34 INDEX 2. Remove the cartridge by pressing the corresponding colored tab on the back of the printhead. The cartridge will pop up slightly. 3. Remove the cartridge. 4. Locate a new cartridge and remove it from its packaging. Remove the foil outer package and the clear plastic shrink wrap.
- Page 35 INDEX 5. Place the new cartridge into its corresponding colored slot. Press down near the back of the cartridge until it clicks into position. Important Note: Make sure the cartridge is securely in place. An improperly positioned cartridge will cause no ink of that color to be printed.
-
Page 36: Section 5: Printing
INDEX Section 5: Printing USING NICELABEL Your printer ships with a basic version of Niceware's NiceLabel software. This easy-to-use software is designed to allow you to create full color labels with text and barcodes quickly and simply. The following is a tutorial to guide you through creating and printing a sample label. - Page 37 INDEX b. Select your printer. This should be the Color Label Printer 900. Click Finish. 3. Now you will see your label in the Document Window. You can start to design your label using Tools from the Tool Box. First, we will use the Text Tool. a.
- Page 38 INDEX 4. Now, insert a barcode. a. Click the Barcode Tool Icon from the Toolbox. You will now have a Barcode Cursor that can be positioned anywhere within the Document Window. Position your cursor in the general area where you wish your barcode to print and click to start entering your barcode information.
- Page 39 INDEX b. The first screen in the Barcode Wizard will allow you to select the type of Barcode you wish to print. You can also enter the data to be used in the barcode. For this we are doing a simple UPC-A barcode.
- Page 40 INDEX 5. Now insert a Picture. Click on the Picture Tool Icon in the toolbox. You will now see a Graphics Cursor. Drag the cursor to the general area where you wish to place the graphic and click to get an Open dialog box. You will be prompted to browse for graphic files.
- Page 41 INDEX b. There are other tools at your disposal to align the object or add shapes. On the right side of the screen you will see alignment tools so you can align the objects on your label in relation to each other. Select objects by clicking on them or clicking and dragging a "lasso"...
-
Page 42: Creating Barcodes In Nicelabel
INDEX B. CREATING BARCODES IN NICELABEL a. Click the Barcode Tool Icon from the Toolbox. b. You will now have a Barcode Cursor that can be positioned anywhere within the Document Window. Position your cursor in the general area where you wish your barcode to print and click to start entering your barcode information. - Page 43 INDEX iii. This contains four tabs, General, Check Digit, Human Readable and Details. iv. The General Tab allows you to choose the appropriate barcode type from the Available barcodes: menu. You can choose one- or two-dimensional barcodes. Note that different barcode types have different requirements - some of them only allow numbers to be encoded, while others only allow upper case characters.
- Page 44 INDEX When you change the barcode dimension directly from the screen by moving the drag handle, the changed dimension will also appear in this dialog box. Some of the barcode types also allow the definition of Narrow- to-wide bar ratio. It can only be set from the predefined steps in the pull-down menu - 1:2, 1:3 or 2:5.
-
Page 45: Printing From Other Programs
INDEX PRINTING FROM OTHER PROGRAMS Since this printer uses a standard Windows printer driver you can print from any application you would like. There are just a few things to remember that will make it much easier. 1. Set the Page/Label Size in the Driver. -
Page 46: Adjusting Print Alignment
They also prohibit printing to the edge of the sheet. This is to avoid any need for alignment. The RX900 senses the beginning of the label with an optical sensor and is capable of printing to top, bottom, left and right edge. - Page 47 INDEX Adjust print alignment using the Status Monitor. Go to the Alignment Tab (third tab). Three items can be adjusted here: Tear off Position. This value adjusts the position of the last label printed after it has been presented for tear off. This only applies if the output mode is set to "Yes"...
-
Page 48: Creating A Full Bleed Print
INDEX You may have to make several adjustments to one or more of these values. After each adjustment you can click the Test button to print a small test pattern on the label. This will help you find the proper alignment value. E. -
Page 49: Printer Driver Settings
INDEX TOF. Decrease the Top of form by 10. This will cause the printer to start printing before the label and ensure a fully printed label. Decrease TOF by 10 Actual Label Stock Size = 2” x 2” Decrease Left Margin Over Bleed Page Size Offset by 12 2.1”... - Page 50 INDEX To find Driver Settings: Click the Start button, choose Printers and Faxes (XP), Printers (Vista), Devices and Printers (Windows 7). Right-click on the Color Label 900 Icon and select Printing Preferences from the drop-down menu. The preferences screen will appear. NOTE on PC Settings: Most applications allow you to change these same printer driver options from their "Print"...
-
Page 51: Paper Size
INDEX Paper Size If you are using NiceLabel, this setting is adjusted during the label setup wizard. If you are using a program other than NiceLabel you will need to set this to the dimensions of your label. Keep in mind that the dimensions are always relative to the width and height of the actual label in the printer. -
Page 52: Ink Cartridge
Media Type There are multiple media type options which correspond with the various types of label stock sold by Primera. Match this setting to the media installed in the printer to achieve the closest color match to the screen. Each of these settings employs a slightly different color table developed specifically for the media type listed. -
Page 53: Output Mode
INDEX Best for Photos mode is best used for photographic images where accurate color reproduction is very essential. Images printed in this mode will look lighter than those printed in Photo mode. Skin tones especially will look more natural in this mode. -
Page 54: Section 6: Troubleshooting And Maintenance
PRINT ALIGNMENT PROBLEMS Image is Vertically Offset The RX900 decides where to start printing by detecting the start of die-cut label, detecting a black mark on the back or detecting a thru-hole that corresponds to the start of the label. - Page 55 INDEX 3. Insufficient Label Gap Distance. See Section 2A for label specifications. 4. Page Size is Bigger than Label Stock Size. If the page size set in the driver is larger than the actual label stock, ink will be printed on the gaps and the sensor will start looking for a gap too late.
-
Page 56: Solving Print Quality Problems
INDEX Page Size. Often the page size is not large enough for the label. If this is the case you may see white space on the right (printers left) side of the the label and no image over-lap on the opposite side. This indicates that the page size needs to be increased. - Page 57 INDEX Monitor. Click on the Align Printhead button on the Cartridge Utilities Tab (second tab). Follow the onscreen prompts to load your paper for alignment. 5. Clean the Maintenance Station. Clean the maintenance station located on the right side of the print area. This includes the rubber cartridge nozzle cap and the plastic squeegee.
-
Page 58: Color Matching And Design Tips
Whether you contract your graphic design or do it yourself, these guidelines will help you get the best quality labels out of your RX900. 1. Image Size/Shape. The image size should correspond with the size of the label you will be printing. Note: If the source image is smaller and must be enlarged to fill the entire label space, this will affect the DPI. - Page 59 INDEX 2. Resolution. Resolution is measured in dots per inch or dpi. 300 dpi is sufficient to get the best possible quality from most images. A 72 DPI image will look fine on screen but WILL NOT print well. Graphics and logos found on websites are typically 72 DPI.
- Page 60 There are multiple media type options which correspond with the various types of label stock sold by Primera. Match this setting to the media installed in the printer to achieve the closest color match to the screen. Each of these settings employs a slightly different color table developed specifically for the media type listed.
-
Page 61: Create A Support Report
INDEX D. CREATE A SUPPORT REPORT If you are encountering any problems with you RX900 tech support may ask you to create a Tech Support Report. You can do this from the Status Monitor by clicking the "i" icon and clicking Create Report… A zip file will be create on your desktop. -
Page 62: Cleaning The Printhead
INDEX CLEANING THE PRINT HEAD It may be necessary to clean the print head nozzles if you notice reduced print quality, missing colors or if you suspect an cartridge nozzle has become slightly dried out or clogged. Try the following solutions: 1. - Page 63 Clogged nozzles on the printhead can be caused by non use of the printer for extended periods of time. Follow these guidelines: Always keep the RX900 plugged in and turned on. The printer will do periodic maintenance to make sure the nozzles do not clog. ...
- Page 64 • Printheads with under 10,000 prints may be replaced depending on the description and circumstances of the failure at the discretion of Primera Tech Support. Notes on Printhead Life The estimated printhead life is approximately 10,000 prints using a 100% coverage label. The number of prints you can expect to receive from one printhead varies from printhead to printhead.This is not a guaranty that the printhead will always...
-
Page 65: Replacing The Printhead
INDEX REPLACING THE PRINTHEAD Regular replacement of the printhead is not necessary. However it may become necessary if you notice a gradual decrease in print quality or if some of the print nozzles are still clogged after repeated manual cleanings as described in Section 5F. - Page 66 INDEX 3. Remove the printhead. Grasp the printhead near the back as shown in the illustration. 4. Locate a new printhead and place it in the carriage. Troubleshooting and Maintenance...
- Page 67 INDEX 5. Close the latch until you hear a click. 6. Press the Pause and Load/Feed buttons simultaneously to move the print carriage back to normal position. Pause Power Load/ Feed Unload Press Pause + Load/Feed to Start and Finish. 7.
-
Page 68: Interpreting The Printer's Indicator Lights
If you still have difficulty, contact the technical support number using one of the methods listed below. Source Location Primera Knowledge Base www.primera.com/knowledgebase.html NiceLabel Software Help files Open the software. Click on the Help Menu - Contents Email Support www.primera.com/contact_tech_support.cfm... -
Page 69: Section 7: Technical Specifications
Windows XP , Vista and Windows 7 Data Interface: USB 2.0; External Control Port Label Design Software: NiceLabel™ SE Primera Edition included. Can also be used with most other popular label design and graphics software programs Electrical Rating: 12VDC, 5.0A... -
Page 70: Section 8: Notices And Warnings
INDEX Section 8: Notices and Warnings Notices: The information in this document is subject to change without notice. NO WARRANTY OF ANY KIND IS MADE WITH REGARD TO THIS MATERIAL, INCLUDING, BUT NOT LIMITED TO, THE IMPLIED WARRANTIES OF MERCHANTABILITY AND FITNESS FOR A PARTICULAR PURPOSE. No liability is assumed for errors contained herein or for incidental or consequential damages in connection with the furnishing, performance, or use of this material. - Page 71 INDEX For Users in Canada: This digital apparatus does not exceed the Class B limits for radio noise for digital apparatus set out on the Radio Interference Regulations of the Canadian Department of Communications. Le present appareil numerique n'emet pas de bruits radioelectriques depassant les limites applicables aux appareils numeriques de la class B prescrites dans le Reglement sur le brouillage radioelectrique edicte par le ministere des Communications du Canada.
-
Page 72: Index
Index Align Printhead ................52 Alignment Tab ................16, 26 Antennae ..................19 Barcode Wizard ................34 Bidirectional..................49 Black Mark ...................7, 15 Cartridge Utilities Tab ............26, 53, 58 Circular Labels ................14 Color Matching ..............48, 53, 54 Continuous Stock ................17 Cost Estimator .................28 Cost Tab ....................26 Die Cut .....................16 DPI ....................54 Fixed Throat Guide ................43... - Page 73 Print Quality ................47, 52 Printer Driver Settings ..............45 Printhead Aligning ..................52 Cleaning ................52, 58 Replacing ................54, 61 Printing .................21, 32, 41 PTStatus ...................16 Resolution ..................55 RFID ....................19 Sensor Type ..................17 Sensor Position ................11, 51 Status Monitor .................26 Reflective ..................7, 17 Roll Arm ...................10 Roll Guide ..................9 Roll Specifications .................6, 8...
- Page 76 Printed in the United States of America P/N 511287...
Need help?
Do you have a question about the RX900 and is the answer not in the manual?
Questions and answers