
Related Manuals for Velleman DVR4MQAEE


Summary of Contents for Velleman DVR4MQAEE
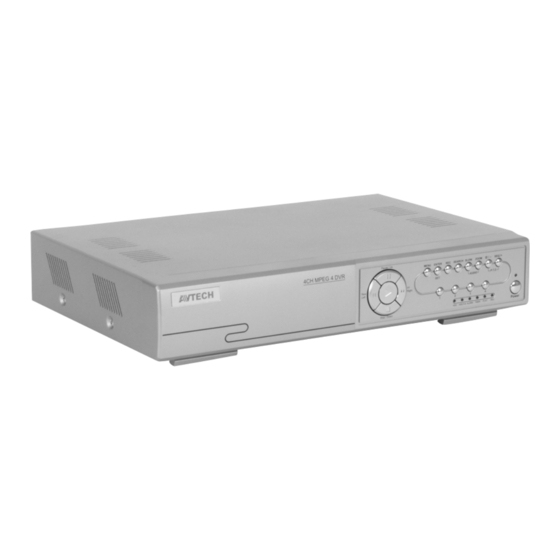
- Page 1 DVR4MQAEE DIGITAL 4-CHANNEL MULTIPLEXER QUAD MPEG-4 RECORDER + ETHERNET USER MANUAL...
- Page 2 DVR4MQAEE_v5 VELLEMAN - 2 -...
-
Page 3: Safety Instructions
If in doubt, contact your local waste disposal authorities. Thank you for buying the DVR4MQAEE! Please read the manual thoroughly before bringing this device into service. If the device was damaged in transit, don't install or use it and contact your dealer. Contents: 1 digital video recorder, 1 power adapter, software, accessories, HDD key and this manual. -
Page 4: Technical Specifications
• External Device: o extensive recording time by connected to Independent Disk Array. o optional: Independent Disk Array (IDA); VGA connector; Velleman cartridge (DVR/CARTR1) 4. Technical Specifications • video system: NTSC / PAL switchable • video compression format: o Frame: MJPEG o CIF: MPEG4 •... - Page 5 Press SEQ to activate the call monitor function. Press SEQ again to escape this mode. Press + to change the settings in the menu. 10. POWER Turn the DVR4MQAEE on or off with this button. In the recording mode, stop the recording before switching off the device. 11. CH1, CH2 , CH3, CH4 Press one of these buttons to select the channel.
-
Page 6: Call Monitor
3. Connect monitors. 4. Connect the external devices. 5. Connect power. NOTE: Please refer to Appendix #1 for HDD installation instructions. NOTE: Please refer to Appendix #2 for pin configurations of the external I/O port. DVR4MQAEE_v5 VELLEMAN - 6 -... - Page 7 3. Before operating the DVR, please set up the system time first (for setting system time, please refer to “9.d. Date” settings). SYSTEM INIT… 1 2 3 4 ↓ AUDIO ↓ AUDIO M ↓ DETECTING MASTER HDD DETECTING SLAVE HDD FAIL ↓ VERSION 1039-09-H6-04-AA-08 SYSTEM NTSC - 783 - DVR4MQAEE_v5 VELLEMAN - 7 -...
-
Page 8: Advanced Functions
LS, SS, TS simultaneously. Therefore, the bigger the value, the more sensitive the detection will become. Application ~ * Slow and regular environment change Scenario: Warehouse Different environments may require different settings. The sample below is for reference only. Entrance Back Door DVR4MQAEE_v5 VELLEMAN - 8 -... - Page 9 Pavement Window DVR4MQAEE_v5 VELLEMAN - 9 -...
-
Page 10: Operation
3. TIMER RECORDING (scheduled time): Recording is scheduled by the timer and is indicated by “TIMER RECORD”. NOTE: When the HDDs are full under O/W recording mode, previous recorded files may be overwritten without further warning notices. DVR4MQAEE_v5 VELLEMAN - 10 -... -
Page 11: Channel Shift
“ENTER” (you can alter the password later; refer to “9.k. Advance Menu_System”). Tip: The default password is “0000”. Press “ENTER” four times instead of using “+” or “-” to select “0” “0” “0” “0”. DVR4MQAEE_v5 VELLEMAN - 11 -... - Page 12 5. RECORD IMG SIZE: There are two recording options: FRAME & CIF. When changing the recorded image size, stop the recording first. 6. RECORD QUALITY: There are four quality settings: BEST, HIGH, NORMAL & BASIC DVR4MQAEE_v5 VELLEMAN - 12 -...
- Page 13 Sunday from 08:00 to 00:00 and Monday 00:00 to 15:00. 2. START HH / MM: Select the starting time for the recording. 3. END HH / MM: Select the finishing time for the recording. DVR4MQAEE_v5 VELLEMAN - 13 -...
- Page 14 Main Menu Options: ADVANCE (MENU) RECORD Move the cursor to the “ADVANCE” and press ”ENTER”. The screen will show the following TIMER options: DATE ADVANCE ADVANCE CAMERA DETECTION DISPLAY ALERT REMOTE SYSTEM NETWORK BACKUP HDD INFO EVENT LOG DVR4MQAEE_v5 VELLEMAN - 14 -...
- Page 15 Move the cursor to “DETECTION” and press ”ENTER”. The screen will show the following options: DETECTION DETECTION SETUP DETECTION TIMER DETECTION SETUP DETECTION TITLE AREA ALARM SETUP SETUP SETUP HIGH SETUP NEXT 1. TITLE: Show the title of each camera channel. DVR4MQAEE_v5 VELLEMAN - 15 -...
- Page 16 8. ALARM: Select LOW / HIGH for the alarm polarity. The default alarm value is OFF. 9. PRE / NEXT: Select “PRE” to go to the previous page; Select “NEXT” to go the next page. DVR4MQAEE_v5 VELLEMAN - 16 -...
- Page 17 6. DWELL DURATION (SEC): Set the duration time of each channel for CALL MONITOR (2, 4, 8, 16 sec.). 7. DE-INTERLACE: Set the “DE-INTERLACE” function on / off. 8. WATERMARK: This function stays always ON. DVR4MQAEE_v5 VELLEMAN - 17 -...
- Page 18 When pre-alarm and event record functions are activated, the DVR will record 8MB file before alarm / motion triggered. PTZ Control: 1. Device: PTZ / Pelco-D protocol PTZ. 2. Connection (RS485): Refer to rear panel / Refer to PIN configuration (see Appendix #2). 3. Detailed Instructions: Refer to PTZ manual. DVR4MQAEE_v5 VELLEMAN - 18 -...
- Page 19 The information of the DVR’s video format will be shown on the screen. k. Advance Menu: NETWORK Move the cursor to the “NETWORK” and press ”ENTER”. The screen will show the following options: NETWORK NETWORK TYPE STATIC 192.168.001.010 PORT 8 0 0 0 DVR4MQAEE_v5 VELLEMAN - 19 -...
- Page 20 1. VLOSS LIST: Show the information of video loss list. 2. NET LIST: Show the information of net login list. 3. OTHERS: Show the information of power on / off, unlock, reset to default list. DVR4MQAEE_v5 VELLEMAN - 20 -...
-
Page 21: Clear All
4. CLEAR ALL: Clear all the event log lists. DVR4MQAEE_v5 VELLEMAN - 21 -... - Page 22 Press the “ZOOM” button on the front panel of the DVR to enlarge the picture of the selected channel (2x digital zoom). Therefore use the “▲▼◄► “ to navigate. 1. Press the “ZOOM” button again to exit the zoom picture. 2. Press “▲▼◄► “ button to move the zoom position. DVR4MQAEE_v5 VELLEMAN - 22 -...
-
Page 23: Software Installation
Copy: press this button to copy all the recorded files saved in your PC. software installation files so you can keep all the settings of video web server for next software installation on other PC. DVR4MQAEE_v5 VELLEMAN - 23 -... - Page 24 200MB, the program will stop recording. h. System Config: press this button to enter the setting page of the video web server. i. Number of Online Users j. CH 1 ~ 4 k. 4-channel Display DVR4MQAEE_v5 VELLEMAN - 24 -...
- Page 25 (press “ESC” to exit from PTZ control AP screen and back to DVR control AP screen). v. Menu / Up / Down / Left / Right w. Turbo Off / On Digital Device Control Panel ~ PTZ DVR4MQAEE_v5 VELLEMAN - 25 -...
- Page 26 DVR4MQAEE_v5 VELLEMAN - 26 -...
- Page 27 Watermark: Proof of the authenticity of the backup video. Open Previous File: Open previous backup video. Open Next File: Open next backup video. DVR4MQAEE_v5 VELLEMAN - 27 -...
-
Page 28: Advanced Setting
NOTE: PPPoE and DHCP network connection type will require applying DDNS service to get a “Hostname” to correspond to dynamic IP address. Refer to “10.f. DDNS” for details. NOTE: Some routers may need to restart the DVR to get the IP address. DVR4MQAEE_v5 VELLEMAN - 28 -... - Page 29 • Use the DDNS username and password to login the DynDNS. • Create Hostname: Login → “Account” → “My Service” → “Add Host Services” → “Add Dynamic DNS Host” → Enter and choose the hostname → Click on “Add Host” → DDNS Hostname created. DVR4MQAEE_v5 VELLEMAN - 29 -...
-
Page 30: Dvr - Camera Setting
Enter the camera channel name (up to 6 characters). 4. Adjustment: Adjust the BR (brightness) / CT (contrast) / ST (saturation) / HUE (hue) / REC (recording) of the camera. 5. After setting, press “OK” and press “APPLY” to confirm. DVR4MQAEE_v5 VELLEMAN - 30 -... - Page 31 PTZ device. 4. Protocol Type: Choose “NORMAL” protocol for our own brand camera. Choose “P-D” (PELCO-D) protocol for all VELLEMAN cameras. 5. Baud Rate: Set the baud rate of each channel (2400, 4800, 9600, 19200, 38400, 57600, 115200), depending on the specifications of the dome camera.
-
Page 32: Network Backup
2. Enter the backup information → Press “Start” → Success → Convert → Play File. 1. Playback Information 2. Time Progress Bar 3. Functions: (1) De-interlace (2) De-blocking (3) OSD (4) AVI Convert (5) Config. Setting DVR4MQAEE_v5 VELLEMAN - 32 -... -
Page 33: Alarm List
2. You can play, delete or clear all motion-triggered recording events easily. 3. Click on the “Refresh” button to update the database list. 4. All the motion-triggered files will be listed systematically for an easy search. DVR4MQAEE_v5 VELLEMAN - 33 -... - Page 34 GUEST — Watch the image only. Only the “a” function can be used. 3. Life time: According to different authority level, different accounts can stay online for different time period (1min, 5min, 10min, 1hour, 1day, infinity). DVR4MQAEE_v5 VELLEMAN - 34 -...
-
Page 35: Online User Info
NOTE: If the TCP port number is not 80, see the example below. IP address: 192.168.1.10; Port number: 888 > Key in “60.121.46.236: 888” into the URL address box and press ENTER. Download AP Download JAVA DVR4MQAEE_v5 VELLEMAN - 35 -... - Page 36 Step 4: Choose “Windows Offline Installation” or “Windows Online Installation”. Windows Offline Installation Windows Online Installation Step 5: Take “Windows Offline Installation” as an example. Save the setup file “jre-1_5_0_04-windows-i586-p” on the desktop of PC. Click twice on the “jre-1_5_0_04-windows-i586-p“ to setup. DVR4MQAEE_v5 VELLEMAN - 36 -...
-
Page 37: Troubleshooting
- Check the camera and monitor video cables and connections. - Check the power supply to the camera. - Check the setting of the camera lens. DVR keeps rebooting - Place the HDD near the power connector or replace the HDD. DVR4MQAEE_v5 VELLEMAN - 37 -... -
Page 38: Appendix #1 - Hdd Installation
IDE bus (pin 1 on motherboard connected with pin 1 of HDD). • Step 7: Close the upper cover of the DVR and fasten all 8 screws (refer to figure 4 and 5). DVR4MQAEE_v5 VELLEMAN - 38 -... -
Page 39: Appendix #2 - Pin Configuration
When alarm has been triggered, signal becomes “Low” and it will stop all alarm activities. Under normal operation, signal remains “High”. PIN 15: EXTERNAL ALARM COM Under normal operation, the COM disconnects from NO. When the alarm is triggered, the COM connects with NO. PIN 16 +17: GND Earth GND DVR4MQAEE_v5 VELLEMAN - 39 -... -
Page 40: Appendix #3 - Recording Time Table
68.2 763.89 31.8 1416.67 BEST 2156.94 89.9 4134.72 172.3 965.28 40.2 1655.55 HIGH 3398.61 141.6 4833.31 201.4 1120.83 46.7 2166.38 90.3 NORMAL 4105.56 171.1 5154.17 214.8 1563.89 65.2 2494.44 103.9 BASIC 4472.22 186.3 6681.94 278.4 DVR4MQAEE_v5 VELLEMAN - 40 -... -
Page 41: Appendix #4 - Compatible Usb Brands
320GB 7200 rpm VELLEMAN cannot be held responsible in the event of damage to or loss of programmes, data or removable media. VELLEMAN advises you to regularly make backups onto different storage media (disc, CD-ROM etc.) of your documents, data, files or software installed onto our product.
Need help?
Do you have a question about the DVR4MQAEE and is the answer not in the manual?
Questions and answers