Table of Contents
Advertisement
Quick Links
Advertisement
Table of Contents

Related Manuals for Nvidia GeForce4 MX Series


Summary of Contents for Nvidia GeForce4 MX Series
- Page 1 User’s Manual GeForce4 MX Series DOC NO : 54-0NV18-01 Rev.A 02/09/03...
- Page 2 FCC Requirement This device has been certified to comply with the limits for a Class B computing device pursuant to Subpart J of Part 15 of the FCC Rules. See instructions if interference to radio reception is suspected. WARNING: This equipment generates and uses radio frequency energy and, if not installed or used properly, that is, in strict accordance with the manufacturer's instructions, may cause interference to radio or television reception.
-
Page 3: Limited Warranty
Notice The information in this document is subject to change in order to improve reliability, design, or function without prior notice and does not represent a commitment on the part of this company. In no event will we be liable for direct, indirect, special, incidental, or consequential damages arising out of the use or the inability to use the product or documentation, even if advised of the possibility of such damages. -
Page 4: Table Of Contents
TABLE OF CONTENTS Introduction......................1 Feature......................1 System Requirements ..................2 Package Contents .................... 2 Hardware Installation..................3 Adapter Configuration..................3 Installing your VGA adapter ................5 Software Installation..................6 Installing driver on Windows 98SE/ME............6 Installing driver on Windows 2000/XP ............6 Installing DirectX on Windows 98SE/ME/2000/XP ........ -
Page 5: Introduction
1. Introduction The NVIDIA graphics-processing unit (GPU) shakes up the gaming industry with unprecedented visual effects and sizzling frame rates—injecting life into the previously artificial world of computer-generated graphics. Powered by the new NVIDIA new nfiniteFX engine and the Lightspeed Memory Architecture , the GPU enables users to look into a rich environment instead of just a computer screen. -
Page 6: System Requirements
1.2 System Requirements □ Any motherboard with AGP bus. □ Microsoft Windows 98SE / ME / 2000 / XP. □ DirectX 8 or higher and OpenGL Features. 1.3 Package Contents □ VGA board. □ Auto-Run Driver CD. □ User’s Manual. □... -
Page 7: Hardware Installation
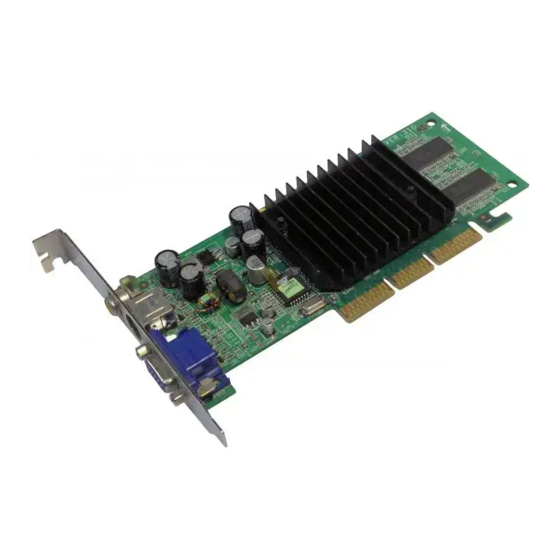
2. Hardware Installation 2.1 Adapter Configuration VGA Card Specification VGA Card Specification... - Page 8 Low-Profile VGA Card Specification Low-Profile VGA Card Specification...
-
Page 9: Installing Your Vga Adapter
2.2 Installing your VGA adapter 1. Power off your computer, remove its outside cover, and then assert yourself by touching the power supply of your computer. Note: Before installing your new VGA card, you must first set the VGA option to either Standard VGA or Standard Display VGA. 2. -
Page 10: Software Installation
3. Software Installation After inserting VGA card into port, please turn on PC and new hardware will be automatically detected. Auto-Run CD will auto-detect your VGA and TV card devices. Therefore, it might show more than one device in the first installing window. Notice : Otherwise, Auto-Run CD will skip the first installing window when it only detects one device. -
Page 11: Installing Directx On Windows 98Se/Me/2000/Xp
3.3 Installing DirectX on Windows 98SE/ME/2000/XP When the system restart after finishing VGA driver setup, please install better DirectX version than that on your system. 1. Double click CD-ROM icon to let it AutoRun. The “VGA Installer” will be shown again. 2. -
Page 12: Optional Functions
4. Optional Functions Following of functions are optional. This product may not support Notice : those functions. Therefore, please check out the features of this product first which are on the paper user’s manual. 4.1 nView Function instructions 4.1.1. Clone mode 1. -
Page 13: Tv-Out Function Instructions
4.2 TV-OUT Function Instructions 4.2.1. How to enable the TV-OUT function The VGA card needs to see real 75 ohms AV input. Connect the signal cable between TV-OUT of VGA and TV's Video input and Warning: turns on the TV before launch “Display Properties”. Otherwise the TV-out function would be gray and un-selectable. - Page 14 4.2.2. How to use TV-out cables correctly? Power off your PC and TV first. 2. Connect the signal cable to the Video input at your TV from your VGA card, and then power on your PC and TV. Caution: Before you power on your system, you have to be sure the VGA Turn Off Turn Off...
- Page 15 B. Click “Video output format” to select output from Composite or S-Video. C. Click “OK” to switch your display mode. D. Click “Yes” to confirm desktop setting. 4.2.4. How to adjustment screen position? 1. Click on “Display” of Control Panel. Select “Device Selection”...
-
Page 16: How To Change Output To Digital Flat Panel
4.3 How to change output to Digital Flat Panel? 1. A. You can click “Digital Flat Panel” to switch VGA output to Digital Flat Panel. B. Click “OK” or “Apply” to switch your display device. 2. Click “OK” to make sure. 3. -
Page 17: Installing Capture Driver (Optional For Video-In)
4.4 Installing Capture Driver (Optional for Video-In) If your VGA board support video in you can select “install capture driver”. 4.4.1. Capture Tool Execute “AMCAP.EXE”. 4.4.2. Capture Setting 1. File A. Set Capture File Click–on to set the filename of the captured video file. - Page 18 2. Options A. Preview Click –on preview to start. B. Audio Format Click–on select audio-sampling format that is installed in your system. C. Video Capture Filter Video decode to set the optional “Video Proc Amp” change Brightness, Contrast, Saturation or Hue by using the various scroll bars and viewing the effect on your video monitor.
-
Page 19: Color Correction Panel
!" Right click from the Windows desktop to display the context menu, click Properties, the Settings tab, and the Advanced button. !" Click the Color Correction tab to display the nVIDIA Color Correction panel. If you are using a nView-based card, have nView enabled, and want to access the Color Control Panel from the nView panel, follow these steps: !"... -
Page 20: Video Mirror Function
4.6 Video Mirror Function 4.6.1. Video Mirror mode Video Mirror is a nView feature that allows a video or DVD application to mirror its playback in full-screen mode on any one of the connected display devices. For Video Mirror functionality, set your nView panel to one of these modes: •Windows XP/2000 Clone or Windows XP DualView. -
Page 21: Desktop Utilities
Color Correction control panel. E. Desktop Manager Settings These settings are also available by click the title bar of an application that has already been configured with nVIDIA Desktop Manager. F. Adjust Display Properties These settings are also available by right-clicking from the Windows desktop, selecting Properties and then the Settings tab. -
Page 22: What Is Nview Desktop Manager
4.8 What is nView Desktop Manager? nView Desktop Manager is a user level application utility that focuses on making you more productive when working on your Windows desktop. Desktop Management was originally created for multiple-display graphics cards but has grown to enhance single-monitor user desktops as well. 4.8.1. - Page 23 4.8.2. Summary of Windows Settings 1. Window Controls A. Enable Window Spanning Across Monitors This options allows windows to span (display) across monitors. When the option is disabled, all windows are prevented from spanning across monitors. Default: Option is disabled. B.
- Page 24 D. Show dialog boxes on application’s monitor This option repositions dialog boxes centered on the parent application’s monitor. 3. User Interface Control You can access Desktop Manager features quickly and easily from any application using the nView system menu extension. Every window has a system menu for basic tasks such as moving or resizing the window.
- Page 25 2. Zoom Settings !" If you are using an nVIDIA dual-display GPU-based graphics card, you have several zoom options available. !" If you just want a Windows tool that lets you zoom certain areas of the desktop in a window, use the “Zoom Window” tool described in this section.
- Page 26 G. Move window to monitor… Moves the active window to a user-specified monitor. H. Move window to desktop… Moves the active window to a user-specified desktop. I. Max/Restore window Toggles a maximize/restore function on the active window. J. Toggle transparency Toggles the active window between being transparent or opaque.
- Page 27 2. Show taskbar Quick Tweak Icon Click the Show taskbar QuickTweak icon option on the “Desktops” page and click Apply. This adds the nVIDIA QuickTweak icon to the Windows taskbar. 3. Show Desktops in Explorer Window folder tree The Show desktops in Explorer window folder tree option lets you view desktops in the Windows Explorer folder tree.
- Page 28 4.8.5. How to over clock Increasing hardware clock frequencies beyond manufacturer’s recommended setting may cause system instability Warning: and possibly damage the hardware. 1. Setting Hardware Options Function Choose “Hardware Options” in “Additional Properties” then enable “Allow clock frequency adjustments”. 2.
-
Page 29: Display Information
5. Display Information 5.1 Resolutions Supported Resolutions Color Depth Refresh Rate (Hz) 8bit 60 70 72 75 85 100 120 140 144 150 170 200 240 640 x 480 16bit 60 70 72 75 85 100 120 140 144 150 170 200 240 32bit 60 70 72 75 85 100 120 140 144 150 170 200 240 8bit... -
Page 30: Faq
6. FAQ Q: While installing on my PC, my computer loses the Vertical Sync. A: Please check your monitor’s specifications. Some monitors connect the DDC signal to ground: Which causes the BIOS not to detect your monitor. Therefore, causing your VGA card not to receive any data or refresh rates. Q: The image on my monitor keeps on flickering and the driver can't change the refresh-rate. - Page 31 Q: TV-OUT is grayed out on my TV-OUT capable. How can I fix it? A: 1. The VGA card needs to see real 75 ohms AV input. However, not all TVs have this, and some have a switch labeled “Terminate” next to the AV inputs to turn the 75 ohms off to allow more than one TV to be connected.
- Page 32 Q: If I set the VGA card as the primary card in the BIOS, my secondary PCI video card is not detected. How can I fix it? A: Check in your C:\CONFIG.SYS file to see if you are loading EMM386.EXE. If you are, remove the line.
Need help?
Do you have a question about the GeForce4 MX Series and is the answer not in the manual?
Questions and answers