Table of Contents
Advertisement
Quick Links
GeForce Experience PC Build DIY Directions
Pointers before starting your build
Wash your hands
o
Start in a clean dry space with good light
o
Layout all your parts on a flat surface
o
Leave the CPU in its protective cover until ready to install
Put on your static bracelet or properly ground yourself on the PC case
o
Do not build your PC on carpet
o
1. Prepping your Case
a. Remove both side panels
b. Remove any manuals or plastic from the case
c. Untangle front panel port cables
d. Install Mobo I.O. Shield
e. Install Mobo stand‐off riser pins
i. Tip: When installing the Mobo stand‐off riser pins ensure you match the layout to
the mounting holes on your mobo
2. Installing the PSU
a. Place the PSU in the case and align the screw holes
b. Ensure that the PSU fan is oriented so it pulls in fresh air (This will vary by case)
c. Thread in all 4 screws before fully tightening them
d. Ensure all 4 screws are tightly fastened
3. Installing the Storage Drive
a. Slide your storage drive into an open Storage slot of your case
b. Fasten your drive into the bay using the clip or screws that come with your case (fasteners
will vary by case)
4. Installing the Optical Drive
a. Remove the top 5.25" filter/vanity cover from the front panel of the case
b. Gently rock the protective metal tab blocking the top 5.25" bay opening
i. Tip: The method for removing both the cover and protective tab will vary by case
c. Insert the optical drive into the top 5.25" bay
d. Fasten your optical drive into the bay using the clip or screws that come with your case
(fasteners will vary by case)
5. Mounting the CPU
a. Release the latch arm(s) on the CPU socket retention bracket
b. Lift the lid of the socket retention bracket until it is pointing perpendicular to the Mobo
c. Look for the arrow on the corner of the CPU
d. When seating the CPU into the socket, match the gold arrow on the corner of the CPU to the
black arrow on the corner of the CPU socket retention bracket
i. Tip: The CPU only goes in and fully seats one way. This is very apparent
e. Close the lid of the CPU socket retention bracket
f.
Fasten the latch arm(s) on the CPU socket retention bracket
i. Tip: This will require a bit of force and will cause the arm to flex slightly
ii. Tip: LGA 2011 CPUs have 2 arms, and there is a required order for opening/closing
1
Advertisement
Table of Contents

Subscribe to Our Youtube Channel
Related Manuals for Nvidia GeForce GTX


Summary of Contents for Nvidia GeForce GTX
- Page 1 GeForce Experience PC Build DIY Directions Pointers before starting your build Wash your hands Start in a clean dry space with good light Layout all your parts on a flat surface Leave the CPU in its protective cover until ready to install Put on your static bracelet or properly ground yourself on the PC case Do not build your PC on carpet 1. Prepping your Case a. Remove both side panels b. Remove any manuals or plastic from the case c. Untangle front panel port cables d. Install Mobo I.O. Shield e. Install Mobo stand‐off riser pins i. Tip: When installing the Mobo stand‐off riser pins ensure you match the layout to the mounting holes on your mobo 2. Installing the PSU a. Place the PSU in the case and align the screw holes b. Ensure that the PSU fan is oriented so it pulls in fresh air (This will vary by case) c. Thread in all 4 screws before fully tightening them d. Ensure all 4 screws are tightly fastened 3. Installing the Storage Drive a. Slide your storage drive into an open Storage slot of your case b.
- Page 2 6. Mounting the CPU Cooler a. Clean the surfaces of the CPU and Cooler interface with isopropyl alcohol and a paper towel or cloth (You want to ensure any finger oils and stock thermal paste are cleaned off) b. Apply a drop about 1/3 the size of a pea to the surface of the CPU c. Use a piece of plastic to spread the thermal paste until 1/3 of the surface is covered. (The compression of the cooler on the CPU will cause the thermal paste to evenly cover the CPU surface) d. Press the mounting pins into the motherboard until you hear a loud and positive click i. Tip: There are many types of CPU coolers and the mounting process will vary. e. Connect the 3 or 4 pin fan power connector to the CPU_FAN power connector on the top of the Mobo 7. Mounting Memory on the Mobo a. Pull back the clasp on the DIMM slot of the motherboard b. Align the memory stick with the DIMM slot i. Note: Memory c. Seat the memory stick into the DIMM slot d. Firmly press down while distributing pressure evenly across the top of the memory stick until you hear a positive click i. Tip: DIMM slot configuration will vary across Mobos. Refer to your owners guide for a diagram of your DIMM slot layout 8. Installing the Mobo a. Lay your case flat on its side with the motherboard bay facing up b. Align the screw holes on your Mobo with the threaded riser pins and set it on the riser pins c.
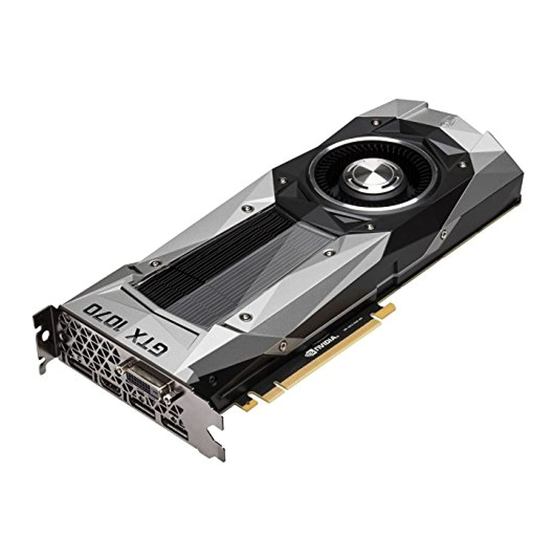
- Page 3 11. Wiring Case Fans a. Firmly plug each 3‐pin fan power connector to a 3‐pin PWR_FAN port on the motherboard i. Tip: There are usually 3‐5 ports located on different places of the motherboard to accommodate fans in different locations. If your case has more than 3 fans you may want to consider a fan power hub that would plug into a MOLEX power connector 12. Wiring Case Panel Ports a. Open your Mobo Owner’s Manual to the layout diagram showing the F_Panel pin layout b. Follow the Diagram and ensure you plug in the Power Switch, Reset button and HDD Data light cables i. Tip: These cables are dual colored. The white or black wire is always the “ground” wire – while the colored wire is usually the “hot” or “+” wire. c. Plug in the Front Panel USB cable into the pinned USB connector (This port is usually found at the bottom of the Mobo to the left of the SATA Data ports) d. Plug in the Front Panel HD Audio Cable into the pinned HD Audio Port. (This is usually found on the left side of the Mobo at the bottom or in‐between the PCI‐E slots 13. Installing the Graphics Cards a. Seat your Graphics Card into PCI‐E Slot #1 b. Apply even pressure across the side of the Graphics Card until you hear and feel a positive click c. Secure the Graphics Card bracket to the case using one of the provided case screws d. Firmly plug in your 6 and or 8‐pin power cables into the power ports on the side of your graphics card e. If you have a second card for SLI repeat steps 12: a,b and c in PCI‐E port 2 or 3 and then install your SLI bridge ...
Need help?
Do you have a question about the GeForce GTX and is the answer not in the manual?
Questions and answers