Table of Contents
Advertisement
Quick Links
Table of Contents
Copyright © 2011 Tripp Lite. All trademarks are the property of their respective owners.
201108084-93-3099.indd 1
Owner's Manual
USB to VGA/DVI Adapter
Model #: U244-001-R
USB to VGA Adapter
Model #: U244-001-VGA-R
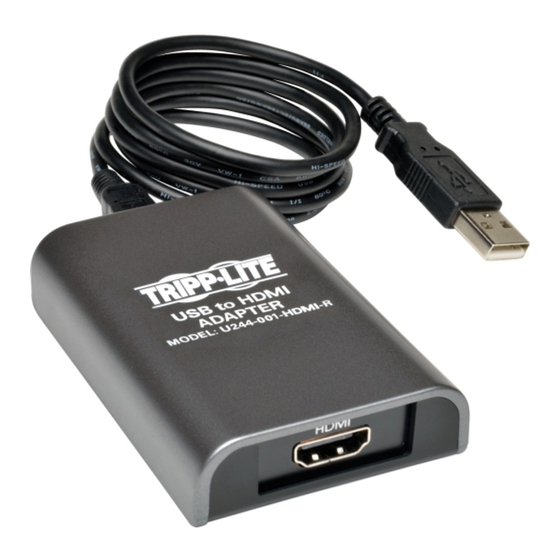
USB to HDMI Adapter
Model #: U244-001-HDMI-R
1111 W. 35th Street, Chicago, IL 60609 USA
www.tripplite.com/support
1
2
2
2
2
3
4
4
6
8
8
9
11
12
8/12/2011 4:40:37 PM
Advertisement
Table of Contents

Related Manuals for Tripp Lite U244-001-R


Summary of Contents for Tripp Lite U244-001-R
-
Page 1: Table Of Contents
3.4 Making the Add-On Display the Primary Display 4. Troubleshooting 5. Specifications 6. Warranty And Warranty Registration 1111 W. 35th Street, Chicago, IL 60609 USA www.tripplite.com/support Copyright © 2011 Tripp Lite. All trademarks are the property of their respective owners. 201108084-93-3099.indd 1 8/12/2011 4:40:37 PM... -
Page 2: Introduction
• Hot-pluggable; add or remove monitor without the need for a system reboot • Automatically resumes from hibernation and suspend modes • Supports video resolutions up to 1920 x 1080 (60Hz), 1080p (60Hz) • Set additional monitors to extend the primary display, duplicate the primary display, or set an additional monitor as the primary display • U244-001-R comes with a DVI to VGA adapter, allowing you to connect either a DVI or VGA display 1.2 Package Contents Before installation, please check the items in the package. The package should contain the following items: • (1) U244-001-R or (1) U244-001-VGA-R or (1) U244-001-HDMI-R • (1) Driver CD... -
Page 3: Installation
1. Introduction Computer requirements when using 1 – 2 display adapters: • 1.2GHz Single Core CPU • 512MB memory Computer requirements when using 3 display adapters: • 1.8GHz Single Core CPU • 1GB memory Computer requirements when using 4 – 6 display adapters: • 1.6GHz Core Duo CPU • 1GB memory Note: Only 1 added monitor can support DVD playback. In order to support DVD playback, your computer must meet the following requirements: • 2.0GHz Core Duo CPU • 1GB memory... -
Page 4: Using The Adapter
2. Installation 2. For Windows users, the set-up process will begin automatically. For Mac users, an install screen will appear with a Display Link Software Installer link. Click this link to begin installation. Follow the prompts that appear to complete the process. 3. When this process is complete, you will need to restart your computer to finish the installation. 4. After restarting your computer, connect the included USB cable from an available USB 2.0 port to the display adapter. 5. Connect your display adapter to a monitor using a DVI or VGA cable, depending on your adapter/monitor connection type. 6. Once connected, the computer will recognize the display adapter, and complete the installation. The video should now be displayed on the add-on monitor. Note: It may take a few moments before the screen appears on the add-on monitor. Also, it is normal for the screen to flicker on and off a few times when first connected. - Page 5 3. Using the Adapter Windows To access the display settings on a Windows computer, right-click on your computer’s desktop, and select the Properties or Personalize option, depending on your Windows operating system. From there you will need to access the Settings or Display option to get to the Display Settings page. A quick way to access this page is to use the display adapter icon in the lower-right corner of your computer screen. Right-click on this icon and select the Advanced option to automatically pull up your computers Display Settings page.
-
Page 6: Extending Video To The Add-On Display
3. Using the Adapter Note: • The display adapter icon only appears in the lower-right corner of Windows computers, and offers a quick way to adjust the display(s) settings. The settings available in this right-click menu may vary depending on your Windows operating system. • Only Mirror mode is supported under Windows Vista Display Driver Model (WDDM) mode. In addition, the Aero Experience (Flip 3D effect) will be disabled under Windows Vista Display Driver Model (WDDM) mode as long as the display adapter is connected. - Page 7 3. Using the Adapter 2. Select the monitor icon that represents the add-on display you wish to change, or choose the add-on display from the drop-down menu. The primary display is always icon 1. 3. Once you’ve selected the monitor icon for the add-on display, check the checkbox to extend video onto the monitor, or select the extension option from the drop-down list. 4. Drag the monitor icons in the Display Settings page so that they are positioned to replicate the location of the actual displays. For example, if display 1 is directly to the left of display 2, the monitor icons should be positioned that way. This affects which side of the screen the mouse is allowed to move to the next display from, and is therefore essential to ensure smooth mouse movement between displays. 5. Click the Apply button to activate the changes. The computer video will now be extended from the primary display to the add-on display. Note: When playing a DVD, it is recommended that you play the DVD on a monitor connected to the computer via standard cabling, and not an add-on monitor connected via display adapter.
-
Page 8: Mirroring Video On The Add-On Display
3. Using the Adapter 3.3 Mirroring Video on the Add-On Display To display the same thing on both the primary and add-on display, follow the steps below: Windows 1. Open your computer’s Display Settings page. 2. Select the monitor icon that represents the add-on display you wish to change, or choose the add-on display from the drop-down menu. The primary display is always icon 1. 3. Un-check the box next to Extend the desktop onto this monitor, or select the option from the drop-down menu to duplicate the display, and then click the apply button. Note: In Mirror mode, the add-on display settings are limited by those of the primary display. If the primary display only supports a resolution of 1280 x 1024, the add-on monitor will be limited to a resolution of 1280 x 1024 or less. -
Page 9: Troubleshooting
3. Using the Adapter 2. Select the monitor icon that represents the add-on display you wish to change, or choose the add-on display from the drop-down menu. The primary display is always icon 1. 3. Check the box next to This is my main monitor and click the Apply button to make the add-on display the primary display for the computer. Note: • Some computers require you to first un-select the original primary display before setting a new primary display. • Once set as the primary display, the add-on display will continue to be the primary display as long as it is connected to the computer. Once disconnected, the primary display will default back to the monitor connected to the computer via standard cable. - Page 10 4. Troubleshooting Q: Why is the add-on monitor flickering? A: This is usually caused by a low refresh rate. When in “Mirror Mode,” increase the refresh rate of the main monitor. This will in turn increase the refresh rate of the add-on monitor, which should stop the flickering. When in “Extended Mode,” increase the refresh rate of the add-on monitor. Q: When I play MPEG file by Windows Media Player on the extended monitor, why does the display become abnormal when I switch it to full screen mode? A: If your system is Windows XP SP1, upgrading to SP2 will solve this problem.
-
Page 11: Specifications
4. Troubleshooting Q: In “Extended” mode, why does the cursor disappear? A: If you’re in extended mode but have not yet connected the add-on monitor to the U244-001-R, the desktop will still pan to the add-on monitor. It’s possible that your cursor has moved to the extended desktop and is no longer visible on the primary display. When this occurs, try the following: • Connect the add-on monitor to the U244-001-R. You should be able to see the mouse cursor once the computer screen is displayed. • Move your mouse to try and drag the cursor back onto the primary monitor. • Unplug the U244-001-R from the computer to restore the cursor. 5. Specifications Feature Specification Source Connector USB A Male (via the included USB 2.0 cable) Display Connector HDMI F, DVI-I F or HD15 F Maximum Number of... -
Page 12: Warranty And Warranty Registration
• Reorient or relocate the receiving antenna. • Increase the separation between the equipment and receiver. • Connect the equipment into an outlet on a circuit different from that to which the receiver is connected. • Consult the dealer or an experienced radio/TV technician for help. Any changes or modifications to this equipment not expressly approved by Tripp Lite could void the user’s authority to operate this equipment. WEEE Compliance Information for Tripp Lite Customers and Recyclers (European Union) Under the Waste Electrical and Electronic Equipment (WEEE) Directive and implementing regulations, when customers buy new electrical and electronic equipment from Tripp Lite they are entitled to: • Send old equipment for recycling on a one-for-one, like-for-like basis (this varies depending on the country) • Send the new equipment back for recycling when this ultimately becomes waste Tripp Lite follows a policy of continuous improvement. Product specifications are subject to change without notice. 1111 W. 35th Street, Chicago, IL 60609 USA 201108084 • 933099-EN www.tripplite.com/support 201108084-93-3099.indd 12...
Need help?
Do you have a question about the U244-001-R and is the answer not in the manual?
Questions and answers