Table of Contents
Advertisement
Available languages
Available languages
Quick Links
19_11_119_9339B0_BOOK.indb 1
19_11_119_9339B0_BOOK.indb 1
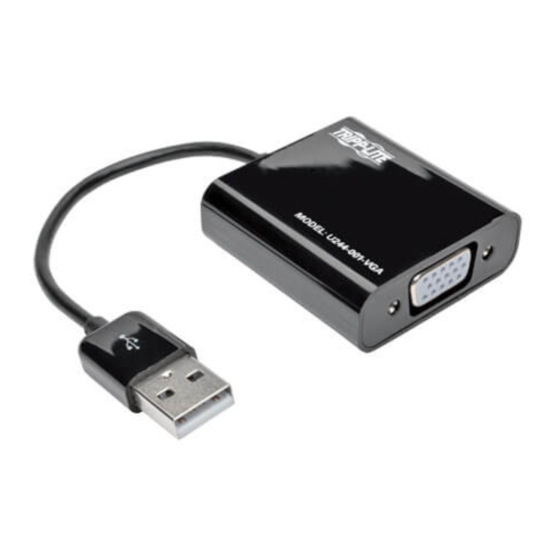
Owner's Manual
USB 2.0 to VGA
Adapter
Model: U244-001-VGA
Español 25 • Français 49 • Русский 73
WARRANTY REGISTRATION
Register your product today and be automatically entered
to win an ISOBAR surge protector in our monthly drawing!
tripplite.com/warranty
1111 W. 35th Street, Chicago, IL 60609 USA
tripplite.com/support
Copyright © 2019 Tripp Lite. All rights reserved.
1
12/30/2019 9:53:56 AM
12/30/2019 9:53:56 AM
Advertisement
Chapters
Table of Contents

Subscribe to Our Youtube Channel
Related Manuals for Tripp Lite U244-001-VGA


Summary of Contents for Tripp Lite U244-001-VGA
- Page 1 Register your product today and be automatically entered to win an ISOBAR surge protector in our monthly drawing! tripplite.com/warranty 1111 W. 35th Street, Chicago, IL 60609 USA tripplite.com/support Copyright © 2019 Tripp Lite. All rights reserved. 19_11_119_9339B0_BOOK.indb 1 19_11_119_9339B0_BOOK.indb 1 12/30/2019 9:53:56 AM 12/30/2019 9:53:56 AM...
-
Page 2: Table Of Contents
Table of Contents 1. Introduction 1.1 Features 1.2 Package Contents 1.3 Optional Accessories 1.4 System Requirements 2. Installation 3. Using the Adapter 3.1 Display Properties 3.2 Extending Video to the Add-On Display 3.3 Mirroring Video on the Add-On Display 3.4 Making the Add-On Display the Primary Display 4. -
Page 3: Introduction
* Requires a network connection on your computer 1.2 Package Contents Before installation, please check the items in the package. The package should contain the following items: • U244-001-VGA • Driver CD • Owner's Manual 1.3 Optional Accessories • P502-Series High Resolution VGA Cables 1.4 System Requirements... - Page 4 1. Introduction • An Intel-based Mac running OS X 10.4 or later. Power PC-based Macs are not supported. • USB 2.0 port • VGA monitor Computer requirements when using 1-2 display adapters: • 1.2 GHz Single Core CPU • 512MB memory Computer requirements when using 3 display adapters: •...
-
Page 5: Installation
USB 2.0 port on your computer. 2. Connect the display adapter to a monitor using a VGA cable, such as Tripp Lite’s P502-Series High Resolution VGA Cables. 3. Once connected, the computer will recognize the display adapter and complete the installation. The video signal should now display on the add-on monitor. - Page 6 3. Using the Adapter Windows To access the display settings on a Windows computer, right-click on your computer’s desktop and select the Properties or Personalize option (depending on your Windows operating system). From there you will need to access the Settings or Display option to get to the Display Settings page.
- Page 7 3. Using the Adapter Below are additional settings available to Windows users via the display adapter right-click menu: • Check for Updates – Connects to Windows Update, checks for newer versions of the Display Link software and downloads them (if available). •...
- Page 8 3. Using the Adapter Notes: • The display adapter icon only appears in the lower-right corner of Windows computers and offers a quick way to adjust the display(s) settings. The settings available in this right-click menu may vary, depending on your Windows operating system.
-
Page 9: Extending Video To The Add-On Display
3. Using the Adapter 3.2 Extending Video to the Add-On Display To extend the video of the primary monitor to the add- on monitor, follow the steps below: Windows 1. Open your computer’s Display Settings page. 2. Select the monitor icon that represents the add-on display you wish to change or choose the add-on display from the drop-down menu. - Page 10 3. Using the Adapter 4. Drag the monitor icons in the Display Settings page so they are positioned to replicate the location of the actual displays. For example, if display 1 is directly to the left of display 2, the monitor icons should be positioned that way.
- Page 11 3. Using the Adapter 3. When unchecked, video will be extended among the connected monitors, with the Arrangement screen display icons to represent the location of the monitors. Drag the monitor icons so they are positioned to replicate the location of the actual displays.
-
Page 12: Mirroring Video On The Add-On Display
3. Using the Adapter 3.3 Mirroring Video on the Add-On Display To display the same thing on both the primary and add-on display, follow the steps below: Windows 1. Open your computer’s Display Settings page. 2. Select the monitor icon that represents the add-on display you wish to change, or choose the add-on display from the drop-down menu. -
Page 13: Making The Add-On Display The Primary Display
3. Using the Adapter 4. (Setting some add-on displays to mirror mode) To set some add-on displays to mirror the primary display while leaving others as extended, uncheck the Mirror Displays setting. 5. While holding down the [Cmd] and [Alt] keys on the keyboard, drag the icon of the add-on monitor that you wish to mirror onto the icon of the primary display. - Page 14 3. Using the Adapter Notes: • Some computers require you to first deselect the original primary display before setting a new primary display. • Once set as the primary display, the add-on display will continue to be the primary display as long as it is connected to the computer.
-
Page 15: Troubleshooting
4. Troubleshooting Q: Why is the display on the add-on monitor blank? If the monitor power LED is Green, wait a moment for the monitor to display the video, as it may take some time for the video to be displayed on the add-on monitor. - Page 16 4. Troubleshooting Q: Why is the add-on monitor flickering? This is usually caused by a low refresh rate. When in “Mirror Mode,” increase the refresh rate of the main monitor. This will in turn increase the refresh rate of the add-on monitor, which should stop the flickering.
- Page 17 4. Troubleshooting • Drag the media player to the add-on screen and close the player. Restart the player and it should open on the add-on monitor. Now try playing the media file again. • Try reducing the hardware acceleration level of the primary display (NOT the add-on monitor) to levels 1, 2 or 3 and restarting the media player.
- Page 18 4. Troubleshooting Q: In “Extended” mode, why does the cursor disappear? If you’re in extended mode but have not yet connected the add-on monitor to the display adapter, the desktop will still pan to the add-on monitor. It’s possible that your cursor has moved to the extended desktop and is no longer visible on the primary display.
-
Page 19: Specifications
5. Specifications 19_11_119_9339B0_BOOK.indb 19 19_11_119_9339B0_BOOK.indb 19 12/30/2019 9:53:57 AM 12/30/2019 9:53:57 AM... -
Page 20: Warranty And Product Registration
Warranty and Product Registration 3-Year Limited Warranty Tripp Lite warrants its products to be free from defects in materials and workmanship for a 3-Year period from the date of retail purchase by end user. Tripp Lite’s obligation under this warranty is limited to repairing or replacing (at its sole option) any such defective products.To obtain service... - Page 21 • Consult the dealer or an experienced radio/TV technician for help. Any changes or modifications to this equipment not expressly approved by Tripp Lite could void the user’s authority to operate this equipment. 19_11_119_9339B0_BOOK.indb 21 19_11_119_9339B0_BOOK.indb 21...
- Page 22 (European Union) Under the Waste Electrical and Electronic Equipment (WEEE) Directive and implementing regulations, when customers buy new electrical and electronic equipment from Tripp Lite they are entitled to: • Send old equipment for recycling on a one-for-one, like-for-like basis (this varies depending on the country) •...
- Page 23 19_11_119_9339B0_BOOK.indb 23 19_11_119_9339B0_BOOK.indb 23 12/30/2019 9:53:57 AM 12/30/2019 9:53:57 AM...
- Page 24 1111 W. 35th Street, Chicago, IL 60609 USA • tripplite.com/support 19-11-119 • 93-39B0_RevA 19_11_119_9339B0_BOOK.indb 24 19_11_119_9339B0_BOOK.indb 24 12/30/2019 9:53:57 AM 12/30/2019 9:53:57 AM...
- Page 25 English 1 • Français 49 • Русский 73 MÁS DE AÑOS 1111 W. 35th Street, Chicago, IL 60609, EE. UU. tripplite.com/support Copyright © 2019 Tripp Lite. Todos los derechos reservados. 19_11_119_9339B0_BOOK.indb 25 19_11_119_9339B0_BOOK.indb 25 12/30/2019 9:53:57 AM 12/30/2019 9:53:57 AM...
-
Page 26: Introducción
Índice Introducción 1.1 Características 1.2 Contenido del Empaque 1.3 Accesorios Opcionales 1.4 Requisitos del Sistema Instalación Uso del Adaptador 3.1 Propiedades de Pantalla 3.2 Ampliación de Video a la Pantalla Complementaria 9 3.3 Replicación de Video en la Pantalla Complementaria 3.4 Hacer de la Pantalla Complementaria la pantalla principal Solución de Problemas... -
Page 27: Contenido Del Empaque
1.2 Contenido del Empaque Antes de la instalación, consulte los artículos en el paquete. El paquete debe contener los siguientes elementos: • U244-001-VGA • CD de Controladores • Manual del Propietario 1.3 Accesorios Opcionales • Cables VGA de Alta Resolución de la Serie P502 1.4 Requisitos del Sistema... - Page 28 1. Introducción • Una Mac basada en Intel con OS X 10.4 o posterior. No soporta Mac basadas en Power PC. • Puerto USB 2.0 • Monitor VGA Requerimientos de computadora al usar adaptadores de 1 a 2 pantallas: • CPU de 1.2GHz de Núcleo Sencillo •...
-
Page 29: Instalación
2. Conecte el adaptador de la pantalla a un monitor usando un cable VGA, como el Cable VGA de Alta Resolución de la Serie P502 de Tripp Lite. 3. Una vez conectada, la computadora reconocerá el adaptador de pantalla y completará la instalación. - Page 30 3. Uso del Adaptador Windows Para acceder a las configuraciones de pantalla en una computadora con Windows, haga clic con el botón derecho del mouse en el escritorio de su computadora y seleccione la opción de propiedades o personalizar (dependiendo de su sistema operativo Windows). De ahí...
- Page 31 3. Uso del Adaptador A continuación se muestran los ajustes adicionales disponibles para los usuarios de Windows a través del menú contextual del adaptador de pantalla: • Buscar actualizaciones: Se conecta con Windows Update, comprueba la existencia de las versiones más recientes del software de enlace de pantalla y lo descarga (si está...
- Page 32 3. Uso del Adaptador Notas: •El icono del adaptador de pantalla solo aparece en la esquina inferior derecha de computadoras Windows y ofrece una forma rápida de ajustar las configuraciones de la(s) pantalla(s). Los ajustes disponibles en este menú contextual pueden variar, dependiendo de su sistema operativo Windows.
-
Page 33: Ampliación De Video A La Pantalla Complementaria
3. Uso del Adaptador 3.2 Ampliación de Video a la Pantalla Complementaria Para ampliar el video del monitor principal en el monitor complementario, siga los pasos indicados a continuación: Windows 1. Abra la página de Configuración de pantalla de su computadora. - Page 34 3. Uso del Adaptador 4. Arrastre los iconos del monitor iconos en la página de configuración de pantalla para que esté posicionado para replicar la ubicación de las pantallas. Por ejemplo, si la pantalla 1 está directamente a la izquierda de la pantalla de 2, los iconos del monitor, deben estar colocados de esa forma.
- Page 35 3. Uso del Adaptador 3. Cuando no esté marcada, el video se extenderá entre los monitores conectados, con la imagen de la disposición mostrando los iconos de pantalla representando la ubicación de los monitores. Arrastre los iconos del monitor para que estén posicionados para replicar la ubicación de las pantallas.
-
Page 36: Replicación De Video En La Pantalla Complementaria
3. Uso del Adaptador 3.3 Replicación de Video en la Pantalla Complementaria Para mostrar lo mismo en la pantalla principal y la complementaria, siga los pasos siguientes: Windows 1. Abra la página de Configuración de pantalla de su computadora. 2. Seleccione el icono del monitor, que representa la pantalla complementaria que desee cambiar o elija la pantalla complementaria desde el menú... -
Page 37: Hacer De La Pantalla Complementaria La Pantalla Principal
3. Uso del Adaptador 3. (Configuración de todas las pantallas adicionales en modo de espejo) Para configurar todas las pantallas adicionales en espejo de la pantalla principal, simplemente seleccione la configuración de Pantallas en espejo. 4. (Configuración de algunas pantallas adicionales en modo de espejo) Para configurar algunas pantallas adicionales en espejo de la pantalla principal mientras deja otras como extendidas, deseleccione la configuración de... - Page 38 3. Uso del Adaptador Notas: • Algunas computadoras requieren que usted deseleccione primero la pantalla principal original antes de configurar una nueva pantalla principal. • Una vez establecida como la pantalla principal, la pantalla adicional continuará siendo la pantalla principal mientras esté...
-
Page 39: Solución De Problemas
4. Solución de Problemas P: ¿Por qué está en blanco la pantalla en el monitor complementario? R: Si el LED de Encendido del monitor está verde, espere un momento para que el monitor muestre el video, ya que puede tomar algún tiempo mostrar el video en el monitor complementario. - Page 40 4. Solución de Problemas P: ¿Por qué el monitor complementario está parpadeando? R: Esto suele ser causado por una baja tasa de actualización. Cuando esté en "modo de espejo", aumente la tasa de actualización del monitor principal. Esto a su vez aumentará la tasa de actualización del monitor complementario, lo que debe detener el parpadeo.
- Page 41 4. Solución de Problemas • Como algunos reproductores de medios requieren soporte de hardware DirectX para operar correctamente, pruebe un reproductor de medios diferente que requiera menos soporte DirectX. • Arrastre el reproductor de medios a la pantalla complementaria y cierre el reproductor. Reinicie el reproductor y debe abrirse en el monitor complementario.
- Page 42 4. Solución de Problemas P: En "modo extendido", ¿por qué el monitor complementario tiene un borde negro alrededor del escritorio? R: Esto sucede cuando la resolución usada por el monitor complementario es mayor que la resolución usada por el monitor principal. Para resolver este problema, configure el monitor complementario para usar la misma resolución que el monitor principal.
-
Page 43: Especificaciones
5. Especificaciones 19_11_119_9339B0_BOOK.indb 43 19_11_119_9339B0_BOOK.indb 43 12/30/2019 9:53:58 AM 12/30/2019 9:53:58 AM... -
Page 44: Garantía
Garantía Garantía Limitada de 3 años Tripp Lite garantiza por 3 años a partir de la fecha de compra original del usuario final que este producto no presenta defectos en cuanto a materiales y de mano de obra. La obligación de Tripp Lite bajo esta garantía está... - Page 45 Garantía EXCEPTO COMO SE INDICA EN EL PRESENTE, TRIPP LITE NO OFRECE GARANTÍAS EXPRESAS O IMPLÍCITAS, INCLUIDAS LAS GARANTÍAS DE COMERCIABILIDAD Y ADECUACIÓN PARA UN DETERMINADO PROPÓSITO. Algunos estados no permiten la limitación o exclusión de garantías implícitas; por lo tanto, las limitaciones o exclusiones antes mencionadas pueden no aplicarse al comprador.
- Page 46 • Enviar el equipo nuevo para reciclaje una vez que finalmente quede en desuso Tripp Lite tiene una política de mejora continua. Las especificaciones están sujetas a cambio sin previo aviso. Las fotografías e ilustraciones pueden diferir ligeramente de los productos reales.
- Page 47 19_11_119_9339B0_BOOK.indb 47 19_11_119_9339B0_BOOK.indb 47 12/30/2019 9:53:58 AM 12/30/2019 9:53:58 AM...
- Page 48 MÁS DE AÑOS 1111 W. 35th Street, Chicago, IL 60609, EE. UU. • tripplite.com/support 19-11-119 • 93-39B0_RevA 19_11_119_9339B0_BOOK.indb 48 19_11_119_9339B0_BOOK.indb 48 12/30/2019 9:53:58 AM 12/30/2019 9:53:58 AM...
- Page 49 USB 2.0 à VGA Modèle : U244-001-VGA English 1 • Español 25 • Русский 73 1111 W. 35th Street, Chicago, IL 60609 USA tripplite.com/support Droits d'auteur © 2019 Tripp Lite. Tous droits réservés. 19_11_119_9339B0_BOOK.indb 49 19_11_119_9339B0_BOOK.indb 49 12/30/2019 9:53:59 AM 12/30/2019 9:53:59 AM...
- Page 50 Table des matières 1. Introduction 1.1 Caractéristiques 1.2 Contenu de l'emballage 1.3 Accessoires en option 1.4 Configuration requise 2. Installation 3. Utilisation de l'adaptateur 3.1 Propriétés de l'écran 3.2 Étendre la vidéo sur l'écran d'appoint 3.3 Miroitage de la vidéo sur l'écran d'appoint 12 3.4 Faire de l'écran d'appoint l'écran principal 4.
-
Page 51: Introduction
* Nécessite une connexion au réseau sur l'ordinateur 1.2 Contenu de l'emballage Avant l'installation, vérifier les articles dans l'emballage. L'emballage devrait contenir les articles suivants : • U244-001-VGA • CD de pilote • Manuel de l'utilisateur 1.3 Accessoires en option •... - Page 52 1. Introduction • Un Mac à base Intel qui utilise OS X 10.4 ou une version plus récente. Les Mac à base Power PC en sont pas pris en charge. • Port USB 2.0 • Moniteur VGA Configuration requise pour l'ordinateur lorsque 1 ou 2 adaptateurs d'écran sont utilisés : •...
-
Page 53: Installation
à un port USB 2.0 disponible sur l'ordinateur. 2. Raccorder l'adaptateur vidéo à un moniteur en utilisant un câble VGA, comme les câbles CGA haute résolution de la série P502 de Tripp Lite. 3. Une fois connecté, l'ordinateur reconnaîtra l'adaptateur vidéo et terminera l'installation. - Page 54 3. Utilisation de l'adaptateur Windows Pour accéder aux paramètres de l'écran sur un ordinateur Windows, cliquer à droite sur le bureau de l'ordinateur, puis sélectionner l'option Properties (propriétés) ou l'option Personalize (personnaliser) (selon le système d'exploitation Windows). De là, accéder à l'option Settings (réglages) ou Display (écran) pour accéder à...
- Page 55 3. Utilisation de l'adaptateur Ci-après figurent des réglages supplémentaires offerts aux utilisateurs de Windows via le menu de clic droit de l'adaptateur vidéo : • Check for updates (recherche de mises à jour) – se connecte à Windows Update, recherche de nouvelles versions du logiciel Display Link, puis les télécharge (le cas échéant).
- Page 56 3. Utilisation de l'adaptateur Remarques : L'icône de l'adaptateur vidéo s'affiche uniquement dans le coin inférieur droit des ordinateurs Windows et offre une façon rapide d'ajuster les réglages de l'écran ou des écrans. Les réglages disponibles dans ce menu de clic droit peuvent varier selon le système d'exploitation Windows.
-
Page 57: Étendre La Vidéo Sur L'écran D'appoint
3. Utilisation de l'adaptateur 3.2 Étendre la vidéo sur l'écran d'appoint Pour étendre la vidéo du moniteur principal au moniteur d'appoint, suivre les étapes ci-dessous : Windows 1. Ouvrir la page Display Settings (réglages de l'écran) de l'ordinateur. 2. Sélectionner l'icône du moniteur qui représente l'écran d'appoint à... - Page 58 3. Utilisation de l'adaptateur 4. Faire glisser les icônes des moniteurs sur la page Display Settings réglages de l'écran) de façon qu'elles soient positionnées pour reproduire l'emplacement des écrans actuels. Par exemple, si l'écran 1 se trouve directement à gauche de l'écran 2, les icônes des moniteurs devraient être positionnées de cette façon.
- Page 59 3. Utilisation de l'adaptateur 3. Lorsque cette case est décochée, la vidéo sera étendue sur les moniteurs connectés, avec les icônes de l'écran Arrangement (disposition) pour représenter l'emplacement des moniteurs. Faire glisser les icônes des moniteurs de façon qu'elles soient positionnées pour reproduire l'emplacement des écrans actuels.
-
Page 60: Miroitage De La Vidéo Sur L'écran D'appoint
3. Utilisation de l'adaptateur 3.3 Miroitage de la vidéo sur l'écran d'ap- point Pour afficher la même chose sur l'écran principal et l'écran d'appoint, suivre les étapes ci-dessous : Windows 1. Ouvrir la page Display Settings (réglages de l'écran) de l'ordinateur. 2. -
Page 61: Faire De L'écran D'appoint L'écran Principal
3. Utilisation de l'adaptateur 3. (Configurer tous les écrans d'appoint en mode miroir) Pour configurer tous les écrans d'appoint pour qu'ils reproduisent l'écran principal, cocher simplement le réglage Mirror Displays (écrans en miroir). 4. (Configurer certains écrans d'appoint en mode miroir) Pour configurer certains écrans d'appoint pour qu'ils reproduisent l'écran principal tout en laissant les autres étendus, décocher simplement... - Page 62 3. Utilisation de l'adaptateur 2. Sélectionner l'icône du moniteur qui représente l'écran d'appoint à modifier ou choisir l'écran d'appoint depuis le menu déroulant. L'écran principal est toujours l'icône 1. 3. Cocher la case à côté de This is my main monitor (il s'agit de mon moniteur principal), puis cliquer sur le bouton Apply (appliquer) pour faire de l'écran d'appoint l'écran principal de l'ordinateur.
-
Page 63: Dépannage
4. Dépannage Q : Pourquoi l'écran du moniteur d'appoint est-il vide? R : Si le voyant à DEL d'alimentation du moniteur est vert, attendre un moment pour permettre au moniteur d'afficher la vidéo, car il peut falloir un certain temps pour que la vidéo s'affiche sur le moniteur d'appoint. - Page 64 4. Dépannage Q : Pourquoi le moniteur d'appoint clignote-t-il? R : Cela est généralement causé par une faible fréquence de rafraîchissement. Alors que l'appareil se trouve en « mode miroir », augmenter la fréquence de rafraîchissement du moniteur principal. Cela permettra d'augmenter la fréquence de rafraîchissement du moniteur d'appoint qui devrait cesser de clignoter.
- Page 65 4. Dépannage • Étant donné que certains lecteurs multimédias exigent le support matériel DirectX pour fonctionner correctement, essayer un différent lecteur multimédia qui exige moins de support DirectX. • Faire glisser le lecteur multimédia vers l'écran d'appoint, puis fermer le lecteur. Redémarrer le lecteur et il devrait s'ouvrir sur le moniteur d'appoint.
- Page 66 4. Dépannage Q : En « mode étendu », pourquoi le moniteur d'appoint a-t-il une bordure noire autour du bureau? R : Cela se produit lorsque la résolution utilisée par le moniteur d'appoint est supérieure à la résolution utilisée par le moniteur principal. Pour résoudre ce problème, configurer le moniteur d'appoint pour qu'il utilise la même résolution que le moniteur principal.
-
Page 67: Caractéristiques Techniques
5. Caractéristiques techniques 19_11_119_9339B0_BOOK.indb 67 19_11_119_9339B0_BOOK.indb 67 12/30/2019 9:53:59 AM 12/30/2019 9:53:59 AM... -
Page 68: Garantie
(RMA) auprès de Tripp Lite ou d'un centre de réparation reconnu par TRIPP LITE. Les produits doivent être retournés à Tripp Lite ou à un centre de réparation autorisé par Tripp Lite en port prépayé et être accompagnés d'une brève description du problème et d'un justificatif de la date et du lieu d'achat. - Page 69 Garantie SAUF DANS LES CAS PRÉVUS PAR LES PRÉSENTES, TRIPP LITE N'ACCORDE AUCUNE GARANTIE, EXPRESSE OU TACITE, Y COMPRIS DES GARANTIES DE QUALITÉ COMMERCIALE ET D'ADAPTATION À UN USAGE PARTICULIER. Certains États n'autorisant pas la limitation ni l'exclusion de garanties tacites, les limitations ou exclusions susmentionnées peuvent ne pas s'appliquer à...
- Page 70 • D'envoyer le vieil équipement au recyclage en autant qu'il remplace un équipement équivalent (cela varie selon les pays) La politique de Tripp Lite en est une d'amélioration continue. Les caractéristiques techniques sont modifiables sans préavis. Les produits réels peuvent différer légèrement des photos et des illustrations.
- Page 71 19_11_119_9339B0_BOOK.indb 71 19_11_119_9339B0_BOOK.indb 71 12/30/2019 9:53:59 AM 12/30/2019 9:53:59 AM...
- Page 72 1111 W. 35th Street, Chicago, IL 60609 USA tripplite.com/support 19-11-119 93-39B0_RevA 19_11_119_9339B0_BOOK.indb 72 19_11_119_9339B0_BOOK.indb 72 12/30/2019 9:54:00 AM 12/30/2019 9:54:00 AM...
- Page 73 Адаптер USB 2.0 ― VGA Модель: U244-001-VGA English 1 • Español 25 • Français 49 1111 W. 35th Street, Chicago, IL 60609 USA tripplite.com/support Оxраняется авторским правом © 2019 Tripp Lite. Перепечатка запрещается. 19_11_119_9339B0_BOOK.indb 73 19_11_119_9339B0_BOOK.indb 73 12/30/2019 9:54:00 AM 12/30/2019 9:54:00 AM...
- Page 74 Содержание Введение 1.1 Функциональные возможности 1.2 Содержимое упаковки 1.3 Опциональные комплектующие 1.4 Системные требования Установка Использование адаптера 3.1 Свойства дисплея 3.2 Ретрансляция видеосигнала на дополнительный дисплей 3.3 Дублирование видео на дополнительном дисплее 3.4 Назначение дополнительного дисплея в качестве основного дисплея Bыявление...
-
Page 75: Введение
* Компьютер должен быть подключен к сети 1.2 Содержимое упаковки Перед началом установки проверьте правильность комплектации. Данное изделие должно поставляться в следующей комплектации: • U244-001-VGA • Компакт-диск с драйверами • Руководство пользователя 1.3 Опциональные комплектующие • Кабели высокого разрешения VGA серии P502 1.4 Системные... - Page 76 1. Введение • Устройство Mac с процессором Intel и OS X 10.4 или более поздних версий. Поддержка компьютеров Mac на платформе Power PC не предусмотрена. • Порт USB 2.0 • VGA-монитор Требования к компьютеру при использовании 1-2 видеоадаптеров: • Одноядерный ЦП с тактовой частотой 1,2 ГГц •...
-
Page 77: Установка
1. Подсоедините вмонтированный USB-кабель переходника к свободному порту USB 2.0 своего компьютера. 2. Подсоедините переходник к монитору через VGA-кабель (например, VGA-кабель высокого разрешения серии P502 марки Tripp Lite). 3. После подключения компьютер распознает переходник и завершает процесс установки. Теперь видеосигнал должен отображаться на дополнительном мониторе. - Page 78 3. Использование адаптера Windows Для перехода в настройки дисплея на компьютере с ОС Windows следует нажать на правую кнопку мыши в области рабочего стола и выбрать опцию Properties (Свойства) или Personalize (Персонализация) (в зависимости от установленной версии операционной системы Windows). Затем...
- Page 79 3. Использование адаптера Ниже приводятся дополнительные настройки, доступные для пользователей Windows через меню экранного адаптера, вызываемое правой кнопкой мыши: • Проверка обновлений – Подключается к Windows Update (Центру обновления Windows), проверяет наличие новых версий программнорго обеспечения Display Link и загружает их (при наличии). •...
- Page 80 3. Использование адаптера Примечания: • Значок экранного адаптера отображается только в правом нижнем углу экрана компьютеров с ОС Windows и обеспечивает быстрое изменение настроек дисплея(-ев). Настройки, доступные через это меню, вызываемое правой кнопкой мыши, могут различаться в зависимости от используемой версии операционной...
-
Page 81: Ретрансляция Видеосигнала На Дополнительный Дисплей
3. Использование адаптера 3.2 Ретрансляция видеосигнала на дополнительный дисплей Для ретрансляции видеосигнала с основного на дополнительный монитор выполните следующие действия: Windows 1. Откройте на своем компьютере страницу Display Settings (Настройка параметров экрана). 2. Выберите значок монитора, соответствующий дополнительному дисплею, настройки которого требуется изменить, или выберите дополнительный... - Page 82 3. Использование адаптера 4. Перетащите значки мониторов на страницу Display Settings (Настройка параметров экрана), разместив их таким образом, чтобы они дублировали расположение физических дисплеев. Например, если дисплей 1 находится непосредственно слева от дисплея 2, то значки мониторов должны располагаться таким же образом. Это влияет...
- Page 83 3. Использование адаптера 3. При снятом флажке видеосигнал будет ретранслироваться на все подключенные мониторы, а значки дисплеев в окне Arrangement (Расположение) будут отображать взаимное расположение мониторов. Перетащите значки мониторов, разместив их таким образом, чтобы они дублировали расположение физических дисплеев. Например, если дисплей 1 находится непосредственно слева...
-
Page 84: Дублирование Видео На Дополнительном Дисплее
3. Использование адаптера 3.3 Дублирование видео на дополнительном дисплее Для показа одного и того же изображения на основном и дополнительном дисплеях выполните следующие действия: Windows 1. Откройте на своем компьютере страницу Display Settings (Настройка параметров экрана). 2. Выберите значок монитора, соответствующий дополнительному дисплею, настройки... -
Page 85: Назначение Дополнительного Дисплея В Качестве Основного Дисплея
3. Использование адаптера 4. (Настройка некоторых дополнительных дисплеев на зеркальный режим) Для того чтобы настроить некоторые дополнительные дисплеи на дублирование основного дисплея, сохранив остальные в режиме ретрансляции, снимите галочку с опции Mirror Displays (Зеркальные мониторы). 5. Удерживая клавиши [Cmd] и [Alt] на клавиатуре, перетащите значок дополнительного... - Page 86 3. Использование адаптера Примечания: • На некоторых компьютерах перед назначением нового основного дисплея требуется отменить выбор предыдущего основного дисплея. • Дополнительный дисплей, назначенный в качестве основного, будет функционировать как основной до момента отключения от компьютера. После его отключения функция основного дисплея по умолчанию возвращается к монитору, подключенному...
-
Page 87: Bыявление И Устранение Неисправностей
4. Bыявление и устранение неисправностей В: Почему на дополнительном мониторе отображается пустой экран? О: Если светодиодный индикатор питания монитора горит зеленым светом, следует дождаться воспроизведения видео на мониторе, поскольку для отображения видеосигнала на дополнительном мониторе может потребоваться некоторое время. Если через несколько... - Page 88 4. Bыявление и устранение неисправностей В: Почему изображение на дополнительном мониторе мерцает? О: Как правило, это вызвано низкой частотой обновления. При работе в "зеркальном режиме" увеличьте частоту обновления основного монитора. В свою очередь, это увеличит частоту обновления дополнительного монитора, в результате чего мерцание...
- Page 89 4. Bыявление и устранение неисправностей • Перетащите медиапроигрыватель на дополнительный экран и закройте проигрыватель. Перезапустите проигрыватель, после чего он должен открыться на дополнительном мониторе. Теперь попытайтесь снова воспроизвести медиафайл. • Попробуйте уменьшить аппаратное ускорение основного дисплея (НЕ дополнительного монитора) до уровня 1, 2 или 3 и...
- Page 90 4. Bыявление и устранение неисправностей В: Почему в режиме "ретрансляции" исчезает курсор? О: Если при нахождении в режиме ретрансляции дополнительный монитор еще не подключен к экранному адаптеру, то рабочий стол ретранслируется на дополнительный монитор. Возможно, курсор сдвинулся на ретранслируемый рабочий стол и не отображается...
-
Page 91: Технические Характеристики
5. Технические характеристики 19_11_119_9339B0_BOOK.indb 91 19_11_119_9339B0_BOOK.indb 91 12/30/2019 9:54:01 AM 12/30/2019 9:54:01 AM... -
Page 92: Гарантийные Обязательства
Гарантийные обязательства Oграниченная гарантия сроком 3 года Компания Tripp Lite гарантирует отсутствие дефектов конструкционных материалов и изготовления изделий в течение 3 лет с момента приобретения конечным пользователем в розничной торговой сети. Обязательства компании Тripp Lite по настоящей гарантии ограничиваются ремонтом или... - Page 93 государствах ограничениe или исключение подразумеваемых гарантий не допускается; следоватeльно, вышеуказанное(-ые) ограничение(-я) или иcключение(-я) могут не распространяться на покупатeля. ЗА ИСКЛЮЧЕНИЕМ ПРЕДУСМОТРЕННЫХ ВЫШЕ СЛУЧАЕВ КОМПАНИЯ TRIPP LITE НИ ПРИ КАКИХ ОБСТОЯТЕЛЬСТВАХ НЕ НЕСЕТ ОТВЕТСТВЕННОСТИ ЗА ПРЯМЫЕ, КОСВЕННЫЕ, СЛУЧАЙНЫЕ ИЛИ ПОБОЧНЫЕ УБЫТКИ ЛИБО УБЫТКИ, ОПРЕДЕЛЯЕМЫЕ ОСОБЫМИ ОБСТОЯТЕЛЬСТВАМИ, ВОЗНИКАЮЩИЕ...
- Page 94 • Отправку нового обoрудования на переработку после окончательной выработки его ресурса Компания Tripp Lite постоянно совершенствует свою продукцию. B cвязи с этим возможно изменение технических характеристик без предварительного уведoмления. Внешний вид реальных изделий может несколько отличаться от представленного на фотографиях и...
- Page 95 19_11_119_9339B0_BOOK.indb 95 19_11_119_9339B0_BOOK.indb 95 12/30/2019 9:54:01 AM 12/30/2019 9:54:01 AM...
- Page 96 1111 W. 35th Street, Chicago, IL 60609 USA • tripplite.com/support 19-11-119 • 93-39B0_RevA 19_11_119_9339B0_BOOK.indb 96 19_11_119_9339B0_BOOK.indb 96 12/30/2019 9:54:01 AM 12/30/2019 9:54:01 AM...
Need help?
Do you have a question about the U244-001-VGA and is the answer not in the manual?
Questions and answers