Table of Contents
Advertisement
Quick Links
COMMERCIAL
GAS WATER HEATER
INSTALLATION, OPERATING
AND MAINTENANCE INSTRUCTION MANUAL
READ THESE INSTRUCTIONS THOROUGHLY BEFORE STARTING
AND RETAIN THESE INSTRUCTIONS IN A SAFE LOCATION
WARNING: If the information in these
instructions is not followed exactly, a
fire or explosion may result causing
property damage, personal injury or
death.
- Do not store or use gasoline or other
flammable vapors and liquids in the
vicinity of this or any other appliance.
- WHAT TO DO IF YOU SMELL GAS
- Do not try to light any appliance.
- Do not touch any electrical switch; do
not use any phone in your building.
- Immediately call your gas supplier from
a neighbor's phone. Follow the gas
supplier's instructions.
- If you cannot reach your gas supplier,
call the fire department.
- Installation and service must be
performed by a qualified installer,
service agency or the gas supplier.
FOR FUTURE REFERENCE
71781
Advertisement
Table of Contents

Subscribe to Our Youtube Channel
Related Manuals for John Wood G65


Summary of Contents for John Wood G65
- Page 1 COMMERCIAL GAS WATER HEATER INSTALLATION, OPERATING AND MAINTENANCE INSTRUCTION MANUAL READ THESE INSTRUCTIONS THOROUGHLY BEFORE STARTING AND RETAIN THESE INSTRUCTIONS IN A SAFE LOCATION FOR FUTURE REFERENCE WARNING: If the information in these instructions is not followed exactly, a fire or explosion may result causing property damage, personal injury or death.
- Page 2 The heater should be located in an area where leakage of the tank or connections will not result in damage to the area adjacent to the water heater or to lower floors of the structure. When such locations cannot be provided, it is recommended that a suitable drain pan be installed under the heater.
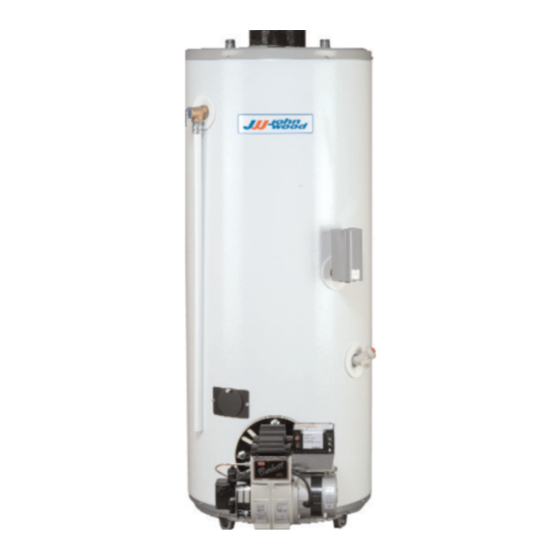
- Page 3 Figure 1 1. Cold water inlet 2. Hot water outlet 3. Gas supply manual shut-off valve 4. Sediment trap 5. Union - ground joint type 6. Gas control 7. Temperature & pressure relief valve 8. Floor drain 9. Drain pan (if used) 6”...
-
Page 4: Water Piping
The discharge capacity must be equal to or greater than the input to the water heater. Water heaters intended to be shipped to Canadian destinations may have the temperature and pressure relief valve factory installed. -
Page 5: Gas Connections
HAVE YOU CHECKED THE GAS SUPPLIED AND COMPARED IT WITH THE GAS MARKED ON THE RATING PLATE? SEE ALSO WARNING ON PAGE 1. The installation of this appliance must conform to applicable local codes and local authorities having jurisdictions. Install the gas piping as indicated in Figure 2. Use only new pipe and fittings with sound, clean-cut pipe thread. - Page 6 SQ. IN. connections should be avoided. However, where a separate chimney is not available, the flue pipe from the water heater should enter the common flue or chimney at a point ABOVE the flue pipe from the coal or oil fired equipment.
-
Page 7: Flue Damper
FLUE DAMPER Flue Damper Installation For Models equipped with a flue damper, the following instructions must be followed. It is recommended to leave a minimum 24” clearance from the actuator side of the flue damper for service access. Step 1: Place flue damper on top pan into flue collector. - Page 8 Connection Diagram Appliance in Standby Condition The motor is energized during appliance thermostat “off” cycle. The flue damper is the “closed” position. Circuit diagram is as shown. Schematic - Valve and Ignition Module FLAME SENSING PILOT BURNER E.C.O. (N.O.) TH.ST 128V R1 (N.C.) R2 (N.O.)
- Page 9 20 VAC 24 VAC E.C.O. R1 (N.C.) R2 (N.O.) SS2 (N.O.) E.S.(N.O.) VENT DAMPER VALVE 20 VAC 24 VAC E.C.O. R1 (N.C.) R2 (N.O.) SS2 (N.O.) E.S.(N.O.) VENT DAMPER VALVE On Appliance Call for Heat - Stage 1 The thermostat contacts close and they relay coil is energized.
-
Page 10: Schematic Diagram
ELECTRONIC IGNITION MODELS: ROBERTSHAW IGNITION MODULE AND VALVE SCHEMATIC DIAGRAM L1 (HOT) SERV. SWITCH NORMAL POSITION TH.ST ROBERTSHAW CONTROL MODULE SP745 NOTE: IF ANY OF THE ORIGINAL WIRE AS SUPPLIED MUST BE REPLACED. USE ONLY TYPE 105 C THERMOPLASTIC OR EQUIVALENT. EXCEPT THE SPARK IGNITION CABLE WHICH MUST BE HIGH VOLTAGE 450 120 VAC 24 VOLT TRANSFORMER... -
Page 11: Connection Diagram
FLAIR DAMPER DRIVE QUICK CONNECT 24 V TRANS YELLOW YELLOW ROBERTSHAW VALVE CONNECTION DIAGRAM JUNCTION BOX ROBERTSHAW CONTROL MODULE SP745 TEMPERATURE CONTROL Page 10 L3 (GND.) L1 120 VAC. L2 NEUTRAL SPARK ELECTRODE PV/MV WHITE RODGERS VALVE PV/MV HONEYWELL VALVE ALL WIRES ARE BLUE, WITH LABELING. -
Page 12: Air Supply
MECHANICAL POWER VENTING OPTION Power venting is an option on your water heater. A power venter kit is available for every model. Please consult with the company for more details. -
Page 13: Lighting Instructions
LIGHTING INSTRUCTIONS WHITE - RODGERS GAS CONTROLS 1. STOP! Read the safety information at the head of this section. 2. Set the thermostat to lowest setting. (Rotate dial clock-wise). 3. Depress gas control slightly and turn clock-wise to “OFF”. If knob is in “ON” position, turn clock-wise to “PILOT”... -
Page 14: Operating Instructions
LIGHTING INSTRUCTIONS ELECTRONIC IGNITION GAS MODELS FOR YOUR SAFETY READ BEFORE LIGHTING WARNING: IF YOU DO NOT FOLLOW THESE INSTRUCTIONS EXACTLY, A FIRE OR EXPLOSION MAY RESULT, CAUSING PROPERTY DAMAGE, PER- SONAL INJURY OR LOSS OF LIFE. This appliance is equipped with an ignition device which automatically lights the pilot, DO NOT TRY TO LIGHT MANUALLY. - Page 15 COMMERCIAL GAS E.I. TROUBLESHOOTING SEQUENCE NOTE: Troubleshooting should be done by qualified service personnel familiar with the start-up and checkout procedure. TURN GAS SUPPLY OFF SET THERMOSTAT TO CALL FOR HEAT VALVE IS POWERED (24 VAC NOMINAL) IS FLUE DAMPER POWERED ACROSS TERMINALS 3 &...
-
Page 16: Maintenance Instructions
LP (PROPANE) GAS MODELS LP. GAS IS HEAVIER THAN AIR. Should there be a leak in the system, the gas will settle at FLOOR LEVEL. Basements, crawl spaces, closets and areas below ground level will serve as pockets for the accumulation of the gas. -
Page 17: General Housekeeping
PRESSURE RELIEF VALVE The temperature and pressure relief valve (T&P valve) is a part of the safety equipment on the water heater. In order to keep the T&P valve functioning properly, operate the valve at least once a year by lifting the manual lever until water dis- charges from the overflow pipe. -
Page 18: Cathodic Protection
Permanent removal of the anode(s) for any purpose will void the warranty. Read the warranty attached to this water heater for a full explanation of the time period that parts and the heater are warranted. -
Page 19: Installation Diagrams
INSTALLATION DIAGRAMS TWO TEMPERATURE DISHWASHER TEMPERED OUTLET 6” MIN. MIXING VALVE COLD WATER INLET SINGLE TEMPERATURE OR BOOSTER HOT WATER OUTLET COLD WATER INLET OR TEMPERED WATER INLET Page 18... - Page 20 SINGLE TEMPERATURE GRAVITY CIRCULATION WITH HORIZONTAL STORAGE TANK HOT WATER OUTLET STORAGE TANK (INSULATED) COLD WATER INLET PRE-HEATER DISHWASHER BOOSTER HOT WATER TO FIXTURE COLD WATER INLET Page 19 PIPE TO OPEN DRAIN T&P RELIEF VALVE 2” RISER 5” MIN. 1 1/2 MIN.
- Page 21 (1) WITH HORIZONTAL STORAGE TANK TEMPERATURE & PRESSURE RELIEF VALVE TANK TEMPERATURE CONTROL PLUG COCK ITEMS 1&2 MUST BE INSTALLED IN ORDER SHOWN (2) WITH VERTICAL STORAGE TANK STORAGE TANK (INSULATED) THERMOMETER STORAGE TANK (INSULATED) 2” RISER (1) CHECK VALVE 3/4”...
- Page 22 PUMP Note 3: Adjust plug cock so the circulating line flow rates does not cause unnecessary turbulation in the tank. Note 4: Return circulating line connection is made through the water heater drain opening. Page 21 DISHWASHER 6” MIN. COLD WATER...
-
Page 23: Installation Record
INSTALLATION RECORD This water heater is protected by a multi-year warranty against leaks, plus a one year warranty on parts. Record key data here for future reference and prompt service. Installed by Installation date Location of Gas Shut-off Valve Model Number... -
Page 24: Warranty
If the glass lined steel tank in the heater leaks due to rust or corrosion within the first *three years after the original installation, GSW will supply a complete new water heater of equivalent size and rating, and the then current model.
Need help?
Do you have a question about the G65 and is the answer not in the manual?
Questions and answers