Table of Contents
Advertisement
Quick Links
Download this manual
See also:
Instruction Manual
Advertisement
Table of Contents

Related Manuals for Olympus PT-EP05L


Summary of Contents for Olympus PT-EP05L
- Page 1 PT-EP05L/06L http://www.olympus.com/ Instruction Manual Mode d’emploi Bedienungsanleitung Manual de instrucciones ©2011 Printed in China VR808501...
-
Page 2: Introduction
Unauthorized copying of this manual in part or in full, except for private use, is prohibited. Unauthorized reproduction is strictly prohibited. OLYMPUS IMAGING CORP. shall not be responsible in any way for lost profits or any claims by third parties in case of any damage occurring from improper use of this product. - Page 3 OLYMPUS IMAGING CORP., we shall bear no responsibility for damage. 2 Use or storage of the product at the following locations may cause defective operation, defects, damage, fire, internal fogging, or water leakage.
- Page 4 Do not use adhesive for repairs or other purposes. When repair is Adhesive required, please contact a dealer or a service station of OLYMPUS IMAGING CORP. 6 Jumping into the water with the Case in your hand, throwing the Case from a boat or ship into the water, and other rough handling may cause water leakage.
-
Page 5: Battery Handling Precautions
Battery handling precautions Follow these important guidelines to prevent batteries from leaking, overheating, burning, exploding, or causing electrical shocks or burns. DANGER Never heat or incinerate batteries. Never contact terminals (+) and (–) with metal. Do not use solder, transform, modify or dismantle the batteries. WARNING Keep batteries dry at all times. -
Page 6: Table Of Contents
Contents Introduction ..........................1 Please read the following items before use ................1 For safe use ........................... 1 Battery handling precautions....................4 1.Preparations ......................7 Check the contents of the package ..................7 Names of the parts......................8 Using the accesories ......................9 Installing and removing of the LCD hood................. - Page 7 Install the O-ring ........................23 Applying grease to the O-ring ....................24 Replace consumable products ..................... 24 9.Appendix ......................25 Specifications ........................25 Supplied accessories for PT-EP05L/06L ............... 25 Optional accessories...................... 25 EN 6...
-
Page 8: Preparations
1. Preparations Check the contents of the package Check that all accessories are in the box. Contact your dealer if accessories are missing or damaged. • LCD hood (on the body) • Case body (Check that the O-ring is installed.) •... -
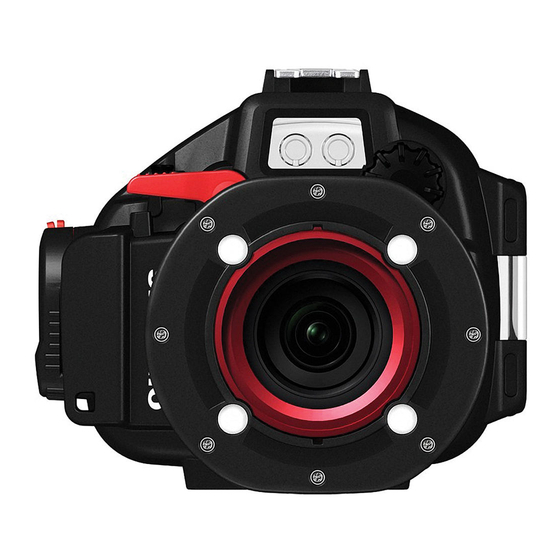
Page 9: Names Of The Parts
Names of the parts PT-EP05L PT-EP06L *l P button/Cross-cursor *c G/Fn button (PT-EP05L) 1 Open/close dial button (PT-EP05L) 2 Slide lock *d U button (PT-EP05L) *e ( (REC) button m LCD monitor window *3 Shutter lever *f INFO (Info display) button... -
Page 10: Using The Accesories
Using the accesories Installing and removing of the LCD hood Installation Fit the LCD hood as shown in the figure into the rails above and below the LCD monitor window one after the other. Removal Remove the LCD hood from the rails above and below the LCD monitor window one after the other by widening the LCD hood. -
Page 11: Installing The Diffuser
Installing the diffuser 1 Attach the diffuser to the port adapter. Diffuser Port adapter 2 Attach the hand strap on the Case body. 3 Install the diffuser on the Case. EN 10... -
Page 12: Advance Check Of The Case
• Attached strap or silica gel getting caught when closing the Case. Perform the test after the above causes have been eliminated. CAUTION: If the advance test should show water leakage with normal handling, stop using the Case and contact your dealer or an Olympus service station. EN 11... -
Page 13: Loading The Digital Camera
If the digital camera is loaded without removing the strap, lens cap and the Case cannot be sealed properly and water leakage may be caused. 4. When using PT-EP05L, insert the back monitor of the camera. 5. Attach the zoom gear (optional) and the antireflective ring. -
Page 14: Open The Case
Open the Case 1 Slide and hold the slide lock towards the arrow direction (1) and turn the open/close dial clockwise (2). 2 Open the rear lid of the Case gently. Slide lock CAUTION: Do not apply too much force while turning the open/close dial. Doing so may damage the dial. Attach the flash to the camera and raise the light emitting part Attach the flash supplied with the camera. -
Page 15: Insert The Batteries For The Light
Insert the batteries for the light Open the battery lid. Insert 2 AAA batteries on the ribbon. Pay attention to the battery direction. Close the battery lid. EN 14... -
Page 16: Load The Digital Camera
Load the digital camera 1 Confirm that the digital camera is OFF. 2 Gently load the digital camera into the Case. 3 Insert a silica gel bag (1g) between the bottom of the digital camera and the Case. The silica gel bag provided for prevention of fogging. CAUTION: •... -
Page 17: Seal The Case
Seal the Case 1 Close the Case gently while aligning the mounting projection of the rear lid and groove of the open/close dial. 2 Turn the open/close dial counter clockwise. • The Case is sealed. Close CAUTION: • If the open/close dial is not fully turned, the Case will not be sealed. This will cause water leakage. •... -
Page 18: Water Leakage Test
Water leakage test The final test after loading the camera is explained below. Always perform this test. It can be performed easily in a water tank or a bathtub. The required time is about five minutes. Confirm the operation of the different buttons. -
Page 19: Connecting The Underwater Flash
4. Connecting the underwater flash Connecting the underwater optical fiber cable To connect the UFL-2 underwater flash (optional) to the Case using an underwater optical fiber cable (optional: PTCB-E02), follow the procedures below. Connecting the underwater optical fiber cable 1 Put the underwater optical fiber cable plug into the optical fiber cable insertion slot. -
Page 20: Installing The Underweater Conversion Lens
5. Installing the underweater conversion lens Attaching the conversion lens. The underwater macro conversion lens PTMC-01 (optional) and underwater wide conversion lens PTWC-01 (optional) are supported. Vignetting in the four corners may occur when using the underwater wide conversion lens (PTWC-01) on land. -
Page 21: Taking Pictures Under Water
6. Taking pictures under water Select the shooting modes For E-PL3 Assign the underwater mode to an Fn button to easily switch to that mode. Select [ ] in [Button Function] in [ ] of [ ] in [MENU], then press the OK button. menu display] of [ ] in [MENU] must be set to ON. -
Page 22: Handling After Shooting
7. Handling after shooting Wipe off any waterdrop After underwater shooting, remove any water drop from the case. Use pressurized air or a soft, lint-free cloth to carefully wipe away any moisture from the hinge between the front and rear lids, the shutter lever and the open/close dial. -
Page 23: Dry The Case
Dry the Case After washing with pure water, use a lint-free soft cloth without any salt on it to wipe off any water drop and dry the Case completely at a well ventilated location in the shade. CAUTION: Do not use hot air from a hair drier or the like for drying and do not expose the Case to direct sunlight, as this may accelerate deterioration and deformation of the Case and deterioration of the O-ring, leading to leakage of water. -
Page 24: Maintaining The Waterproof Function
8. Maintaining the waterproof function The O-ring is a consumable product. Before each use, perform proper maintenance. Always be sure to perform the O-ring maintenance operation as described below. Neglecting this maintenance may become the cause of water leakage. Perform at the location without sand or dust, after washing and drying your hands. Remove the O-ring Open the Case and remove the O-ring. -
Page 25: Applying Grease To The O-Ring
O-ring even before a year has passed if it shows signs of damage, cracking or loss of elasticity. CAUTION: • Use genuine Olympus silicone grease, silica gel and O-ring. • Do not try to replace the O-ring by yourself. -
Page 26: Appendix
Approx. –30 g (in the freshwater) (including camera, lens, zoom gear, antirefletive ring, batteries and media card) * We reserve the right to change the external appearance and the specifications without notice. Supplied accessories for PT-EP05L/06L O-ring: POL-EP03 Silicone grease: PSOLG-2 Silica gel: SILCA-5S...
Need help?
Do you have a question about the PT-EP05L and is the answer not in the manual?
Questions and answers