Table of Contents
Advertisement
Quick Links
Advertisement
Table of Contents

Related Manuals for Olympus PT-059


Summary of Contents for Olympus PT-059
- Page 1 PT-059 使用說明書...
-
Page 2: Introduction
Unauthorized copying of this manual in part or in full, except for private use, is prohibited. Unauthorized reproduction is strictly prohibited. OLYMPUS CORPORATION shall not be responsible in any way for lost profi ts or any claims by third parties in case of any damage occurring from improper use of this product. -
Page 3: For Safe Use
For safe use This instruction manual uses various pictographs for correct use of the product and to prevent danger to the user and other persons as well as property damage. These pictographs and their meanings are shown below. This shows the content regarding assumption of WARNING possibility of human death or severe injury in case of handling with disregard of this indication. - Page 4 In case of the loss of image data caused by disassembly, repair or modifi cation etc. by any party other than those appointed by OLYMPUS CORPORATION, we shall bear no responsibility for damage. 2 Use or storage of the product at the following locations may cause defective operation, trouble, damage, fi...
- Page 5 Do not use adhesive for repairs or other purposes. When repair is required, please contact a dealer or a service station of OLYMPUS CORPORATION. 6 Jumping into the water with the Case in your pocket or in your hand, throwing the Case from a boat or ship into the water, and other rough handling may cause water leakage.
-
Page 6: Table Of Contents
Contents Introduction ................30 Please read the following items before use ......30 For safe use ................31 1. Preparations..............36 Check the contents of the package ........36 Names of the parts ..............37 Using the accesories ............. 39 Install the hand strap .............. 39 Installation and removal of the monitor hood ...... - Page 7 6. Handling After Shooting ..........54 Wash the Case with pure water ..........54 Wipe off any waterdrop ............54 Take out the digital camera ............ 55 Dry the Case ................55 7. Maintaining the Waterproof Function ......56 Remove the O-ring ..............56 Remove any sand, dirt, etc.
-
Page 8: Preparations
1. Preparations Check the contents of the package Check that all accessories are in the box. Contact your dealer if accessories are missing or damaged. • Optical fi ber cable adapter • Silicone grease • Silica gel 1g (5) (PFCA-03) (PSOLG-2) (SILCA-5S) •... -
Page 9: Names Of The Parts
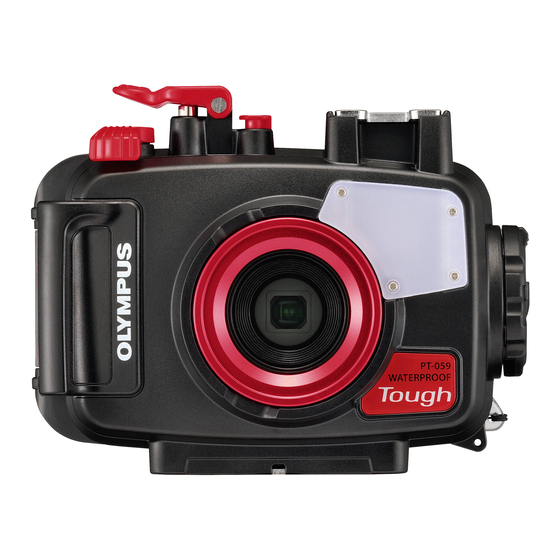
Names of the parts * 6 LOG lever 1 Palm grip a Lens ring 2 Zoom lever 7 Diff user b Monitor inner hood 3 Shutter button 8 Slide lock c Rear lid 4 ON/OFF button 9 Open/close dial d O-ring 5 Accessory mount 0 Lock knob e Tripod seat... - Page 10 k F button/Arrow pad C f INFO button o MENU button g Control dial p Mode function call l # button/Arrow pad D h R(Movie) button/ button/Arrow pad F m OK/AFL button (*1) Select button q Monitor window n jY button/S button/ i Mode dial r Monitor hood Arrow pad E...
-
Page 11: Using The Accesories
Using the accesories Install the hand strap Install the hand strap on the Case body. Installation illustration Installation completed Hand strap Hand strap ring You can also attach the strap on the upper hand strap ring of the Case. How to use the hand strap Pass your hand through the hand strap and adjust the length with the stop button. -
Page 12: Installation And Removal Of The Monitor Hood
Installation and removal of the monitor hood Installation Fit the monitor hood as shown in the fi gure into the guides above and below the monitor window one after the other. Removal Remove the monitor hood from the guides above and below the monitor window one after the other by widening the monitor hood. -
Page 13: Prepare The Digital Camera
Prepare the digital camera Prepare the digital camera before loading it in the Case. 1. Battery Confi rmation It is impossible to change the batteries when using the Case. Make sure that you have suffi cient remaining battery capacity before use. 2. -
Page 14: Advance Check Of The Case
Before using, always perform the following advance checks. If the advance test should show water leakage with normal handling, stop using the Case and contact your dealer or an Olympus service station. Remove the O-ring Open the Case and remove the O-ring. -
Page 15: Remove Any Sand, Dirt, Etc
Remove any sand, dirt, etc. After visually checking that dirt has been removed from the O-ring, check for attached sand and other foreign matter, as well as for damage and cracks by squeezing the entire circumference of the O-ring lightly with your fi... -
Page 16: Install The O-Ring
Examples of foreign matter sticking to the O-ring Hair Fibers Grains of sand Install the O-ring Confi rm that no foreign matter is in the groove and then fi t the O-ring. At this time, confi rm that the O-ring does not stick out from the groove. When sealing this product, make sure that no hairs, fi... -
Page 17: Install The Digital Camera
3. Install the digital camera Open the Case 1 Slide the lock knob towards the arrow direction (1 of fi gure below). 2 Slide and hold the slide lock towards the arrow direction (2 of fi gure below) and turn the open/close dial counter clockwise (3 of fi gure below). -
Page 18: Load The Digital Camera
Load the digital camera 1 Confi rm that the digital camera is OFF. 2 Confi rm that the LOG lever of the digital camera is set to the OFF side. 3 Gently and straightly insert the digital camera into the Case. 4 Insert 2 piling up silica gel bags (1 g) between the bottom of the digital camera and the Case. -
Page 19: Make Sure The Camera Is Loaded Properly
Make sure the camera is loaded properly Check the following points before sealing the Case. • Is the digital camera loaded properly? • Are silica gel bags inserted all the way? When the silica gel bags are not inserted correctly, it causes entrapment when closing the rear lid. -
Page 20: Seal The Case
Seal the Case 1 Set the LOG lever to the OFF side. 2 Close the Case gently while aligning the mounting projection of the rear lid and groove. 3 Turn the open/close dial clockwise until you hear a “click” sound to lock the Case. -
Page 21: Waterproofness Test
Waterproofness test The fi nal test after loading the camera is explained below. Always perform this test. It can be performed easily in a water tank or a bathtub. Confi rm the operation of the diff erent buttons. The required time is about 5 minutes. •... -
Page 22: Connecting The Underwater Fl Ash
4. Connecting the underwater fl ash To connect the underwater fl ash (optional) to the Case using an underwater optical fi ber cable (optional: PTCB-E02), follow the procedures below. How to install 1 Attach the optical fi ber cable adapter to the diff user shown in the fi... - Page 23 Setting of the digital camera When using the underwater fl ash supporting wireless RC fl ash, set the camera and the underwater fl ash to RC mode. For details, refer to the instruction manuals of the camera and the fl ash. In case of UFL-1, plug the optical fi...
-
Page 24: Taking Pictures Under Water
5. Taking Pictures Under Water Camera GPS, electronic compass, temperature sensor and pressure sensor do not work properly when using Case. Underwater shooting modes For details, refer to the instruction manuals of the digital camera. ] Underwater Snapshot Suitable for shooting seaside and pool portraits. E Underwater Wide Suitable for shooting underwater. -
Page 25: How To Select The Shooting Scene
How to select the shooting scene 1 Turn the mode dial, and then Control dial set the camera’s shooting mode to “H”. 2 Press the left/right arrow pad Mode dial or control dial to select the sub mode, and then press the OK/ Arrow pad AFL button. -
Page 26: Handling After Shooting
6. Handling After Shooting Wash the Case with pure water 1 After use, clean the protector thoroughly with pure water as soon as possible. Fill a water tank or bathtub with pure water, shake the Case in the water a number of times, and then remove all the sand and gravel particles adhering around the open/close dial, the buttons and the levers. -
Page 27: Take Out The Digital Camera
Take out the digital camera Open the Case carefully and take the digital camera out. • When opening the Case, take suffi cient care that no water will drip from your hair or body onto the Case and the camera. •... -
Page 28: Maintaining The Waterproof Function
Replace the O-ring even before a year has passed if it shows signs of damage, crack or loss of elasticity. • Please use genuine Olympus silicone grease, silica gel and O-ring. • Do not try to replace the O-ring by yourself. -
Page 29: Appendix
8. Appendix Specifi cations Compatible models Olympus digital camera OLYMPUS Tough TG-6 Pressure resistance Depth of up to 45 m Main materials Body: Polycarbonate Lens window: Glass (Double sided multiple coat / water repellent coat) Operating 0°C - 40°C (32°F - 104°F) (operation) / environment –20°C - 60°C (–4°F - 140°F) (storage) - Page 30 date of issue 2019.03. ©2019 Printed in China WD630700...
Need help?
Do you have a question about the PT-059 and is the answer not in the manual?
Questions and answers