Table of Contents
Advertisement
Advertisement
Table of Contents

Related Manuals for AEG Electrolux LAVATHERM 88800


Summary of Contents for AEG Electrolux LAVATHERM 88800
- Page 1 LAVATHERM 88800 User manual Pro Steam Condenser Dryer...
-
Page 2: Dear Customer
Dear Customer Thank you for choosing one of our high-quality products. With this appliance you will experience the perfect combination of functional design and cutting edge technology. Convince yourself that our appliances are engineered to deliver the best performance and control - indeed we are setting the highest standards of excellence. -
Page 3: Table Of Contents
Contents Contents Operating Instructions Important safety information Product description Control panel What is shown in the display First start-up Switching machine on / switching light on Setting the language Setting the time Before first use Before first use Sorting and preparing laundry Opening loading door / loading laundry Pro Steam system Fill steam water tank... - Page 4 Contents DELICATE SENSITIVE LONG ANTI-CREASE BUZZER CHILD LOCK SPIN SPEED Selecting TIME (TIJD PROGR.) Selecting DELAY START (STARTUITSTEL) Starting the drying programme Changing a programme Putting in extra items or taking items out before end of programme Drying programme complete / removing laundry Care and cleaning Cleaning fluff filter Cleaning the door seal...
- Page 5 Contents Electrical connection Changing door stop Special accessories Environment Packaging material Old appliance Environmental tips Guarantee conditions Guarantee/Customer Service European Guarantee Service www.electrolux.com Subject to change without notice...
-
Page 6: Operating Instructions
Important safety information Operating Instructions Important safety information Only operate the ProSteam programmes with distilled water! Mains water causes damage to the appliance. In the interest of your safety and to ensure the correct use, before installing and first using the appliance, read this user manual carefully, including its hints and warnings. - Page 7 Important safety information • Under no circumstances should you attempt to repair the machine yourself. Repairs carried out by inexperienced persons may cause injury or serious mal- functioning. Contact your local Service Centre. Always insist on genuine spare parts. • Items that have been soiled with substances such as cooking oil acetone, petrol, kerosene, spot removers, turpentine, waxes and wax removers should be washed in hot water with an extra amount of detergent before being dried in the tumble dryer.
- Page 8 Important safety information WARNING! Never stop a tumble dry before the end of the drying cycle unless all items are quickly removed and spread out so that the heat is dissipated. Risk of fire! • Risk of electric shock! Do not spray down the appliance with jets of water. Installation •...
- Page 9 Important safety information • Do not overload the appliance. See the relevant section in the user manual. • Clothes which are dripping wet should not be placed in the dryer. • Garments which have been in contact with volatile petroleum products should not be machine dried.
- Page 10 Important safety information • Make sure that children and small animals cannot climb into the appliance’s drum. Could endanger life! Keep the appliance door shut whenever it is not being used. • Keep all detergents in a safe place out of children’s reach. •...
-
Page 11: Product Description
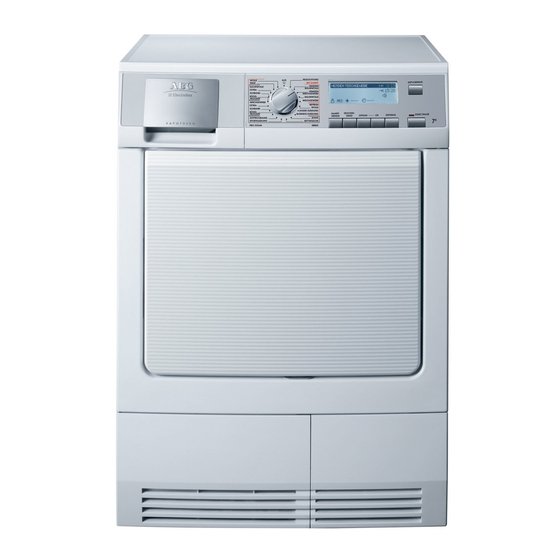
Product description Control panel Water recirculation valve/filter Filler neck for steam water tank Drawer with condensed water container Fine strainer (lint filter) Lamp for inside light Large mesh filter (lint filter) Micro-fine filter (lint filter) Loading door (reversible) Rating plate Button for opening door in plinth Base door upstream of heat exchanger Air slots... -
Page 12: Control Panel
Control panel Drainage hose for water tank Screwed feet (with height adjustment) Control panel LICHT AAN/ ECLAIRAGE ARRET STOOM/ VAPEUR WOL/ LAINE ZIJDE/ SOIE KATOENEN HEMD CHEMISES COTON KATOEN/ COTON SYNTHETISCHE HEMDEN EXTRA DROOG/ CHEMISES EXTRA SEC SYNTHETIQUES KATOEN KASTDROOG COTON PRET A RANGER SYNTHETISCH... -
Page 13: First Start-Up
First start-up Option icon after option selection. Visualization of additional functions. Each time when the cycle is performed, you are informed by animated progress bar about cycle status. In some cases you might be also guide and warn by displayed messages. First start-up Switching machine on / switching light on Turn the programme selector to any programme or turn it to LIGHT. -
Page 14: Setting The Time
First start-up mistake. To confirm the choice press the OK button again. In case of mistake or at any time after the first time use a short-cut is provided to avoid going through the SETTINGS. Keeping pressed together the buttons STEAM LEVEL and DRYNESS for about 5 seconds the language setting view appears. -
Page 15: Before First Use
Before first use Before first use In order to remove any residues which may have been produced during production, wipe the dryer drum with a damp cloth or carry out a brief drying cycle (30 MIN) with damp cloths in the machine. -
Page 16: Sorting And Preparing Laundry
Sorting and preparing laundry Sorting laundry • Sort by fabric type: – Cotton/linen for programmes in COTTONS (KATOEN) (KATOEN) pogramme group. – Mixtures and synthetics for programmes in SYNTHETICS (KATOENEN) pro- gramme group. • Sorting by care label. The care labels mean: Drying in the tumble Dry at reduced Dry at normal... -
Page 17: Opening Loading Door / Loading Laundry
• Do not dry new, coloured textiles together with light-coloured laundry items. Colours may fade (check colour fastness of fabric when damp in an inconspicu- ous area). • Do not use dry cleaning sets in combination with Pro Steam programmes. Preparing laundry •... -
Page 18: Pro Steam System
Pro Steam system Fill steam water tank You must fill up the steam water tank before using a Pro Steam programme for the first time. Use the distilled water provided if there is not yet any condensed water from previous drying programmes (see chapter on ‘Care and cleaning, Emp- tying condensed water container’). - Page 19 The water in the condense water tank will never automatically fill the steam water tank. The water recirculation system works only if it is supplied by water arising during standard drying cycles. To activate this system turn the valve in ON position. When the valve is ON the steam water tank will be filled during the next drying cycle.
-
Page 20: Overview Of Pro Steam Programmes
Overview of Pro Steam programmes Additional functions / options Programmes Application/properties COTTON SHIRTS wet, For 1- 5 cotton shirts. Min. 80% (KATOENEN 1.0 kg • • • • • natural fibres (cotton, linen etc). HEMD) SYNTHETIC SHIRTS wet, For 1- 5 synthetic shirts. Max. 20% (SYNTHETISCHE 1.0 kg •... - Page 21 All information on applications is for guidance only. Smoothing results may vary depending on the selected programme and especially the fittings and material properties of the textile. The results can be improved if necessary by using different programmes and steam volumes. For example, some tex- tiles containing more than 20% synthetic but with the right fittings may behave more like cotton textiles in a Pro Steam programme.
- Page 22 STEAM LEVEL Loading Programme DURATION dry [min.] DURATION wet [min.] (NIVEAU volume STOOM) 1 - 2 items COTTON SHIRTS (KATOENEN 3 - 4 items 19 +/-3 40 +/-10 HEMD) 5 items 1 - 2 items SYNTHETIC SHIRTS (SYNTHETISCHE 3 - 4 items 21 +/-3 30 +/-5 HEMDEN)
-
Page 23: Selecting The Programme
Selecting the programme Use the programme selector to set the programme you require. The estimated programme duration (in hours and minutes) appears in the multi-display as well as cycle finish time. Select STEAM LEVEL (NIVEAU STOOM) To achieve the best results, different steam levels are required for different volumes of laundry. -
Page 24: Long Anti-Crease
To deselect an option follow the same steps. Option icon should disappear. LONG ANTI-CREASE A 90 minute anti-crease phase is set. The display now shows the long anti-crease icon. If this additional option is selected, the anti-crease phase (30 min.) at the end of the Pro Steam cycle is lengthened by 60 minutes. -
Page 25: Setting Delay (Startuitstel) Function
In certain programmes the spin speed has not effect (time controlled cycles), its selection can be not selectable and only three dashes are visualized. Available se- lections: from 800 to 1800 rpm's in 100 rpm's intervals. The maximum value depends by selected program, the minimum is always 800 rpm For those programs where the spin speed has no effect (time controlled cycles), the selection is not allowed and three dashes “- - -”... -
Page 26: Changing A Programme
As soon as the right level of dryness is reached, the Pro Steam programme will start automatically. Alternately STEAM TREATMENT and STEAM INJECTION phases names are displayed. During the steam phases that form part of the Pro Steam programme and also the anti-crease phase the loading door cannot be opened. -
Page 27: Pro Steam Programme Complete / Removing Laundry
3. Close loading securely. Lock must audibly lock. 4. Press the START PAUSE (START PAUZE) button to continue the drying cycle. Pro Steam programme complete / removing laundry After the Pro Steam cycle is completed , 0:00 starts flashing and alternatively the messages: Finished. -
Page 28: Drying
Drying Drying programmes overview Additional functions / options Care Application/properties mark Thorough drying of thick EXTRA (EX- or multi- layered fabrics, 7 kg • • • • • • • e.g. terry towelling items, DROOG) bathrobes. Thorough drying of fab- CUPBOARD rics of even thicknesses, (KAST-... - Page 29 Additional functions / options Care Application/properties mark For further drying of TIME (TIJD individual items of laun- 7 kg • • • • • PROGR.) dry or for small volumes of less than 1kg. SPORTS LIGHT For sportswear, thin fab- •...
-
Page 30: Selecting The Programme
Additional functions / options Care Application/properties mark For drying woollen fab- rics after they have been washed, using warm air at minimum mechanical load (Follow section • WOOL 1 kg • • • • “Sorting and preparing (WOL) washing”). Recommen- dation: Remove fabrics immediately after drying, as no anti-crease pro-... -
Page 31: Selecting Additional Options
time with the DRYNESS (DROOGTEGRAAD) LEVEL function selected and dryness level MIN, MED or MAX. In the case of a drying cycle with relatively dry laundry, the end of the programme cycle displayed at the beginning is corrected after a while. -
Page 32: Long Anti-Crease
LONG ANTI-CREASE A 90 minute anti-crease phase is set. The display now shows the long anti-crease icon. If this additional option is selected, the anti-crease phase (30 min.) at the end of the drying cycle is lengthened by 60 minutes. The laundry can be removed at any time during the anti-crease phase. -
Page 33: Selecting Time (Tijd Progr.)
In certain programmes the spin speed has not effect (time controlled cycles), its selection can be not selectable and only three dashes are visualized. Available se- lections: from 800 to 1800 rpm's in 100 rpm's intervals. The maximum value depends by selected program, the minimum is always 800 rpm For those programs where the spin speed has no effect (time controlled cycles), the selection is not allowed and three dashes “- - -”... -
Page 34: Changing A Programme
Changing a programme To change a programme which has been selected by mistake once the programme has started, first turn the programme selector to OFF and then reset the programme. The programme can no longer be changed directly once the programme has started. - Page 35 After each drying cycle – Clean the micro-fine filter and fine filter – Drain the condensed water container (See chapter “Care and Cleaning”.) 5. Close door.
-
Page 36: Care And Cleaning
Care and cleaning Cleaning fluff filter The filters collect all the fluff which accumulates during drying. To ensure that the dryer works perfectly, the fluff filters (micro-fine filter and fine strainer) must be cleaned after every drying cycle. The message Please clean the filters. is shown in the display to remind you this operation. - Page 37 Push down unlock button on large mesh filter. Large mesh filter jumps up. Take out fine strainer. Remove fluff from fine strainer. It is best to use a damp hand for this purpose. Clean the entire filter area The strainer area does not have to be cleaned after every drying cycle, but should be checked regularly and cleaned of fluff if necessary.
-
Page 38: Cleaning The Door Seal
If the fine strainer is not fitted, the large mesh filter will not snap into place and the loading door cannot be closed. Cleaning the door seal Wipe the door seal with a damp cloth immediately after the drying cycle has finished. -
Page 39: Cleaning Heat Exchanger
2. Pour condensed water out into a ba- sin or similar receptacle. 3. Slide outlet connections in and refit condensate tank. If the programme has been interrup- ted as a result of the condensate tank being full: Press the START PAUSE (START PAUZE) button to continue the drying cycle. - Page 40 2. Open door in plinth. To do this, press the release button on the bottom of the door aperture and open the door in the plinth to the left. 3. Clean fluff from the inside of the door and the heat exchanger front chamber.
-
Page 41: Cleaning The Water Recirculation Valve/Filter
Cleaning the water recirculation valve/filter If the messagePlease clean the water recirculation filter is shown in the display, the recirculation filter needs to be cleaned. The valve/filter is placed behind the tank handle - see chapter "Product description". 1. Pull out completely the drawer con- taining condensed water container. -
Page 42: What To Do If
What to do if ... Troubleshooting by yourself If, during operation, the warning message appears on the LCD follow strictly guides included in the massage on the display. If you are not able to solve the problem Problem Possible cause Remedy Plug in at mains socket. - Page 43 Select a different programme Wrong programme selected. the next time you dry (see “Pro- gramme chart” chapter). Lint filters clogged. Clean lint filters. Fluff filter clogged. Clean fluff filter. Heat exchanger clogged with Clean heat exchanger. lint. Observe recommended loading Overloading of laundry.
-
Page 44: Changing The Bulb For Interior Lighting
Select time programme or Drying cycle ends shortly after Not enough washing loaded or higher drying level (e.g. INTEN- programme starts. Finished washing loaded is too dry for SIVE DRY instead of STORAGE message is displayed. selected programme. DRY). Lint filter clogged. Clean lint filter. -
Page 45: Machine Settings
Machine settings WARNING! For safety reasons, the cover must be screwed down tightly. If this is not done, the dryer must not be operated. Machine settings The special options that can be set under SETTINGS remain permanently stored independent of each drying cycle – even after the appliance has been switched off or the mains plug has been removed from the socket. -
Page 46: Time
Machine settings TIME 1. Press OPTION (OPTIE) button until TIME selected. SETTINGS LANGUAGE 2. Press OK to confirm - hour indication CLOCK 9:21 starts blinking. BRIGHTNESS 3. Press OPTION (OPTIE) until you set the right hour. 4. Press OK to confirm - minutes indication starts blinking. -
Page 47: Water Hardness
Machine settings WATER HARDNESS Water contains, a variable quantity of lime- SETTINGS stone and mineral salts of which quantities CONTRAST vary according to geographical locations thus WATER HARDNESS FULL TANK WARNING varying its conductivity values. Relevant variations of the conductivity of the water compared to those prefixed by the factory could slightly influence the residual humidity of the laundry at the end of the cy-... -
Page 48: Technical Data
Technical data Warning is set to ON as default. Technical data This appliance conforms with the following EU Directives: – 73/23/EEC dated 19.02.1973 Low Voltage Directive – 89/336/EEC dated 03.05.1989 EMC Directive inclusive of Amending Directive 92/31/EEC – 93/68/EEC dated 22.07.1993 CE Marking Directive Height x width x depth 85 x 60 x 58 cm Depth with loading door open... -
Page 49: Hints For Test Institutes
Hints for test institutes Hints for test institutes Parameters possible to be checked by the Test Institutes: • Energy consumption (corrected with final humidity) during the cupboard dry cotton cycle with nominal load. • Energy consumption (corrected with final humidity) during the cupboard dry cotton cycle with half load. -
Page 50: Removing Transport Safety Packaging
Installation The hot air emitted by the tumble dryer can reach temperatures of up to 60°C. The appliance must therefore not be installed on floors which are not resistant to high temperatures. When operating the tumble dryer, the room temperature must not be lower than +5°C and higher than +35°C, as it may affect the performance of the appliance. -
Page 51: Changing Door Stop
Installation Connect the machine to an earthed socket, in accordance with current wiring regulations. WARNING! The manufacturer declines any responsibility for damage or injury through failure to comply with the above safety precautions. Should the appliance power supply cable need to be replaced, this must be carried out by our Service Center. -
Page 52: Special Accessories
Available from your Service Force Centre or your specialist dealer These intermediate installation kits can be used to arrange the dryer and an automatic AEG-Electrolux washing machine (60cm wide, front loading) as a space- saving washer/dryer stack. The automatic washing machine is at the bottom and the dryer is at the top. -
Page 53: Environment
Environment – with extractable stacker plate 916.018 903 Read carefully the instructions supplied with the kit. Installation kit for external condensate drain Attached to your product Installation kit 125 122 510 for direct draining of condensate into a basin, siphon, gully, etc. -
Page 54: Environmental Tips
Environment WARNING! Remove mains plug from socket when you have no further use for the machine. Cut off mains cable and dispose of together with plug. Destroy loading door hook. Children cannot then lock themselves in the machine and put their lives at risk. Environmental tips •... -
Page 55: Guarantee Conditions
Guarantee/Customer Service Guarantee conditions Guarantee/Customer Service Belgium DECLARATION OF GUARANTEE TERMS. Our appliances are produced with the greatest of care. However, a defect may still occur. Our consumer services department will repair this upon request, either dur- ing or after the guarantee period. The service life of the appliance will not, however, be reduced as a result. - Page 56 Guarantee/Customer Service – abnormal environmental conditions in general, – unsuitable operating conditions, – contact with harsh substances. The guarantee does not apply to defects due to transport which have occurred outside of our responsibility. Nor will the guarantee cover those caused by inadequate installation or assembly, lack of maintenance or failure to respect the assembly instructions or directions for use.
-
Page 57: European Guarantee
E-mail: consumer-service.luxembourg@electrolux.lu European Guarantee This appliance is guaranteed by Electrolux in each of the countries listed at the back of this user manual, for the period specified in the appliance guarantee or otherwise by law. If you move from one of these countries to another of the coun-... - Page 58 • The appliance is installed and used in accordance with instructions issued by Electrolux and is only used within the home, i.e. is not used for commercial purposes. • The appliance is installed in accordance with all relevant regulations in force within your new country of residence.
-
Page 59: Service
Service In the event of technical faults, please first check whether you can remedy the problem yourself with the help of the operating instructions (Chapter “What to do if…”). If you were not able to remedy the problem yourself, please contact the Customer Care Department or one of our service partners. - Page 60 Deutschland +49 180 32 26 622 Muggenhofer Str. 135, 90429 Nürnberg Eesti +37 2 66 50 030 Pärnu mnt. 153, 11624 Tallinn España +34 902 11 63 88 Carretera M-300, Km. 29,900 Alcalá de Henares Madrid France www.electrolux.fr Great Britain...
- Page 61 Electrolux Domáce spotre‐ biče SK, Seberíniho 1, 821 03 Bratislava Suomi www.electrolux.fi Sverige +46 (0)771 76 76 76 Electrolux Service, S:t Görans- gatan 143, S-105 45 Stockholm Türkiye +90 21 22 93 10 25 Tarlabaşı caddesi no : 35 Taksim İstanbul Россия...
- Page 64 www.aeg-electrolux.co.uk...