Table of Contents
Advertisement
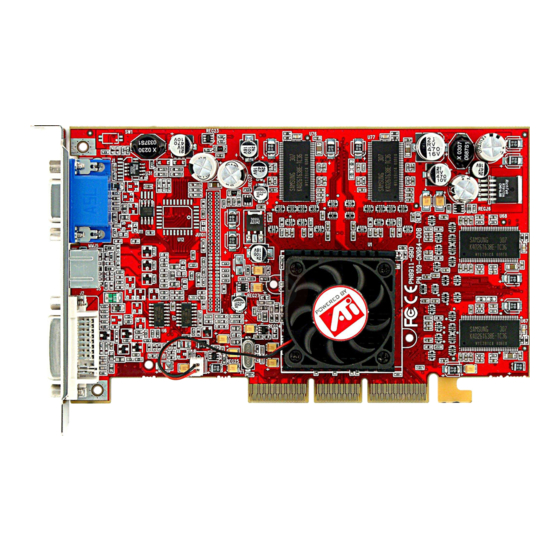
RADEON
RADEON
User's Guide
P/N 137-40401-10
Copyright © 2002, ATI Technologies Inc. All rights reserved.
ATI and all ATI product and product feature names are trademarks and/or registered
trademarks of ATI Technologies Inc. All other company and/or product names are
trademarks and/or registered trademarks of their respective owners. Features,
performance and specifications are subject to change without notice. Product may not
be exactly as shown in the diagrams.
Reproduction of this manual, or parts thereof, in any form, without the express written
permission of ATI Technologies Inc. is strictly prohibited.
™
9000
™
9000 PRO
i
Advertisement
Table of Contents

Related Manuals for ATI Technologies RADEON 9000


Summary of Contents for ATI Technologies RADEON 9000
- Page 1 Copyright © 2002, ATI Technologies Inc. All rights reserved. ATI and all ATI product and product feature names are trademarks and/or registered trademarks of ATI Technologies Inc. All other company and/or product names are trademarks and/or registered trademarks of their respective owners. Features, performance and specifications are subject to change without notice.
- Page 2 ATI hardware, software, or other products and documentation provided herein. ATI Technologies Inc. reserves the right to make changes without further notice to a product or system described herein to improve reliability, function or design. With...
-
Page 3: Table Of Contents
Table of Contents Introduction........1 Features At A Glance .................. 2 Radeon™... - Page 4 Adjusting Monitor Display..............29 Viewing Text on a TV................29 Reducing Edge Distortion ..............30 Changing Display Configurations ............31 Using Games and Applications ............31 Connect to a TV, VCR, or Camcorder for video capturing ..................33 Windows® Volume Control..............34 Capturing video using Windows®...
-
Page 5: Introduction
Introduction The RADEON™ 9000 family of graphic accelerators delivers ground breaking 3D graphics performance. • Designed and built by ATI Technologies Inc. • Powered by the RADEON™ 9000 family of Graphics Processing Units (GPU). • Awesome 3D gaming performance. ®... -
Page 6: Features At A Glance
Features At A Glance Radeon™ 9000 family The RADEON™ 9000 family provides high performance acceleration for today's demanding 3D graphic applications. Its main features are: • VIDEO IMMERSION™ II which provides industry-leading DVD playback and digital TV decode capability • CHARISMA ENGINE™ II which is the main GPU, providing the necessary power to accelerate today’s 3D games and applications •... -
Page 7: Ati's Catalyst Software Suite
ATI’s Catalyst Software Suite Multiple Displays and 3D Gaming Experience ATI’s Catalyst™ Software Suite provides multiple display functionality, and the advanced graphic features, such as SMARTSHADER™, for the ultimate 3D gaming experience. For help on installing the Catalyst™ Software Suite, refer to the Getting Started Guide. - Page 8 can also use HydraVision™ for advanced multi- monitor management. For more information on HydraVision™, please refer to the HydraVision™ User’s Guide PDF located on your ATI Installation...
-
Page 9: Multiple Displays (Optional)
Multiple Displays (optional) Connecting Your Monitor(s) The RADEON™ 9000 family provides hardware support for one VGA monitor and one flat panel monitor, or two VGA monitors using a DVI-I-to- VGA adapter*. It also provides TV Output via an S-Video out or a Composite out connector. Plug the monitor cable into your card (if you are running multiple monitors, connect their cables to the appropriate connectors), then turn on the PC and... -
Page 10: Display Configurations
Display Configurations The following table lists the different ways you can connect displays to your card. Display Connector(s) Used Comments Configuration VGA connector OR DVI-I One CRT CRT- cathode ray tube connector with DVI-I-to- display analog display VGA adapter One DFP DFP - digital flat panel DVI-I connector display... -
Page 11: Catalyst™ Software Suite
Catalyst™ Software Suite The following section provides an explanation of each ATI tab available after installing the Catalyst™ Software Suite. Features presented in the following pages may not be supported in all operating systems and/or may appear differently. ATI Displays Tab The ATI Displays tab provides the multi monitor features. -
Page 12: Enabling/Disabling Secondary Displays (Optional)
Enabling/Disabling Secondary Displays (optional) ® Access the Windows Control Panel. Double- click Display. Click on the Settings tab and then the Advanced... button. Click on the ATI Displays tab. Click the enable/disable button for the display device you want to enable/disable. Click OK or Apply to save the changes. - Page 13 To enable Extended Desktop Mode, refer to the section Enabling Extended Desktop Mode (optional). ® Access the Windows Control Panel. Double- click Display. Click on the Settings tab and then the Advanced... button. Click on the ATI Displays tab. ® ®...
-
Page 14: Virtually Repositioning Your Displays (Optional)
Virtually Repositioning Your Displays (optional) On the Settings tab, click and drag the appropriate monitor icon to the desired position. For example, the secondary display can be dragged to the left of the primary display, allowing it to be virtually on the left, as shown below. -
Page 15: Ati Color Tab
ATI Color Tab The ATI Color tab is used to adjust the color settings. You can change the red, green and blue display colors. Desktop brightness and Game Gamma (brightness) can also be changed. ATI Color Tab This increases or decreases the brightness of your Desktop desktop. - Page 16 Clicking the Game Gamma button accesses the Game Gamma Properties. Game Gamma Properties These controls allow you to increase or decrease the Red Green color brightness of Direct 3D and OpenGL games Blue sliders played in fullscreen mode. (NOTE: Game Gamma is NOT supported in Windows NT4.0) Uncheck this to adjust the RGB sliders individually.
-
Page 17: Ati Options Tab
ATI Options Tab The ATI Options tab provides detailed driver information and access to the card’s specifications. You can also enable or disable the ATI taskbar icon. ATI Options Tab Provides the Catalyst version number, 2D version Version Information number and the driver build information. Provides access to the Details tab which lists the Details button card’s hardware details and driver information. -
Page 18: Ati Overlay Tab
Unchecking this allows you to remove the ATI icon Show ATI icon on from your system tray without disabling the ATI taskbar icon applications. Quick resolution feature is accessible by left- Disable quick clicking the ATI icon in the system tray. Checking resolution feature this option disables the feature. - Page 19 overlay, which is only available on the Primary display. The video overlay controls are automatically activated during playback of any video file type that supports overlay adjustments. ATI Overlay Tab Use this slider to adjust the brightness of the video Brightness image.
-
Page 20: Direct 3D® Control Panel
® Direct 3D Control Panel Using this tab, gamers can tweak the settings of their ® Direct 3D games. Main and Custom Settings In the Main Settings you can maximize overall performance by moving the slider to the left, or you can enhance overall image quality by moving the slider to the right. - Page 21 This allows you to emphasize what kind of application experience you’d like to have. Moving the slider to the left will maximize application performance, while moving Main Settings the slider to the right will provide excellent 3D image slider quality. Moving this slider from one position to the next changes the individual Custom Settings sliders found below.
- Page 22 Selecting this decides whether your application should use high quality or high performance textures. Moving Texture the slider to the right delivers the highest quality Preference experience. Moving the slider to the left emphasizes a slider high performance solution while still providing good visuals.
-
Page 23: Direct 3D® Compatibility Settings
® Direct 3D Compatibility Settings This will enable W-Buffer support for 3D games. It is recommended to disable this for games that do not Support W- support this feature. Certain applications require the buffer increased precision of W-Buffering and will exhibit artifacts unless the W-Buffer is enabled. - Page 24 When applications use both dithering and alpha blending, visual artifacts can occur. This option allows Alpha you to select how the application should handle both dithering features at the same time. In most cases Error method Diffusion will handle this situation quite well, but there are a few cases where selecting Ordered may be necessary.
-
Page 25: Opengl® Control Panel
® OpenGL Control Panel Using this tab, gamers can tweak the settings of their ® OpenGL games. Main and Custom Settings In the Main Settings you can maximize overall performance by moving the slider to the left, or you can enhance overall image quality by moving the slider to the right. - Page 26 This allows you to emphasize what kind of application experience you’d like to have. Moving the slider to the left will maximize application performance, while moving Main Settings the slider to the right will provide excellent 3D image slider quality. Moving this slider from one position to the next changes the individual Custom Settings sliders found below.
- Page 27 Selecting this decides whether your application should use high quality or high performance textures. Moving Texture the slider to the right delivers the highest quality Preference experience. Moving the slider to the left emphasizes a slider high performance solution while still providing good visuals.
-
Page 28: Opengl® Compatibility Settings
® OpenGL Compatibility Settings Force Z-buffer This allows you to explicitly set the Z-Buffer depth. Most depth applications will work best when Disabled is selected When applications use both dithering and alpha blending, visual artifacts can occur. This option allows Alpha you to select how the application should handle both dithering... -
Page 29: Using Tv Out
Using TV Out View your PC’s display on a TV The RADEON™ 9000 family has TV Out capability. You can attach your card to a TV and monitor at the same time. Or you can connect it to your VCR and record your monitor’s display. - Page 30 support either an S-video connector or a Composite connector. If your TV has cable input only, you can connect your card to your TV through your VCR or an RF modulator (available in most electronics stores). The RADEON™ 9000 PRO that only has the Composite out connector DOES NOT support connection to TVs with S-Video In.
-
Page 31: Starting Windows® With Tv Display Enabled
® Starting Windows with TV Display Enabled The TV screen may become scrambled during the ® initial Windows logo display. This is only a temporary effect and your screen will be restored within a few seconds. During start up, your card will go through a sequence of mode settings, during which your TV display will remain blank. -
Page 32: Using And Adjusting Tv Out
Click on the Settings tab and then the Advanced... button. Click on the ATI Displays tab. Click on the TV button. Click the enable/disable button. Click OK or Apply to save the changes. Using and Adjusting TV Out For information about how to use TV display, right click the ATI taskbar icon, point to Help, then point to ATI Television Display. -
Page 33: Adjusting Monitor Display
Adjusting Monitor Display The size of the display on your monitor may be smaller and not perfectly centered when you have TV display enabled. These effects are caused by the changes required to provide a proper display on the Use the controls available on the Adjustments tab on the Monitor Properties page (accessible by clicking on the Monitor button on the ATI Displays tab) to adjust the display on your monitor only. -
Page 34: Reducing Edge Distortion
Reducing Edge Distortion When using a TV for your PC’s display, you may see some edge distortion on the left and right side of your TV screen. This effect depends on your TV and the PC application you are running. To reduce edge distortion, you can increase the TV display’s horizontal size. -
Page 35: Changing Display Configurations
Drag the Contrast slider to the right to increase the contrast. Click OK or Apply to save the changes you have made. Changing Display Configurations If you move your PC to a place where you are using TV display only, make sure that you have the TV display feature enabled. -
Page 37: Connect To A Tv, Vcr, Or Camcorder For Video Capturing
Connect a TV, camcorder, or VCR to your RADEON 9000 family graphics card, as shown. The audio and video output connectors on your TV, camcorder, or VCR will be similar to these. -
Page 38: Windows® Volume Control
® Windows Volume Control For correct audio performance, your sound card’s line input must be active. To display the Line Input setting in the ® Windows Volume Control panel: Right-click the speaker icon in the Taskbar (usually in the lower-right corner of your screen). Click Open Volume Controls. -
Page 39: Capturing Video Using
Capturing video using ® Windows Movie Maker ® To capture video with Windows Movie Maker: Click Start then All Programs then Accessories then ® Windows Movie Maker. Click the Record button to open the Record dialog. Select Record both to record video and audio. Choose record quality.
Need help?
Do you have a question about the RADEON 9000 and is the answer not in the manual?
Questions and answers