Advertisement
Available languages
Available languages
Quick Links
Download this manual
See also:
Installation Manual
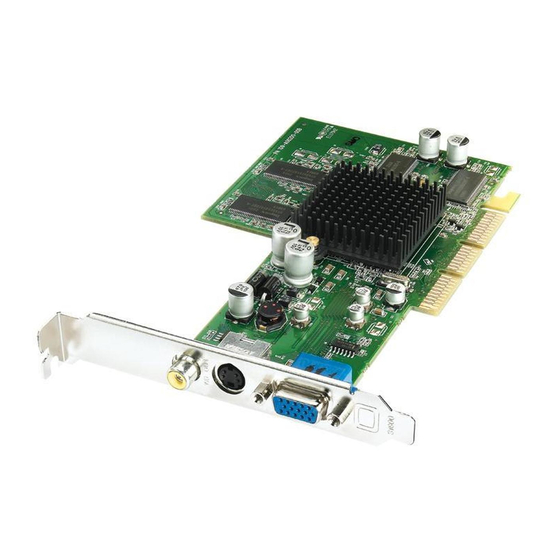
Features
• Powered by the RADEON
TM
9200 graphics processing unit (GPU)
• Supports DirectX® 8.1 and OpenGL® 1.3
• Supports 3D resolutions (32-bit color) up to 2048x1536
•
SMARTSHADER™
technology
•
SMOOTHVISION™
technology
•
CHARISMA ENGINE™
II technology
•
PIXEL TAPESTRY™ II
technology
•
VIDEO IMMERSION™ II
technology
• Dual independent displays (DVI/CRT, DVI/TV, CRT/TV)
• Provides S-video connect or Composite connect (optional)
• Provides DVI (Digital Visual Interface) output port (optional)
• DVI-I-To-VGA Adapter (optional)
• HydraVision™ software (optional)
ATI's graphics accelerator are the most advanced on the market today.
They improve the performance of your system and display exceptional
graphics.
Your ATI graphics accelerator comes complete with enhanced drivers
and comprehensive award-winning software utilities designed to make
you more productive. Please read this guide before attempting to install
your card.
Preparing Your Computer
Turn off the power to your system and discharge your body's static
electric charge by touching a grounded surface — e. g., the metal surface
of the power supply — before performing any hardware procedure.
The manufacturer assumes no liability for any damage, caused directly or
indirectly, by improper installation of any components by unauthorized
service personnel. If you do not feel comfortable performing the
installation, consult a qualified computer technician.
Damage to system components, the accelerator card, and injury to you
may result if power is applied during installation.
If you are using an operating system other than Windows 98 or Windows
Me, you may need to do the following before installing your card.
• If your current system configuration uses special drivers that are not
640x480 VGA, you may encounter conflicts with the card.
recommend that you first reconfigure your operating system to use a
VGA driver supplied with your operating system before installing the
card. For more information about changing your operating system
configuration, see your operating system documentation.
Installing Your ATI Graphics Accelerator Card
1. Shutdown the system and turn off the PC.
2. Open the computer and locate a free PCI slot.
3. Remove the cover for that slot from the computer chassis.
4. Place the ATI board into that slot and screw the board in.
5. Replace the computer cover.
6. Place the VGA monitor cable into the ATI Card.
To install the ATI enhanced driver for Windows 98 or
Windows Me
NOTE!
When you restart your system following installation of your ATI card,
Windows 98 and Windows Me detects the new hardware and may attempt
to install a driver from its system registry. When prompted to "Restart the
computer now", select NO. Then follow the normal installation
procedure below.
Selecting 'NO' for the initial restart prompt is a necessary step since
Windows may load an older display driver that is incompatible with your
new graphics card. Always use the driver available on the ATI
Installation CD-ROM, or an applicable driver update.
All ATI Installation CD-ROMs include a complete set of display drivers
and multimedia software. Use the same ATI Installation CD-ROM to
install the ATI enhanced display driver.
1. Insert the ATI INSTALLATION CD-ROM into your CD-ROM drive.
2. Click Start.
3. Select Run.
4. Type the following:
D:\ATISETUP.EXE
(If D is not your CD-ROM drive, substitute D with the correct drive
letter.)
5. Follow the Wizard's on- screen instructions to complete the
We
installation.
For correct resolution and refresh rate operation, you now need to select
a display device. You may also want to change the color palette from 256
colors (the default) to a higher number of instructions, refer to colors.
For ATI's online help file. Simply double-click the ATI icon on the
taskbar to access the online help. For more information about using the
ATI PLAYER, open the ATI PLAYER online help by clicking on the [?] in
the upper- right corner of the PLAYER window.
To install the ATI enhanced driver for Windows 2000 or
Windows XP
Note: Please uninstall any existing video drivers that could possibly
create a conflict before attempting to install this VGA card.
1. Start Windows.
2. When Windows detects your ATI graphics card, the Found New
Hardware Wizard dialog box appears.
3. Click Cancel to enter the Windows desktop.
4. Insert the CD installation disc into your CD-ROM drive.
5. Click Start.
6. Select Run.
7. Type the following:
D:\ATISETUP.EXE
(If D is not your CD-ROM drive, substitute D with the correct drive
letter.)
8. Follow the on-screen instructions to complete the installation.
9. When Setup has finished installing all the necessary files on your
computer, it will prompt you to restart your computer. Click Yes and
Finish to complete Setup and restart your computer.
To connect a TV or VCR to your computer
1. Determine if your TV or VCR has an S-Video or a Composite video
connection.
2. Looking at the back of your computer, locate the corresponding video-
out connector.
3. Using an S-video or a Composite cable, attach one end of the cable to
the video-out connector on your computer and the other end to your
TV or VCR.
Using TV Display (TV-out function optional)
Your graphics accelerator is configured for TV display. Using this feature,
you can connect a TV to your computer's video output to view the
desktop.
If you are not using a TV for your computer's display, it is recommended
that you disable TV display for optimal performance (higher refresh rates).
You can re-enable TV display at a later date.
• For NTSC, 800x600x60Hz and 1024x768x60Hz(hidden)
• For PAL, 800x600x50Hz and 1024x768x50Hz(hidden)
• Low resolution modes but they are hidden and used by application
programs and cannot be select end user.
1. Click the Settings tab to view the Display Properties.
2. Click the Advanced button.
3. Click the Displays tab.
If you are running an extended desktop, you must first select the video
adapter whose display properties you want to change.
4. Click the TV button.
Your TV must be enabled before you can change its display properties.
5. Click the Advanced tab.
6. In the Composite Sharpness box, select a value from the list.
7. Click OK or Apply to save the changes you have made.
Advertisement

Related Manuals for ATI Technologies RADEON 9200


Summary of Contents for ATI Technologies RADEON 9200
- Page 1 Features • If your current system configuration uses special drivers that are not 5. Follow the Wizard’s on- screen instructions to complete the Using TV Display (TV-out function optional) 640x480 VGA, you may encounter conflicts with the card. installation. • Powered by the RADEON 9200 graphics processing unit (GPU) Your graphics accelerator is configured for TV display.
- Page 2 To select your TV broadcast format by country 7. Click OK or Apply to save the changes you have made and exit to the Deutsch Displays page. 8. Click Close. 1. Click the Settings tab to view the Display Properties. Click Yes to restart your computer.
- Page 3 So stellen Sie das richtige TV-Rundfunkformat Ihres Utilisation et réglage de TV Out Français Español Landes ein (Die TV-Out Funktion ist optional) Pour activer ou désactiver l’affichage du téléviseur ® Pour installer les pilotes étendus d'ATI pour Instalación de controlador ATI en Windows •...
- Page 4 中文 安裝 Windows 98/Me 驅動程式 Windows 使用 TV-Out 功能 Standard PCI Graphics Adapter(VGA) TV-Out Windows 98/Me System Widows Quick Installation Guide CD-ROM ATISETUP Installation Handbuch 注意: Installation Guide de l’Utilisateur 1. 您一定要先啟動電視才能變更其顯示器內容。 2. 當您要切換電視輸出時,請將螢幕解析度調整為 Instalación Guía del Usuario 800x600x60Hz 或 640x480x60Hz 否則將無法成功地切 換至電視輸出。...
Need help?
Do you have a question about the RADEON 9200 and is the answer not in the manual?
Questions and answers