Table of Contents
Advertisement
Quick Links
MODEL G0459/G0459P
12" DRUM SANDER
OWNER'S MANUAL
177335
Copyright © oCtober, 2005 by grizzly industrial, inC. revised august, 2011 (bl)
WARNiNG: NO PORtiON Of thiS MANUAL MAy bE REPRODUcED iN ANy ShAPE
OR fORM WithOUt thE WRittEN APPROvAL Of GRizzLy iNDUStRiAL, iNc.
(For models manuFaCtured sinCe 7/11) #bl7307 printed in taiWan
Advertisement
Table of Contents

Subscribe to Our Youtube Channel
Related Manuals for Grizzly G0459P


Summary of Contents for Grizzly G0459P
- Page 1 12" DRUM SANDER OWNER’S MANUAL 177335 Copyright © oCtober, 2005 by grizzly industrial, inC. revised august, 2011 (bl) WARNiNG: NO PORtiON Of thiS MANUAL MAy bE REPRODUcED iN ANy ShAPE OR fORM WithOUt thE WRittEN APPROvAL Of GRizzLy iNDUStRiAL, iNc.
- Page 2 This manual provides critical safety instructions on the proper setup, operation, maintenance, and service of this machine/tool. Save this document, refer to it often, and use it to instruct other operators. Failure to read, understand and follow the instructions in this manual may result in fire or serious personal injury—including amputation, electrocution, or death.
-
Page 3: Table Of Contents
iNtRODUctiON ... 2 manual accuracy ... 2 Contact info... 2 machine description ... 2 identification ... 3 machine data sheet ... 4 SEctiON 1: SAfEty ... 8 safety instructions for machinery ... 8 additional safety for drum sanders ... 10 SEctiON 2: POWER SUPPLy ... -
Page 4: Introduction
finish. -
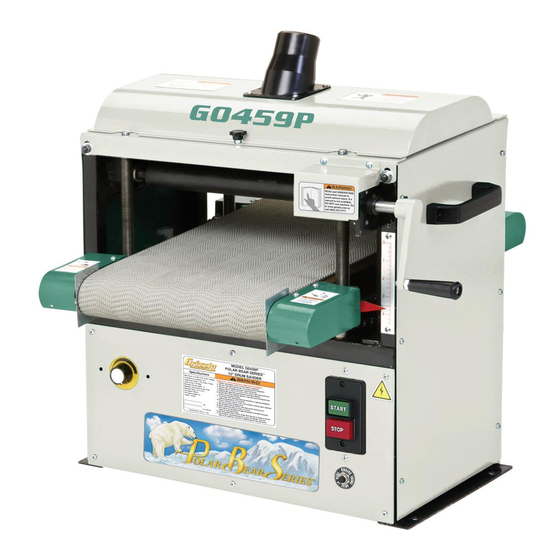
Page 5: Identification
Cover dC Feed motor Front elevation Chain guard drum sander Frame model g0459/g0459p (mfg. 7/11+) identification dust port variable speed Control figure 1. Front view, model g0459. to reduce the risk of serious injury when using this machine, read and... -
Page 6: Machine Data Sheet
The information contained herein is deemed accurate as of 7/11/2011 and represents our most recent product specifications. Model G0459 Due to our ongoing improvement efforts, this information may not accurately describe items previously purchased. PAGE 1 OF 2 model g0459/g0459p (mfg. 7/11+) - Page 7 The information contained herein is deemed accurate as of 7/13/2011 and represents our most recent product specifications. Model G0459 Due to our ongoing improvement efforts, this information may not accurately describe items previously purchased. model g0459/g0459p (mfg. 7/11+) PAGE 2 OF 2...
- Page 8 The information contained herein is deemed accurate as of 7/11/2011 and represents our most recent product specifications. Model G0459P Due to our ongoing improvement efforts, this information may not accurately describe items previously purchased. PAGE 1 OF 2 model g0459/g0459p (mfg. 7/11+)
- Page 9 The information contained herein is deemed accurate as of 7/13/2011 and represents our most recent product specifications. Model G0459P Due to our ongoing improvement efforts, this information may not accurately describe items previously purchased. model g0459/g0459p (mfg. 7/11+) PAGE 2 OF 2...
-
Page 10: Section 1: Safety
NOTICE This symbol is used to alert the user to useful information about proper operation of the machine. Safety instructions for Machinery OWNER’S MANUAL. EYE PROTECTION. HAZARDOUS DUST. WEARING PROPER APPAREL. HEARING PROTECTION. MENTAL ALERTNESS. model g0459/g0459p (mfg. 7/11+) -
Page 11: Unattended Operation
ONLY USE AS INTENDED. USE RECOMMENDED ACCESSORIES. CHILDREN & BYSTANDERS. REMOVE ADJUSTING TOOLS. SECURING WORKPIECE. FEED DIRECTION. FORCING MACHINERY. model g0459/g0459p (mfg. 7/11+) GUARDS & COVERS. NEVER STAND ON MACHINE. STABLE MACHINE. AWKWARD POSITIONS. UNATTENDED OPERATION. MAINTAIN WITH CARE. CHECK DAMAGED PARTS. -
Page 12: Additional Safety For Drum Sanders
RESPiRAtOR AND SAfEty GLASSES. always wear a respirator and safety glasses while operat- ing the machine. dust and chips are created when sanding. some debris will be ejected, becoming hazards to the eyes and lungs. model g0459/g0459p (mfg. 7/11+) -
Page 13: Section 2: Power Supply
Rating full-Load current Rating at 110v ...14.1 Amps model g0459/g0459p (mfg. 7/11+) circuit Requirements Nominal voltage ... 110v/120v cycle ...60 hz Phase ... Single-Phase Power Supply circuit ... 15 Amps... -
Page 14: Extension Cords
-12- Extension cords Minimum Gauge Size ...14 AWG Maximum Length (Shorter is better)...50 ft. model g0459/g0459p (mfg. 7/11+) -
Page 15: Section 3: Setup
... 1 • drill bit ⁄ ” ... 1 model g0459/g0459p (mfg. 7/11+) at (570) 546-9663 for advice. Otherwise, filing a freight claim can be difficult. box 1: (figure 3) A. drum sander (not shown) ... 1 b. Crank handle ... 1 c. -
Page 16: Site Considerations
Space Allocation See below for required space allocation. Children or untrained people may be seriously injured by this machine. Only install in an access restricted location. -14- Physical Environment Electrical Installation Lighting figure 4. minimum working clearances. model g0459/g0459p (mfg. 7/11+) -
Page 17: Mounting
"through mount" where holes are drilled all the way through the workbench, and hex bolts, washers, and hex nuts are used to secure the drum sander to the workbench. figure 5. example of a through mount setup. -
Page 18: Dust Collection
Dust collection DO NOt operate the Model G0459/G0459P without an adequate dust collection system. this sander creates substantial amounts of wood dust while operating. failure to use a dust collection system can result in short and long-term respiratory illness. Recommended cfM at Dust Port: 150 cfM Do not confuse this CFM recommendation with the rating of the dust collector. -
Page 19: Test Run
OFF. model g0459/g0459p (mfg. 7/11+) Recommended Adjustments For your convenience, the adjustments listed below have been performed at the factory and no further setup is required to operate your machine. -
Page 20: Section 4: Operations
Regardless of the content in this section, Grizzly industrial will not be held liable for accidents caused by lack of training. -18- to complete a typical operation, the operator... -
Page 21: Basic Controls
0.027" (0.69 mm). c. On button: turns motor ON. D. Off button: turns motor OFF. figure 11. g0459/g0459p controls. model g0459/g0459p (mfg. 7/11+) Disabling & Locking Switch IMPORTANT: figure 12. -
Page 22: Sanding Tips
• reduce snipe when sanding more than one board of the same thickness by feeding them into the sander with the front end of the sec- ond board touching the back end of the first board. • Feed boards into the sander at different points on the conveyor to maximize sandpaper life and prevent uneven conveyor belt wear. -
Page 23: Depth Of Cut
If the table is lowered too far, the conveyor belt may rub against the chain, leaving grease on the belt. model g0459/g0459p (mfg. 7/11+) ⁄ turn of figure 15. setting depth of cut. -
Page 24: Variable Speed
180° between passes to ensure an even cut. model g0459/g0459p (mfg. 7/11+) -
Page 25: Choosing Sandpaper
Paper Replacement the model g0459/g0459p is designed for 3" wide hook-and-loop sandpaper rolls. to change sandpaper: disConneCt poWer to the sander! open the top cover to expose the drum. -
Page 26: Section 5: Accessories
Grizzly. NOTICE Refer to the newest copy of the Grizzly catalog for other accessories available for this machine. Aluminum Oxide hook & Loop Sanding Rolls, 3"... -
Page 27: Section 6: Maintenance
Cleaning the model g0459/g0459p is relatively easy. From time to time, vacuum wood dust off of the internal components, especially the motor. model g0459/g0459p (mfg. 7/11+) - Page 28 We recommend you create a checklist for routine inspection and maintenance. Remember to always disconnect the drum sander from its power source before attempting to inspect, adjust, or repair this machine! model g0459/g0459p (mfg. 7/11+)
-
Page 29: Section 7: Service
5. motor bearings are at fault. 6. Centrifugal switch. motor overheats. 1. motor overloaded. 2. air circulation through the motor restricted. model g0459/g0459p (mfg. 7/11+) troubleshooting possible solution 1. test power plug and receptacle for good contact and correct wiring. -
Page 30: Sanding Operations
2. adjust fan cover mounting position, tighten fan, or shim fan cover. 3. replace v-belt (Page 31). 1. tighten drum pillow block bearings. 2. replace drum pillow block bearings. 1. grease the pillow block bearings (Page 26). 2. replace the drum bearings. model g0459/g0459p (mfg. 7/11+) - Page 31 2. dust collector underpowered or too far away from this machine. grease on 1. Chain too low. conveyor belt model g0459/g0459p (mfg. 7/11+) possible solution 1. align pulleys (Page 31). 2. properly tension v-belts (Page 30). 1. tension conveyor (Page 32).
-
Page 32: Gauge Blocks
Jointed edge held against Fence figure 25. Checking v-belt tension with a re-install the side panel and handle. ⁄ "– ⁄ " with moderate pres- straightedge and a ruler. model g0459/g0459p (mfg. 7/11+) -
Page 33: Pulley Alignment
(mfg. 7/11+) Pulley Alignment pulley alignment is another important factor in power transmission and belt life. the pulleys should be parallel to each other and in the same plane (coplaner) for optimum performance. -
Page 34: Conveyor Tensioning & Tracking
—if the conveyor tracks too far to the other side, then adjust the bolt as necessary to bring it back and repeat Steps 2 & 3 until the tracking is correct. model g0459/g0459p (mfg. 7/11+) -
Page 35: Drum Adjustments
... 1 gauge blocks (see Page 30) ... 2 Feeler gauge set ... 1 For the model g0459/g0459p drum sander to function properly, the sanding drum must be aligned in two directions: (1) parallel to the con- veyor belt (see figure 29 below) and (2) perpen- dicular to feed direction (see figure 30). - Page 36 Note: After you have adjusted the drum, do not forget to tighten the lock nuts and recheck the alignment by repeating Steps 1–3. model g0459/g0459p (mfg. 7/11+) ⁄ ", the...
-
Page 37: Pressure Roller Height
(lower- ing pressure rollers). model g0459/g0459p (mfg. 7/11+) however, you can only minimize snipe so much before the workpiece will slip or kick out, causing a hazard to the operator. if this happens, you have raised the pressure rollers too high for them to function as intended—the pressure rollers must... -
Page 38: Scale Pointer Calibration
(mfg. 7/11+) -
Page 39: Table Lift Screws
Make sure you have done this before removing the chain. model g0459/g0459p (mfg. 7/11+) figure 38. marking sprocket tooth and chain. loosen the chain by loosening the hex nut on the bottom of the idler roller sprocket shown in figure 39. -
Page 40: Conveyor Belt Replacement
(4 hex bolts and 4 flat washers), compression springs and spring plates (figure 41) from the front pres- sure roller and set the roller aside. spring plate figure 41. Front pressure roller components. model g0459/g0459p (mfg. 7/11+) photo Compression spring... - Page 41 Page 31 for help). the drum sander should now look similar to figure 43. figure 43. drum sander disassembled to Step 8. model g0459/g0459p (mfg. 7/11+) remove the sanding drum (4 lock nuts and 4 flat washers) and v-belt (figure 44). photo figure 44.
- Page 42 17. With the help of an assistant, carefully lift the table off of the drum sander cabinet, as shown in figure 49. figure 49. example of lifting the table off of the drum sander cabinet with two people. brass shims model g0459/g0459p (mfg. 7/11+)
- Page 43 24. place the right side of the conveyor on a flat surface, then unthread and remove the front and rear table lift screws. 25. remove the belt. the table should look like figure 51. model g0459/g0459p (mfg. 7/11+) Front right rear sprocket lift screw figure 51.
-
Page 44: Changing Motor Brushes
Cover figure 53. motor brush components removed (one of two brushes shown). insert the new carbon brushes into the holes in the motor housing. re-install the brush covers. model g0459/g0459p (mfg. 7/11+) -
Page 45: Section 8: Wiring
The photos and diagrams included in this section are best viewed in color. You can view these pages in color at www.grizzly.com. model g0459/g0459p (mfg. 7/11+) Note: Please gather the serial number and manufacture date of your WIRE/COMPONENT DAMAGE. MOTOR WIRING. CAPACITORS/INVERTERS. -
Page 46: Electrical Components
Electrical components figure 57. Capacitor. figure 54. Feed motor. figure 58. variable speed control and circuit figure 55. drum motor wiring. board. figure 56. switch box wiring. READ ELECTRICAL SAFETY -44- model g0459/g0459p (mfg. 7/11+) ON PAGE 43! -
Page 47: Wiring Diagram
(figure 58) The motor wiring shown here is current at the time of printing, but it match Always use the wiring diagram inside the motor junction box. model g0459/g0459p (mfg. 7/11+) Wiring Diagram DRUM MOTOR (figure 55) your machine. wiring diagram... -
Page 48: Section 9: Parts
SEctiON 9: PARtS frame -46- model g0459/g0459p (mfg. 7/11+) -
Page 49: Frame Parts List
30-4V2 P0459030-4V2 DC MOTOR CORD V2.03.09 30-5 P0459030-5 CONTROL WIRE 31V2 P0459031V2 STRAIN RELIEF MGB16 V2.07.11 31-1 P0459031-1 STRAIN RELIEF 3/4" 32V3 P0459032V3 FRONT PANEL V3.01.11 model g0459/g0459p (mfg. 7/11+) frame Parts List PART # 32V3 P0459P032V3 33V2 P0459033V2 PN02 PW07 PN05 PB05 46V2 P0459046V2... -
Page 50: Drum
SET SCREW 5/16-24 X 1/2 FLAT WASHER 3/8 LOCK NUT 3/8-16 COMP SPRING 24-20-8MM 63L HEX BOLT 1/4-20 X 3/8 FLAT WASHER 1/4 BRACKET HOOK & LOOP SANDBELT HOOK & LOOP DRUM COVER DRUM PULLEY V-BELT 4L360 model g0459/g0459p (mfg. 7/11+) -
Page 51: Conveyor
-49- model g0459/g0459p (mfg. 7/11+) -
Page 52: Conveyor Parts List
MUSt maintain the original location and readability of the labels on the machine. if any label is removed or becomes unreadable, REPLAcE that label before using the machine again. contact Grizzly at (800) 523-4777 or www.grizzly.com to order new labels. -50-... -
Page 53: Warranty Card
The following information is given on a voluntary basis. It will be used for marketing purposes to help us develop better products and services. Of course, all information is strictly confidential. Note: We never use names more than 3 times. _____________________________________________________________________ _________________________________________________________________________________ _________________________________________________________________________________... -
Page 55: Warranty And Returns
WARRANty AND REtURNS... - Page 56 Buy Direct and Save with Grizzly – Trusted, Proven and a Great Value! ® ~Since 1983~ Visit Our Website Today For Current Specials! ORDER 24 HOURS A DAY! 1-800-523-4777...
Need help?
Do you have a question about the G0459P and is the answer not in the manual?
Questions and answers