Grizzly G0450 Instruction Manual
37" drum sander
Hide thumbs
Also See for G0450:
- Parts breakdown (10 pages) ,
- Owner's manual (80 pages) ,
- Instruction manual (60 pages)
Table of Contents
Advertisement
Quick Links
Advertisement
Table of Contents

Related Manuals for Grizzly G0450


Summary of Contents for Grizzly G0450
- Page 1 37" DRUM SANDER MODEL G0449/G0450 INSTRUCTION MANUAL COPYRIGHT © JUNE, 2005 BY GRIZZLY INDUSTRIAL, INC. REVISED APRIL, 2007 (BL) WARNING: NO PORTION OF THIS MANUAL MAY BE REPRODUCED IN ANY SHAPE OR FORM WITHOUT THE WRITTEN APPROVAL OF GRIZZLY INDUSTRIAL, INC.
- Page 2 Some dust created by power sanding, sawing, grind- ing, drilling, and other construction activities contains chemicals known to the State of California to cause cancer, birth defects or other reproductive harm. Some examples of these chemicals are: • Lead from lead-based paints. •...
-
Page 3: Table Of Contents
G0449 ... 11 G0450 at 220V ... 11 G0450 at 440V ... 12 Power Connection ... 12 Phase Converter with G0450 ... 12 Grounding ... 13 Extension Cords ... 13 Rewiring to 440V ... 13 SECTION 3: SET UP ... 14 Set Up Safety ... - Page 4 Conveyor Belt Replacement ... 39 G0449 Electrical Components ... 42 G0449 Wiring Diagram ... 43 G0450 220V 3 Phase Electrical Components ... 44 G0450 220V 3 Phase Wiring Diagram ... 45 G0450 440V 3 Phase Electrical Components ... 46 G0450 440V 3 Phase Wiring Diagram ... 47 Frame Parts Breakdown ...
-
Page 5: Introduction
G0449/G0450 as supplied when the manual was prepared. However, owing to Grizzly’s policy of continuous improvement, changes may be made at any time with no obligation on the part of Grizzly. For your convenience, we always keep current Grizzly manuals available on our website at www. -
Page 6: Machine Data
... Advanced Dust Collection MACHINE DATA MODEL G0449 37" DRUM SANDER SHEET ⁄ " ⁄ " x 28 ⁄ " ⁄ " ⁄ " ⁄ ⁄ '' Diameter Rubber ⁄ '' x 90 ⁄ '' Continuous Belt G0449/G0450 37" Drum Sander... -
Page 7: Machine Data Sheet
Pressure Rollers (5) ... 1 Conveyor Belt ... 36 ... Easy Access Control Panel w/Load Meter ... Requires Sanding Rolls 6" Wide ... Variable Speed Conveyor ... Advanced Dust Collection G0449/G0450 37" Drum Sander MACHINE DATA SHEET MODEL G0450 37" DRUM SANDER ⁄... -
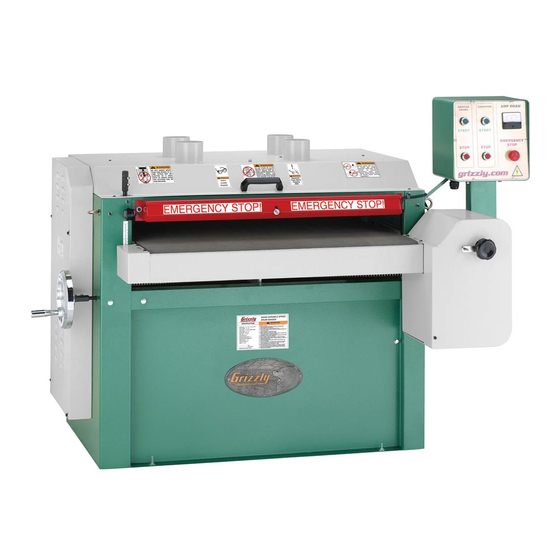
Page 8: Identification
G0449/G0450 37" Drum Sander... -
Page 9: Control Panel
A. SANDING DRUMS START Button—Starts the sanding drums. B. CONVEYOR START Button—Starts the conveyor belt. C. AMP DRAW Meter—Displays the combined amperage draw of both motors. D. EMERGENCY STOP Button—Stops all machine functions. G0449/G0450 37" Drum Sander Control Panel... -
Page 10: Section 1: Safety
G0449/G0450 37" Drum Sander... -
Page 11: Safety Instructions For Machinery
Follow instructions for lubricating and changing accessories. 16. MAKE SURE GUARDS ARE IN PLACE AND WORK CORRECTLY BEFORE USING MACHINERY. G0449/G0450 37" Drum Sander 17. REMOVE WRENCHES. Make a habit of checking for keys and adjusting wrenches before turn- ing machinery ON. -
Page 12: Additional Safety For Drum Sanders
Like all machines there is danger associat- ed with the Model G0449/G0450. Accidents are frequently caused by lack of familiarity or failure to pay attention. Use this machine with respect and caution to lessen the pos- sibility of operator injury. -
Page 13: Section 2: Circuit Requirements
440V 3-phase operation if needed. Amps Amperage Draw The Model G0450 has a 15 HP motor that will draw the following amps at 220V 3-phase: Main Motor at 220V ... 40 Amps Feed Motor at 220V ... 1.3 Amps... -
Page 14: G0450 At 440V
440V 3-phase operation if needed. Amperage Draw The Model G0450 has a 15 HP motor that will draw the following amps at 440V 3-phase: Main Motor at 440V ... 20 Amps Feed Motor at 440V ... 0.65 Amps... -
Page 15: Grounding
G0449/G0450 37" Drum Sander Rewiring to 440V The Model G0450 can be rewired for 440V operation. This rewiring job consists of replacing the existing control panel box with a 440V control panel box and rewiring the motor. -
Page 16: Section 3: Set Up
4" Dust Hoses (length as needed) ... 4 • 4" Hose Clamp ... 4 Unpacking The Model G0449/G0450 was carefully packed when it left our warehouse. If you discover the machine is damaged after you have signed for delivery, please immediately call Customer Service at (570) 546-9663 for advice. -
Page 17: Inventory
G0449/G0450 37" Drum Sander Site Considerations Floor Load The Model G0449/G0450 weighs 1058/1143 lbs. and has a base footprint of 45½" W x 28½" D. Most commercial floors are suitable for your machine. Some residential floors may require additional reinforcement to support both the machine and operator. -
Page 18: Attaching Top Cover
Lift the control panel into place and secure it with the bolts, lock washers, and flat washers removed in Step 1. Attach the brace from the control panel to the sander as shown in Figure 8. Front View Panel Figure 8. Control panel brace. G0449/G0450 37" Drum Sander... -
Page 19: Placing Sander
Lift the sander and move it to your predeter- mined location. DO NOT lift it any higher than is necessary to clear the floor. G0449/G0450 37" Drum Sander Mounting to Floor Although not required, we recommend that you mount your new machine to the floor. Because this is an optional step and floor materials may vary, floor mounting hardware is not included. -
Page 20: Installing Handwheel
CFM at the sander. We recommend using a dust collection system that produces a minimum of 2000 CFM. A fine layer of dust will be present on your stock as it comes out of the sander. This is normal. Components and Hardware Needed: Dust Hoses 4"... -
Page 21: Power Cord
Figure 13 or 14, and close the control panel. Note For Model G0450 Only: When using a phase converter, connect the manufactured power leg to the L2 terminal (Figure 14). -
Page 22: Test Run
Press the conveyor START button. —If problems occur, EMERGENCY STOP button. —For Model G0450 only: If the conveyor belt is rotating backwards, disconnect the sander from power and exchange wires L1 & L3 in the control panel. Press the SANDING DRUMS START but- ton. -
Page 23: Section 4: Operations
OMMEND that you read books, trade maga- zines, or get formal training before begin- ning any projects. Regardless of the con- tent in this section, Grizzly Industrial will not be held liable for accidents caused by lack of training. G0449/G0450 37" Drum Sander... -
Page 24: Variable Speed
G0449 Maximum Amp Load ...47A G0450 Maximum Amp Load at 220V ...39A G0450 Maximum Amp Load at 440V ...20A To sand a workpiece: Adjust the table height according to the instructions in Depth of Cut on Page 21. -
Page 25: Sanding Tips
The Model G0449/G0450 allows you to place a different grit sandpaper on each drum. The first drum should have a coarser grit than the sec- ond. -
Page 26: Paper Replacement
Paper Replacement The Model G0449/G0450 is designed for 6" wide sandpaper rolls. Turn to SECTION 5: ACCESSORIES on Page 25 for grit selection and model numbers. Tools Needed: Phillips Screwdriver #2 ... 1 Spring Tension Tools ... 2 To change the paper:... -
Page 27: Section 5: Accessories
If you work around dust everyday, a half-mask respirator can be a lifesaver. Also compatible with safety glasses! Figure 20. Half-mask respirator and disposable cartridge filters. G0449/G0450 37" Drum Sander PRO-STICK Sanding Pad ® Extend the life of your sandpaper! Just feed this... -
Page 28: Section 6: Maintenance
Wait until the machine is turned OFF, unplugged, and all working parts have come to a rest before you do anything! Cleaning Cleaning the Model G0449/G0450 is relatively easy. From time to time vacuum wood dust off of the internal components, especially the motor. -26-... - Page 29 (Figure 24), remove the drain plug, drain the oil, and reinstall the drain plug. Figure 25. Table lift screws. G0449/G0450 37" Drum Sander Failure to routinely inspect your drum sander for damage and wear could result in unsatis- factory work results, premature component or machinery failure, or operator injury.
-
Page 30: Section 7: Service
SECTION 7: SERVICE This section is provided for your convenience—it is not a substitute for the Grizzly Service Department. If any adjustments arise that are not described in this manual, you need replacement parts, or you are unsure of how to perform the procedures in this section, then feel free to call our Technical Support line. - Page 31 Sandpaper tears off drums during opera- tion. Table elevation controls are stiff and hard to adjust. Poor dust collection. G0449/G0450 37" Drum Sander Possible Cause 1. Drum bearings lack sufficient grease. 2. Drum bearings are worn and need replacement. 1. Pulleys not aligned correctly.
-
Page 32: Gauge Blocks
29 for an example of how to perform a V-belt deflection test with a straightedge and ruler. Previously Jointed Edge Figure 29. Checking V-belt tension with a Held Against straightedge and a ruler. Fence ⁄ "– ⁄ " when pushed in G0449/G0450 37" Drum Sander... -
Page 33: Pulley Alignment
Note: A matched set means all the V-belts are the same size and also have the same serial number. G0449/G0450 37" Drum Sander Pulley Alignment Pulley alignment is another important factor in power transmission and belt life. The pulleys should be parallel to each other and in the same plane (coplaner) for optimum performance. -
Page 34: Conveyor Tensioning & Tracking
—If the conveyor tracks too far to the other side, then adjust the bolt as necessary to bring it back and repeat Steps 2 & 3 until the tracking is correct. G0449/G0450 37" Drum Sander... -
Page 35: Drum Adjustments
Figure 33. Drum perpendicular to feed direction. ������������ ������������� Figure 34. Drum parallel to conveyor belt. G0449/G0450 37" Drum Sander The drums can be adjusted in fine increments at the pillow bearings and in larger increments by using the table lift screws (Page 27). - Page 36 12. Go to the end of the drum that has the great- est distance between the rear upper frame angle, and adjust the wedge bolt counter- clockwise until the distance between the upper frame angle is within end. G0449/G0450 37" Drum Sander ⁄ ", skip to ⁄ ", con- ⁄...
- Page 37 Figure 38. Measuring distance between edge of the front drum and the front upper frame angle. G0449/G0450 37" Drum Sander —If the difference between the two measure- ments at each end are within Step 19.
-
Page 38: Pressure Roller Height
2) repeat with the other side; 3) tighten the hex nuts togeth- er to make sure the adjustments are locked in place. G0449/G0450 37" Drum Sander... -
Page 39: Scale Pointer Calibration
Loosen the screw that secures the scale pointer and adjust it to the thickness of the workpiece. G0449/G0450 37" Drum Sander Dust Scoop Position Tools Needed: Hex Wrench 4mm ... 1 Setting: Distance From Roller ... -
Page 40: Table Lift Screws
Re-tension the chain and check the new height setting. 10. Repeat Steps 5–9 as needed until the table height is parallel to the drums in all four cor- ners, and calibrate the scale pointer. G0449/G0450 37" Drum Sander... -
Page 41: Conveyor Belt Replacement
Remove the top cover (6 button head screws) and pulley cover (4 hex bolts). Remove the rear dust scoop (4 button head screws). G0449/G0450 37" Drum Sander Remove the V-belts (see Page 31 for help). The drum sander should now look similar to Figure 44. - Page 42 Figure Figure 47. Chain removed from table by removing the master link. 15. Loosen the conveyor belt from the rear adjustments, as shown in Figure 48. Figure 48. Conveyor belt loosened at the rear adjustment. G0449/G0450 37" Drum Sander...
- Page 43 Figure 50. Lifting the table off of the drum sander cabinet with four people. G0449/G0450 37" Drum Sander 20. Remove the brackets from the left side of the table and remove the belt (see Figure 51).
-
Page 44: G0449 Electrical Components
E-STOP Button Conveyor STOP Drum STOP Figure 52. G0449 back side of front panel. Main Motor Contactor Feed Motor Contactor Feed Motor Relay Current Transformer Terminal Block Main Motor Relay Ground Figure 53. Model G0449 Electrical panel. -42- G0449/G0450 37" Drum Sander... -
Page 45: G0449 Wiring Diagram
G0449 Wiring Diagram Conveyor START Amp Meter E-STOP Button Current Transformer Main Motor Contactor Ground ������ G0449/G0450 37" Drum Sander ����������� Conveyor STOP Feed Motor Contactor ���� ���� �� ���� ���� ��� �� �� Main Motor Relay ���� ������������������ �����... -
Page 46: G0450 220V 3 Phase Electrical Components
Current Transformer Main Motor Relay (dial = 38A @ 220V) Ground Figure 56. Model G0450 220V 3 Phase Electrical panel. -44- Drum START Figure 55. G0450 junction wiring. Note: Always use the wiring diagrams on the inside of the junction box as they reflect machine changes since the time of writing. -
Page 47: G0450 220V 3 Phase Wiring Diagram
G0450 220V 3 Phase Wiring Diagram Amp Meter Conveyor START E-STOP Button Current Transformer Main Motor Contactor �� �� Main Motor Relay Ground ������ G0449/G0450 37" Drum Sander ����������� Conveyor STOP Feed Motor Contactor ���� ���� �� ���� ���� ����... -
Page 48: G0450 440V 3 Phase Electrical Components
G0450 440V 3 Phase Electrical Components Conveyor START Amp Meter E-STOP Button Conveyor STOP Drum STOP Figure 57. G0450 440V back side of front panel. Amp Meter Transformer Current Transformer Main Motor Relay (dial = 21-25A @440V (dial = 0.75-1.05A @ 440V) Figure 59. -
Page 49: G0450 440V 3 Phase Wiring Diagram
G0450 440V 3 Phase Wiring Diagram Amp Meter Conveyor START E-STOP Button Amp Meter Transformer Current Transformer Main Motor Contactor �� �� �� Main Motor Relay Ground ������ G0449/G0450 37" Drum Sander ����������� Conveyor STOP Feed Motor Contactor ���� ����... -
Page 50: Frame Parts Breakdown
��� ��� ��� ��� ��� ��� �� ��� ��� �� ��� ��� ��� ��� �� �� �� �� �� �� �� �� �� �� �� �� �� �� ��� ��� ��� ��� G0449/G0450 37" Drum Sander ��� ��� ��� ���... -
Page 51: Frame Parts List
SUPPORT PLATE, LEFT P0449041 SUPPORT PLATE, RIGHT PSB01M CAP SCREW M6-1 X 16 PW06 FLAT WASHER 1/4 PSBS09M BUTTON HD CAP SCR M6-1 X 12 G0449/G0450 37" Drum Sander Frame Parts List PART # PW06 P0449047 P0449048 P0449049 P0449050 PB83M... -
Page 52: Conveyor Parts Breakdown
Conveyor Parts Breakdown -50- G0449/G0450 37" Drum Sander... -
Page 53: Conveyor Parts List
COMPRESSION SPRING P0449135 PULLEY P0449136 V-BELT AX-25 P0449137 PULLEY P0449138 MOTOR 1/3HP 220V 1-PH (G0449) P0450138 MOTOR 1/4HP 220/440V 3-PH (G0450) 138-1 P0449138-1 FAN COVER (G0449) 138-1 P0450138-1 FAN COVER (G0450) 138-2 P0449138-2 FAN (G0449) 138-2 P0450138-2 FAN (G0450) 138-3 P0449138-3... -
Page 54: Roller And Drum Parts Breakdown
Roller and Drum Parts Breakdown -52- G0449/G0450 37" Drum Sander... -
Page 55: Roller And Drum Parts List
HAND WARNING PLABEL-30 KEEP DOOR CLOSED P0449240 PHILLIPS SCREWDRIVER P0449241 RELAY 220V 1Ø BTH-60 (G0449) P0450241 RELAY 220V 3Ø BTH-60 (G0450) 241A P0450241A RELAY 440V 3Ø NTH-25 (G0450) P0449242 RELAY 220V 1Ø NTH-3 (G0449) P0450242 RELAY 220V 3Ø NTH-1.9 (G0450) -
Page 56: Warranty And Returns
WARRANTY AND RETURNS Grizzly Industrial, Inc. warrants every product it sells for a period of 1 year to the original purchaser from the date of purchase. This warranty does not apply to defects due directly or indirectly to misuse, abuse, negligence, accidents, repairs or alterations or lack of maintenance. - Page 57 Do you think your machine represents a good value? Would you recommend Grizzly Industrial to a friend? Would you allow us to use your name as a reference for Grizzly customers in your area? Note: We never use names more than 3 times.
- Page 58 FOLD ALONG DOTTED LINE FOLD ALONG DOTTED LINE Send a Grizzly Catalog to a friend: GRIZZLY INDUSTRIAL, INC. P.O. BOX 2069 BELLINGHAM, WA 98227-2069 Name_______________________________ Street_______________________________ City______________State______Zip______ TAPE ALONG EDGES--PLEASE DO NOT STAPLE Place Stamp Here...
- Page 60 Buy Direct and Save with Grizzly Visit Our Website Today And Discover Why • • • – Trusted, Proven and a Great Value! ® Grizzly Is The Industry Leader! ® SECURE ORDERING ORDERS SHIPPED WITHIN 24 HOURS E-MAIL RESPONSE WITHIN ONE HOUR...
Need help?
Do you have a question about the G0450 and is the answer not in the manual?
Questions and answers