Grizzly G0477 Owner's Manual
15" planer/moulder
Hide thumbs
Also See for G0477:
- Parts breakdown (10 pages) ,
- Owner's manual (48 pages) ,
- Owner's manual (48 pages)
Table of Contents
Advertisement
Quick Links
Advertisement
Table of Contents

Related Manuals for Grizzly G0477


Summary of Contents for Grizzly G0477
- Page 1 MODEL G0477 15" PLANER/MOULDER OWNER'S MANUAL COPYRIGHT © APRIL, 2006 BY GRIZZLY INDUSTRIAL, INC. WARNING: NO PORTION OF THIS MANUAL MAY BE REPRODUCED IN ANY SHAPE OR FORM WITHOUT THE WRITTEN APPROVAL OF GRIZZLY INDUSTRIAL, INC. #JK8066 PRINTED IN CHINA...
- Page 2 ���� ������ �������� �������� ������ ������������ �� ��� ������ ������ ���������� ����������� ��� ������� �� ���� ������������������ ������� �� ����� ���������� ��� ������ ��� ������������ ����� �� ���� ������ ��� ������ �� ������� �������� ������� ��������� ����������� ������������� �� ������ ���...
-
Page 3: Table Of Contents
Changing Motor Brushes ... 29 Electrical Components ... 30 Wiring Diagram ... 31 G0477 Body Breakdown ... 32 G0477 Table and Base Breakdown ... 33 G0477 Gearbox Breakdown ... 34 G0477 Stand Breakdown ... 35 G0477 Labels ... 36 Parts List ... 37... -
Page 4: Introduction
INTRODUCTION Foreword We are proud to offer the Model G0477 15" Planer/Moulder. This machine is part of a grow- ing Grizzly family of fine woodworking machinery. When used according to the guidelines set forth in this manual, you can expect years of trouble-free, enjoyable operation and proof of Grizzly’s com-... -
Page 5: Machine Data Sheet
� ������������������������������������������������������������������������������������������������������������������������������� ����������������������� ���� ��������������� ��������� ����������� � �������������������������������������������������������������������������������������������������������������������������������������������������������� ������ � ���������������������������������������������������������������������������������������������������������������������������������������������������������� ����� � ������������������������������������������������������������������������������������������������������������������������������������������������������� ������ � ���������������������������������������������������������������������������������������������������������������������������������������������������� ������� � ������������������������������������������������������������������������������������������������������������������������������������������������������ ����� � ������������������������������������������������������������������������������������������������������������������������������������������������������� � ������������������������������������������������������������������������������������������������������������������������������������������ �������� � ����������������������������������������� � ������������������������������������������������������������������������������������������ �������� � Model G0477 15" Planer/Moulder ������� ���� �����... - Page 6 ��������������������������������������������������������������������������������������������������������������������������������������������������������������� � � ������������������������������������������������������������������������������������������������������������������������������������������� ����������������� ����� ��������������� � ������������������������������������������������������������������������������������������������������������������������������������������������������������������ ����� � ��������� � ������������������������������������������������������������������������������������������������������������������������������������������������������������������ � �������������������������������������������������������������������������������������������������������������������������� �������������������������� � ��������������������������������������������������������������������������������������������������������������������������������������������������������������� ������ ��������� � ������������������������ � �������������������������� � ���������������������������� � ������������������������������� � ��������������������������������������������������� � ������������������������ � ������������������������� � ������ Model G0477 15" Planer/Moulder...
-
Page 7: Identification
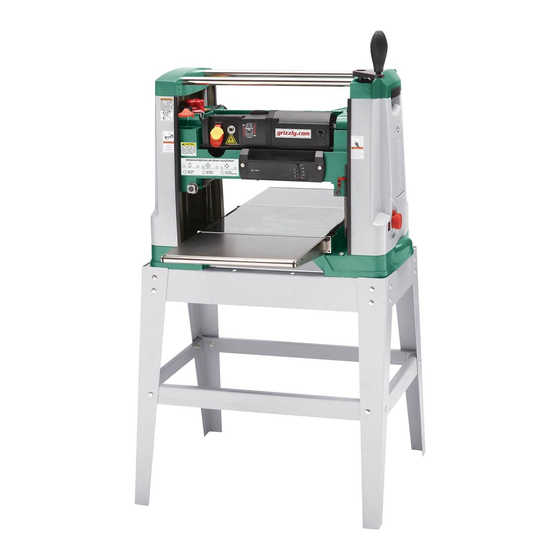
Figure 1. G0477 Component and Control Identification. A. Infeed/Outfeed Roller Height Adjuster B. ON/OFF Switch C. Circuit Breaker Reset Button D. Return Rollers E. Headstock Height Hand Crank G. Tool Storage H. Depth-of-cut Gauge Model G0477 15" Planer/Moulder Identification Cutterhead Lock... -
Page 8: Section 1: Safety
Wear protective hair covering to con- tain long hair and wear non-slip footwear. 6. NEVER OPERATE MACHINERY WHEN TIRED, OR UNDER THE INFLUENCE OF OPERATING DRUGS OR ALCOHOL. Be mentally alert at all times when running machinery. OPERATING MACHINERY. Model G0477 15" Planer/Moulder... - Page 9 Follow instructions for lubricating and changing accessories. 16. MAKE SURE GUARDS ARE IN PLACE AND WORK CORRECTLY BEFORE USING MACHINERY. Model G0477 15" Planer/Moulder 17. REMOVE WRENCHES. Make a habit of checking for keys and adjusting wrenches before turn- ing machinery ON.
-
Page 10: Additional Safety For Planer/Moulders
Use this and other machinery with caution and respect. Failure to do so could result in serious per- sonal injury, damage to equipment, or poor work results. Model G0477 15" Planer/Moulder ⁄ " ⁄ " ⁄... -
Page 11: Section 2: Circuit Requirements
DO NOT connect the machine to the power source until instructed to do so. Amperage Draw The Model G0477 has a 2 ⁄ HP motor which draws the following amps under maximum load: Motor Draw ... -
Page 12: Section 3: Set Up
Open-End Wrench 13mm or • Open-End Wrench 14mm ... 1 The Model G0477 was carefully packed when it left our warehouse. If you discover the machine is damaged after you have signed for delivery, please immediately call Customer Service at (570) 546-9663 for advice. -
Page 13: Inventory
(e.g. a nut or a washer), we would be glad to replace them, or for the sake of expedi- ency, replacements can be obtained at your local hardware store. The Model G0477 is a very heavy machine. Serious personal injury... -
Page 14: Clean Up
Remove this protective coating with a sol- vent cleaner or citrus-based degreaser such as Grizzly’s G7895 Degreaser. To clean thoroughly, some parts may need to be removed. For opti- mum performance from your machine, make sure you clean all moving parts or sliding contact surfaces that are coated. -
Page 15: Stand Assembly
Stand Assembly The stand for the Model G0477 must be assem- bled before the planer/moulder can be mounted on it. It may be helpful to refer to the Stand Breakdown on Page 35 during this procedure. Components and Hardware Needed: Notched Legs* ... -
Page 16: Mounting Planer/Moulder On Stand
M8-1.25 x 80 hex bolts, flat washers and hex nuts. -14- Dust Chute and Bag DO NOT operate the Model G0477 without the dust collection bag installed. This plan- er/moulder creates substantial amounts of wood dust while operating. Failure to use the... -
Page 17: Crank Handle
Fasten with the cap screw. Figure 9. Crank handle installed. Model G0477 15" Planer/Moulder Test Run Once the assembly is complete, test run your machine to make sure it runs properly. -
Page 18: Section 4: Operations
OMMEND that you read books, trade maga- zines, or get formal training before begin- ning any projects. Regardless of the con- tent in this section, Grizzly Industrial will not be held liable for accidents caused by lack of training. -16-... -
Page 19: Operation Tips
Model G0477 15" Planer/Moulder • Avoid planing wood with a high water con- tent. Wood with more than 20% moisture... -
Page 20: Headstock Height Adjustment
Preset Thickness Settings The Model G0477 features a preset thickness knob, which prevents the headstock from moving any lower than the desired workpiece thickness. To use the preset depth gauge (Figure 14): Raise the headstock to allow room for the workpiece. -
Page 21: Roller Height Adjustment
�������������� ������ ������ ���������� ������� � ������� Model G0477 15" Planer/Moulder The Model G0477 features three infeed/outfeed roller height settings. The provided special wrench is used to turn the roller height adjuster, as shown in Figure 16. Figure 16. Roller height adjuster. -
Page 22: Moulding Knives
Moulding Knives Tools Needed: Wrench 8mm ... 1 The G0477 has two moulding knife slots. Each slot can accommodate two different moulding knives at the same time. However, both moulding knife slots must be set up identically for a suc- cessful moulding operation. -
Page 23: Setting Up Moulding Guide Fence
Figure 21. Extension Table Clamp Screw Figure 21. Clamp installation. Model G0477 15" Planer/Moulder Adjusting Moulding Guide Fence To adjust the guide fences to fit a workpiece: UNPLUG THE PLANER/MOULDER FROM THE POWER SOURCE! Place the workpiece flush against the center guide. - Page 24 ����� �� �������� �������� ������� ���� Figure 22. Guide Fence Plan (shown at approx. 30% size). -22- ���� ���� ����� �� ������� ������� �������� Guide Board ������ ������ Base Board Wing Bolt Flat Washer Threaded Inserts Model G0477 15" Planer/Moulder...
-
Page 25: Section 5: Accessories
Knives come in sets of three. G4548 G4564 G4520 G4553 G4547 G4540 G4542 G4543 G4534 G4560 G4535 G4529 G4532 G4530 Model G0477 15" Planer/Moulder G4549 G4554 G4555 G4541 G4521 G4559 G4558 G4545 G4544 G4539 G4527 G4536 G4537 G4550 G4561... -
Page 26: Section 6: Maintenance
Inspect all chains, sprockets, and gears and lubricate as necessary. Cleaning Cleaning the Model G0477 is relatively easy. Vacuum excess wood chips and sawdust, and wipe off the remaining dust with a dry cloth. If any resin has built up, use a resin dissolving cleaner to remove it. -
Page 27: Section 7: Service
2. Dust collector fan is hitting the cover. 3. Belt(s) damaged. Vibration when running or cutting. 1. Loose or damaged moulding or plan- 2. Damaged belt(s). 3. Worn cutterhead bearings. Model G0477 15" Planer/Moulder tions. appliances, and other motors. restricted. tions. or loose. - Page 28 3. Replace cutterhead bearings. 1. Replace the knives (Page 27) or have them professionally sharpened. 2. Increase the feed rate. 3. Increase the depth of cut. 1. Ensure guide boards are parallel and adjusted correctly (Page 21) Model G0477 15" Planer/Moulder...
-
Page 29: Changing Planing Knives
Tools Needed: Wrench 10mm ... 1 Hex Wrench 4mm ... 1 The Model G0477 features double-edged plan- ing knives that can be reversed when one edge becomes dull. Follow these instructions when reversing or replacing knives. -
Page 30: Changing Belts
Tools Needed: Hex Wrench 4mm ... 1 Hex Wrench 5mm ... 1 The Model G0477 features two ribbed belts, shown in Figure 26, that are generally good for the life of the machine. However, there are some instances where these belts must be replaced. -
Page 31: Changing Motor Brushes
Steps 4–6 above. Check chain lubrication. Refer to SECTION 6: MAINTENANCE on Page 24 for further details. Model G0477 15" Planer/Moulder Changing Motor Brushes Tools Needed: Flat Head Screwdriver ... 1 If the motor fails to develop full power or other- wise appears to run sluggishly, the motor brushes may need to be replaced. -
Page 32: Electrical Components
Electrical Components Power Switch Circuit Breaker Figure 29. Rear of power switch and circuit breaker (switch assembly inverted). -30- Model G0477 15" Planer/Moulder... -
Page 33: Wiring Diagram
����� ����� ����� �� �� ����� ������ ���������� �� �� �� �� �� Model G0477 15" Planer/Moulder Wiring Diagram ����� ����� ������ ������� ������� �� �� ���� ����� ��� �� �� �� ������ �� �� ��� ��� �� �� �������... -
Page 34: G0477 Body Breakdown
��� ��� ��� ��� ��� ��� ��� ��� ��� ��� ��� ��� ��� ��� ��� ��� ��� ��� ��� ��� ��� ��� ��� ��� ��� ��� ��� ��� ��� ��� ��� ��� ��� Model G0477 15" Planer/Moulder ��� ��� ���... -
Page 35: G0477 Table And Base Breakdown
G0477 Table and Base Breakdown -33- Model G0477 15" Planer/Moulder... -
Page 36: G0477 Gearbox Breakdown
����� -34- �� �� �� �� �� �� �� �� �� �� �� �� �� �� �� �� �� �� �� �� �� �� �� �� �� �� �� �� �� �� �� �� �� �� Model G0477 15" Planer/Moulder... -
Page 37: G0477 Stand Breakdown
G0477 Stand Breakdown ��� ��� ��� ��� ��� ��� ��� ��� ��� ��� ��� ��� ��� ��� ��� ��� ��� ��� -35- Model G0477 15" Planer/Moulder... -
Page 38: G0477 Labels
MUST maintain the original location and readability of the labels on the machine. If any label is removed or becomes unreadable, REPLACE that label before using the machine again. Contact Grizzly at (800) 523-4777 or www.grizzly.com to order new labels. -36-... -
Page 39: Parts List
GEAR PSB20M CAP SCREW M5-.8 X 14 PSB04M CAP SCREW M6-1 X 10 PW03M FLAT WASHER 6MM P0477049 SPROCKET P0477050 IDLER SEAT Model G0477 15" Planer/Moulder Parts List REF PART # PR05M P0477052 PSB152M P0477054 P6002 P0477056 P0477057 P0477058 PSB108M... - Page 40 V-BELT 160J3 P0477191 CUTTERHEAD EXTEND PULLEY PSB15M CAP SCREW M5-.8 X 20 P0477193 BUSHING P0477194 SET BLOCK P0477195 EXTENSION SPRING P0477196 COMPRESSION SPRING P0477197 BEARING BLOCK P0477198 ROLLER P0477199 COMPRESSION SPRING PR05M EXT RETAINING RING 15MM Model G0477 15" Planer/Moulder...
- Page 41 PSB06M CAP SCREW M6-1 X 25 PN01M HEX NUT M6-1 PB10M HEX BOLT M6-1 X 25 P6000 BALL BEARING 6000ZZ Model G0477 15" Planer/Moulder REF PART # DESCRIPTION P0477251 BEARING RETAINER PFB14M FLANGE BOLT M5-.8 X 12 P0477253 SPINDLE WASHER...
- Page 42 ELECTRICITY LABEL P0477327 FEED ROLLER CAUTION LABEL PLABEL-12 READ MANUAL 2" X 3-5/16" P0477329 SPEED CHANGE CAUTION LABEL P0477330 CRANK HANDLE LABEL P0477331 CUTTERHEAD WARNING LABEL P0477332 POWER ADJUST LABEL P0477333 GRIZZLY.COM LABEL 1" X 4-1/4" Model G0477 15" Planer/Moulder...
-
Page 43: Warranty And Returns
WARRANTY AND RETURNS Grizzly Industrial, Inc. warrants every product it sells for a period of 1 year to the original purchaser from the date of purchase. This warranty does not apply to defects due directly or indirectly to misuse, abuse, negligence, accidents, repairs or alterations or lack of maintenance. - Page 45 ���������������������������������������������������������������������������������� � ������������������������������������������������������������������������������������ ����� ����������������������� ������ � ������������������������ ���� ��������������������� ���������������������������� ������ ������������������������ ���������� � ���������������� ���������������������������� ������������������������������� ��������������������������� ��� ��������� ����������� �� ����� �� � ��������� ������ �� ���� �� ���� ��� ��������� �������� �� ���� �� ������� ������ �������� ��� ��������� �� ������� ��� ����������� �� �������� ������������� ���...
- Page 46 ���������������������� ���������������������� ����������������������������������� ����������������������������������� ������������������������������������� �������������������������������������� ������� ����������� ���� ���� ��� ���� ����������� �� ���������� �������������������������������������� ����� ����� ����...
- Page 48 ��� ������ ��� ���� ���� ������� ����� ��� ������� ����� ��� �������� ��� ������� � � � ���� ����� ��� � � �������� ������ ��� � ����� ������ � �� ��� �������� ������� � ������ �������� ������ ������� ������ �� ����� ������...
Need help?
Do you have a question about the G0477 and is the answer not in the manual?
Questions and answers