Table of Contents
Advertisement
Quick Links
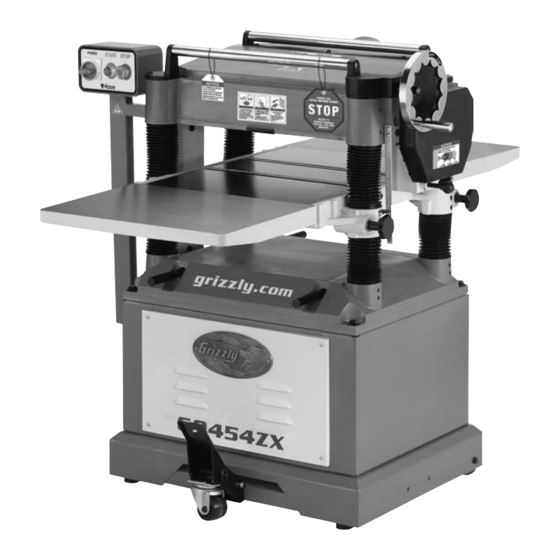
MODEL G0453ZX/G0454ZX
15" & 20" PLANER
w/SPIRAL CUTTERHEAD
OWNER'S MANUAL
(For models manufactured since 01/24)
COPYRIGHT © MAY, 2023 BY GRIZZLY INDUSTRIAL, INC., REVISED FEBRUARY, 2024 (MN)
WARNING: NO PORTION OF THIS MANUAL MAY BE REPRODUCED IN ANY SHAPE
OR FORM WITHOUT THE WRITTEN APPROVAL OF GRIZZLY INDUSTRIAL, INC.
#MNLW22721 PRINTED IN CHINA
V2.02.24
***Keep for Future Reference***
Advertisement
Table of Contents

Related Manuals for Grizzly G0453ZX


Summary of Contents for Grizzly G0453ZX
- Page 1 OWNER'S MANUAL (For models manufactured since 01/24) COPYRIGHT © MAY, 2023 BY GRIZZLY INDUSTRIAL, INC., REVISED FEBRUARY, 2024 (MN) WARNING: NO PORTION OF THIS MANUAL MAY BE REPRODUCED IN ANY SHAPE OR FORM WITHOUT THE WRITTEN APPROVAL OF GRIZZLY INDUSTRIAL, INC.
- Page 2 This manual provides critical safety instructions on the proper setup, operation, maintenance, and service of this machine/tool. Save this document, refer to it often, and use it to instruct other operators. Failure to read, understand and follow the instructions in this manual may result in fire or serious personal injury—including amputation, electrocution, or death.
-
Page 3: Table Of Contents
Controls & Components ......... 4 Heights ............41 Internal Components ........5 Adjusting Feed Roller Spring Tension .... 44 Machine Data Sheet (G0453ZX) ....6 Positioning Chip Deflector ......45 Machine Data Sheet (G0454ZX) ....8 Calibrating Table Height Scale ...... 45 Tensioning Table Height Chain ...... -
Page 4: Introduction
Always consider safety first, as it applies to your individual working conditions. Use this and other machinery with caution and respect. Failure to do so could result in serious personal injury, damage to equip- ment, or poor work results. Model G0453ZX/G0454ZX (Mfd. Since 01/24) -
Page 5: Identification
Table Foot Pedal Height Scale Feed Rate Control Knob Lifting Bars Table Lock (2 of 4) (1 of 2) G0454ZX Shown To reduce your risk of serious injury, read this entire manual BEFORE using machine. Model G0453ZX/G0454ZX (Mfd. Since 01/24) -
Page 6: Controls & Components
Figure 2. G0453ZX control panel. Operation Controls G. POWER Switch: Turns incoming power ON and OFF. Remove orange key to disable switch. -
Page 7: Internal Components
D. Cutterhead: Holds indexable carbide inserts Planer Table: Provides a smooth and level that remove material from workpiece. path for workpiece as it moves through planer. E. Chip Deflector: Directs chips into dust hood. Model G0453ZX/G0454ZX (Mfd. Since 01/24) -
Page 8: Machine Data Sheet (G0453Zx)
MACHINE DATA SHEET Customer Service #: (570) 546-9663 · To Order Call: (800) 523-4777 · Fax #: (800) 438-5901 MODEL G0453ZX 15" PLANER WITH SPIRAL CUTTERHEAD Product Dimensions: Weight................................602 lbs. Width (side-to-side) x Depth (front-to-back) x Height............... 37 x 42-1/2 x 45-1/2 in. - Page 9 The information contained herein is deemed accurate as of 2/22/2024 and represents our most recent product specifications. Model G0453ZX PAGE 2 OF 3 Due to our ongoing improvement efforts, this information may not accurately describe items previously purchased. Model G0453ZX/G0454ZX (Mfd. Since 01/24)
-
Page 10: Machine Data Sheet (G0454Zx)
The information contained herein is deemed accurate as of 2/12/2024 and represents our most recent product specifications. Model G0454ZX PAGE 1 OF 2 Due to our ongoing improvement efforts, this information may not accurately describe items previously purchased. Model G0453ZX/G0454ZX (Mfd. Since 01/24) - Page 11 The information contained herein is deemed accurate as of 2/12/2024 and represents our most recent product specifications. Model G0454ZX PAGE 2 OF 2 Due to our ongoing improvement efforts, this information may not accurately describe items previously purchased. Model G0453ZX/G0454ZX (Mfd. Since 01/24)
-
Page 12: Section 1: Safety
Never operate under the influence of drugs or injury or blindness from flying particles. Everyday alcohol, when tired, or when distracted. eyeglasses are NOT approved safety glasses. -10- Model G0453ZX/G0454ZX (Mfd. Since 01/24) - Page 13 EXPERIENCING DIFFICULTIES. If at any time debris. Make sure they are properly installed, you experience difficulties performing the intend- undamaged, and working correctly BEFORE ed operation, stop using the machine! Contact our operating machine. Technical Support at (570) 546-9663. -11- Model G0453ZX/G0454ZX (Mfd. Since 01/24)
-
Page 14: Additional Safety For Planers
GRAIN DIRECTION. Planing across grain is hard on planer and may cause kickback. Plane in same direction or at a slight angle with wood grain. -12- Model G0453ZX/G0454ZX (Mfd. Since 01/24) -
Page 15: Section 2: Power Supply
-13- Model G0453ZX/G0454ZX (Mfd. Since 01/24) - Page 16 Additionally, it must service personnel, and it must comply with meet the following size requirements: all local codes and ordinances. Minimum Gauge Size ......10 AWG Maximum Length (Shorter is Better) ..50 ft. -14- Model G0453ZX/G0454ZX (Mfd. Since 01/24)
-
Page 17: Section 3: Setup
• Disposable Gloves ..... As Needed • Lifting Straps Wear safety glasses during Rated for at least 1,000 lbs. (G0453ZX) ..2 the entire setup process! Rated for at least 1,200 lbs. (G0454ZX) ..2 • Lifting Equipment Rated for at least 1,000 lbs. (G0453ZX) ..1 Rated for at least 1,200 lbs. -
Page 18: Inventory
Indexable Carbide Inserts 14 x 14 x 2mm .. 3 U. Torx Bits T-20 ..........2 Hex Wrenches 3, 4, 5, 6mm ....1 Ea. W. Open-End Wrenches 8/10, 12/14, 17/19mm ......1 Ea. X. T-Handle Torx Wrenches T-20 ....2 Figure 7. Box inventory. -16- Model G0453ZX/G0454ZX (Mfd. Since 01/24) -
Page 19: Cleanup
Figure 8. T23692 Orange Power Degreaser. Repeat Steps 2–3 as necessary until clean, then coat all unpainted surfaces with a quality metal protectant to prevent rust. -17- Model G0453ZX/G0454ZX (Mfd. Since 01/24) -
Page 20: Site Considerations
Wall Min. 30" for Maintenance Model G0453ZX X = 42½" Y = 37" Feed Direction Model G0454ZX X = 56" Y = 44" = Electrical Connection Figure 9. Minimum working clearances. -18- Model G0453ZX/G0454ZX (Mfd. Since 01/24) -
Page 21: Lifting & Placing
Figure 11. Hand-tighten for now. other people. Each piece of lifting equipment must be rated for at least 1,000 lbs. (G0453ZX)/1200 Thread (3) M8-1.25 x 20 set screws into each lbs. (G0454ZX) to support dynamic loads that extension wing (see Figure 11). - Page 22 (see Figure 14). Handwheel Handle Crosspiece Figure 12. Handwheel components installed. Attach dust hood to planer with (6) M6-1 x 12 flange bolts (see Figure 13). Figure 14. Foot pedal installed. Figure 13. Dust hood installed. -20- Model G0453ZX/G0454ZX (Mfd. Since 01/24)
-
Page 23: Dust Collection
Figure 15. Dust hose attached to dust port. -21- Model G0453ZX/G0454ZX (Mfd. Since 01/24) -
Page 24: Test Run
To test run machine: Clear all setup tools and loose objects away from machine. Figure 18. Removing switch key from paddle Move POWER switch to OFF position. switch. -22- Model G0453ZX/G0454ZX (Mfd. Since 01/24) -
Page 25: Recommended Adjustments
After approximately 16 hours of opera- tion, V-belt will stretch and seat into pulley grooves and need to be properly tensioned to avoid severely reducing life of V-belt. Refer to Tensioning/Replacing V-Belt on Page 40 for detailed instructions. -23- Model G0453ZX/G0454ZX (Mfd. Since 01/24) -
Page 26: Section 4: Operations
Read books/magazines or get formal training before beginning any proj- OFF. ects. Regardless of the content in this sec- tion, Grizzly Industrial will not be held liable for accidents caused by lack of training. -24- Model G0453ZX/G0454ZX (Mfd. Since 01/24) -
Page 27: Workpiece Inspection
On the contrary, a Figure 19. Janka Hardness Rating for some workpiece supported on the bowed side common wood species. will rock during operation and could cause severe injury from kickback. -25- Model G0453ZX/G0454ZX (Mfd. Since 01/24) -
Page 28: Planing Tips
Always true cupped or warped stock on a • jointer before planing. -26- Model G0453ZX/G0454ZX (Mfd. Since 01/24) -
Page 29: Depth Of Cut
Indicator & feed roller pressure or excessive feed rate. Scale Figure 20. Depth of cut indicator and scale. Solution: Reduce outfeed roller pressure; reduce feed rate. -27- Model G0453ZX/G0454ZX (Mfd. Since 01/24) -
Page 30: Setting Feed Rate
Figure 21. Feed rate control knob positions. results. NOTICE Only change the feed rate when the planer is running, but DO NOT attempt to change the feed rate during any cutting operations or damage to the gearbox will result. -28- Model G0453ZX/G0454ZX (Mfd. Since 01/24) -
Page 31: Rotating/Replacing Cutterhead Inserts
Rotating/Replacing Tools Needed Hex Wrench 3mm ..........1 Cutterhead Inserts Wrench or Socket 12mm (G0453ZX) ....1 Wrench or Socket 14mm (G0454ZX) ....1 Rotacator (Optional) .......... 1 The spiral cutterhead is equipped with indexable To adjust bed roller height: carbide inserts that can be rotated to reveal any one of their four cutting edges. - Page 32 Dirt or dust trapped between insert and cutterhead will raise insert, and make marks on your workpiece when planing. Tip: Use low-pressure compressed air or a vacuum nozzle to clean out cutterhead pocket. -30- Model G0453ZX/G0454ZX (Mfd. Since 01/24)
-
Page 33: Section 5: Accessories
To reduce this risk, only install accessories recommended for this machine by Grizzly. NOTICE Refer to our website or latest catalog for additional recommended accessories. W1218A—Rotacator™ Precision Planer Tool... - Page 34 Figure 30. Heavy-duty roller tables. Figure 29. Model G0862 3 HP Portable Cyclone Dust Collector. -32- Model G0453ZX/G0454ZX (Mfd. Since 01/24)
-
Page 35: Section 6: Maintenance
To reduce risk of shock or accidental startup, always disconnect machine from power before adjustments, Cleaning the Model G0453ZX/G0454ZX is rela- maintenance, or service. tively easy. Vacuum excess wood chips and saw- dust, and wipe off the remaining dust with a dry cloth. - Page 36 (see Figure 34). Use shop rags and mineral spirits to clean away debris and grime, then brush a light coat of multi-purpose Figure 32. T26419 Syn-O-Gen Synthetic grease onto the chain and sprockets. Grease. -34- Model G0453ZX/G0454ZX (Mfd. Since 01/24)
- Page 37 Replace the gearbox oil with ISO 320 or equiva- lent oil until it just reaches the fill plug. Figure 37. Location of drive chains and sprockets. Drain Plug Figure 35. Location of gearbox drain plug. -35- Model G0453ZX/G0454ZX (Mfd. Since 01/24)
-
Page 38: Checking Anti-Kickback Fingers
Proper operation of anti-kickback fingers is critical for safe operation of this planer. DO NOT operate planer if anti-kickback fingers are not operating correctly. Failure to heed this warning could result in serious personal injury. -36- Model G0453ZX/G0454ZX (Mfd. Since 01/24) -
Page 39: Section 7: Service
2. Rotate STOP button head to reset. Replace if at fault power supply (G0454ZX only). only). breaker 3. Switch disabling key removed (G0453ZX 3. Install switch disabling key (G0453ZX only). immediately only). trips after 4. Machine circuit breaker tripped or at fault 4. Reset circuit breaker (G0454ZX only). - Page 40 3. Feeding workpiece too fast. 3. Reduce feed rate (Page 28). 4. Mis-adjusted chip breaker/pressure bar. 4. Adjust height of chip breaker/pressure bar (Page 41). 5. Nicked, chipped, or dull insert. 5. Rotate/replace insert (Page 29). -38- Model G0453ZX/G0454ZX (Mfd. Since 01/24)
- Page 41 1. Reduce outfeed roller spring pressure (Page 44). on workpiece. (However, if reduced too much, workpiece may stop in Note: A certain middle of cut). amount of serration is inevitable with steel outfeed rollers. -39- Model G0453ZX/G0454ZX (Mfd. Since 01/24)
-
Page 42: Tensioning/Replacing V-Belts
Tools Needed Hex Nuts Hex Wrenches 4, 13mm ......1 Ea. Wrench or Socket 13mm ........1 Open-End Wrenches 18mm ......2 To tension/replace V-belts: DISCONNECT MACHINE FROM POWER! Figure 41. Location of motor mount. -40- Model G0453ZX/G0454ZX (Mfd. Since 01/24) -
Page 43: Feed Rollers, Chip Breaker & Pressure Bar Heights
Chip Pressure install cabinet cover and belt cover. Breaker (Bottom Dead Center) A & B Infeed Outfeed Roller Roller Figure 43. Planer component recommended clearances (illustration is not to scale). -41- Model G0453ZX/G0454ZX (Mfd. Since 01/24) - Page 44 Move feed speed knob to neutral position to allow infeed roller to freely rotate. Keeping Rotacator dial at "0", position it under right-hand side of infeed roller and find BDC of a knife/insert edge by rocking infeed roller back and forth. -42- Model G0453ZX/G0454ZX (Mfd. Since 01/24)
- Page 45 Adjustment Jam Nut & Set Screw Figure 48. Wood blocks properly positioned on Figure 47. Example of adjusting pressure bar the planer table. height. 14. Install belt cover, top cover, drive chain cover, and dust hood. -43- Model G0453ZX/G0454ZX (Mfd. Since 01/24)
-
Page 46: Adjusting Feed Roller Spring Tension
10. Repeat Steps 8–9 with outfeed roller, only adjust the gaps to 0.020". Tension 11. Install belt cover, top cover, and drive chain Screws cover. Figure 50. Location of roller spring tension adjustment screws. -44- Model G0453ZX/G0454ZX (Mfd. Since 01/24) -
Page 47: Positioning Chip Deflector
(see Figure 51) that secure chip deflector and adjust gap to correct setting. Re-tighten flange bolts, then replace belt cover, top cover, and dust port. -45- Model G0453ZX/G0454ZX (Mfd. Since 01/24) -
Page 48: Tensioning Table Height Chain
DO NOT let chain fall off sprockets. It can be very difficult to return chain to its proper When you are satisfied with pulley alignment, location on sprockets without changing tighten all fasteners, and replace belt cover table adjustments. and cabinet covers. -46- Model G0453ZX/G0454ZX (Mfd. Since 01/24) -
Page 49: Adjusting Table Parallelism
0.020". Remove cabinet panel and locate chain underneath table. FRONT-TO-BACK (Side View) Head Parallel Parallel Table Head NOT Parallel NOT Parallel Table Figure 56. Front-to-back parallelism of table and cutterhead. -47- Model G0453ZX/G0454ZX (Mfd. Since 01/24) - Page 50 Figure 58. Location of table micro-adjustment screws (one side shown only). Carefully rotate sprocket (clockwise to raise table; counterclockwise to lower table) just enough to position next tooth at marked loca- tion, then fit chain around sprocket again. -48- Model G0453ZX/G0454ZX (Mfd. Since 01/24)
-
Page 51: Tensioning Drive Chain
Remove drive chain cover to access drive chain components. Figure 59. Drive chain adjustment. Clean and lubricate chain and sprockets (refer to Drive Chain & Sprockets on Page 35), then install drive chain cover. -49- Model G0453ZX/G0454ZX (Mfd. Since 01/24) -
Page 52: Section 8: Wiring
Technical Support at (570) 546-9663. The photos and diagrams included in this section are best viewed in color. You can view these pages in color at www.grizzly.com. -50- Model G0453ZX/G0454ZX (Mfd. Since 01/24) -
Page 53: G0453Zx Wiring Diagram
KEDU HY18N 20A NHD NLB22-F10GI NHD NLB22-F11RI Magnetic Switch Start 13NO Capacitor Capacitor 70uF 300uF 300VAC 450VAC Contactor NHD C-25D 220V 14NO Ground OL Relay NHD NTH-32 220V Motor READ ELECTRICAL SAFETY -51- Model G0453ZX/G0454ZX (Mfd. Since 01/24) ON PAGE 50! -
Page 54: G0453Zx Electrical Components
G0453ZX Electrical Components Figure 60. Control panel wiring. Figure 62. Magnetic switch wiring. Figure 61. Motor wiring. READ ELECTRICAL SAFETY -52- Model G0453ZX/G0454ZX (Mfd. Since 01/24) ON PAGE 50! -
Page 55: G0454Zx Wiring Diagram
RHU-10M 97 NO 98 NO 95 NC 96 NC 97 NO 98 NO 95 NC 96 NC Start Capacitor 600uF 250VAC Transformer JUCHE JCY-63 220/24V Ground 220V Motor READ ELECTRICAL SAFETY -53- Model G0453ZX/G0454ZX (Mfd. Since 01/24) ON PAGE 50! -
Page 56: G0454Zx Electrical Components
G0454ZX Electrical Components Figure 63. Electrical box wiring. READ ELECTRICAL SAFETY -54- Model G0453ZX/G0454ZX (Mfd. Since 01/24) ON PAGE 50! - Page 57 Figure 64. Control box wiring. Figure 65. Motor junction box wiring. READ ELECTRICAL SAFETY -55- Model G0453ZX/G0454ZX (Mfd. Since 01/24) ON PAGE 50!
-
Page 58: Section 9: Parts
SECTION 9: PARTS We do our best to stock replacement parts when possible, but we cannot guarantee that all parts shown are available for purchase. Call (800) 523-4777 or visit www.grizzly.com/parts to check for availability. G0453ZX Headstock 53-1 53-2 42 43 -56- BUY PARTS ONLINE AT GRIZZLY.COM! - Page 59 DEPTH LIMITER P0453ZX125 SET SCREW M6-1 X 8 P0453ZX066 FLAT HD SCR M5-.8 X 12 P0453ZX126 SET SCREW M8-1.25 X 12 -57- BUY PARTS ONLINE AT GRIZZLY.COM! Model G0453ZX/G0454ZX (Mfd. Since 01/24) Scan QR code to visit our Parts Store.
-
Page 60: G0453Zx Table
SET SCREW M6-1 X 12 P0453ZX212 FLAT WASHER 8MM P0453ZX206 P0453ZX213 HEX BOLT M8-1.25 X 30 P0453ZX207 WEDGE DOG P0453ZX214 SET SCREW M8-1.25 X 20 -58- BUY PARTS ONLINE AT GRIZZLY.COM! Model G0453ZX/G0454ZX (Mfd. Since 01/24) Scan QR code to visit our Parts Store. -
Page 61: G0453Zx Columns
CAP SCREW M6-1 X 16 P0453ZX330 COLUMN SEAL P0453ZX315 BUSHING 14 X 40 X 20MM P0453ZX333 CHAIN 081-1 134 LINKS P0453ZX316 GEAR 24T -59- BUY PARTS ONLINE AT GRIZZLY.COM! Model G0453ZX/G0454ZX (Mfd. Since 01/24) Scan QR code to visit our Parts Store. -
Page 62: G0453Zx Gearbox
BALL BEARING 6204-2RS P0453ZX420 BALL BEARING 6201-2RS P0453ZX441 GEAR 14T P0453ZX421 PHLP HD SCR M6-1 X 8 P0453ZX442 CAP SCREW M6-1 X 20 -60- BUY PARTS ONLINE AT GRIZZLY.COM! Model G0453ZX/G0454ZX (Mfd. Since 01/24) Scan QR code to visit our Parts Store. -
Page 63: G0453Zx Stand
550-1 517-10 517-4 550-4 550-5 517-11 517-6 529-14 529-4 529-12 529-6 529-3 529-10 529-2 529-5 529-1 529-13 529-7 529-8 529-11 529-9 -61- BUY PARTS ONLINE AT GRIZZLY.COM! Model G0453ZX/G0454ZX (Mfd. Since 01/24) Scan QR code to visit our Parts Store. - Page 64 FLAT WASHER 14 X 30 X 3MM P0453ZX586 WRENCH 12 X 14MM OPEN-ENDS 529-3 P0453ZX529-3 CAPTIVE PIN 13MM P0453ZX587 WRENCH 17 X 19MM OPEN-ENDS -62- BUY PARTS ONLINE AT GRIZZLY.COM! Model G0453ZX/G0454ZX (Mfd. Since 01/24) Scan QR code to visit our Parts Store.
-
Page 65: G0453Zx Labels & Cosmetics
Safety labels help reduce the risk of serious injury caused by machine hazards. If any label comes off or becomes unreadable, the owner of this machine MUST replace it in the original location before resuming operations. For replacements, contact (800) 523-4777 or www.grizzly.com. -63- BUY PARTS ONLINE AT GRIZZLY.COM! -
Page 66: G0454Zx Headstock
P0454ZX005 HANDWHEEL 197D X 12B-K X M10-1.5 P0454ZX011 WORM HOUSING P0454ZX006 HANDWHEEL BUSHING P0454ZX012 CAP SCREW M6-1 X 60 P0454ZX007 INT RETAINING RING 32MM P0454ZX013 RETURN ROLLER -64- BUY PARTS ONLINE AT GRIZZLY.COM! Model G0453ZX/G0454ZX (Mfd. Since 01/24) Scan QR code to visit our Parts Store. - Page 67 123 P0454ZX123 FLAT HD CAP SCR M10-1.5 X 25 P0454ZX070 COMPRESSION SPRING 3.5 X 19 X 69MM 124 P0454ZX124 SET SCREW M10-1.5 X 12 -65- BUY PARTS ONLINE AT GRIZZLY.COM! Model G0453ZX/G0454ZX (Mfd. Since 01/24) Scan QR code to visit our Parts Store.
-
Page 68: G0454Zx Table
SET SCREW M6-1 X 12 P0454ZX212 FLAT WASHER 8MM P0454ZX206 P0454ZX213 HEX BOLT M8-1.25 X 30 P0454ZX207 WEDGE DOG P0454ZX214 SET SCREW M8-1.25 X 16 -66- BUY PARTS ONLINE AT GRIZZLY.COM! Model G0453ZX/G0454ZX (Mfd. Since 01/24) Scan QR code to visit our Parts Store. -
Page 69: G0454Zx Columns
BUTTON HD CAP SCR M6-1 X 8 P0454ZX315 BUSHING 14 X 38 X 20MM P0454ZX332 LEADSCREW COVER P0454ZX316 GEAR 24T P0454ZX333 CHAIN 08A-1 166 LINKS -67- BUY PARTS ONLINE AT GRIZZLY.COM! Model G0453ZX/G0454ZX (Mfd. Since 01/24) Scan QR code to visit our Parts Store. -
Page 70: G0454Zx Gearbox
P0454ZX421 BUTTON HD CAP SCR M6-1 X 10 P0454ZX443 FLAT WASHER 6 X 10 X 1MM COPPER P0454ZX422 FLAT WASHER 6MM -68- BUY PARTS ONLINE AT GRIZZLY.COM! Model G0453ZX/G0454ZX (Mfd. Since 01/24) Scan QR code to visit our Parts Store. -
Page 71: G0454Zx Stand
517-2 517-9 517-7 517-3 517-9 517-6 517-4 529-1 529-14 529-2 529-13 529-3 529-4 529-12 529-11 529-5 529-6 529-8 529-9 529-7 529-10 -69- BUY PARTS ONLINE AT GRIZZLY.COM! Model G0453ZX/G0454ZX (Mfd. Since 01/24) Scan QR code to visit our Parts Store. - Page 72 MOTOR CORD 3W 12G 35" 529-3 P0454ZX529-3 SHAFT 13MM P0454ZX578 GROUNDING PLATE 529-4 P0454ZX529-4 HEX BOLT M8-1.25 X 50 P0454ZX579 HEX NUT M6-1 -70- BUY PARTS ONLINE AT GRIZZLY.COM! Model G0453ZX/G0454ZX (Mfd. Since 01/24) Scan QR code to visit our Parts Store.
-
Page 73: G0454Zx Labels & Cosmetics (Front)
DIRECTION LABEL P0454ZX610 GRIZZLY NAME PLATE P0454ZX605 NOTICE LABEL P0454ZX611 SHIPPING HANG TAG P0454ZX606 TOUCH-UP PAINT, GRIZZLY GREEN P0454ZX612 ELECTRICITY LABEL -71- BUY PARTS ONLINE AT GRIZZLY.COM! Model G0453ZX/G0454ZX (Mfd. Since 01/24) Scan QR code to visit our Parts Store. -
Page 74: G0454Zx Labels & Cosmetics (Top)
Safety labels help reduce the risk of serious injury caused by machine hazards. If any label comes off or becomes unreadable, the owner of this machine MUST replace it in the original location before resuming operations. For replacements, contact (800) 523-4777 or www.grizzly.com. -72- BUY PARTS ONLINE AT GRIZZLY.COM! -
Page 75: Warranty & Returns
WARRANTY & RETURNS Grizzly Industrial, Inc. warrants every product it sells for a period of 1 year to the original purchaser from the date of purchase. This warranty does not apply to defects due directly or indirectly to misuse, abuse, negligence, accidents, repairs or alterations or lack of maintenance.
Need help?
Do you have a question about the G0453ZX and is the answer not in the manual?
Questions and answers