
Related Manuals for Yamaha Zuma YW125Y


Summary of Contents for Yamaha Zuma YW125Y
- Page 1 Read this manual carefully before operating this vehicle. OWNER’S MANUAL YW125Y LIT-11626-22-71 32S-F8199-10...
- Page 2 EAU10042 Q Read this manual carefully before operating this vehicle. This manual should stay with this vehicle if it is sold.
- Page 3 Yamaha dealer. The design and manufacture of this Yamaha scooter fully comply with the emissions standards for clean air applicable at the date of manufacture. Yamaha has met these standards without reducing the performance or economy of operation of the scooter.
- Page 4 EAU10122 IMPORTANT MANUAL INFORMATION EAU10132 Particularly important information is distinguished in this manual by the following notations: This is the safety alert symbol. It is used to alert you to potential personal injury hazards. Obey all safety messages that follow this symbol to avoid possible injury or death.
- Page 5 EAU10122 IMPORTANT MANUAL INFORMATION EAUT2191 YW125Y OWNER’S MANUAL ©2008 by Yamaha Motor Corporation, U.S.A. 1st edition, July 2008 All rights reserved. Any reprinting or unauthorized use without the written permission of Yamaha Motor Corporation, U.S.A. is expressly prohibited. Printed in Taiwan.
-
Page 6: Table Of Contents
EAU10210 TABLE OF CONTENTS LOCATION OF IMPORTANT FOR YOUR SAFETY - PRE-OPERATION Valve clearance ......6-15 LABELS ..........1-1 CHECKS ..........4-1 Tires ..........6-16 SAFETY INFORMATION ....1-3 Pre-operation check list ....4-2 Cast wheels ........6-17 Further safe-riding points ....1-7 Checking the front brake lever free OPERATION AND IMPORTANT RIDING play .......... - Page 7 SPECIFICATIONS ......8-1 CONSUMER INFORMATION ..... 9-1 Identification numbers ..... 9-1 Reporting safety defects ....9-3 Motorcycle noise regulation .... 9-4 Maintenance record ......9-5 YAMAHA MOTOR CORPORATION, U.S.A. RIVA LIMITED WARRANTY ......... 9-7 YAMAHA EXTENDED SERVICE (Y.E.S.) .......... 9-9...
-
Page 8: Location Of Important Labels
Read and understand all of the labels on your vehicle. They contain important information for safe and proper operation of your vehicle. Never remove any labels from your vehicle. If a label becomes difficult to read or comes off, a replacement label is available from your Yamaha dealer. - Page 9 EAU45762 LOCATION OF IMPORTANT LABELS 175kpa, {1.75kgf/cm },25psi 200kpa, {2.00kgf/cm },29psi 4JK-F8446-01 200kpa, {2.00kgf/cm },29psi 225kpa, {2.25kgf/cm },33psi 24P-F1668-00...
-
Page 10: Safety Information
Safety information<IXE> EAU10221 EAU10221 SAFETY INFORMATION SAFETY INFORMATION EAU10263 Safe Riding likely places for scooter Be a Responsible Owner Perform the pre-operation checks each accidents to occur. As the vehicle’s owner, you are respon- time you use the vehicle to make sure •... -
Page 11: Safety Information
EAU10221 SAFETY INFORMATION excessive speed or undercornering ● Never ride under the influence of feet. The engine or exhaust system (insufficient lean angle for the alcohol or other drugs. become very hot during or after ● speed). This scooter is designed for on-road operation and can cause burns. - Page 12 Yamaha accessories, which are avail- mize imbalance or instability. caution when adding cargo or accesso- able only from a Yamaha dealer, have ● Shifting weights can create a sud- ries to your scooter. Use extra care when been designed, tested, and approved by den imbalance.
- Page 13 • Certain accessories can specifically recommended by Yamaha, ing it to make sure that it does not displace the operator from his even if sold and installed by a Yamaha in any way reduce ground clear- or her normal riding position. dealer.
-
Page 14: Further Safe-Riding Points
Safe-riding points<IXE> EAU10221 SAFETY INFORMATION ate. Refer to page 6-16 for tire specifi- EAUT2030 sers (tapered around the cuff and Further safe-riding points cations and more information on replac- ankle so they do not flap), and a ● Make sure to signal clearly when ing your tires. - Page 15 EAU10221 SAFETY INFORMATION 1-15...
-
Page 16: Description
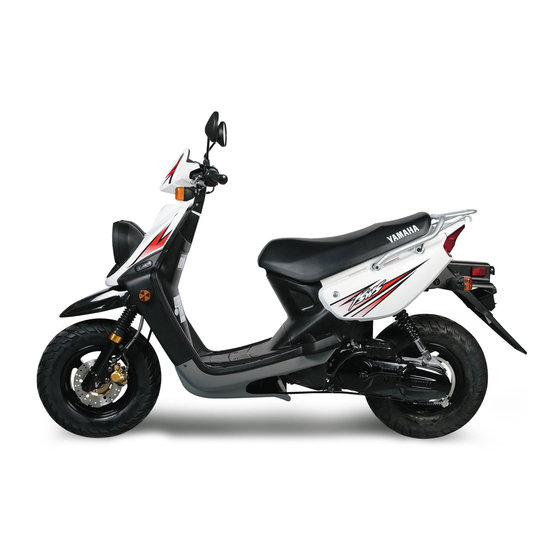
Part locations<IXE> EAU10401 EAU10401 DESCRIPTION DESCRIPTION EAU10410 Left view 1. Front turn signal light (page 6-28) 2. Battery (page 6-25) 3. Helmet holder (page 3-9) 4. Sidestand (page 3-10) 5. V-belt case air filter cover (page 6-13) 6. Centerstand (page 6-22) 7. -
Page 17: Right View
EAU10401 DESCRIPTION EAU10420 Right view 1. Tail/brake light (page 6-28) 2. Muffler (page 3-7) 3. Storage compartment (page 3-9) 4. Seat (page 3-8) 5. Fuel tank cap (page 3-5) 6. Spark plug (page 6-9) 7. Headlight (page 6-27) 2-17... -
Page 18: Controls And Instruments
EAU10401 DESCRIPTION EAU10430 Controls and instruments 1. Rear brake lever (page 6-18) 2. Left handlebar switches (page 3-4) 3. Speedometer unit (page 3-3) 4. Fuel gauge (page 3-3) 5. Brake fluid reservoir (page 6-20) 6. Right handlebar switches (page 3-4) 7. -
Page 19: Instrument And Control Functions
Main switch/steering lock<IXE> EAU1044D EAU1044D INSTRUMENT AND CONTROL FUNCTIONS INSTRUMENT AND CONTROL FUNCTIONS EAU45440 EAUT2270 EAU10681 Main switch/steering lock LOCK All electrical circuits are supplied with The steering is locked, and all electrical power, and the meter lighting and tail- systems are off. -
Page 20: Keyhole Cover
High beam indicator light<IXE> EAU1044D INSTRUMENT AND CONTROL FUNCTIONS To unlock the steering EAUT2111 EAU10980 Keyhole cover Indicator lights 1. Turn. 1. Turn signal indicator light “4 6” 1. Keyhole cover lever 2. Release. 2. High beam indicator light“&” To open the keyhole cover 3. -
Page 21: Speedometer Unit
This warning light flashes or stays on if an electrical circuit monitoring the en- gine is not working correctly. If this oc- curs, have a Yamaha dealer check the self-diagnosis system. The electrical circuit of the warning light can be checked by turning the key to “ON”. -
Page 22: Handlebar Switches
Start switch<IXE> EAU1044D INSTRUMENT AND CONTROL FUNCTIONS EAU12347 Right EAU12500 * ” Handlebar switches Horn switch “* Press this switch to sound the horn. Left EAU12660 Engine stop switch “# # # # # /$ $ $ $ $ ” Set this switch to “#”... -
Page 23: Front Brake Lever
Fuel tank cap<IXE> EAU1044D INSTRUMENT AND CONTROL FUNCTIONS EAU12900 EAU12950 EAU13041 Front brake lever Rear brake lever Fuel tank cap 1. Front brake lever 1. Rear brake lever 1. Fuel tank cap The front brake lever is located on the The rear brake lever is located on the To open the fuel tank cap right handlebar grip. -
Page 24: Fuel
Fuel<IXE> EAU1044D INSTRUMENT AND CONTROL FUNCTIONS EAU13221 on the vehicle. Never refuel while Fuel smoking, or while in the vicinity of The fuel tank cap cannot be closed un- sparks, open flames, or other less the key is in the lock. In addition, sources of ignition such as the pi- the key cannot be removed if the cap is lot lights of water heaters and... -
Page 25: Catalytic Converter
Fuel tank capacity: ● ● ● ● ● Park the motorcycle in a place mended by Yamaha because it can 6.0 L (1.59 US gal) (1.32 Imp.gal) where pedestrians or children cause damage to the fuel system or... -
Page 26: Seat
Seat<IXE> EAU1044D INSTRUMENT AND CONTROL FUNCTIONS ECA10701 EAUT2670 from “OFF” to “OPEN” or from “ON” to Seat NOTICE “OPEN”. Use only unleaded gasoline. The use of leaded gasoline will cause To close the seat unrepairable damage to the catalytic 1. Fold the seat down, and then push converter. -
Page 27: Helmet Holder
Storage compartment<IXE> EAU1044D INSTRUMENT AND CONTROL FUNCTIONS EAU14301 To release the helmet from the EAU14452 Helmet holder Storage compartment helmet holder Open the seat, remove the helmet from the helmet holder, and then close the seat. 1. Helmet holder 1. Storage compartment The helmet holder is located under the The storage compartment is located seat. -
Page 28: Sidestand
The sidestand is located on the left side tem regularly as described below and of the frame. Raise the sidestand or lower have a Yamaha dealer repair it if it it with your foot while holding the motor- does not function properly. -
Page 29: Ignition Circuit Cut-Off System
Ignition circuit cut-off system<IXE> EAU1044D INSTRUMENT AND CONTROL FUNCTIONS EAU45051 Ignition circuit cut-off system The ignition circuit cut-off system (com- prising the sidestand switch and brake light switches) has the following func- tions. 8 It prevents star ting when the sidestand is up, but neither brake is applied. -
Page 30: Instrument And Control Functions
WARNING With the engine turned off: 1. Move the sidestand down. If a malfunction is noted, have a Yamaha 2. Make sure that the engine stop switch is turned on. dealer check the system before riding. 3. Turn the key on. -
Page 31: For Your Safety - Pre-Operation Checks
Failure to inspect or maintain the vehicle properly increases the possibility of an accident or equipment damage. Do not operate the vehicle if you find any problem. If a problem cannot be corrected by the procedures provided in this manual, have the vehicle inspected by a Yamaha dealer. Before using this vehicle, check the following points:... -
Page 32: Pre-Operation Check List
• Make sure that operation is smooth. • Check cable free play. Throttle grip 6-15, 6-22 • If necessary, have Yamaha dealer adjust cable free play and lubricate cable and grip housing. • Make sure that operation is smooth. Control cables 6-22 •... - Page 33 • Check operation. 3-2, 3-4 and switches • Correct if necessary. Engine stop switch • Check operation. • Check operation of ignition circuit cut-off system. Sidestand switch 3-10 • If system is not working correctly, have Yamaha dealer check vehicle. 4-33...
-
Page 34: Operation And Important Riding Points
If the engine does not start, release is a control or function you do not un- NOTICE the start switch, wait a few sec- derstand, ask your Yamaha dealer. See page 5-3 for engine break-in in- onds, and then try again. Each EWA10271... -
Page 35: Starting Off
Braking<IXE> EAU15943 OPERATION AND IMPORTANT RIDING POINTS EAU16761 EAU16780 EAU16793 Starting off Acceleration and decelera- Braking tion EWA10300 WARNING Before starting off, allow the engine to ● ● ● ● ● warm up. Avoid braking hard or suddenly (especially when leaning over to one side), otherwise the scooter 1. -
Page 36: Tips For Reducing Fuel Consumption
If any engine trouble should occur Avoid prolonged operation above 1/3 during the engine break-in period, throttle. immediately have a Yamaha dealer After every hour of operation, stop the check the vehicle. engine, and then let it cool for five to ten minutes. -
Page 37: Parking
Parking<IXE> EAU15943 OPERATION AND IMPORTANT RIDING POINTS EAU17213 Parking When parking, stop the engine, and then remove the key from the main switch. EWA10311 WARNING ● ● ● ● ● Since the engine and exhaust system can become very hot, park in a place where pedestri- ans or children are not likely to touch them and be burned. -
Page 38: Periodic Maintenance And Adjustment
(if applicable). Yamaha deal- tivities incorrectly may increase your or wet conditions, the air filter ele- ers are trained and equipped to perform... -
Page 39: Owner's Tool Kit
Owner’s tool kit If you do not have the tools or experi- ence required for a particular job, have a Yamaha dealer perform it for you. 1. Owner’s tool kit The owner’s tool kit is located inside the storage compartment under the seat. -
Page 40: Periodic Maintenance Chart For The Emission Control System
Fuel injection • Check engine idle speed. • Check for leakage. Exhaust system • Tighten if necessary. • Replace gasket(s) if necessary. * Since these items require special tools, data and technical skills, have a Yamaha dealer perform the service. 6-40... -
Page 41: General Maintenance And Lubrication Chart
Maintenance and lubrication, periodic<IXE> EAU1722A PERIODIC MAINTENANCE AND ADJUSTMENT EAU32125 General maintenance and lubrication chart INITIAL ODOMETER READING 600 mi 2,000 mi 4,000 mi 6,000 mi 8,000 mi 10,000 mi (1,000 km) (4,000 km) (7,000 km) (10,000 km) (13,000 km) (16,000 km) ITEM ROUTINE... - Page 42 EAU1722A PERIODIC MAINTENANCE AND ADJUSTMENT INITIAL ODOMETER READING 600 mi 2,000 mi 4,000 mi 6,000 mi 8,000 mi 10,000 mi (1,000 km) (4,000 km) (7,000 km) (10,000 km) (13,000 km) (16,000 km) ITEM ROUTINE month months months months months months •...
- Page 43 • Adjust headlight beam. * Since these items require special tools, data and technical skills, have a Yamaha dealer perform the service. From 12000 mi (19000 km) or 36 months, repeat the maintenance intervals starting from 4000 mi (7000 km) or 12 months.
- Page 44 EAU1722A PERIODIC MAINTENANCE AND ADJUSTMENT EAUT2710 8 Air filter and V-belt filter 9 This model’s air filter is equipped with a disposable oil-coated paper element, which must not be cleaned with compressed air to avoid damaging it. 9 The air filter element needs to be replaced and V-belt filter needs to be serviced more frequently when riding in unusually wet or dusty areas.
-
Page 45: Removing And Installing Panels
Panel, removing and installing<IXE> EAU1722A PERIODIC MAINTENANCE AND ADJUSTMENT EAU18771 EAU19272 EAUT2532 Removing and installing Panel A Panel B To remove the panel To remove the panel panels Remove the screw, and then pull out- 1. Remove panel A. (See page 6-8.) The panels shown need to be removed ward on the areas shown. -
Page 46: Checking The Spark Plug
Do not attempt to diag- the specified torque. nose such problems yourself. Instead, have a Yamaha dealer check the vehicle. Tightening torque: Spark plug: 13 Nm (1.3 m • kgf, 9.4ft • lbf) -
Page 47: Engine Oil
Engine oil<IXE> EAU1722A PERIODIC MAINTENANCE AND ADJUSTMENT EAUT2592 3. Wait a few minutes until the oil Engine oil settles, remove the oil filler cap, If a torque wrench is not available when The engine oil level should be checked wipe the dipstick clean, insert it installing a spark plug, a good estimate before each ride. - Page 48 EAU1722A PERIODIC MAINTENANCE AND ADJUSTMENT Tightening torque: Engine oil drain bolt: 20 Nm (2.0 m • kgf, 14.5 ft • lbf) 5. Refill with the specified amount of the recommended engine oil, and then install and tighten the oil filler cap.
-
Page 49: Final Transmission Oil
Final transmission oil The final transmission case must be checked for oil leakage before each ride. If any leakage is found, have a Yamaha dealer check and repair the scooter. In addition, the final transmission oil must be changed as follows at the intervals specified in the periodic maintenance and lubrication chart. -
Page 50: Air Filter And V-Belt Case Air Filter Elements
Air filter and V-belt case air filter elements<IXE> EAU1722A PERIODIC MAINTENANCE AND ADJUSTMENT 7. Check the final transmission case EAUT2660 1. Place the scooter on the Air filter and V-belt case air for oil leakage. If oil is leaking, centerstand. filter elements check for the cause. - Page 51 The air filter element should be wet but not dripping. Recommended oil: Yamaha foam air filter oil or other quality foam air filter oil 1. V-belt air filter case cover 1. Air filter element 2. Screw 5.
-
Page 52: Checking The Engine Idling Speed
To prevent this from necessary, have it adjusted by a Yamaha occurring, the valve clearance must be dealer at the intervals specified in the adjusted by a Yamaha dealer at the in- periodic maintenance and lubrication tervals specified in the periodic mainte- chart. -
Page 53: Tires
* Total weight of rider, passenger, nail or glass fragments in it, or if the trol. cargo and accessories sidewall is cracked, have a Yamaha 8 8 8 8 8 The tire air pressure must be dealer replace the tire immediately. EWA10511... -
Page 54: Cast Wheels
Yamaha Motor Co., Ltd. tires, should be left to a Yamaha ened tire life. dealer, who has the necessary ● Ride at moderate speeds after... -
Page 55: Checking The Front Brake Lever Free Play
The brake lever free play should mea- lever end. If there is free play, have a sure 10 ~ 20 mm (0.39 ~ 0.79 in) as Yamaha dealer inspect the brake sys- shown. Periodically check the brake le- tem. ver free play and, if necessary, adjust it EWA14211 as follows. -
Page 56: Checking The Front Brake Pads And Rear Brake Shoes
The front brake pads and the rear brake Yamaha dealer replace the brake pads shoes must be checked for wear at the as a set. intervals specified in the periodic main- EAU22540 tenance and lubrication chart. -
Page 57: Checking The Brake Fluid Level
Observe these precautions: Checking the brake fluid level 8 When checking the fluid level, make limit line, have a Yamaha dealer replace sure that the top of the master cyl- the brake shoes as a set. inder is level by turning the handle- bars. -
Page 58: Changing The Brake Fluid
EAU23093 Changing the brake fluid Checking and lubricating the gradually go down. However, if the Have a Yamaha dealer change the brake cables brake fluid level goes down sud- fluid at the intervals specified in the TIP The operation of all control cables and... -
Page 59: Checking And Lubricating The Throttle Grip And Cable
If the centerstand or sidestand does Rear brake lever: not move up and down smoothly, Lithium-soap-based grease have a Yamaha dealer check or repair it. Otherwise, the centerstand or sidestand could contact the ground and distract the operator, resulting in... -
Page 60: Checking The Front Fork
1. Place the vehicle on a level sur- fork does not operate smoothly, have face and hold it in an upright posi- a Yamaha dealer check or repair it. tion. WARNING! To avoid injury, securely support the vehicle so there is no danger of it falling over. -
Page 61: Checking The Steering
If there is play in the wheel hub or periodic maintenance and lubrication if the wheel does not turn smoothly, chart. have a Yamaha dealer check the wheel 1. Place vehicle bearings. centerstand. -
Page 62: Battery
To charge the battery batteries. In case of contact, ad- minister the following FIRST AID. Have a Yamaha dealer charge the bat- 9 9 9 9 9 EXTERNAL: Flush with tery as soon as possible if it seems to plenty of water. -
Page 63: Replacing The Fuses
Fuses, replacing<IXE> EAU1722A PERIODIC MAINTENANCE AND ADJUSTMENT To store the battery ECA16530 EAUT2681 Replacing the fuses NOTICE 1. If the vehicle will not be used for more than one month, remove the Always keep the battery charged. Stor- battery, fully charge it, and then ing a discharged battery can cause place it in a cool, dry place. -
Page 64: Replacing A Headlight Bulb
If a headlight bulb burns out, second intervals to initialize the idle ing than recommended to avoid have a Yamaha dealer replace it and, if speed control system. causing extensive damage to the necessary, adjust the headlight beam. -
Page 65: Tail/Brake Light
If the tail/brake light does not come on, 3. Insert a new bulb into the socket, have a Yamaha dealer check its electri- 1. Turn signal light Bulb push it in, and then turn it clock- cal circuit or replace the bulb. -
Page 66: Troubleshooting
However, should your scooter require any repair, take it to a Yamaha dealer, whose skilled technicians have the necessary tools, experience, and know-how to ser- vice the scooter properly. -
Page 67: Troubleshooting Chart
Remove the spark plug and check the electrodes. The engine does not start. Have a Yamaha dealer check the vehicle. Check the battery. 4. Battery The engine turns over The battery is good. -
Page 68: Scooter Care And Storage
Rust and corrosion can develop even if matte colored finished parts. Be sure ECA10781 high-quality components are used. A to consult a Yamaha dealer for ad- NOTICE rusty exhaust pipe may go unnoticed vice on what products to use before ●... -
Page 69: Scooter Care And Storage
EAU25991 SCOOTER CARE AND STORAGE sponges which have been in con- scratched, use a quality plastic 1. Clean the scooter with cold water tact with strong or abrasive clean- polishing compound after wash- and a mild detergent after the en- ing products, solvent or thinner, ing. -
Page 70: Storage
Contaminants on the brakes or tires ventilated room or covering it can cause loss of control. Consult a Yamaha dealer for advice on with a tarp, while it is still wet, ● ● ● ● ● Make sure that there is no oil or what products to use. - Page 71 EAU25991 SCOOTER CARE AND STORAGE from deteriorating. 4. Lubricate all control cables and the 3. Perform the following steps to pro- pivoting points of all levers and Make any necessary repairs before stor- tect the cylinder, piston rings, etc. pedals as well as of the sidestand/ ing the scooter.
-
Page 72: Specifications
Specifications<IXE> EAU26320 EAU26320 SPECIFICATIONS SPECIFICATIONS EAU2633P Engine oil Manufacturer Dimensions AISAN Type Overall length Spark plug (s) SAE 20W-40 or SAE 10W-30 1910 mm (75.2 in) Manufacturer/model Overall width 130 ˚ F DENSO / U22ESR-N 765 mm (30.1 in) Spark plug gap YAMALUBE 4 (10W-40) Overall height or SAE 10W-40... -
Page 73: Specifications
EAU26320 SPECIFICATIONS Manufacturer/model Front brake Voltage, capacity KENDA / K761 12 V, 6.5 Ah Type Rear tire Headlight Single disc brake Type Operation Bulb type Tubeless Right hand operation Halogen bulb Size Recommended fluid Bulb voltage, wattage x quantity 130 / 70 - 12 DOT 4 Headlight Manufacturer/model... -
Page 74: Consumer Information
Record the key identification number, vehicle identification number and model label information in the spaces provided below for assistance when ordering spare parts from a Yamaha dealer or for reference in case the vehicle is sto- len. KEY IDENTIFICATION NUMBER: 1. -
Page 75: Consumer Information
1. Model label The model label is affixed to the frame under the seat. (See page 3-8.) Record the information on this label in the space provided. This information will be needed when ordering spare parts from a Yamaha dealer. 9-75... -
Page 76: Reporting Safety Defects
If you believe that your vehicle has a defect which could cause a crash or could cause injury or death, you should immedi- ately inform the National Highway Traffic Safety Administration (NHTSA) in addition to notifying Yamaha Motor Corporation, U.S.A. If NHTSA receives similar complaints, it may open an investigation, and if it finds that a safety defect exists in a group of vehicles, it may order a recall and remedy campaign. -
Page 77: Motorcycle Noise Regulation
Noise regulation<IXE> EAU26343 CONSUMER INFORMATION EAU26560 Motorcycle noise regulation TAMPERING WITH NOISE CONTROL SYSTEM PROHIBITED: Federal law prohibits the following acts or the causing thereof: (1) The removal or rendering inoperative by any person other than for purposes of maintenance, repair, or replacement of any device or element of design incorporated into any new vehicle for the purpose of noise control prior to its sale or delivery to the ultimate purchaser or while it is in use or (2) the use of the vehicle after such device or element of design has been removed or rendered inoperative by any person. -
Page 78: Maintenance Record
Maintenance record<IXE> EAU26343 CONSUMER INFORMATION EAU26600 Maintenance record Copies of work orders and/or receipts for parts purchased and installed on your motorcycle will be required to document that maintenance has been completed in accordance with the emissions warranty. The chart below is printed only as a reminder that maintenance work is required. - Page 79 EAU26343 CONSUMER INFORMATION Maintenance Date of Servicing dealer Mileage Remarks interval service name and address 14000 mi (22000 km) or 42 months 16000 mi (25000 km) or 48 months 18000 mi (28000 km) or 54 months 20000 mi (31000 km) or 60 months 9-79...
-
Page 80: Yamaha Motor Corporation, U.s.a. Riva Limited Warranty
Warranty, limited<IXE> EAU26343 CONSUMER INFORMATION EAU26681 YAMAHA MOTOR CORPORATION, U.S.A. RIVA LIMITED WARRANTY 9-80... - Page 81 EAU26343 CONSUMER INFORMATION 9-81...
-
Page 82: Yamaha Extended Service (Y.e.s.)
This excellent Y.E.S. plan coverage is only available to dealer to see how comforting uninterrupted factory- Yamaha owners like you, and only while your Yamaha is still backed protection can be. within the Yamaha Limited Warranty period. So visit your authorized Yamaha dealer to get all the facts. - Page 83 Yamaha Limited Warranty expires. A special note: If visiting your dealer isn’t convenient, contact Yamaha with your Primary ID number (your frame number). We’ll be happy to help you get the Y.E.S. coverage you need.
- Page 84 INDEX Fuel consumption, tips for reducing ..5-3 Pre-operation check list ......4-2 Fuel gauge ..........3-3 Acceleration and deceleration ....5-2 Fuel tank cap ..........3-5 Air filter and V-belt case air filter Rear brake lever free play, adjusting ..6-18 Fuses, replacing ........
- Page 85 INDEX Warranty, extended ........9-9 Warranty, limited ........9-7 Wheel bearings, checking ...... 6-24 Wheels ............ 6-17...
- Page 88 YAMAHA MOTOR TAIWAN CO., LTD PRINTED IN TAIWAN 2008.07-0.8× × × × × 1!
Need help?
Do you have a question about the Zuma YW125Y and is the answer not in the manual?
Questions and answers