Table of Contents
Advertisement
Quick Links
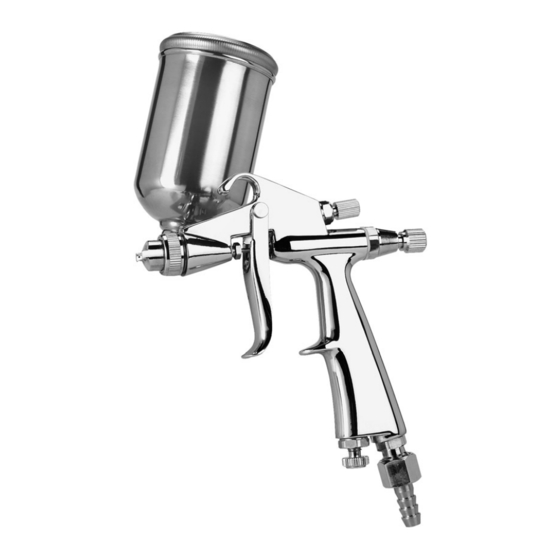
MODEL H8115/H8117
MINI SPRAY GUN
0.6MM & 0.8MM NOZZLE
OWNER'S MANUAL
Model H8115
Model H8117
COPYRIGHT © JANUARY, 2007 BY GRIZZLY INDUSTRIAL, INC.
WARNING: NO PORTION OF THIS MANUAL MAY BE REPRODUCED IN ANY SHAPE
OR FORM WITHOUT THE WRITTEN APPROVAL OF GRIZZLY INDUSTRIAL, INC.
#BL8891 PRINTED IN CHINA
Advertisement
Table of Contents

Related Manuals for Grizzly H8115


Summary of Contents for Grizzly H8115
- Page 1 OWNER'S MANUAL Model H8115 Model H8117 COPYRIGHT © JANUARY, 2007 BY GRIZZLY INDUSTRIAL, INC. WARNING: NO PORTION OF THIS MANUAL MAY BE REPRODUCED IN ANY SHAPE OR FORM WITHOUT THE WRITTEN APPROVAL OF GRIZZLY INDUSTRIAL, INC. #BL8891 PRINTED IN CHINA...
-
Page 3: Table Of Contents
SECTION 4: OPERATIONS ...11 Spraying ...11 Atomizing Cap and Fan Adjustments ...13 SECTION 5: ACCESSORIES...14 SECTION 6: MAINTENANCE ...15 Cleaning ...15 Lubrication ...16 Troubleshooting ...17 Notes ...19 Parts Breakdown H8115 ...20 Parts Breakdown H8117 ...21 WARRANTY AND RETURNS ...22 Model H8115/H8117 Spray Gun... -
Page 4: Section 1: Safety
USE THE RIGHT TOOL. Do not force tool or attachment to do a job for which it was not designed. INFLUENCE ALCOHOL. Model H8115/H8117 Spray Gun WORKSHOP CHILD UNDER DRUGS... -
Page 5: Safety Instructions For Pneumatic Tools
17. REDUCE UNINTENTIONAL SPRAYING. Do not carry tool with hand on trig- ger and always disconnect from air when not in use. Model H8115/H8117 Spray Gun 18. DISCONNECT TOOLS before ser- vicing and changing accessories. 19. USE ACCESSORIES. owner’s manual for recommended accessories. -
Page 6: Additional Safety Instructions For Spray Guns
NOT exceed the recommended inlet air pressure. Excessive pres- sure could cause the spray gun to blow seals or cause other internal equipment damage. 14. LOCAL authorities regarding exhaust and waste disposal requirements. PRESSURE. LAWS. Consult local Model H8115/H8117 Spray Gun... -
Page 7: Section 2: Introduction
SECTION 2: INTRODUCTION Foreword We are proud to offer the Grizzly Model H8115/H8117 Spray Gun, part of a grow- ing Grizzly family of fine pneumatic tools. When used according to the guidelines set forth in this manual, you can expect years of trouble-free, enjoyable operation, and proof of Grizzly’s commitment to customer... -
Page 8: Tool Data Sheet
45-60 PSI Stainless Steel " @ 8" Polished Metal/Plastic Small to Medium Liquid Particles H8117 150ml Gravity 0.8mm 5 CFM 3.0-4.0 BAR 43-60 PSI Stainless Steel " @ 8" Polished Metal/Plastic Small to Medium Liquid Particles Model H8115/H8117 Spray Gun... -
Page 9: Section 3: Set Up
Inventory After you have unpacked the carton you should find the following: Model H8115 Inventory (Figure 1): A. Spray Gun ..1 B. Cup 200 ml ... 1 C. Cleaning Brush ... 1 D. Service Wrench ... 1 E. -
Page 10: Controls
546-9663. -10- Controls Atomizing Cap ⁄ " Trigger Air Flow Control Figure 4. H8115 Controls. Atomizing Cap Trigger Air Flow Control Figure 5. H8117 Controls. Fluid Control: Controls the volume of material that travels through the fluid tip. Pattern Control: Adjusts the spray pattern from a round pattern to a wide fan. -
Page 11: Section 4: Operations
Model H8115/H8117 Spray Gun Spraying The Model H8115/H8117 is designed to spray liquids paints and lacquers that are low viscosity or have been thinned down. It is ideal for auto body touch-ups, wood- working projects, and projects with hard to reach areas. - Page 12 If it doesn't please refer to Troubleshooting on Page 17. 14. To orient the H8115 spray gun down- ward or upward, loosen the nut that secures the cup to the gun, adjust the gun angle and tighten the nut.
-
Page 13: Atomizing Cap And Fan Adjustments
Figure 10. Set up for vertical spray stroke, Model H8117. Rotating the pattern adjustment control in Figure 9 or 10 will give you a range between the two patterns in Figure 11. " 6"-8" Figure 11. Fan adjustment, Model H8115. -13-... -
Page 14: Section 5: Accessories
H3174—Air Blow Gun with 2 Tips This air blow gun includes a safety tip and rubber tip for all normal air cleaning jobs. ⁄ " NPT. Figure 15. H3174 Air Blow Gun with 2 Model H8115/H8117 Spray Gun pressure regulator. Tips. -
Page 15: Section 6: Maintenance
Atomizing Spring & Needle Figure 16. Typical disassembly for clean- ing. Model H8115/H8117 Spray Gun 5. Unscrew the atomizing cap with your fingers and the fluid tip with the ser- vice wrench. The fully disassembled gun should look like Figure 16. -
Page 16: Lubrication
Lubrication Lubricate the following areas on the Model H8115 (Figure 17) and Model H8117 (Figure 18) with spray oil, grease, or petroleum jelly after cleaning. A. Atomizing Cap Threads B. Air Valve Packing C. Trigger Pin D. Air Flow Control Valve E. -
Page 17: Troubleshooting
4. Material is too thin. No spray output. 1. No pressure at gun. 2. Fluid passages dirty. 3. Fluid control closed. 4. Out of paint. Model H8115/H8117 Spray Gun Troubleshooting Solution 1. Tighten fluid tip or replace seat with new one. 2. Add material. - Page 18 1. Lower inlet air pressure. 2. Keep gun at recommended distance. 3. Slow down and maintain consistent even parallel stroke. 1. Clean or replace both. 1. Install an in-line air filter, or replace air line. Model H8115/H8117 Spray Gun...
-
Page 19: Notes
Notes Model H8115/H8117 Spray Gun -19-... -
Page 20: Parts Breakdown H8115
PH8115032 ATOMIZING CAP PH8115033 ROUND NUT PH8115034 PAINT INLET PLUG PH8115035 PAINT INLET CONNECTOR PH8115036 BUTTERFLY NUT PH8115037 CUP KNOB PH8115038 LID PH8115039 CUP PH8115040 CLEANING BRUSH PH8115041 SERVICE WRENCH PH8115042 BARBED HOSE FITTING PH8115043 LOCK NUT Model H8115/H8117 Spray Gun... -
Page 21: Parts Breakdown H8117
PH8117018 O-RING 17 X 1.5 PH8117019 FLUID NOZZLE 0.8MM PH8117020 FLUID NOZZLE WASHER PH8117021 DIRECTION SCREW PH8117022 ADJ. NEEDLE WASHER PH8117023 WASHER PH8117024 COMPRESSION SPRING PH8117025 TRIGGER PIN I Model H8115/H8117 Spray Gun Parts Breakdown H8117 �� �� �� �� �� �� �� ��... -
Page 22: Warranty And Returns
WARRANTY AND RETURNS Grizzly Industrial, Inc. warrants every product it sells for a period of 1 year to the original purchaser from the date of purchase. This warranty does not apply to defects due directly or indirectly to misuse, abuse, negligence, accidents, repairs or alterations or lack of maintenance. - Page 23 ____20-29 ____50-59 How long have you been a woodworker/metalworker? ____0-2 Years How many of your machines or tools are Grizzly? ____0-2 Do you think your machine represents a good value? ____Yes Would you recommend Grizzly Industrial to a friend? ____Yes Would you allow us to use your name as a reference for our customers in your area? Note: We never use names more than 3 times.
- Page 24 Send a Grizzly Catalog to a friend: Name________________________________ Street________________________________ City______________State______Zip_______ FOLD ALONG DOTTED LINE GRIZZLY INDUSTRIAL, INC. P.O. BOX 2069 BELLINGHAM, WA 98227-2069 TAPE ALONG EDGES--PLEASE DO NOT STAPLE Place Stamp Here...
Need help?
Do you have a question about the H8115 and is the answer not in the manual?
Questions and answers