Table of Contents
Advertisement
Advertisement
Table of Contents

Related Manuals for Power Acoustik PTID-3200


Summary of Contents for Power Acoustik PTID-3200
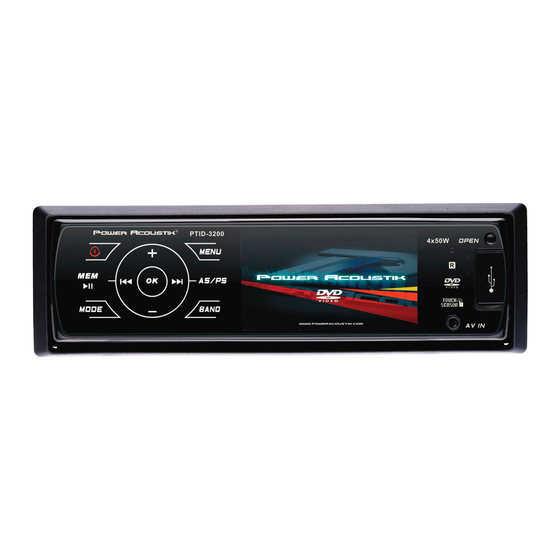
- Page 1 PTID-3200/ PTID-3200T In-Dash 3.2” Monitor Touch Sensor DVD/MP4/CD MW/FM Radio Built-in NTSC tuner Owner’s Manual Take the time to read through this owner’s manual. Familiarity with installation and operation procedures will help you obtain the best Performance from your new DVD-receiver.
-
Page 2: Table Of Contents
Table of Contents Table of Contents........................1 Important Safeguards.........................2 Accessories ........................3 Installation/Un-Installation ......................4 Wiring Connections..........................5 Detachable Control Panel ......................6 Panel Controls……………......................6 IR Remote Controls ........................8 General Operations........................9 Digital Tuner..........................11 Memory Card/ USB Operations......................12 Disc operations..........................14 MP3 overview..........................17 TV Operations............................18 Compatible Files ..........................19 SETUP Menu ......................19 Other Functions..........................21 Anti-theft system..........................21... -
Page 3: Important Safeguards
Important Safeguards Using the device at temperature below -10℃ may cause the breakage of the device. BEFORE USING PLEASE HEAT UP THE PASSENGER COMPARTMENT TO THE RECOMMENDED TEMPERATURE! Read carefully through this manual to familiarize yourself with this high-quality sound system. Disconnect the vehicle's negative battery terminal while mounting and connecting the unit. -
Page 4: Accessories
Accessories Package contains the following accessories for installation and operation of the unit. (1) Washer, Spring 1 each Washer, M5 Nut (2) Mounting Strap (3) Screw (4) Bolt (5) Mounting Collar (6) Release Key (7) Rubber Cushion AV in Cable Panel Carrying Case Owner’s Manual Remote Controller... -
Page 5: Installation/Un-Installation
Installation/Un-Installation First complete the electrical connections, and then check Lock lever (※) them for correctness. Installation This unit can be installed in any dashboard having an opening as shown on the picture. The dashboard should be 4.75 – 5.56 mm thick in order to be able to support the unit. -
Page 6: Wiring Connections
Wiring Connections Make sure you have good chassis ground. A good ground connection will eliminate most electrical noise problems. A good chassis ground requires a tight connection to the vehicle’s metal chassis. The area around the ground connection should be clean, bare metal without rust, paint, plastic, dust, or dirt for a good electrical connection. -
Page 7: Detachable Control Panel
Detachable Control Panel Detaching the control panel Turn the Power off. Press OPEN button release the panel. Pull the panel out. Attaching the control panel Insert the left side of the control panel into the main unit. Press the control panel right side until the “click” sound is heard. Caution: DO NOT insert the control panel from the right side. - Page 8 1. POWER/ MUTE 9. LCD 2. MODE 10. AV in jack 3. MENU 11. MEM/ 4. AS/PS 12. OK 5. Volume Up (+) 13. OPEN 6. NEXT 14. USB jack 7. IR sensor 15. BAND 8. PREVIOUS 16. Volume Down (-) Inner Panel 17.
-
Page 9: Ir Remote Controls
IR Remote Control 1. MODE 16. MENU 2. POWER 17. SUB-T 3. BND/RDM 18. SETUP 4. ENTER 19. ANGLE 5. Cursor / / / 20. INT 6. STEREO/MONO 21. VOL+ 7. LOC/ PROG 22. A-B/ZOOM 8. P.SCN/RPT 23. SEL 9. -
Page 10: General Operations
General Operations Reset the Unit In case the unit is malfunctioned or need to reset to factory default setting, press RESET button in inner panel then the unit will be reset. Power on/off Press “POWER” button to turn on the unit. Long press POWER button on front panel or press POWER button on RC to power off the unit. - Page 11 Press buttons on remote to adjust the audio setting data (or press the knob on front panel to adjust the setting data). Press SEL button on remote again to save the setting data and return to current mode. Notes: If turn off the power, all the settings of each mode will be saved. - If turn off the battery power, all the settings will be clear and become factory default setting.
-
Page 12: Digital Tuner
EXPERT MENU MENU DESCRIPTION Set search radio station by DX or LOCAL mode. DX→LOCAL STEREO Set radio audio at STEREO or MONO mode, STEREO→MONO BEEP Set press keys‘ sound. 2ND→ALL→OFF LOUD Set loudness on or off. OFF→ON SUBWOOFER Set subwoofer ON→OFF Set OSD BACKLIGHT: HIGHT→LOW →MID BACKLIGHT OSD COLOR... -
Page 13: Memory Card/ Usb Operations
Preset station 1-6 play and setting Play preset station: to play the preset station 1-6, you can press number key 1-6 on remote control, Preset station setting: during manual turning or automatic tuning, press and hold the number 1-6 buttons on remote to store the preset station 1-6 or press MEM button on front panel and rotate VOL knob to select the preset station 1-6 and press OK button to store. - Page 14 GOTO Function Long press AUDIO/GOTO button on remote control to show GOTO menu, use 0-9 to input track/ time to go to directly. Fast Forward and Backward b uttons and hold for two seconds to select the fast playing in backward or Press the forward in 2 times, press and hold for two seconds again for 4times, repeat this operation for 8 times =>...
-
Page 15: Disc Operations
Changing the Subtitle Language (only for MP4 files) Press SUB-T button on the remote to select the preferred language for sub-title. ZOOM (only for MP4 files) Press ZOOM button and hold for 2 seconds on remote to activate zoom function in the following sequences: ZOOM 2 =>... - Page 16 ISO 9660 or ISO 9660 +Joliet format - Max. 30 characters Max. Track number is 448 Max. nested directory is 8 levels The max. album number is 99 The max. length of each track is 99 minutes 59 seconds Supported sampling frequency for MP3 disc: 8 KHz to 48 (44.1 KHz preferably) KHz Supported bit-rates of MP3 disc are: 32 - 320 kbps (128 kbps preferably).
- Page 17 Repeat playback Press the RPT/P.SCN button on the RC once or more times to repeat the playback: - For VCD/CD: display appears Repeat Track => Repeat Disc => Off (Some discs do not support this functions). - For DVD: display appears Repeat Chapter => Repeat Title => Off - For File disc: display appears File =>...
-
Page 18: Mp3 Overview
Selecting different audio modes For DVD disc: press AUDIO on the RC repeatedly to select the audio language to listen (if the disc supports multi-language mode). For VCD disc: press AUDIO on the RC repeatedly to select the following modes: L R STEREO (Channel left =>... -
Page 19: Tv Operations
DO NOT store more than 448 MP3 files per disc. For ISO 9660 - compliant format, the maximum allowable depth of nested folders is 8, including the root directory (folder). When CD-R disc is used, playback is possible only for discs, which have been finalized. Make sure that when MP3 CD-R or CD-RW is burned that it is formatted as a data disc and NOT as an audio disc. -
Page 20: Compatible Files
Fine Select this menu item is to fine TV picture and sound until it achieves the best quality, press cursor left/right buttons on remote control to adjust. Memory Select memory on or off is to set whether memory the searched station or not, press press OK button on front panel or ENTER button on remote control to select. - Page 21 Rating For DVD discs which support rating system, setting up rating control can prevent children from watching content that might not be suitable to their age. Commonly used rating codes: Code Description None Kid safe General Audiences - All ages admitted PARENTAL GUIDANCE SUGGESTED - Some material may not be suitable for children PG-13...
-
Page 22: Other Functions
Video Setup: Brightness With this menu item you can set up the brightness of the image. Contrast With this menu item you can set up the contrast of the image. With this menu item you can set up the hue. Saturation With this menu item you can set up the color saturation. -
Page 23: Note On Discs
Note on Discs Only use groundless loudspeakers. Use only loudspeakers of minimal 40Watt, using fewer watts may result in damaging your loud speakers at higher volumes. Use 4~8 Ω (Ohm impedance) loudspeakers only; using higher or lesser impedance may damage the unit. -
Page 24: Troubleshooting Guide
Troubleshooting guide Symptom Cause Solution If the power supply is properly connected to General The car ignition is not on. the car No power The fuse is blown. accessory switch the ignition key to “ACC”. Replace the fuse. Disc Presence of disc inside the Remove the disc in the player then put a new Disc cannot be player... -
Page 25: Specification
Specification General Power supply: 12 V DC Current consumption: max. 10 A Maximum power output: 40W x 4 channels Compatible formats: DVD/SVCD/VCD/HDCD/MP3/MP4/WMA/CDDA/Picture-CD/JPEG/ CD-R/ -RW/DVD±R/±RW playback Dimensions (W x D x H) / 178 x 175 x 50 mm / 1.8 kg weight: ESP function: 40 sec.
Need help?
Do you have a question about the PTID-3200 and is the answer not in the manual?
Questions and answers