Table of Contents
Advertisement
Quick Links
Advertisement
Table of Contents

Related Manuals for Wow iQ 150

Summary of Contents for Wow iQ 150
- Page 1 User manual iQ 150 – Generation 21 Scieneo.amplio 2 2153-ENG / V-1.1-29/04/13...
-
Page 3: Limitation Of Liability
All Rights Reserved. The information in this document is subject to change without prior notice in order to improve reliability, design and function and does not represent a commitment on the part of the manufacturer. In no event will the manufacturer be liable for direct, indirect, special, incidental, or consequential damages arising out of the use or inability to use the product or documentation, even if advised of the possibility of such damages. -
Page 4: Table Of Contents
Heat Related Safety Notice ................7 Headset and Earphone Volume Level Notice ............8 Cleaning the Keyboard ..................8 Travel Notice....................8 Touring the WOW! 150 ..................9 Front ....................... 9 Left view ......................10 Right view ...................... 11 Back ......................12 Base ...................... -
Page 5: For Your Safety
For Your Safety Before using the IQ150, make sure that you understand the following precautions: Do not drop, crush, or step on the iQ150. Do not place objects or apply heavy pressure on the iQ150. Do not place on uneven or unstable work surfaces. Do not block the openings provided for ventilation, as overheating may occur. -
Page 6: Caring For Your Iq150
1.1 Caring for Your iQ150 To avoid electrical shock or damage to the unit… Disconnect power from the computer by unplugging the power cord from the AC outlet (not by unplugging the power cord from the computer). Be sure not to clean the computer when it is plugged into a wall socket. -
Page 7: Regulatory Information
1.2 Regulatory Information Product: scieneo.amplio 2 (iQ150) Model No.: EC10IS2 Applicant: Elitegroup Computer Systems Co., LTD European Notice Products with the CE Marking comply with both the EMC Directive (2004/108/EC) and the Low Voltage Directive (2006/95/EC) and R&TTE Directive (1999/5/EC) issued by the Commission of the European Community. -
Page 8: Information On The Power Cord
1.3 Information on the Power Cord To reduce the risk of electric shock or damage to the equipment: Plug the power cord into an AC outlet that is easily accessible at all times. Disconnect power from the computer by unplugging the power cord from the AC outlet (not by unplugging the power cord from the computer). -
Page 9: Lithium Battery Warning / Bridge Battery Warning
When discarding a battery pack, contact your local waste disposal provider regarding local restrictions on the disposal or recycling of batteries. Use only supplied AC Adapter for charging CAUTION! Danger of explosion if battery is incorrectly replaced. Only qualified service technicians should replace and discard the battery pack. Replace only with same or equivalent type recommended by the manufacturer. -
Page 10: Headset And Earphone Volume Level Notice
1.7 Headset and Earphone Volume Level Notice Listening to music at high volume levels and for extended durations can damage one's hearing. To reduce the risk of hearing damage, lower the volume to a safe, comfortable level and reduce the amount of time listening at high levels. -
Page 11: Touring The Wow! 150
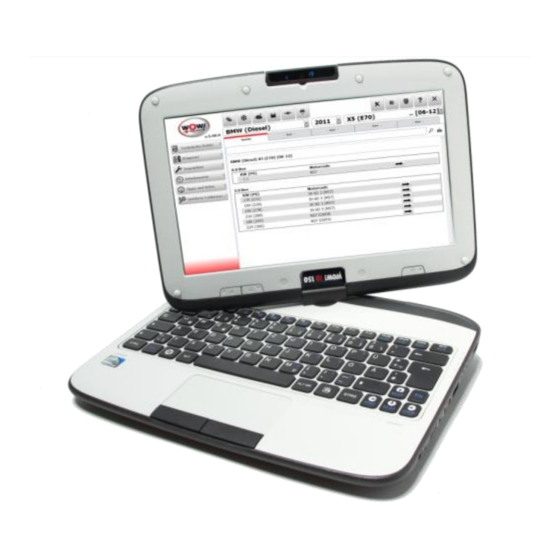
Touring the WOW! 150 2.1 Front Built-in rotating camera Use the Built-in rotating camera for video conferencing. Microphone The microphone is used when you are having an audio/video conference with the other party. LCD display Contents of the current system operation are displayed here. -
Page 12: Left View
Touch pad Use the touch pad and two buttons as a mouse. See “Using The Touch Pad”. Touchpad Buttons Works like the two buttons on an ordinary mouse. Scrolling switch Use the scrolling switch when the system is in tablet mode. Scroll from left to right: for scrolling up function Scroll from right to left: for scrolling down function. -
Page 13: Right View
2.3 Right view Stylus pen slot The Stylus pen for the touch screen is stored here. Headphone jacks Use the headphone jacks to connect external headphone sets. Microphone jack Use the microphone jack to connect an external microphone. USB 2.0 port Use this port to connect Universal Serial Bus devices. -
Page 14: Back
2.4 Back Handle Use the handle to carry the iQ150. LCD Display Rotating This bar is used to rotate the LCD display. Scrolling switch Use the scroll bar when the system is in tablet mode. Scroll from left to right: for scrolling up function Scroll from right to left: for scrolling down function... -
Page 15: Base
2.5 Base Battery bay The battery pack is stored here. Battery lock switch Use the battery lock switch to lock the battery pack in the battery bay. Stereo speakers The stereo speakers allow for audio output. -
Page 16: Getting Started
Getting Started Congratulations on your purchase of the iQ150. Your iQ150 features a built-in rotating camera, two headphone ports for sharing music, a rotating LCD display panel, and touch screen functions. In this section, you will be introduced to the basic operations of your iQ150. 3.1 Installing the Battery WARNING! Before installing or removing the battery, make sure the iQ150 is... -
Page 17: Removing The Battery Pack
The red battery status LED indicator blinks and the system beeps 3x in 1.2sec (each beeping last 200ms and 200ms off interval before the next beep). When the WOW! 150 warns you of its low battery condition, you will have about three to five minutes to save your current work. -
Page 18: Connecting The Ac Adapter
3.6 Charging the Battery and Charging Time To charge the battery, plug the AC adapter into the WOW! 150 and an electrical outlet. Charging time for 6 cells (5200mAh) battery pack; the battery will be 70 percent charged in about 150 mins and fully charged in about 260mins . -
Page 19: Opening The Lcd Panel
3.7 Opening the LCD Panel To open the LCD panel: 1. Steady the base of the iQ150 with one hand. 2. Hold a corner of the LCD panel with the other hand. 3. Gently raise the LCD panel to the upright position. WARNING! Never slam the LCD panel shut, as this may damage the Display. -
Page 20: Turning On Your Computer
3.9 Switching the Power Off 1. Make sure all applications are turned off. 2. Press the ON/OFF button for Stand-by. 3. To completely switch off the WOW! 150, shut down him down from the Windows start menu. WARNING Never turn the iQ150 off during the POST, or an unrecoverable error may occur. -
Page 21: Conserving The Battery Power
3.10 Conserving the Battery Power You can use a combination of key controls to enter the sleep or hibernation mode to conserve the battery power. In the sleep mode, hardware devices, such as the display panel and hard disk, are turned off to conserve energy. To enter the hibernation mode in Windows: Press the Windows logo key, and then press [U] or. -
Page 22: Led Status Indicators
3.11 LED Status Indicators The LED status bar is on the right side and allowing you to see the system and power status of your iQ150 at a glance. Indication Symbol Blue light indicates the numeric keypad is activated Blue light indicates the cap-lock is activated. Blue light indicates the system is reading/writing data. -
Page 23: Using The Wow! 150
Using the WOW! 150 4.1 Using the Keyboard You can use certain key combinations to quickly configure system settings. Graphic symbol Action System control Fn + F1 Turn the WLAN module off or on. Fn + F2 Enter the sleep mode. -
Page 24: Using The Touch Pad
Fn + SysRq Capture the on screen display as a (PrtSc) graphic. Fn + Ins (Num Lock and unlock the number pad. Fn + Del (Scr LK) Turn the scroll lock function on or off. Fn + ↑ (PgUp) Move to the previous page. Fn + ↓... -
Page 25: Using The Touch Screen
To left-click, press the left button once. • To double click, quickly press the left button twice. • To right-click, press the right button once. • To drag and drop, press and hold the left button, and move your finger •... -
Page 26: Quick Controller
4.4 Quick Controller Press the Home button twice to launch the quick controller display panel when the computer is turned to tablet mode. Brightness Control – Decrease or increase the screen brightness after you click the + / - key. Volume Control –... -
Page 27: Rotating The Display Panel
4.5 Rotating the Display Panel The display panel of your notebook can rotate up to 180 degrees, clockwise or counterclockwise. You can fold it down with the display facing up, and use it as a writing pad. By clicking the icon (1) in the Quick Launch bar, the view of the desktop can be rotated manually. - Page 28 3. Turn 180 degrees until the display panel gently snaps into place. WARNING Do not try to turn the display panel more than 180 degrees. NOTE If you rotate the display panel clockwise, you must turn it counterclockwise to return to its original position. If you rotate the display panel counterclockwise, you must turn it clockwise to return to its original position.
-
Page 29: Using The Display Panel As A Writing Pad
4.6 Using the Display Panel as a Writing Pad 1. Make sure the display panel has been rotated 180 degrees. 2. Hold the display panel by one or both of the upper corners. 3. Gently lower the display panel to the closed position. -
Page 30: Using The Built-In Rotating Camera
4.7 Using the Built-in Rotating Camera The built-in rotating camera can rotate up to 180 degrees, and is equipped with an internal sensor to automatically switch to the correct orientation. You can rotate the built-in rotating camera back and forth to use on both sides of the display panel. -
Page 31: Sharing The Same Audio Source
4.8 Sharing the Same Audio Source The two headphone ports located on the right side of the iQ150 allow two persons to share the same audio source, such as music, movies and videos. To share the same audio source: 1. Plug in two sets of headphones. 2. -
Page 32: Network Communication
Bluetooth devices: 1. First Click on the icon on the desktop or the taskbar. 2. Click on Add Device 3. Follow the wizard's instructions NOTE Bluetooth devices manufactured by WOW!, E.g. WOW! Snooper are configured at the WOW! software. -
Page 33: Troubleshooting
The WoW! software remains unaffected during system recovery. The WoW! update status and your registrations are retained. WARNING Use only if you are prompted by the Service Partner to. WARNING... - Page 34 WARNING ! Perform a manual data backup before starting the system recovery. All the data on the C: partition are deleted. 1. Start the computer 2. Click on "backup now“ on the desktop. 3. The system recovery is started from the hard disk. 4.
- Page 35 After Systemrecovery the WOW! Software will be brought back via online update on the current state.
-
Page 36: Specifications
Specifications Items Prototype Description Model Nr: EC10IS2 scieneo.amplio 2 (iQ150) ® Intel Atom Processor N2600 1.66GHz Memory Single-channel DDR3 800 MHz So-DIMM DRAM • module Supports 1GB/2GB of system RAM • ® Chipset Intel NM10 Express Chipset Audio Codec Realtek ALC269-VB6 Azalia integrated audio Analog 2.1 D3 mode support Card Reader Support 2 in 1 SDHC/ MMC Memory Card. -
Page 37: Faq
Please Keep this number in case of service requests. 8.2 Activation code for Windows The activation code for your Windows license is depending on the right side of the battery shaft or on the back of the WOW! 150. -
Page 38: Contacts
Importer: DynaTech & Translatorworld Am Brand 4 D-07580 Rückersdorf +49(0)36602 / 260-500 (Service) http://www.dynatech.de • info@dynatech.de Distribution: WOW! Würth Online World GmbH Schliffenstraße Falkhof 74653 Künzelsau +49 (0) 7940/15-1770 +49 (0)7940/15-3299 info@wow-portal.com http://www.wow-portal.com Please contact for further questions and for service to the Würth company... - Page 40 2153-ENG / V-1.1-29/04/2013...