Raritan Dominion KX Quick Installation And Setup Manual
Hide thumbs
Also See for Dominion KX:
- User manual (80 pages) ,
- Quick installation and setup manual (8 pages) ,
- Brochure (4 pages)
Advertisement
Quick Links
I. Prepare Devices and Network for Remote Operation
Congratulations on your purchase of Dominion KX, the industry's most fully-featured digital KVM
(keyboard/video/mouse) switch. Before connecting the Dominion KX, configure each device that you intend to
access via Dominion KX with the parameters below. This very important installation procedure ensures optimal
performance and responsiveness when using the remote server access capabilities of Dominion KX.
For more detailed documentation, please see the CD ROM enclosed with your shipment or go to the User
Documentation Support page on Raritan's Website. For assistance in North or South America, please contact
the Raritan Technical Support Team by telephone (732) 764-8886, by fax (732) 764-8887, or by e-mail
tech@raritan.com - ask for Technical Support - Monday through Friday, 8:00 a.m. to 8:00 p.m., Eastern .
All Servers
Windows 95 / 98 / NT
A. For optimal bandwidth efficien-
Set mouse motion speed to the
cy and video performance, set the
slowest setting in Control Panel
OS desktop background to a pre-
> Mouse > Motion.
dominantly solid, plain, light-col-
ored graphic.
B. Ensure that the server's video
resolution and refresh rate are
supported by Dominion KX, and
the signal is non-interlaced.
Text Modes:
640x480 @ 60Hz
1024x768 @ 60Hz
640x480 @ 72Hz
1024x768 @ 70Hz
640x480 @ 75Hz
1024x768 @ 75Hz
Disable window, menu, and list
640x480 @ 85Hz
1024x768 @ 85Hz
animation in Control Panel >
720x400 @ 70Hz
1152x864 @ 60Hz
Display > Effects.
720x400 @ 85Hz
1152x864 @ 70Hz
800x600 @ 56Hz
1152x864 @ 75Hz
Linux (with Graphical
800x600 @ 60Hz
1280x960 @ 60Hz
Desktop)
800x600 @ 72Hz
1280x1024 @ 60Hz
800x600 @ 75Hz
Set mouse acceleration to exactly
800x600 @ 85Hz
1 and threshold to exactly 1.
Sun Solaris (with
Windows XP / Windows
Graphical Desktop)
2003
Set mouse acceleration to exactly
Disable Enhanced pointer pre-
cision and set the mouse motion
1. Ensure that your video card is
set to a supported resolution and
speed exactly to the middle speed
that its output is VGA (H-and-V
setting. These options are located
Sync, not composite sync). This
in Control Panel > Mouse >
non-default configuration can be
Pointer Options.
set in the bootprom mode by issu-
Disable
transition
effects
in
ing the command:
Control
Panel
> Display >
Appearance > Effects.
setenv output-device
screen:r1024x768x70
Windows 2000 / ME
When finished, issue the "boot"
command to reboot.
Set mouse pointer acceleration to
"None" and the mouse motion
speed exactly to the middle speed
setting. Disable transition effects
in Control Panel > Display >
Effects.
II. Attach Local User Console, Set IP Address, and Connect to Network
In this step, you will connect the console used for accessing servers directly at the rack, use this console to set Dominion KX's IP address, and
connect to your Network. To return to the On-Screen Display (OSD) at any time, press the Scroll Lock key twice rapidly.
1. Attach the included AC power cord to
the Dominion KX unit, and plug into an AC
power outlet. If installing a KX464 with dual
power failover protection, attach the second
included AC power cord and plug it into a dif-
ferent power source than the first power
cord.
2. Attach a keyboard and mouse (either
PS/2 or USB); and a multisync monitor to the
corresponding ports in the back of Dominion
KX marked "Local User."
3. Power ON the Dominion KX.
4. After the KX unit boots, the On Screen
Display (OSD) appears. Use the OSD to
access servers while using the unit at the
rack. Log in with the default username/pass-
word of admin/raritan (or your new user-
name/password if you have already changed
defaults) and press ENTER.
Macintosh
5. Press the F5 key to activate the
Administrative Menu.
No specific mouse settings are
6. Use the ↑ ↑ and ↓ ↓ keys to
required, but you must set the
Network Settings and press ENTER.
Raritan Remote Client to Single
7. Specify TCP/IP parameters for your
Cursor
Mode
when
using
Dominion KX unit: IP address; subnet mask;
Dominion KX to access and con-
and default gateway.
trol a Macintosh system remotely.
Please note that the default
Mouse Mode is Standard.
Please see the Dominion KX User
Guide on the enclosed CD-ROM
for additional details on switching
Mouse Cursor Mode or activating
Intelligent Mouse Mode.
Network / Firewall
III. Attach Servers
To enable remote access to
Dominion KX, your network and
In this step, connect Dominion KX to the servers that you want it to manage.
firewall must allow communica-
tion on TCP Port 5000. You can
also configure Dominion KX to
use a different TCP port of your
own designation; please see the
Dominion KX User Guide for addi-
tional informtion.
Optional: To access Dominion
KX via Web browser, your firewall
must also allow access to TCP
Port 443 (Standard HTTPS). For
To AC
Power
additional convenience, you may
Outlet
also want to allow access to TCP
Port
80
(Standard
HTTP);
Dominion KX will forward all
HTTP requests to HTTPS, allow-
ing end users to securely use
either "http" or "https" as a URL.
1. If not already attached, attach keyboard,
mouse, and multisync monitor to the corre-
Note:
Raritan
recommends
sponding ports in the back of Dominion KX
changing the default Admin pass-
marked "Local User." This Local User
word ("raritan") as soon as possi-
Console is used to access servers directly
ble after installation. Please see
from the rack.
2. Connect one end of a standard, straight-
VIII.
Change
Password
for
instructions.
through UTP cable (Cat5 / 5e / 6) to an unoc-
cupied server port on the rear panel of the
1
To AC Power Outlet
When finished, press the letter S on your
keyboard. The unit will reboot automatically.
Note: If you experience network disconnect
issues, change your MAC layer parameter to
100/full duplex or the appropriate value for
your network.
8. Connect one end of a straight-through
Ethernet cable (included) to the port labeled
"LAN1" on Dominion KX, and the other end
s
elect option 3
to a network switch or router. [Optional] For
Ethernet redundancy, use a straight-through
Ethernet cable to connect the "LAN2" port to
another network switch or router. Should the
Ethernet connectivity on LAN1 become
unavailable, Dominion KX will failover to this
port with the same TCP/IP settings — at all
other times, this port will be disabled.
Note: You must enable automatic failover in
KX Manager, or this option will not function -
please see the Dominion KX User Guide for
additional information.
2
1
To
To
External
LAN/
Modem
WAN
(optional)
Local User Console
Dominion KX.
3. Connect the other end of the UTP cable to
the RJ45 port on a Dominion KX Computer
Interface Module: DCIM-PS2 (PS/2 ports);
DCIM-USB (USB ports); DCIM-SUSB (USB
ports for Sun servers); or DCIM-SUN (Sun
ports with HD15 video). Paragon CIMs sup-
ported by DKX version 1.4 and higher
include: P2CIM-PS2, P2CIM-SUN, P2CIM-
For more detailed instructions, please consult the User Manual found on the enclosed CD-ROM or visit www.raritan.com.
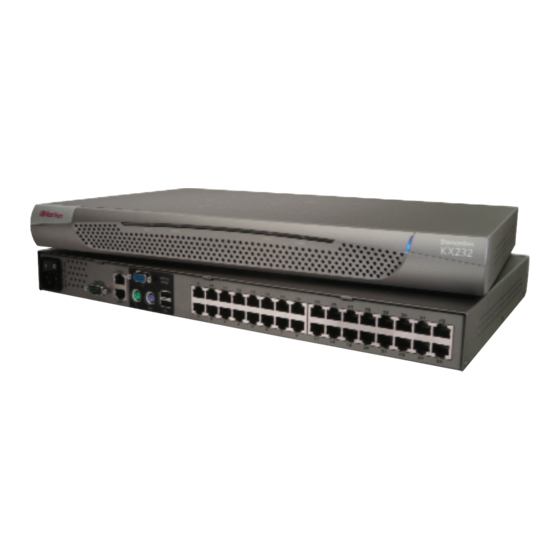
2
Dominion KX
Local User Console
Keyboard,
monitor,
and
mouse
used
to
access connected servers locally at the rack. Also
used for initial IP address configuration.
9. From any networked workstation, con-
firm access by typing the following URL in
your Internet browser's address line:
http://IP-ADDRESS/admin
where IP-ADDRESS is the IP address that
you designated in Step 7.
ALTERNATIVE
You can also connect to
:
Dominion KX directly via Ethernet from your
workstation, skipping steps 4 - 8 above.
To do so, attach one end of a crossover
Ethernet cable (included) directly to your
workstation's Ethernet card, and the other
end to Dominion KX's "LAN1" port.
Enable your workstation to access the
default
IP address
of
Dominion
KX:
192.168.0.192. One method is to temporarily
set your workstation's IP parameters to:
IP Address: 192.168.0.1
Subnet mask: 255.255.255.0
Default gateway: 192.168.0.1
When finished, follow Step 9, above, being
sure to use Dominion KX's default IP
address: 192.168.0.192.
To KVM Ports
of Managed
Server
4
Standard UTP Cable
3
P/N: DCIM-XXXX
(Cat5 / 5e / 6)
USB, P2CIM-SUSB, UKVMPD, USKVMPD,
UKVMC,
USKVMC,
P2CIM-PS2-DUAL,
UUSBPD, and P2CIM-PWR.
4. Connect the remaining ports on the CIM
to the corresponding KVM ports of a server
that you want to manage using Dominion KX.
5. Repeat steps 2 through 4 to connect any
other servers that you want to manage using
Dominion KX.
Rev. F May 2006 255-80-6030
Advertisement

Subscribe to Our Youtube Channel
Related Manuals for Raritan Dominion KX


Summary of Contents for Raritan Dominion KX
- Page 1 II. Attach Local User Console, Set IP Address, and Connect to Network In this step, you will connect the console used for accessing servers directly at the rack, use this console to set Dominion KX’s IP address, and connect to your Network. To return to the On-Screen Display (OSD) at any time, press the Scroll Lock key twice rapidly.
- Page 2 IV. Assign Names to Server Ports After logging on to the Dominion KX unit, use the MPC or RRC Navigator on the left side of the MPC or RRC screens to select and connect to Using the Local User Console a port.
Need help?
Do you have a question about the Dominion KX and is the answer not in the manual?
Questions and answers