Table of Contents
Advertisement
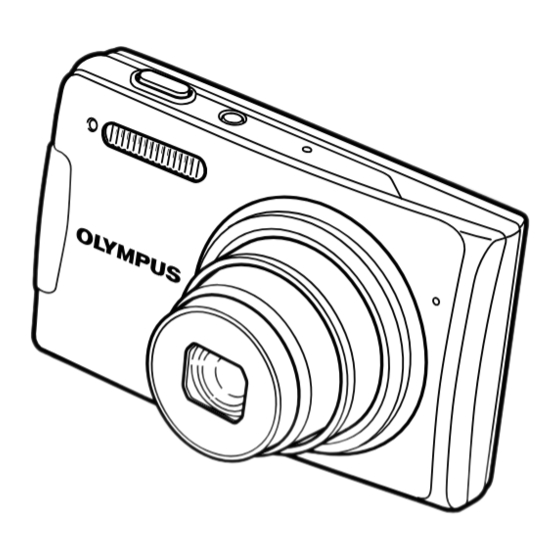
DIGITAL CAMERA
Instruction Manual
● Thank you for purchasing an Olympus digital camera. Before you start to
use your new camera, please read these instructions carefully to enjoy
optimum performance and a longer service life. Keep this manual in a
safe place for future reference.
● We recommend that you take test shots to get accustomed to your
camera before taking important photographs.
● In the interest of continually improving products, Olympus reserves the
right to update or modify information contained in this manual.
● The screen and camera illustrations shown in this manual were produced
during the development stages and may differ from the actual product.
Advertisement
Table of Contents

Related Manuals for Olympus µ 1060


Summary of Contents for Olympus µ 1060
-
Page 1: Digital Camera
DIGITAL CAMERA Instruction Manual ● Thank you for purchasing an Olympus digital camera. Before you start to use your new camera, please read these instructions carefully to enjoy optimum performance and a longer service life. Keep this manual in a safe place for future reference. -
Page 2: Table Of Contents
Shooting, Playback, and Erasing ............42 ............15 Printing .......... 50 Using Shooting Modes ....18 Using OLYMPUS Master 2.... 56 Using Shooting Functions ... 20 Usage Tips ........58 Using Playback Features ..... 25 Appendix ........63 Menus for Shooting Functions ..28... - Page 3 Please read “Menu Settings” (p. 28 to 49) while referring to this page. Three Ways to Adjust Settings Using the Menu Using the Menu Buttons in use button Arrow pad Various camera settings can be accessed through the menus, including functions used during shooting and playback and the date/time and screen display.
- Page 4 Using the Direct Buttons Using the Direct Buttons Frequently used shooting functions can be accessed using the direct buttons. Shutter button (p. 15) Zoom button (p. 20) F button (exposure compensation) (p. 21) & button (macro) (p. 22) # button ( ash) (p. 21) Y button (self-timer) (p.
-
Page 5: Menu Index
Menu Index Menus for Shooting Functions When the mode dial is set to a shooting mode position (h K s n), settings can be adjusted. IMAGE QUALITY CAMERA RESET MENU SETUP SILENT PANORAMA S C N MODE EXIT MENU Shooting mode top menu 3 / s ...... -
Page 6: Names Of Parts
Names of Parts Camera unit Self-timer lamp ........ p.22 Battery/card compartment cover ..p.11 Multi-connector ....p.48, 50, 56 Microphone ........p.40 Connector cover ....p.48, 50, 56 Lens ..........p.74 Strap eyelet ........p.10 Tripod socket Flash ..........p.21 Speaker... - Page 7 q/P button (playback/print) ... p.36, 50 Shutter button ......... p.15 button ........p.3, 23 o button ........ p.15 Zoom button ........p.20 Arrow pad ........p.3, 12 F button (exposure compensation) Monitor ........p.8, 46 Card access lamp ......p.64 ...........
- Page 8 Monitor Shooting mode display 1600 00:34 +2.0 +2.0 1/30 F3.5 14 13 Still image Movie Alarm ..........p.47 Shooting mode ......p.15, 18 Number of storable still pictures/ Flash mode ........p.21 remaining recording time ....p.65 Silent mode ........p.49 Current memory ......
- Page 9 Playback mode display 00:14 /00:34 2008.10.26 12:30 V V GA +2.0 +2.0 1/1000 F3.5 ISO 1600 1600 2008.10.26 12:30 2008.10.26 12:30 100-0004 100-0004 2008.10.26 12:30 2008.10.26 12:30 MOVIE PLAY Still image Movie Silent mode ........p.49 Image size ........p.28 Print reservation/ File number ........
-
Page 10: Preparing The Camera
USB cable A/V cable Charging indicator On: Charging Off: Charged OLYMPUS Master 2 microSD Attachment CD-ROM Other accessories not shown: Instruction Manual (this manual), warranty card Contents may vary depending on purchase location. Battery comes partially charged. Before use,... - Page 11 Loading the battery and Index area the xD-Picture Card™ (sold separately) into the camera Notch Do not insert anything other than an xD-Picture Card or the microSD Attachment into the camera. Battery/card Insert the card straight in until it clicks into compartment place.
- Page 12 Using the microSD card/ Arrow pad and operation guide microSDHC card (sold The symbols 1243, displayed separately) on various settings and movie playback screens indicate that the arrow pad is to be used. A microSD card or microSDHC card (hereafter both will be referred to as microSD card) is also Exposure effects.
-
Page 13: Setting The Date And Time
Setting the date and time As in Steps 2 and 3, use 1234 and the button to set [M](month), The date and time set here are used to image fi le [D](day), and [TIME](hours and names, date prints, and other data. minutes). -
Page 14: Changing The Display Language
Changing the display language Use 12 to select [W] and press the button. The language of the menu and error messages displayed on the monitor is selectable. ENGLISH Set the mode dial to a position other FRANCAIS than R or 6. DEUTSCH ESPAÑOL ITALIANO... -
Page 15: Shooting, Playback, And Erasing
Shooting, Playback, and Erasing Shooting with optimum aperture Hold the camera, and compose the value and shutter speed shot. (K mode) In this mode, automatic camera shooting can Monitor be used while also allowing changes to a wide range of other shooting menu functions, such as exposure compensation, white balance and so on as needed. -
Page 16: Viewing Images
Viewing images To take the picture, gently press the shutter button all the way down while being careful not to shake the camera. Set the mode dial to q. Press fully 1/400 F3.5 2008.10.26 12:30 Image review screen Playback image To view images during shooting Frame number Pressing the q button enables playback of... -
Page 17: Erasing Images During Playback
Erasing images during playback Operations during movie playback (Single image erase) Volume: During playback, press 12. Fast-forward/rewind: Select with 34. Each time a button is pressed, the playback speed Press the S button when the cycles through 2x, 20x, and standard (1x) speed in the direction of the pressed button. -
Page 18: Using Shooting Modes
Using Shooting Modes Using the best shooting mode Shooting with automatic for the scene (s mode) settings ( h mode) The camera will automatically select the optimal Set the mode dial to s. shooting mode for the scene. This is a fully automatic mode that allows you to take a picture PORTRAIT suited to the scene by simply pressing the shutter... - Page 19 Shooting movies (n mode) Set the mode dial to n. A mode indicator 00:34 Using the zoom You cannot use the optical zoom while shooting a movie. Please use the [DIGITAL ZOOM] (p. 30) Press the shutter button halfway down to focus on the subject, and gently press the button all the way down to start recording.
-
Page 20: Using Shooting Functions
Using Shooting Functions Using the optical zoom Brightening the subject against backlight (SHADOW ADJ Pressing the zoom button adjusts the shooting range. The camera detects a person's face that is darkened by backlight and brightens it for the Pressing the wide Pressing the telephoto picture. -
Page 21: Adjusting The Brightness
Using the fl ash Adjusting the brightness (Exposure compensation) The fl ash functions can be selected to best match the shooting conditions and render the desired The exposure value automatically set by the image. camera can be adjusted brighter or darker to obtain a desired shot. -
Page 22: Macro Shooting
Shooting close-ups Using the self-timer (Macro shooting) After the shutter button is pressed all the way down, the picture is taken after a time delay. This function enables the camera to focus and shoot subjects at close distances. Press the Y button. Press the &... -
Page 23: Using The Func Menu
Changing the shooting Using the FUNC menu information display The FUNC menu provides the following menu functions that can be quickly accessed, adjusted The display of shooting information on the monitor and set. can be changed to best match the situation; for example, the information can be removed if there is •... - Page 24 Setting the camera by following the shooting guide (R mode) An on-screen guide is provided so users can easily select a desired camera setting and get the best results, such as brightening a subject or shooting into backlight. Set the mode dial to R. SHOOTING GUIDE Shoot w/ effects preview.
-
Page 25: Using Playback Features
Using Playback Features Index view, calendar view, and To select an image in index view close-up view Use 1234 to select an image, and press the button to display the selected image in Index view and calendar view enable quick single-image view. -
Page 26: Playing Back Panorama Images
Playing back panorama images Playing back My Favorite images Panorama images that were combined together using [COMBINE IN CAMERA 1] or [COMBINE IN The user’s favorite images (max. of 8 images) can CAMERA 2] can be scrolled for viewing. be registered in the internal memory. [~ PANORAMA] (p. - Page 27 To play back My Favorite images automatically (Slideshow) 1 Press the m button while playing back My Favorite images. MY FAVORITE SLIDESHOW ADD FAVORITE EXIT MENU 2 Use 12 to select [SLIDESHOW], and press the button. To register additional My Favorite images 1 Press the m button while playing back My Favorite images.
-
Page 28: Menus For Shooting Functions
Menus for Shooting Functions When the mode dial is set to a shooting mode (h K s A), settings can be adjusted. The icon next to indicates the position to adjust the mode dial to when setting functions. The default settings of the function are highlighted in Selecting the appropriate image quality for your application [D IMAGE QUALITY] D IMAGE QUALITY : h K s A... - Page 29 Refer to "Using the Menu" (p. 3) when adjusting the settings of these functions. Adjusting to a natural color scheme [WB] Selecting the ISO sensitivity [ISO] K CAMERA MENU K CAMERA MENU : K s A Although lower ISO values reduce sensitivity, Submenu 2 Application sharp images can be taken under fully lit...
- Page 30 Shooting pictures sequentially while the Shooting at higher magnifi cations than shutter button is held down [DRIVE] optical zoom without reducing the image quality [FINE ZOOM] K CAMERA MENU DRIVE K CAMERA MENU FINE ZOOM : K s : K s Submenu 2 Application Submenu 2...
- Page 31 Refer to "Using the Menu" (p. 3) when adjusting the settings of these functions. Selecting the method for measuring the Recording sound when shooting still brightness [METERING] images [R] K CAMERA MENU K CAMERA MENU METERING : K s A : K s Submenu 2 Application...
- Page 32 Selecting a scene mode according to the Saving only selected images shooting situation [/ s] from sequentially shot images ([SHOOT & SELECT 1/2] mode) 1 Select [e SHOOT & SELECT 1] or [f SHOOT & SELECT 2]. Hold down the shutter button to take sequential shots.
- Page 33 MOVIE], and press the button to set. ● This function is ready for shooting immediately An Olympus xD-Picture Card is required after setting this option. for panoramic shooting. Cards by other 2 Press the shutter button to start movie manufacturers do not support panoramic shooting.
- Page 34 Taking pictures with Taking pictures with [COMBINE IN CAMERA 1] [COMBINE IN CAMERA 2] 1 Use 34 to specify at which edge the next 1 Press the shutter button to take the fi rst frame. picture is to be connected. 2 Move the camera slightly in the direction of the second frame.
- Page 35 10 frames. • Self-timer (p. 22) • [D IMAGE QUALITY] (p. 28) Refer to the OLYMPUS Master 2 help guide for [/ s] (p. 32) • details on how to make panorama images. •...
-
Page 36: Menus For Playback, Editing, And Printing Functions
Menus for Playback, Editing, and Printing Functions When the mode dial is set to q, settings can be adjusted during image playback. Playing back pictures automatically [y SLIDESHOW] y SLIDESHOW Submenu 1 Submenu 2 Submenu 3 Application NORMAL/ NEXT PAGE 1/ NEXT PAGE 2/ ALL/STILL Selects, respectively, the content to be included... - Page 37 Refer to "Using the Menu" (p. 3) when adjusting the settings of these functions. Registering images to the internal Cropping a picture [P] memory as My Favorite images E EDIT [5 ADD FAVORITE] 1 Use 34 to select an image, and press the 5 ADD FAVORITE ...
- Page 38 Changing the color tone of image Adding a calendar to an image [COLOR EDIT] [CALENDAR] E EDIT E EDIT COLOR EDIT CALENDAR Submenu 2 Application CALENDAR This changes the image to black Black & white and white. This changes the image to a sepia Sepia tone.
- Page 39 Refer to "Using the Menu" (p. 3) when adjusting the settings of these functions. Highlighting a face with blurry effect Extracting a clip from a movie [EDIT] around it [FACE FOCUS] E EDIT EDIT E EDIT FACE FOCUS Submenu 2 Application A face that is largest and facing front in The original movie is left unchanged,...
- Page 40 Protecting images [0] Adding sound to still images [R] q PLAYBACK MENU q PLAYBACK MENU Protected images cannot be erased by Submenu 2 Application [ERASE] (p. 17), [SEL. IMAGE], or [ALL The camera adds (records) sound for ERASE] (p. 41), but all images are erased by approx.
- Page 41 Refer to "Using the Menu" (p. 3) when adjusting the settings of these functions. Saving print settings to the image data Erasing images [S ERASE] [< PRINT ORDER] S ERASE < PRINT ORDER Before erasing, check that no important data is left in the internal memory or card.
-
Page 42: Menus For Other Camera Settings
Submenu 2 Application is left in the internal memory or card. The language for the menus and Non-Olympus cards and cards that have been Languages error messages displayed on the formatted by a computer must be formatted monitor is selected. - Page 43 Refer to "Using the Menu" (p. 3) when adjusting the settings of these functions. Setting the startup display screen and sound when the camera is turned on [PW ON SETUP] x SETUP PW ON SETUP Submenu 2 Submenu 3 Application No image is displayed.
- Page 44 Selecting the camera sound and its volume [SOUND SETTINGS] x SETUP SOUND SETTINGS Submenu 2 Submenu 3 Submenu 4 Application SOUND TYPE Selects the operating sound and volume of the BEEP OFF (No sound)/ camera buttons (except the shutter button). VOLUME LOW/HIGH SOUND TYPE...
-
Page 45: Pixel Mapping
Refer to "Using the Menu" (p. 3) when adjusting the settings of these functions. Resetting the fi le names of pictures Adjusting the CCD and adjusting the [FILE NAME] image processing function [PIXEL MAPPING] x SETUP FILE NAME x SETUP PIXEL MAPPING Folder name Folder name... - Page 46 Adjusting the brightness of the monitor Setting the date and time for another time zone [DUALTIME] x SETUP x SETUP DUALTIME When [DUALTIME] is set to [ON], the date and To adjust the monitor brightness time set here are used in image fi le names, 1 Use 12 to adjust the brightness while dated prints and other data.
- Page 47 Refer to "Using the Menu" (p. 3) when adjusting the settings of these functions. Using the alarm [ALARM CLOCK] x SETUP ALARM CLOCK When [X] has not been set, [ALARM CLOCK] is not available. When [j SILENT MODE] (p. 49) is set to [ON], the alarm will not sound. When [DUALTIME] (p.
- Page 48 Selecting the video signal system to match your TV [VIDEO OUT] x SETUP VIDEO OUT The TV video signal system varies depending on the countries and regions. Before viewing camera images on your TV, select the video output according to your TV’s video signal type. Submenu 2 Application NTSC...
- Page 49 Refer to "Using the Menu" (p. 3) when adjusting the settings of these functions. Saving battery power between shots Turning off the camera sounds [POWER SAVE] [j SILENT MODE] j SILENT MODE x SETUP POWER SAVE Submenu 2 Application Submenu 1 Application This activates the individual settings Cancels [POWER SAVE].
-
Page 50: Printing
Printing Direct printing (PictBridge Turn on the printer, and then connect the printer and camera. By connecting the camera to a PictBridge- compatible printer, you can print images directly < button without using a computer. To fi nd out if your printer supports PictBridge, refer to the printer’s instruction manual. - Page 51 Changing the printer’s settings Use 12 to select [SIZE] (Submenu for printing [CUSTOM PRINT] 3), and press 4. If the [PRINTPAPER] screen is not displayed, the [SIZE], [BORDERLESS], and [PICS/ Follow Steps 1 and 2 for [EASY SHEET] are set to the printer’s standard. PRINT] (p.
- Page 52 2 Use 12 to select [OK], and press the Use 34 to select an image. button. Press the < button to make a [SINGLE PRINT] reservation for the displayed image. Press 2 to make detailed printer settings for the current image. CANCEL To make detailed printer settings BACK...
- Page 53 Single-frame print reservations To cancel printing [<] 1 Press the button while [TRANSFERRING] is displayed. 2 Select [CANCEL] using 12 and then Set the mode dial to q, and then press the button. press the m button to display the top menu.
- Page 54 Reserving one print each of all Use 12 to select the [X] (date images on the card [U] print) screen option, and press the button. Follow Steps 1 and 2 in [<] (p. 53). Submenu 2 Application This prints the image only. Use 12 to select [U], and press the This prints the image with the ...
-
Page 55: Resetting The Print Reservation Data For Selected Images
Resetting the print reservation data for selected images Follow Steps 1 and 2 of “Resetting all print reservation data” (p. 54). Use 12 to select [<], and press the button. Use 12 to select [KEEP] and press the button. Use 34 to select the image with the print reservation you want to cancel. -
Page 56: Using Olympus Master 2
● Browse window appears after starting the EASY PRINT software. CUSTOM PRINT When OLYMPUS Master 2 is started for the EXIT fi rst time after installation, "Default Settings" and "Registration" screens will appear. Follow the instructions on the screen. Locate the position of the USB port by referring to your computer’s instructions manual. -
Page 57: Without Using Olympus Master
Operating OLYMPUS Master 2 When OLYMPUS Master 2 is started, a Quick Start Guide will appear on the screen to help you become familiar with the software. If the Quick Start Guide is not displayed, click the toolbar to show the Guide. -
Page 58: Usage Tips
Usage Tips ● With prolonged camera use, the internal temperature If the camera does not work as intended, or if an may increase, resulting in automatic shutdown. If error message is displayed on the screen, and you this occurs, remove the battery from the camera and are unsure of what to do, refer to the information wait until the camera has suffi... -
Page 59: Error Message
Error message Battery problem BATTERY Charge the battery. EMPTY When one of the messages below is displayed on the monitor, check the corrective action. Connection problem Error message Corrective action Connect the camera and computer or printer correctly. Card problem CONNECTION Insert a new card. -
Page 60: Shooting Tips
Shooting tips When you are unsure of how to take a picture that When objects are at different you envision, refer to the information below. distances Focusing “Focusing on the subject” ● Fast-moving object Taking a picture of a subject not in the center of the screen After focusing on an object at the same distance as the subject, compose the shot, and take the picture. -
Page 61: Image Quality
Exposure (brightness) Image quality “Taking pictures with the right brightness” Taking sharper pictures ● ● Taking pictures of a subject against a backlight Taking pictures with the optical zoom A face against the backlight is brightened. Avoid using [DIGITAL ZOOM] (p. 30) to take pictures. ●... - Page 62 Playback/Editing tips Playback “Playing images in the internal memory” ● Removing the card from the camera “Removing the xD-Picture Card” (p. 11). “Using the microSD card” ● “Using the microSD card/microSDHC card (sold separately)” (p. 12) Editing “Erasing the sound recorded to a still image”...
-
Page 63: Appendix
Appendix Camera care Battery and charger • This camera uses one Olympus lithium ion Exterior battery (LI-42B/LI-40B). No other type of • Wipe gently with a soft cloth. If the camera is batteries can be used. very dirty, soak the cloth in mild soapy water and •... -
Page 64: Using An Ac Adapter
Card (16MB to 2GB) (TypeH/M/M+/ Standard) Using a new card Before using a non-Olympus card or a card that was used for another purpose in a computer or other device, use [MEMORY FORMAT]/ [FORMAT] (p. 42) to format the card. - Page 65 Number of storable pictures (still pictures)/recording length (movies) in the internal memory and xD-Picture Card Still pictures Number of storable still pictures COMPRES- Internal memory Using a 1GB xD-Picture Card IMAGE SIZE SION With sound Without sound With sound Without sound F 3648×2736 H 2560×1920 I 2048×1536...
-
Page 66: Using A Microsd Attachment
Using a microSD Attachment SAFETY PRECAUTIONS Do not use the bundled microSD Attachment CAUTION with Olympus digital cameras that do not RISK OF ELECTRIC SHOCK support it. Do not use it with other brands of DO NOT OPEN digital cameras, computers, printers and other CAUTION: TO REDUCE THE RISK OF ELECTRICAL devices that support xD-Picture Card media. -
Page 67: Handling The Camera
• The camera uses a lithium ion battery specifi ed • Accidentally swallowing the battery, cards or by Olympus. Charge the battery with the specifi ed other small parts. charger. Do not use any other chargers. • Accidentally fi ring the fl ash into their own eyes or •... -
Page 68: Lcd Monitor
Before loading, always inspect the battery carefully • This camera uses a lithium ion battery specifi ed by for leaks, discoloration, warping or any other Olympus. Do not use any other type of battery. abnormality. • If the battery’s terminals get wet or greasy, camera •... -
Page 69: Legal And Other Notices
• Olympus reserves all rights to this manual. • Consult your dealer or an experienced radio/TV technician for help. Only the OLYMPUS-supplied Warning USB cable should be used to connect the camera to USB enabled personal computers (PC). - Page 70 Representative plug of power supply cord of countries/regions around the world A Type B Type BF Type B3 Type C Type SE Type O Type (American Type) (British Type) (British Type) (British Type) (CEE Type) (CEE Type) (Oceania Type) The representative supply voltage and plug type are described in this chart. Depending on the area, different types of plugs and supply voltages are used.
- Page 71 If any Product proves to be defective within the P.O. Box 610, Center one-year warranty period, the customer must Valley, PA 18034-0610, return the defective Product to any of Olympus U.S.A. Service Centers, following the procedure set forth Telephone Number : 484-896-5000 below (See “WHAT TO DO WHEN SERVICE IS...
- Page 72 (f) Products which do not contain a validly placed and recorded Olympus serial number, unless they are a POSSIBILITY OF SUCH POTENTIAL LOSS OR model on which Olympus does not place and record DAMAGE. serial numbers. Representations and warranties made by any...
- Page 73 Business Machines Corporation. storage medium and/or remove any fi lm from the • Microsoft and Windows are registered trademarks of Product prior to sending the Product to Olympus Microsoft Corporation. for service. • Macintosh is a trademark of Apple Inc.
-
Page 74: Specifications
: 30 % to 90 % (operation)/10 % to 90 % (storage) Power supply : One Olympus lithium ion battery (LI-42B/LI-40B) or Olympus AC adapter Dimensions : 93.7 mm (W) × 56.4 mm (H) × 25.1 mm (D) (3.7 × 2.2 × 1.0 in.) (excluding... - Page 75 Lithium ion battery (LI-42B) Product type : Lithium ion rechargeable battery Standard voltage : DC 3.7 V Standard capacity : 740 mAh Battery life : Approx. 300 full charges (varies on usage) Operating environment Temperature : 0°C to 40°C (32°F to 104°F) (charging)/ -10°C to 60°C (14°F to 140°F) (operation)/ -20°C to 35°C (-4°F to 95°F) (storage) Dimensions...
-
Page 76: Index
Index AC adapter........p. 64 EASY PRINT ........p. 50 ADD FAVORITE ........ p. 37 EDIT ........p. 5, 36, 62 AF MODE ......... p. 31 ERASE AF target mark ........p. 15 Single image erase ....p. 17 ALARM CLOCK ........ p. 47 SEL. - Page 77 NTSC ..........p. 48 Number of storable still pictures ..p. 65 USB cable ......p. 10, 50, 56 OLYMPUS Master 2 ..... p. 10, 33, 56 VIDEO OUT ........p. 48 Optical zoom ........p. 20 Volume ........p. 16, 44 PAL ...........
- Page 78 Printed in China VS794801 1AG6P1P4963--...
Need help?
Do you have a question about the µ 1060 and is the answer not in the manual?
Questions and answers